Whitelists
In this article, you will learn how to always allow transfers by creating a list using the beneficiary's information - mobile number, email ID, UPI VPA, and bank account.
We provide our merchants the option to create a whitelist for beneficiaries deemed acceptable and trustworthy. Once a beneficiary is added to the whitelist, we ensure that any initiated transfer to this beneficiary is allowed without any risk checks, facilitating the transaction smoothly.
Create a whitelist
Whitelists allows you to always initiate a transfer to a beneficiary by adding any of the information: mobile number, email address, UPI VPA, or bank account information. Once you login to the Payouts dashboard, navigate to RiskShield> Whitelists.
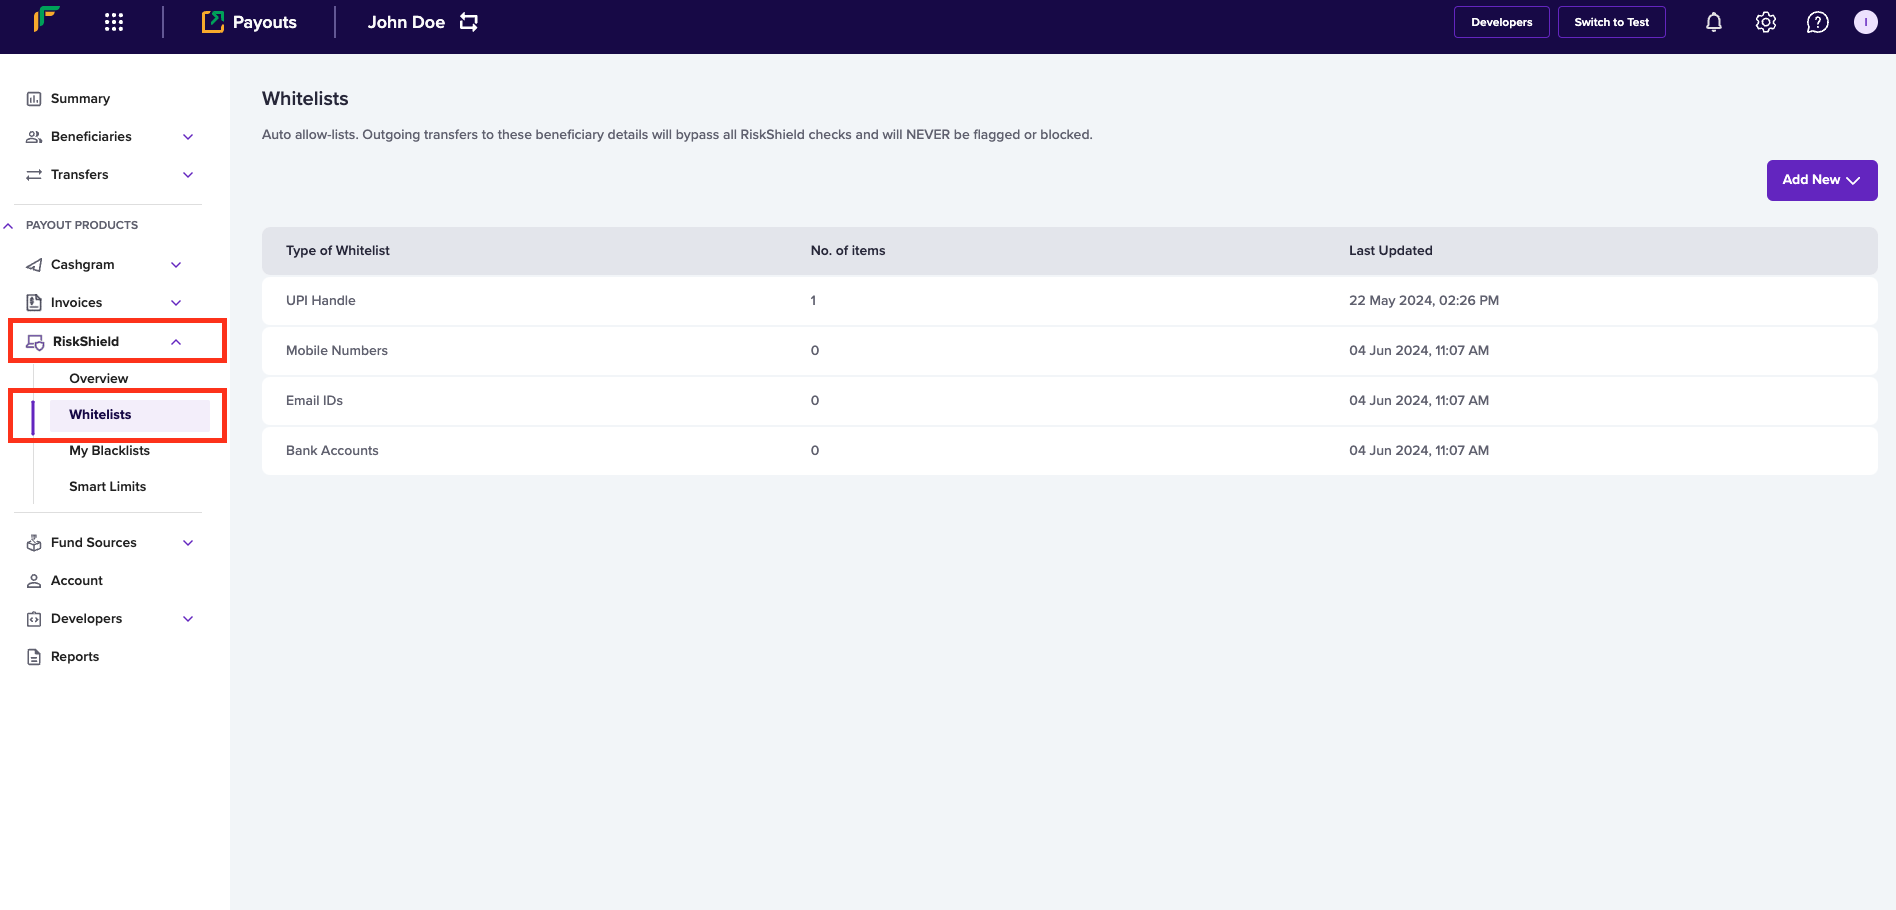
RiskShield > Whitelists
Allow a beneficiary using mobile number
Follow the instructions below to allow a beneficiary using the beneficiary's mobile number:
- Click Add New > Mobile Number.
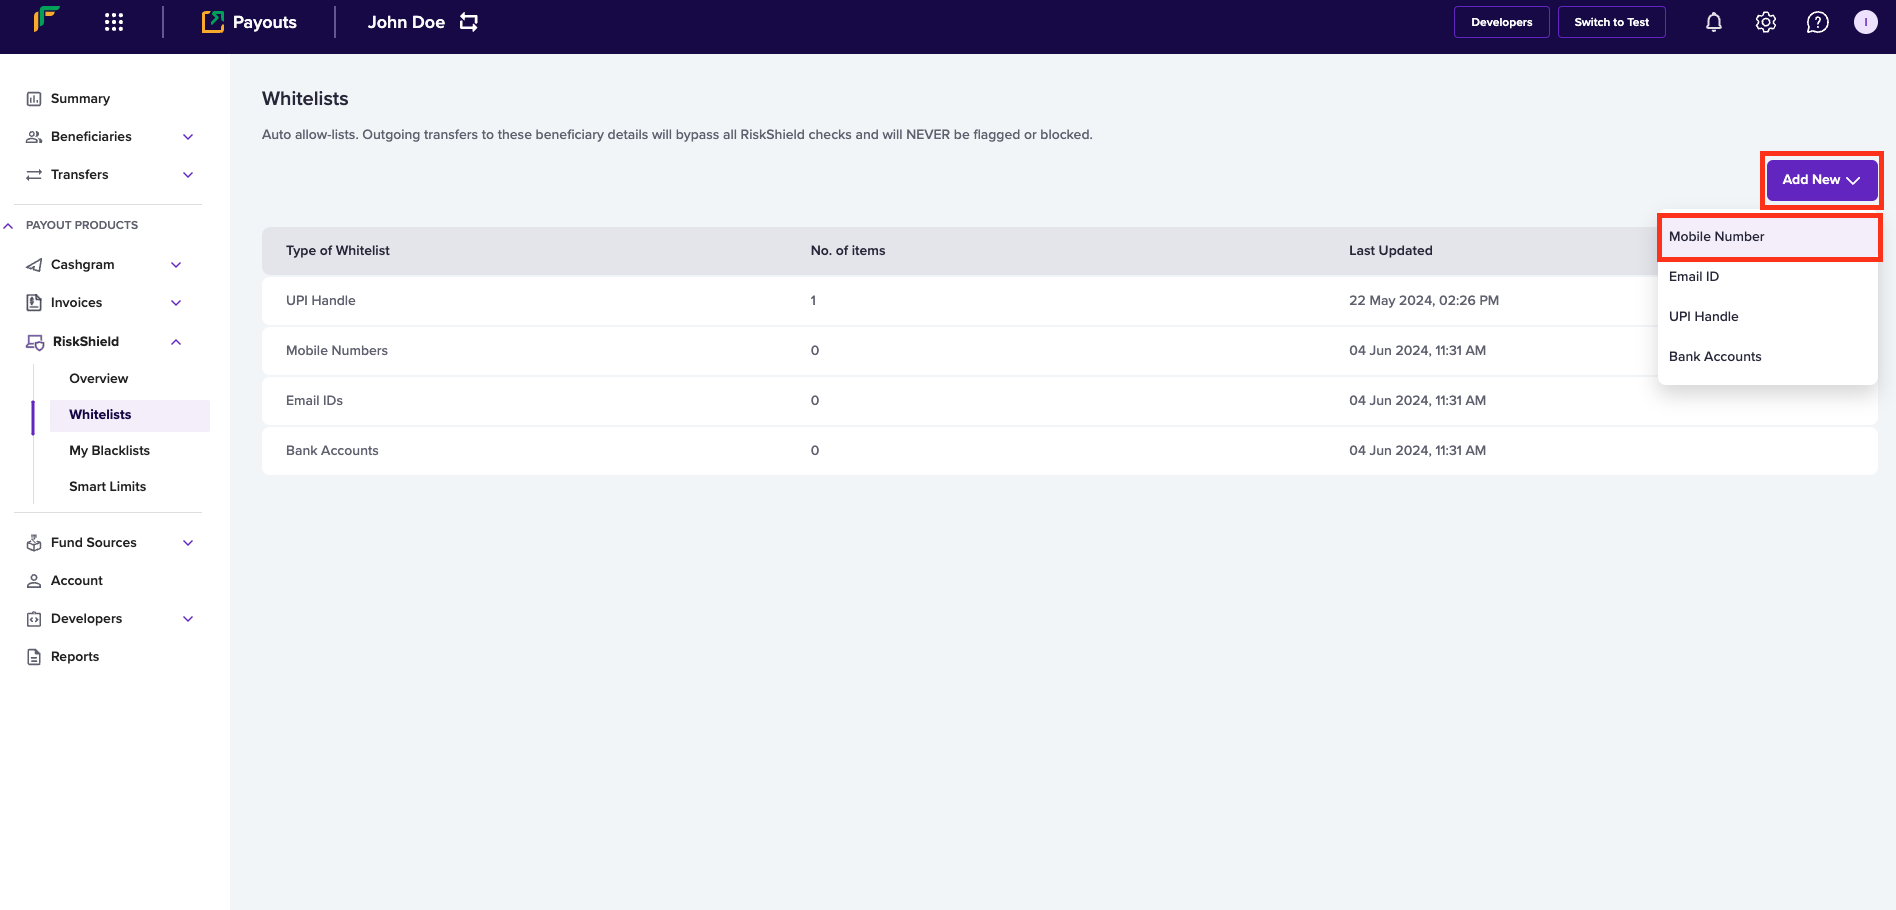
Add New > Mobile Number
- Enter the following information in the Add Mobile Number to Whitelist popup:
- Single Mobile Number - If you want to allow a single mobile number, select this option and enter the mobile number in this field.
- Multiple Mobile Number - If you want to allow multiple mobile numbers, select this option, use Download sample file and enter mobile numbers as per the format in the file, and upload the file using Upload File.
- Click Add Now.

Add Mobile Number to Whitelist
Allow a beneficiary using email ID
Follow the instructions below to allow a beneficiary using the beneficiary's email ID:
- Click Add New > Email ID.
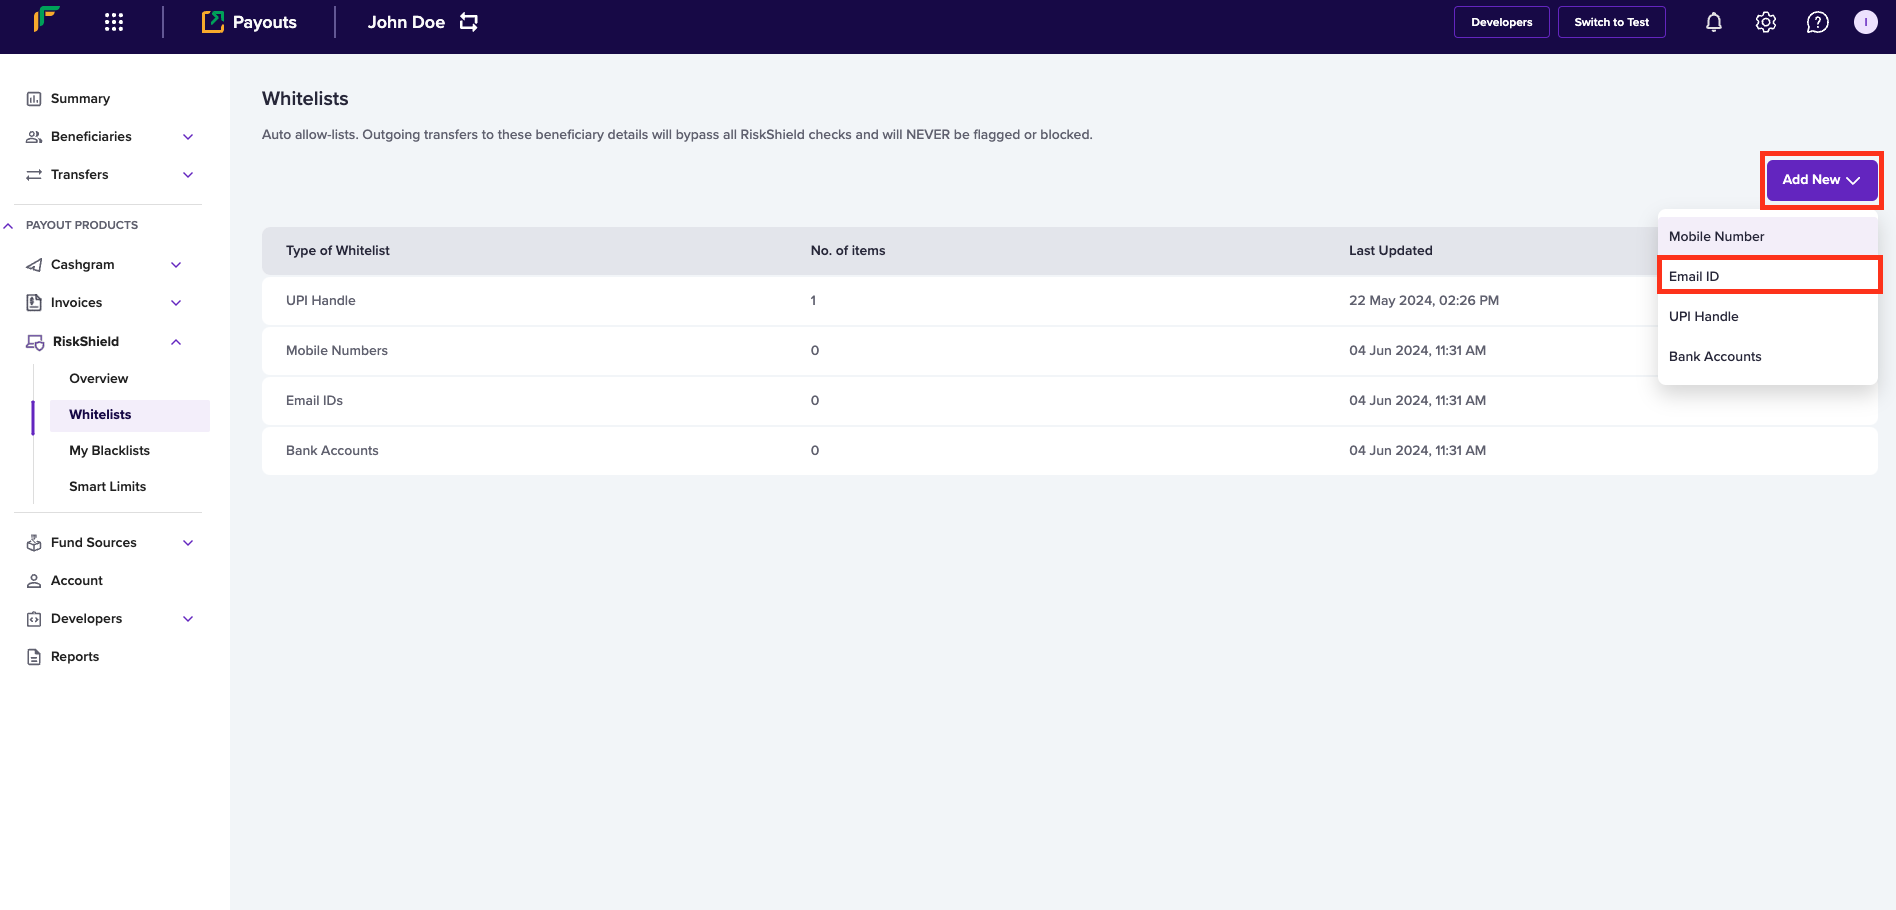
Add New > Email ID
- Enter the following information in the Add Email ID to Whitelist popup:
- Single Email ID - If you want to allow a single email address, select this option and enter the email ID in this field.
- Multiple Email ID - If you want to allow multiple email addresses, select this option, use Download sample file and enter email IDs as per the format in the file, and upload the file using Upload File.
- Click Add Now.
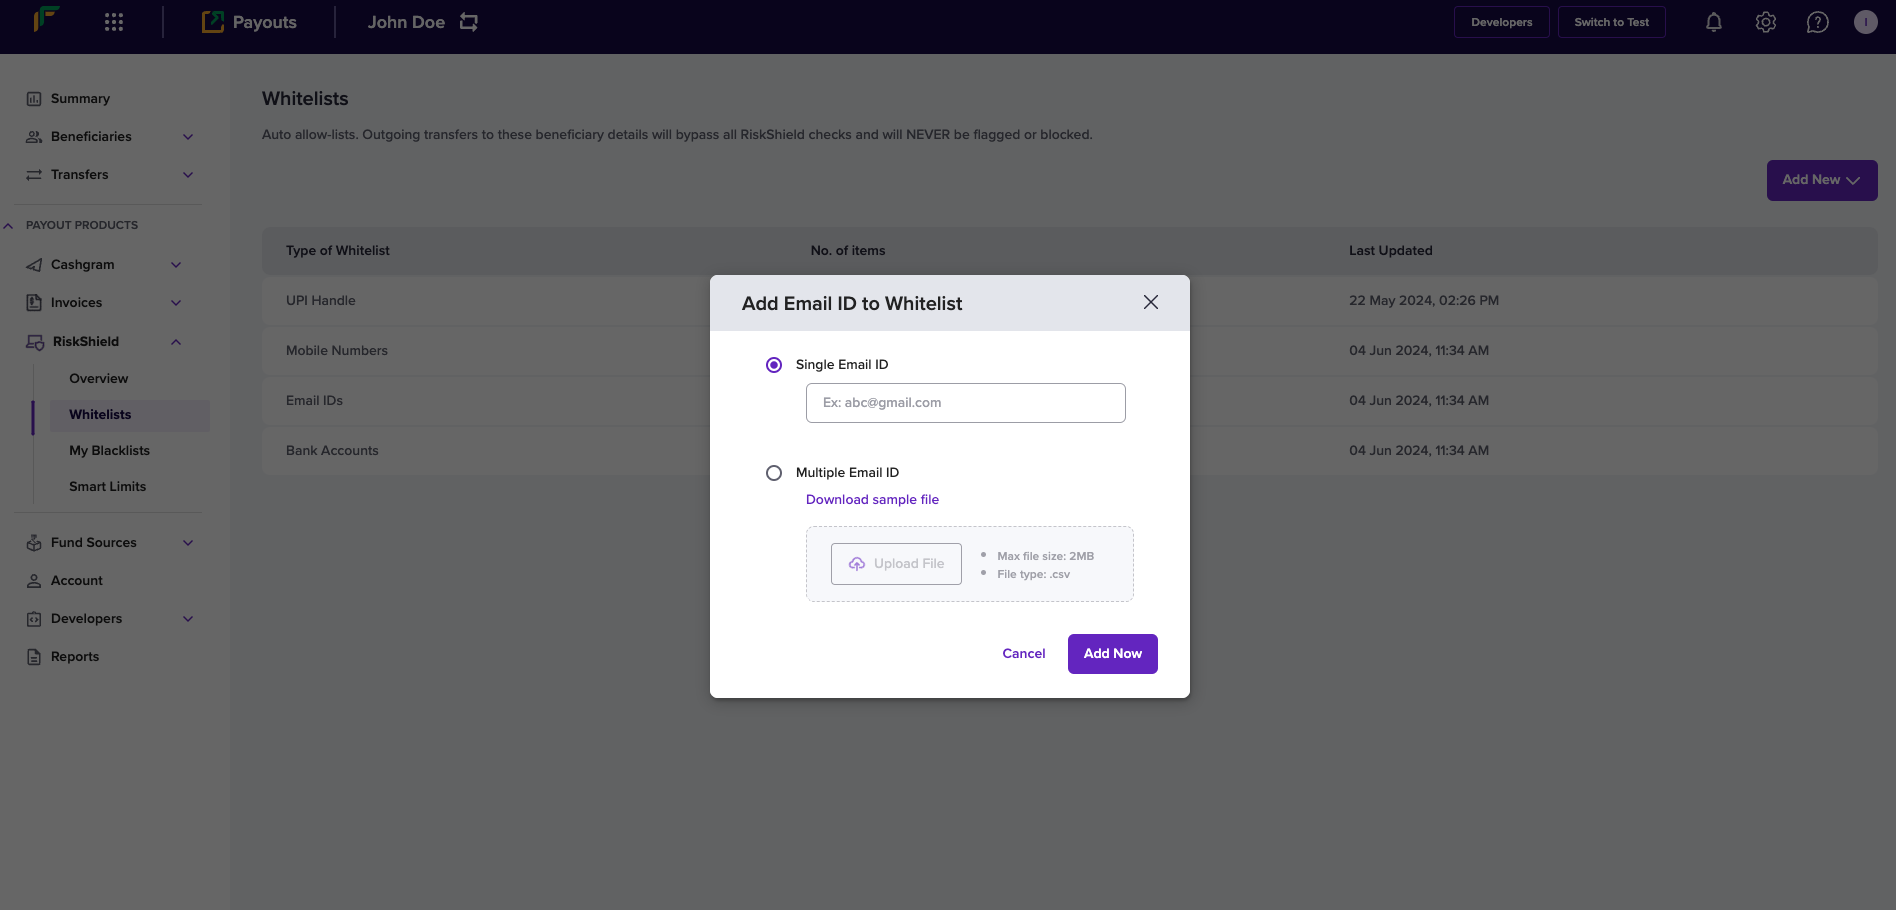
Add Email ID to Whitelist
Allow a beneficiary using UPI VPA
Follow the instructions below to allow a beneficiary using the beneficiary's UPI VPA:
- Click Add New > UPI Handle
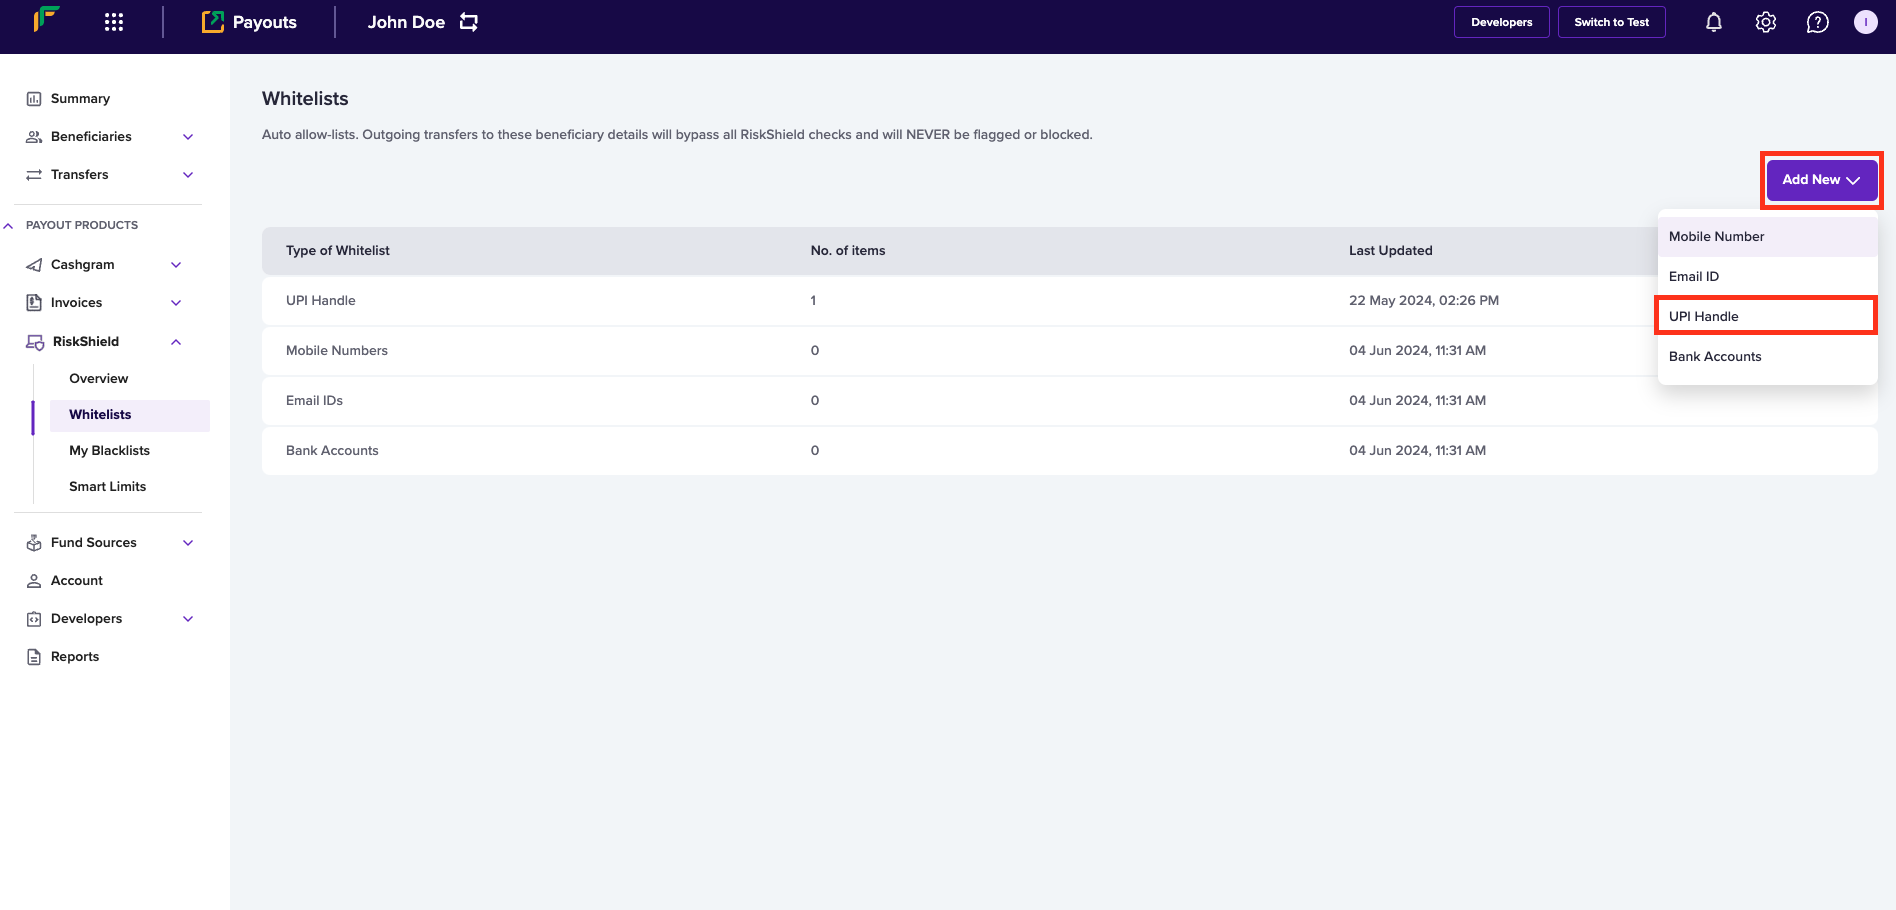
Add New > UPI Handle
- Enter the following information in the Add UPI Handle to Whitelist popup:
- Single UPI Handle - If you want to allow a single UPI handle, select this option and enter the UPI VPA in this field.
- Multiple UPI Handle - If you want to allow multiple UPI handles, select this option, use Download sample file and enter UPI VPA information as per the format in the file, and upload the file using Upload File.
- Click Add Now.
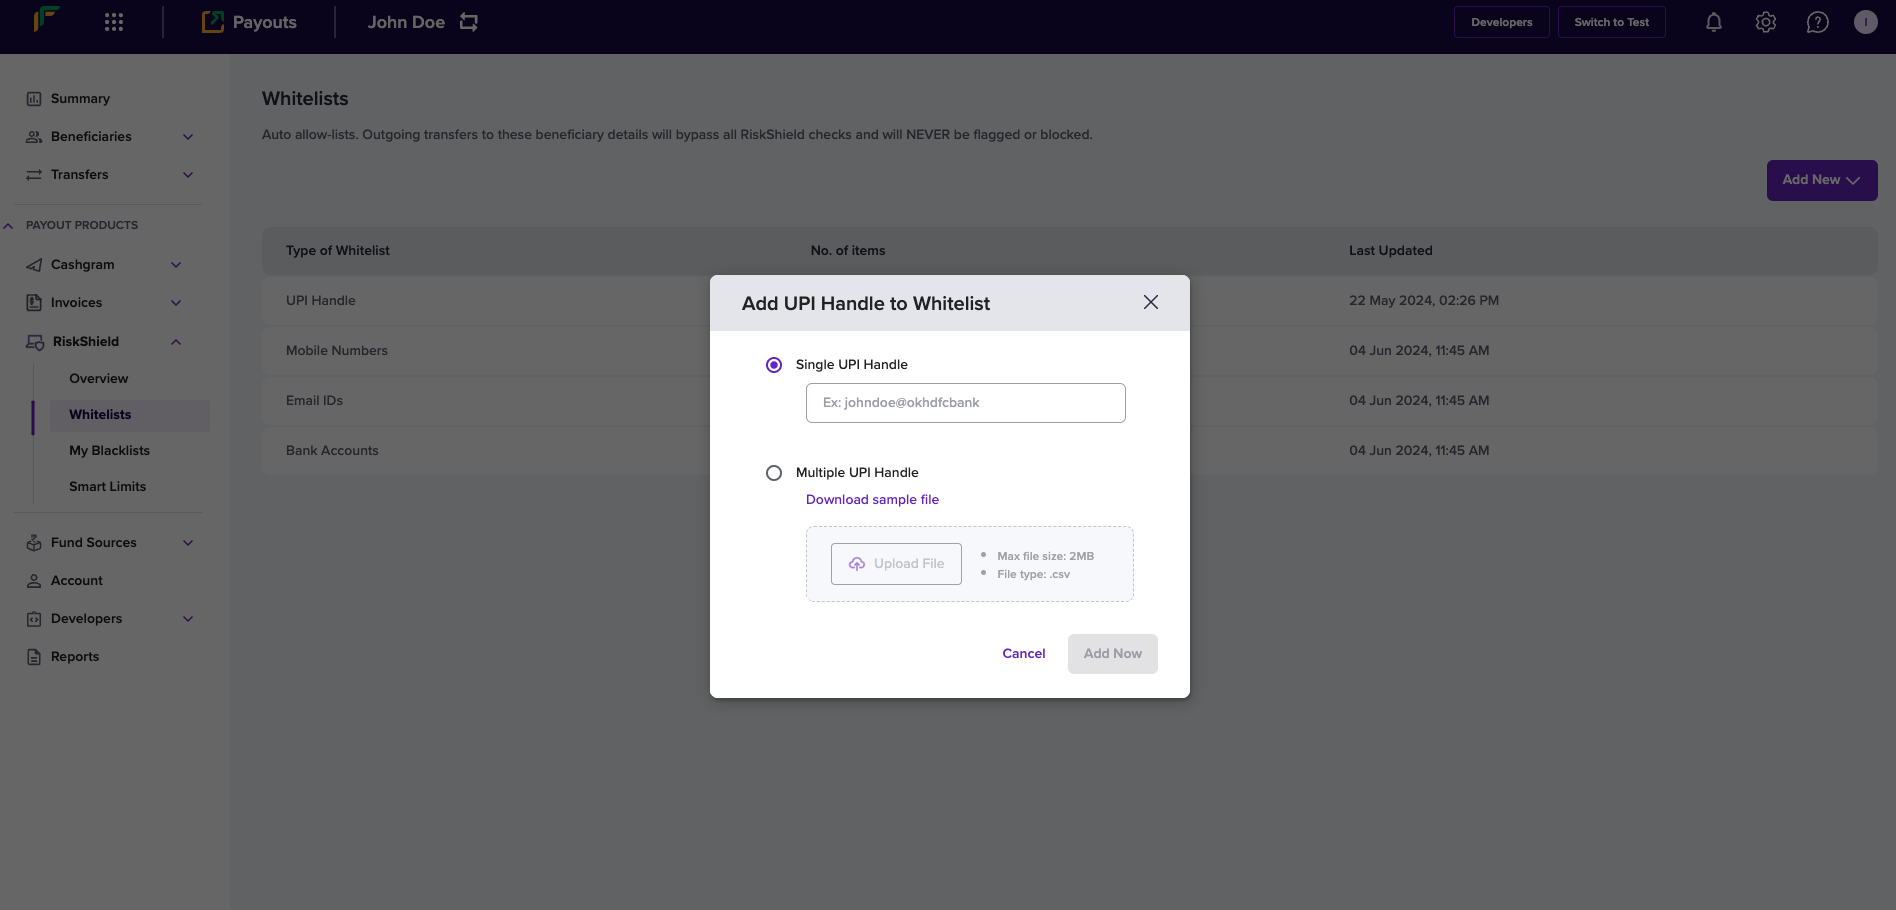
Add UPI Handle to Whitelist
Allow a beneficiary using bank account information
Follow the instructions below to allow a beneficiary using the beneficiary's bank account information:
- Click Add New > Bank Accounts.

- Enter the following information in the Add Bank Account to Whitelist popup:
- Single Bank Account - Enter the bank account number of the beneficiary in this field.
- Enter IFSC Code - Enter the IFSC information in this field.
- Click Add Now.
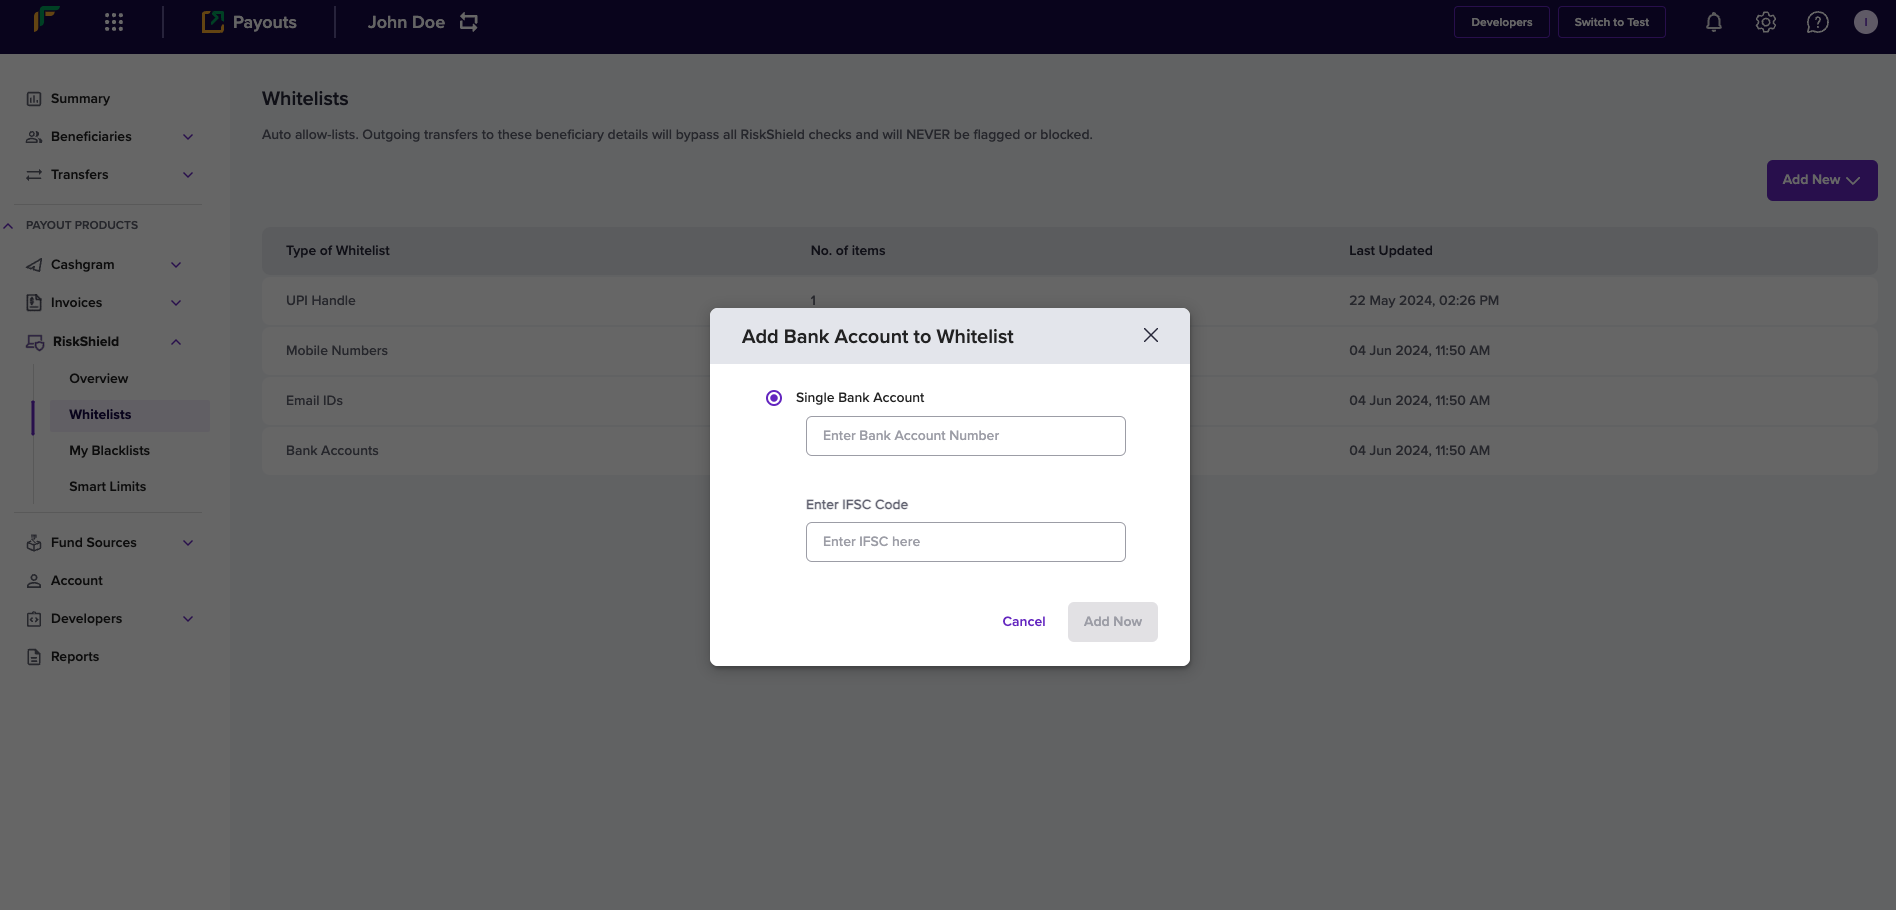
Add Bank Account to Whitelist
View and manage whitelist
You can view the complete list of any whitelist type - UPI Handle, Mobile Numbers, Email IDs, and Bank Accounts. The Whitelists screen provides you with the information of each whitelist type. Click a whitelist type to view and drill-down its complete information.
Edit whitelist Information
Follow the instructions below to edit the UPI VPA information of the beneficiary added to your whitelist:
- Click UPI Handle from the Whitelists screen.
- Click the Edit icon.
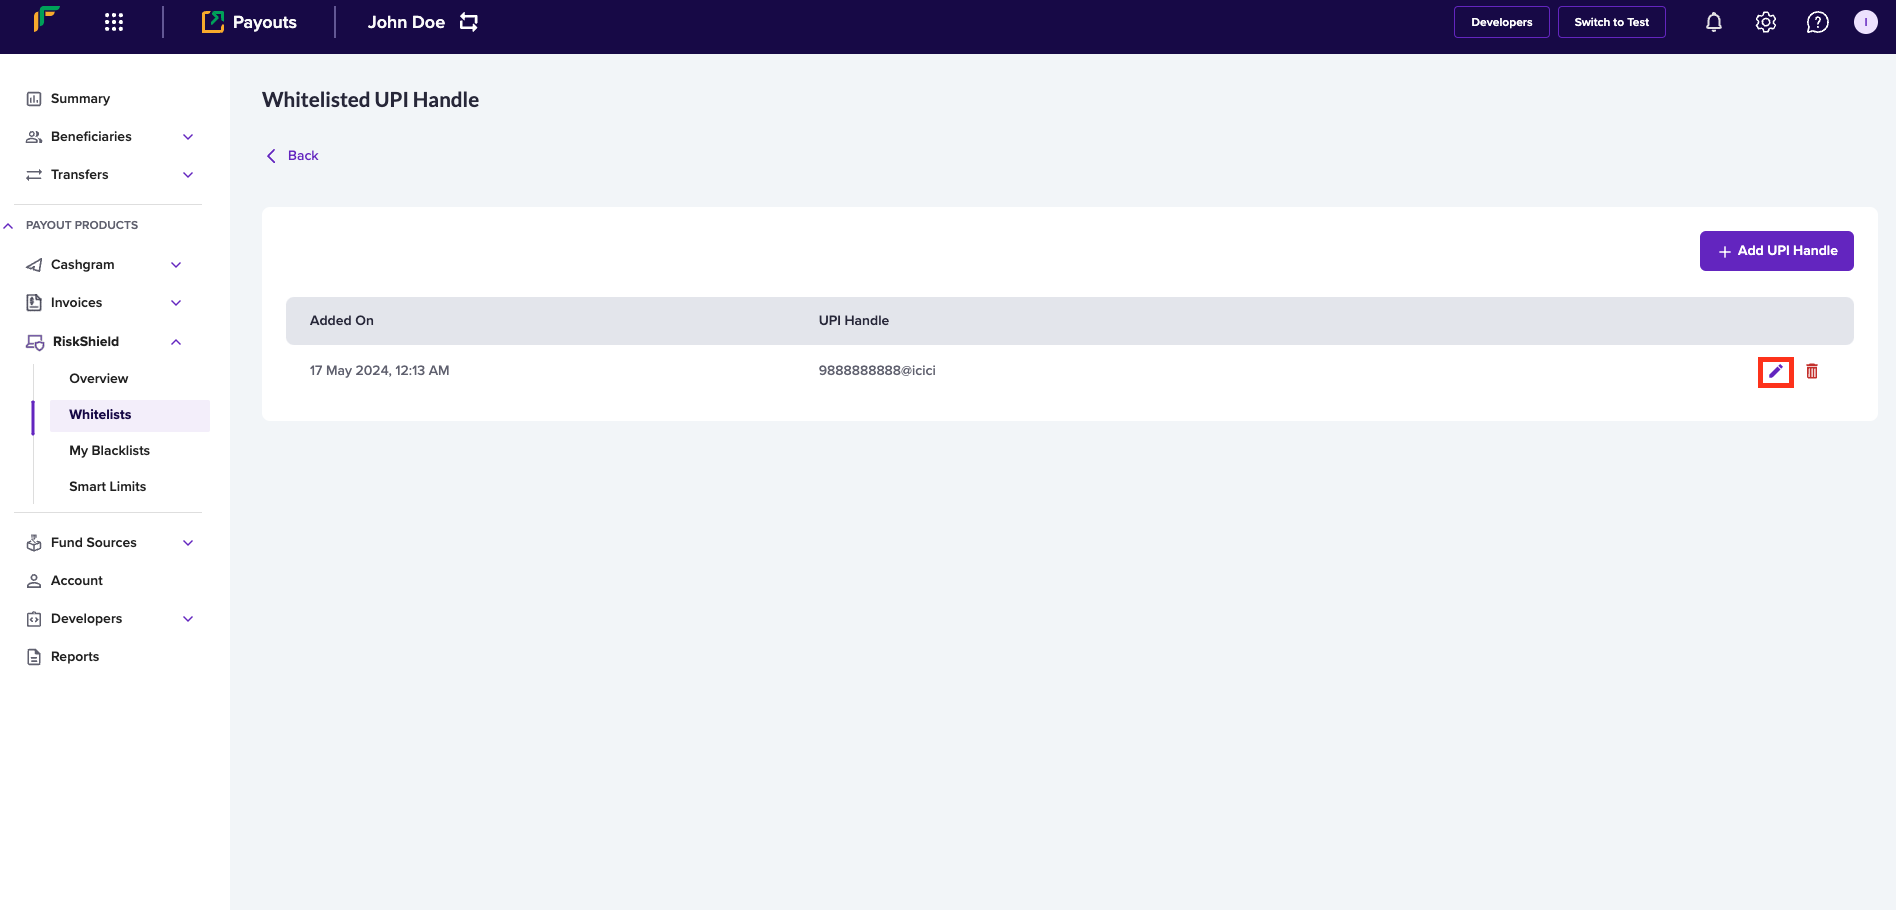
Edit UPI
- Enter the following information in the Update UPI Handle popup:
- Single UPI Handle - Edit the UPI VPA information in this field.
- Multiple UPI Handle - If you want to edit multiple UPI VPA information, click Download sample file, enter the updated information as per the format in the file, and upload the file using Upload File.
- Click Add Now.
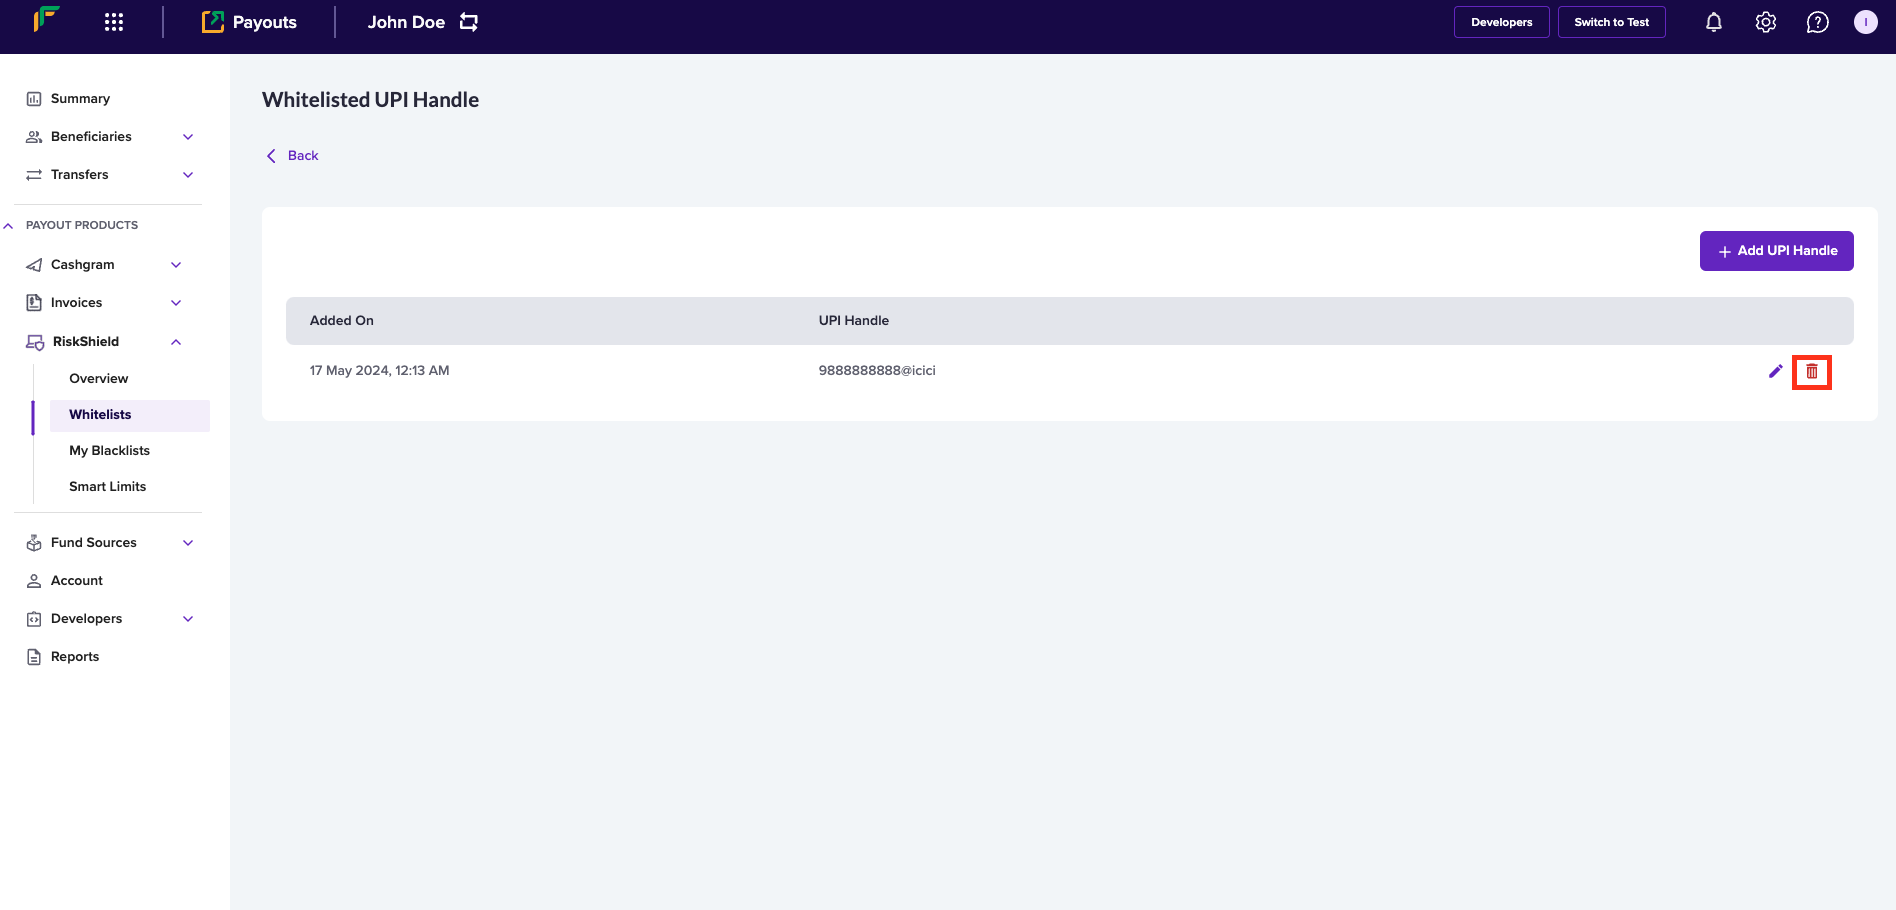
Delete whitelist information
Follow the instructions below to delete a beneficiary's UPI VPA information from your whitelist:
- From the list of UPI information, click the Delete icon against the UPI information that you want to delete.
- Click Delete.
Delete UPI
Follow the same instructions to view and manage information in your blacklist.
Updated 3 months ago