Affiliate Partner Dashboard
In this article, you will learn about the various functionalities in the Affiliate dashboard.
The Affiliate Dashboard is a feature-rich user interface that helps you to add and manage your merchants effectively. Analyse your business progress, monitor your commissions and more within the dashboard.
Summary
The Summary screen gives you details about your daily transactions, like the current-day transaction count, the value of the transactions made by your merchants, and the last commission amount you received from Cashfree Payments as per the referral program.
The following details are available on this page -
- Number of Transactions Today - Total number of PG and Payout transactions done by your merchants.
- Value of Today's Transactions - Total value of PG and Payout transactions done by your merchants today.
- Merchant Stats - Number of merchants you have added and activated.
Referral Link
- Referral Link - Copy and share your unique Referral Link with your clients or merchants for sign up and activation.
- Partner Logo - Use the Cashfree Affiliate Partner badge on your website or marketing assets visible to your clients or merchants.
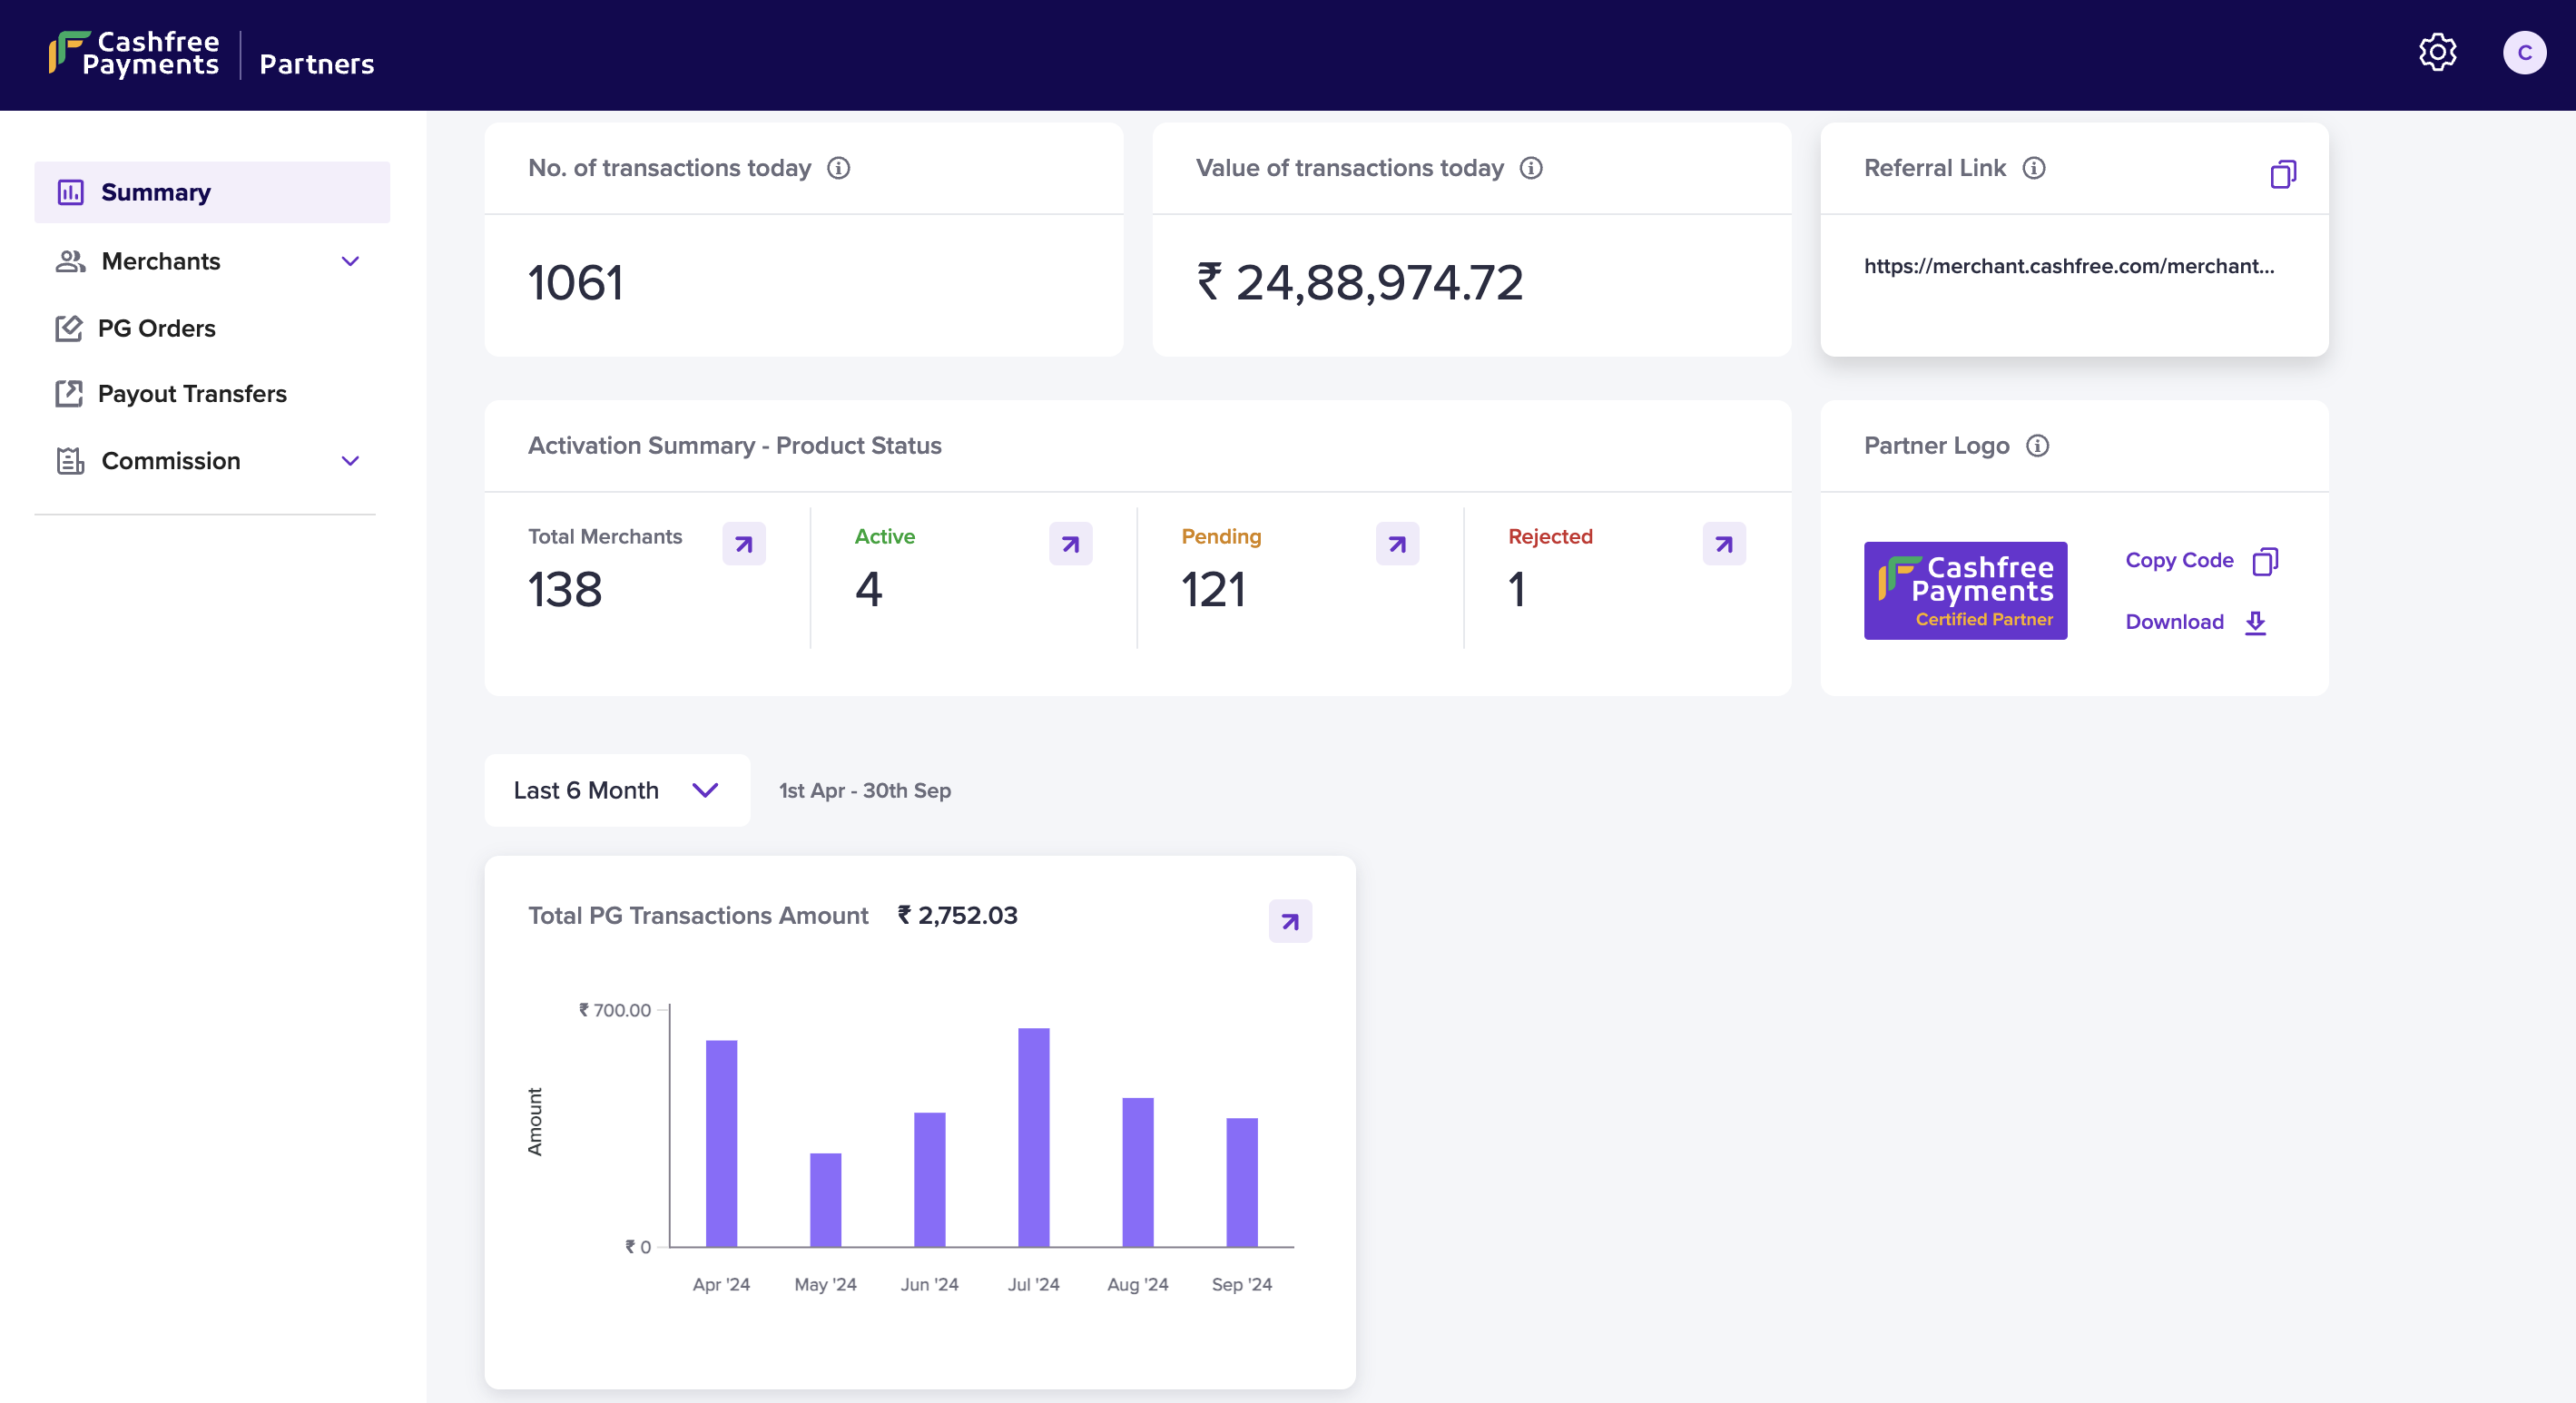
Summary Screen
Merchants
Add Merchant
To add a merchant,
-
Go to the Affiliate Dashboard > Merchants > Add Merchant.
-
In the Add New Merchant screen, enter the merchant Business Name, Registered Email", Phone Number, and Merchant ID**. Merchant ID is a unique alphanumeric identifier for the merchants. It will be auto-generated if not provided. The maximum number of characters allowed is 40. (Hyphen and underscore allowed.)
-
For faster onboarding and KYC verification, you can submit the merchants' basic KYC details.
Details Required (Optional):
- Business Type
- Business Model
- Business PAN Details
- Bank Account Details
- Business Category and subcategory
- Website and application link
- Authorised signatory PAN details
- Name as per Authorized Signatory PAN
- GSTIN
-
Accept the terms and conditions, and click Submit.
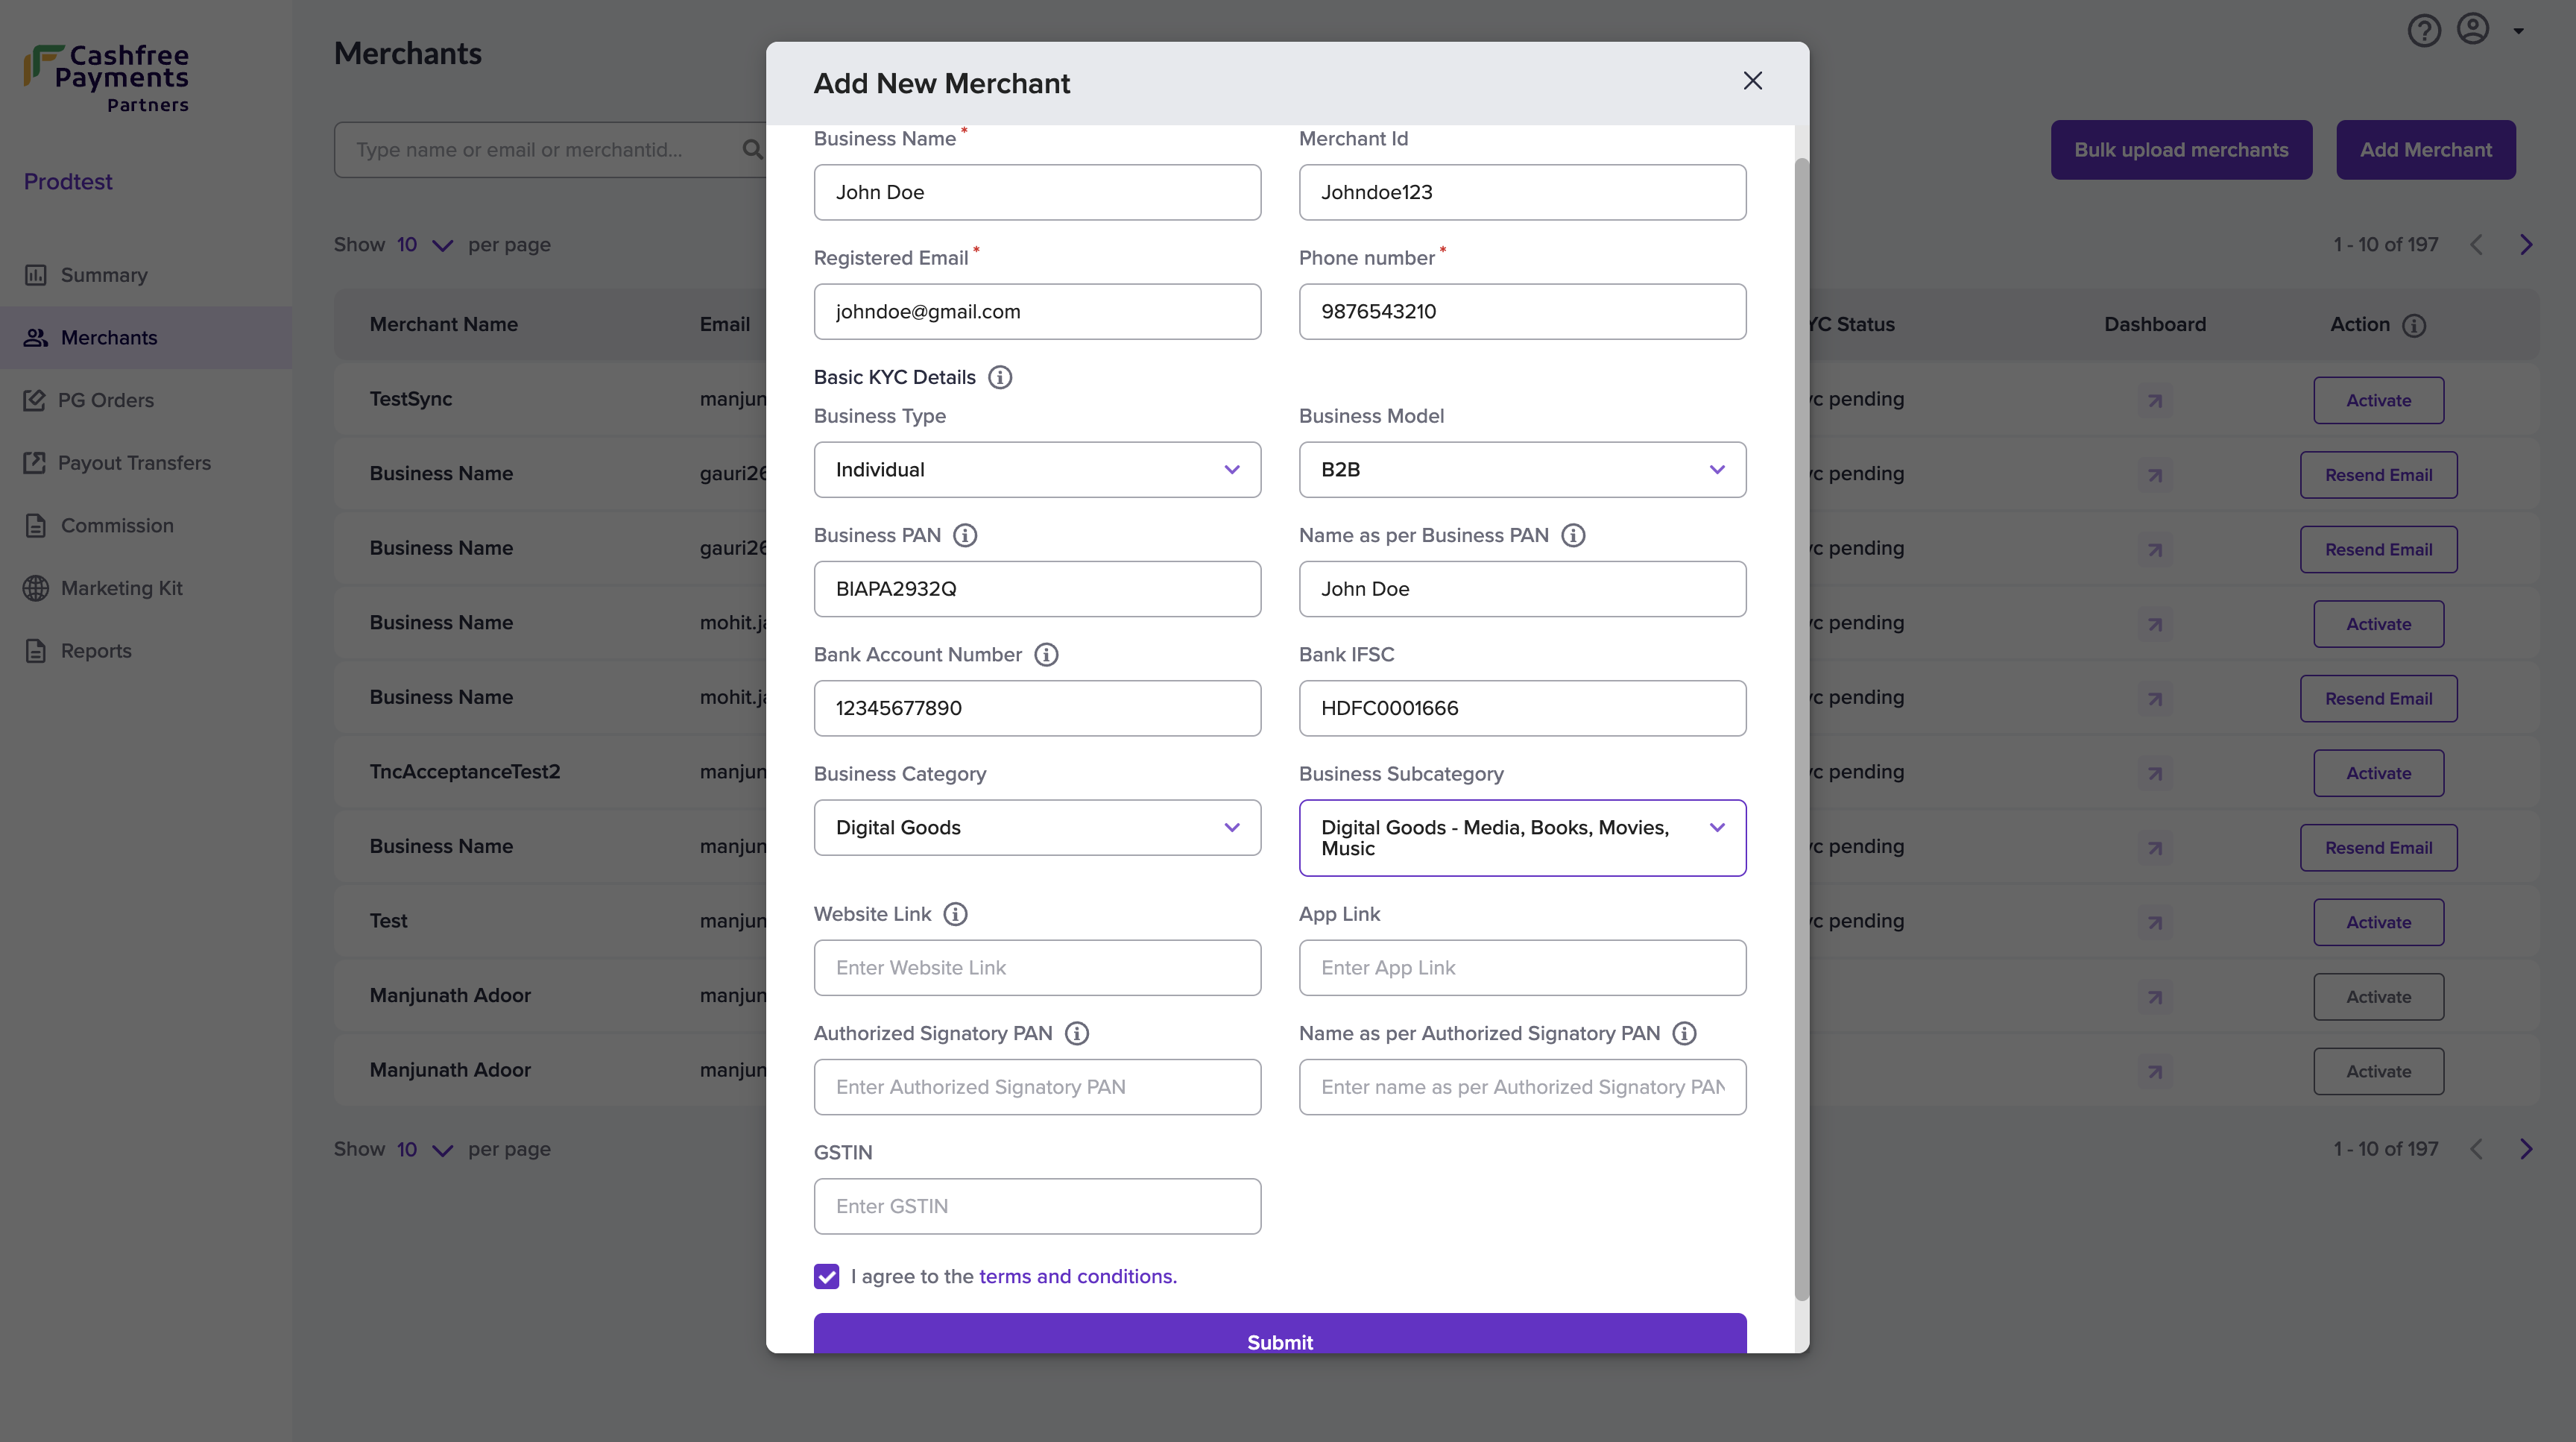
Add New Merchant
A verification email will be sent to the merchant, and the onboarding status will be updated after successful verification.
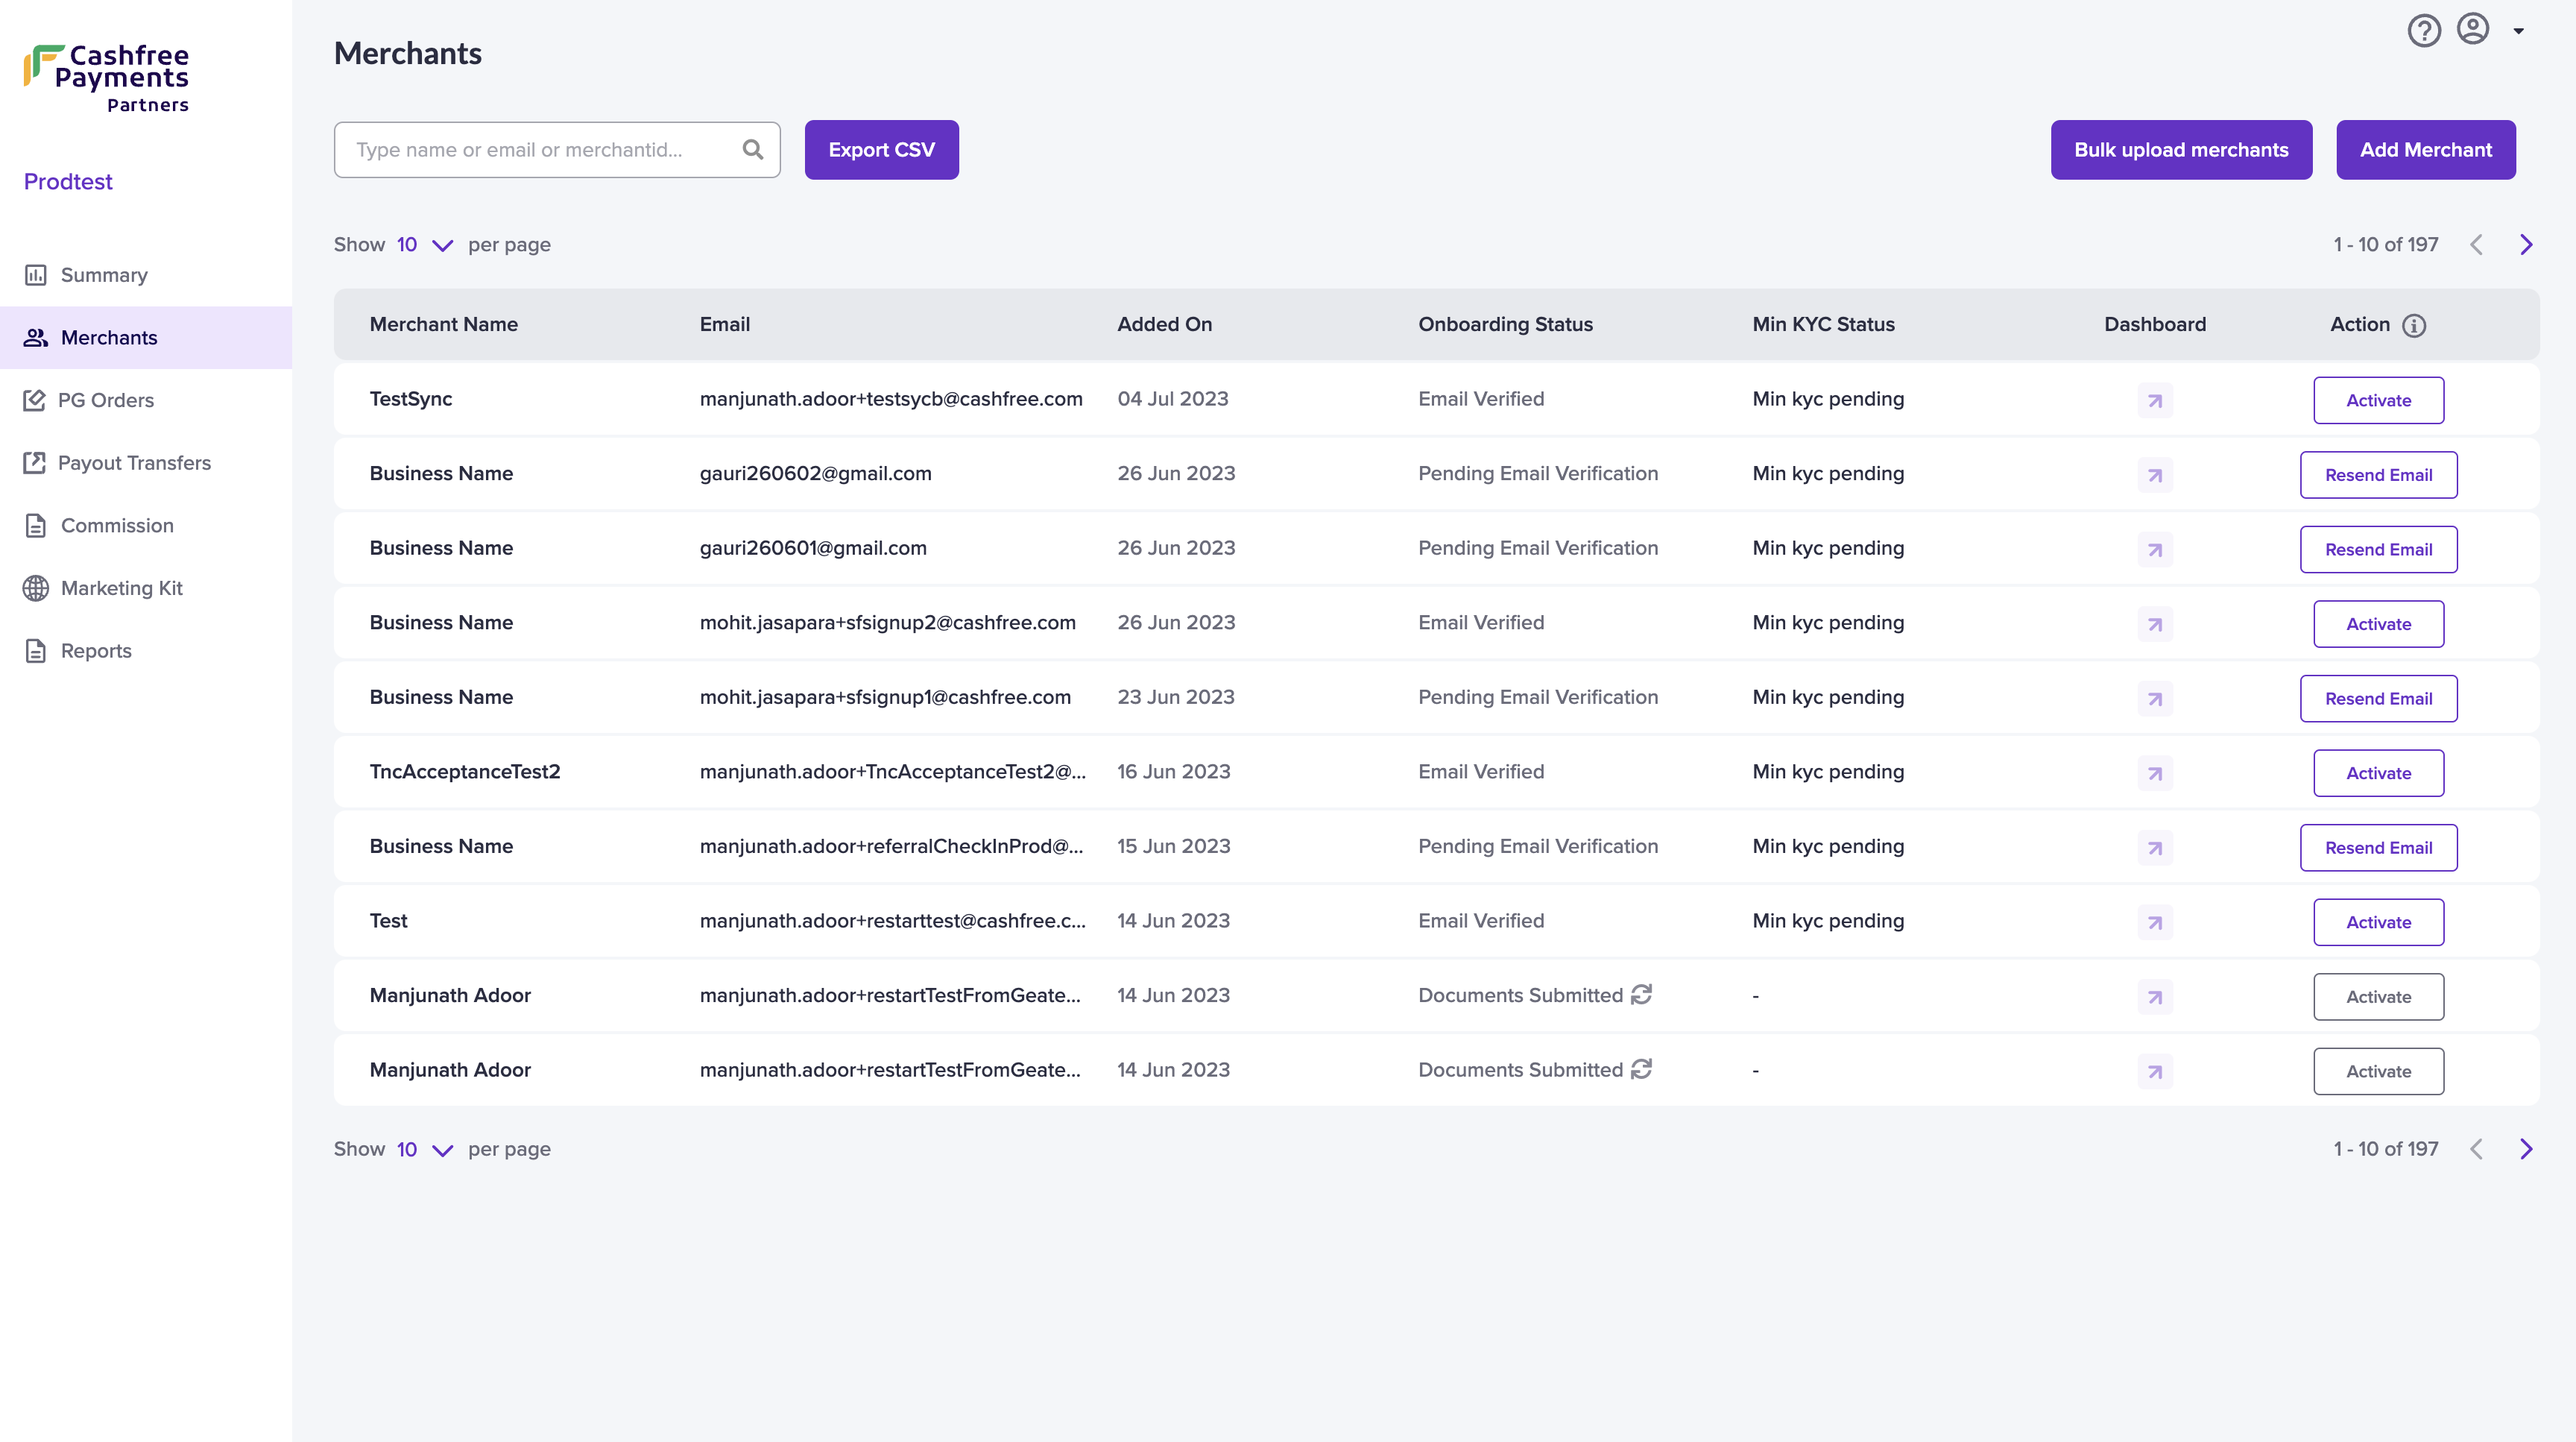
Merchants HomePage
To know more about how to activate an account, see our Activate Account and Account Activation Checklist page.
If your merchant has not received the email, click the Resend Email option in the Merchants screen to resend the verification email to the merchant.
Bulk Upload Merchant Details
To onboard many merchants at once, you can add all the details in a file (format specified by Cashfree Payments) and upload it.
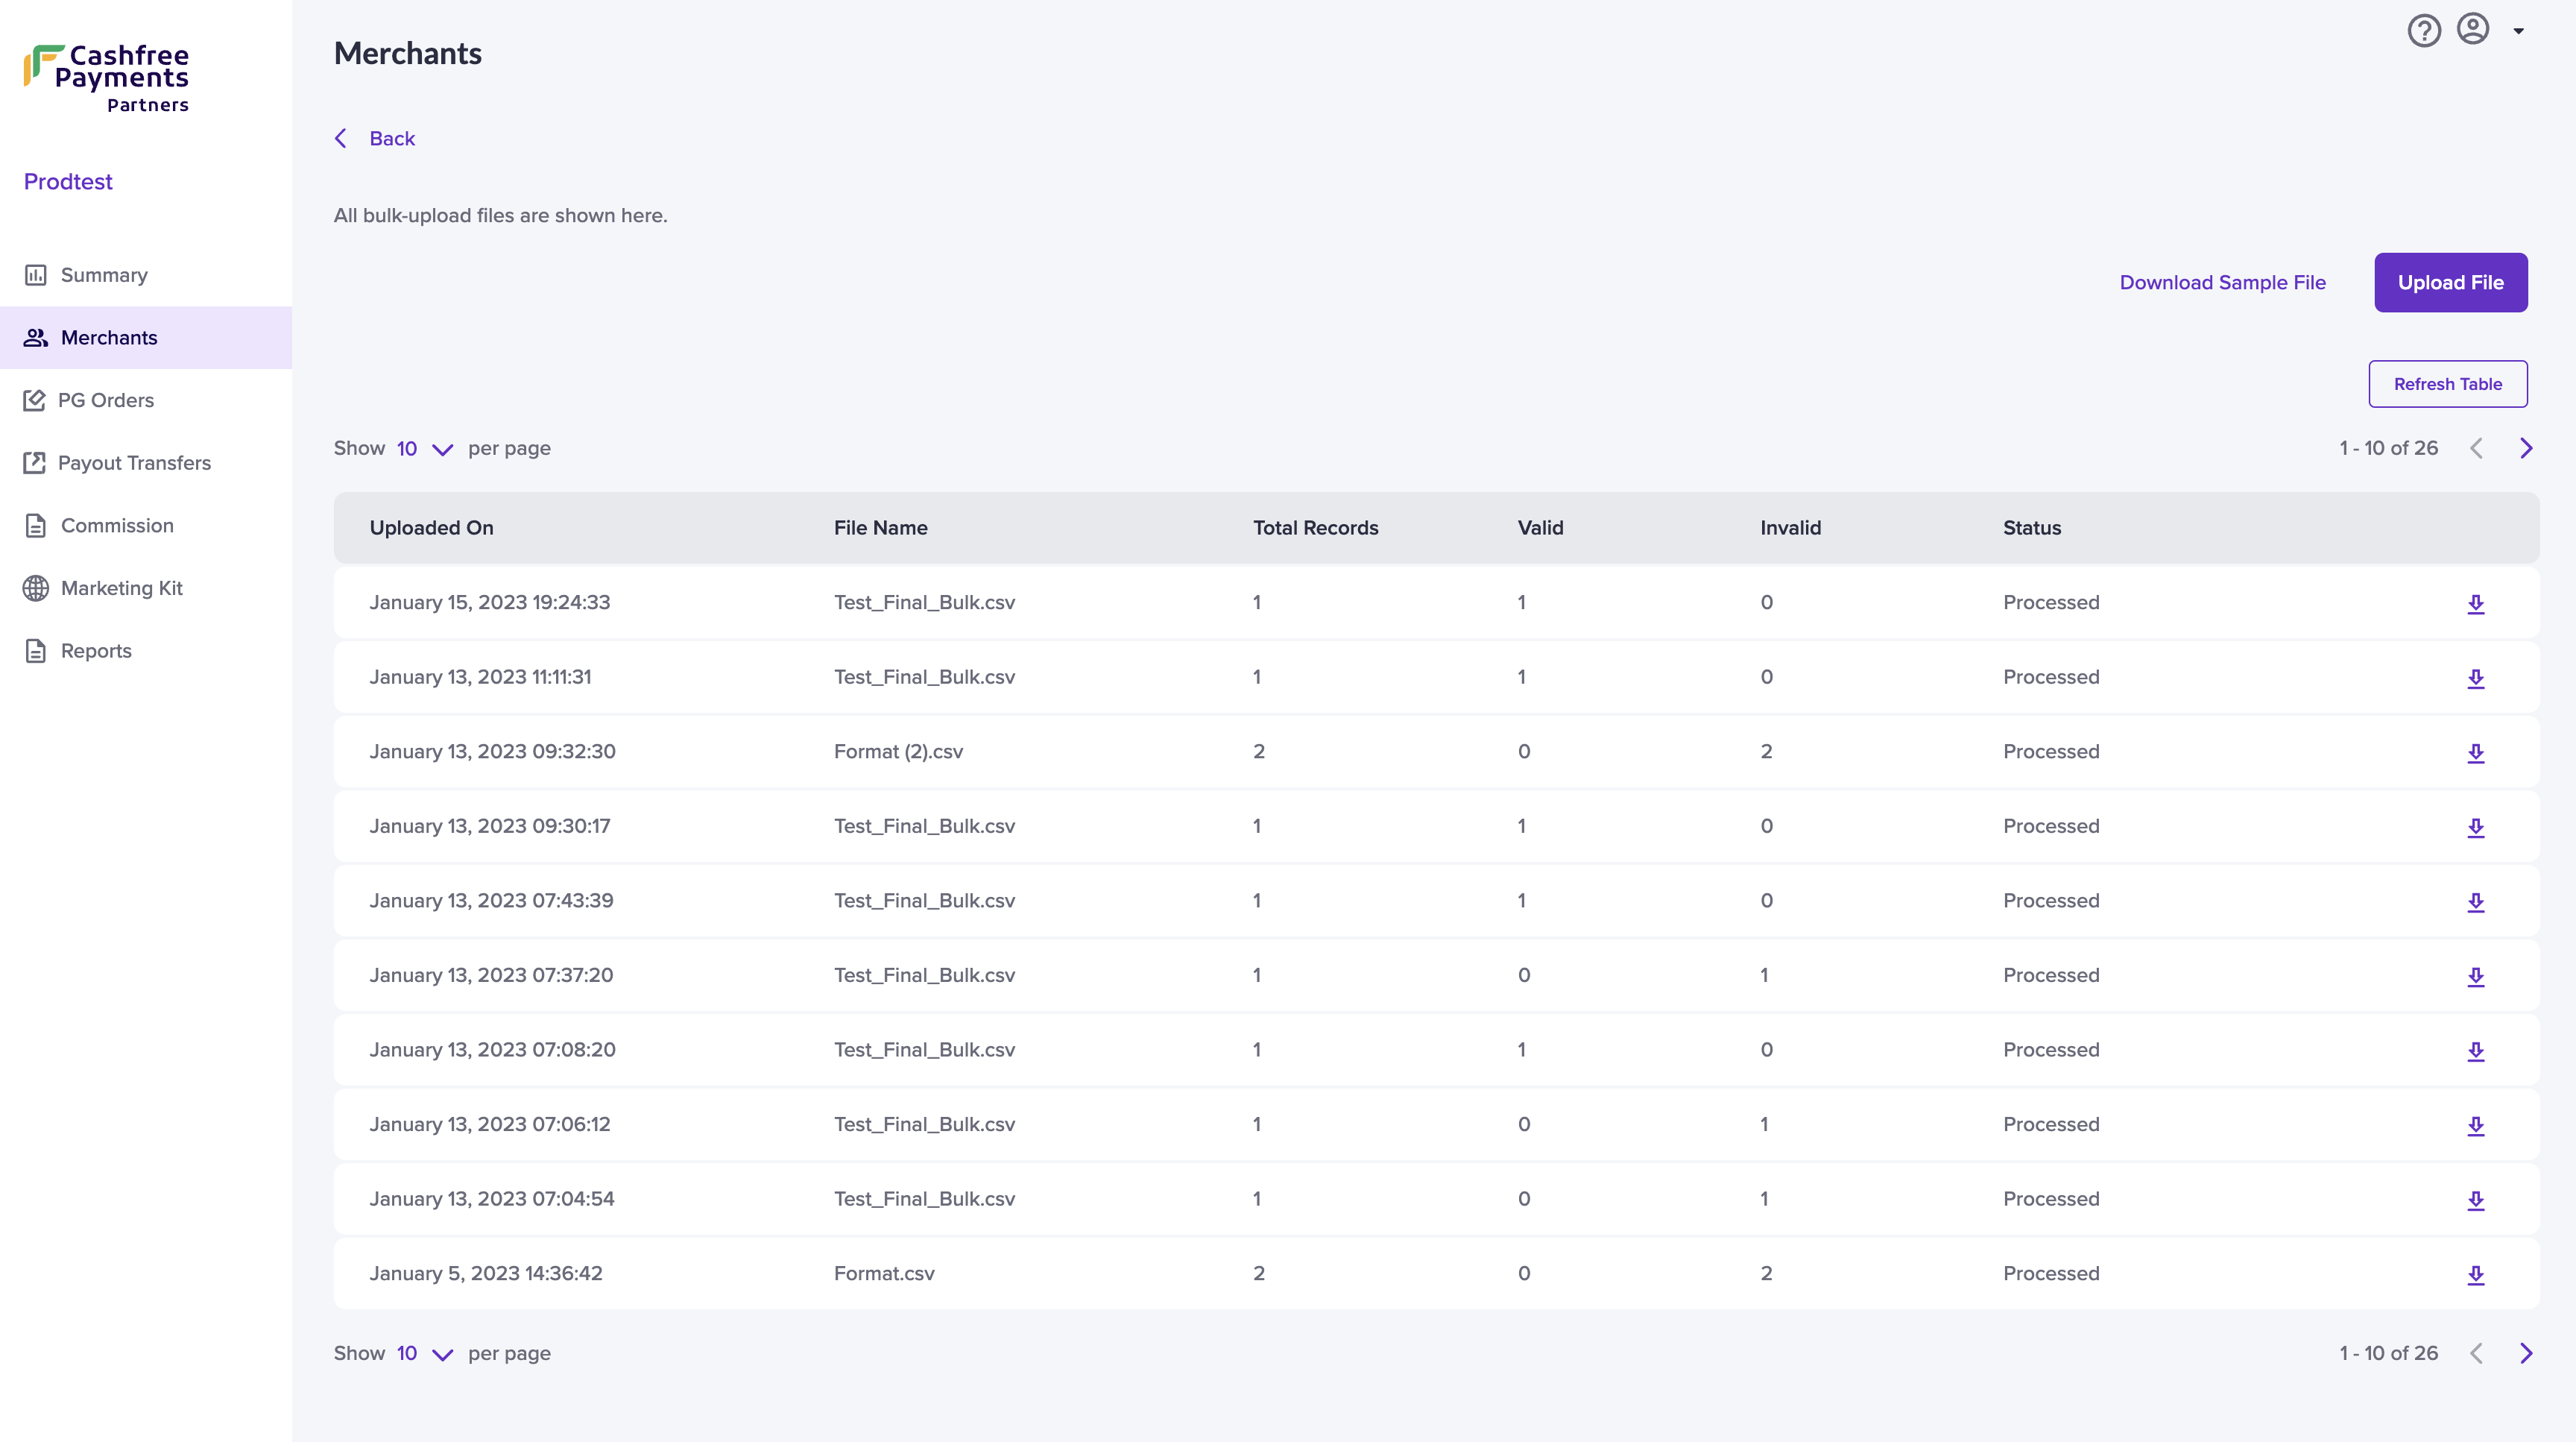
Bulk Upload Merchants
To bulk upload merchant details,
-
Go to the Affiliate Dashboard > Merchants > click Bulk upload merchants.
-
Click Upload File and choose the file you want to upload. Ensure all the details are provided as per the sample file. Fill in the mandatory fields - Business Name, Registered Email, Phone Number, and Merchant ID.
You can also specify the business details, PAN, and bank account details of the merchants for KYC verification, if required. -
Details like the number of merchants added to the file, how many are valid/invalid, and the status of the uploaded file will be displayed after the file is successfully uploaded. You can download the file and correct any errors in the file and upload it again.

Bulk Upload Success
Sample file is available here.
Activation Lifecycle
Onboarding Status
Pending Email Verification: The Merchant must first verify their registered email address. An email is sent automatically from Cashfree Payments (from [email protected]) to the merchant email ID you specified when you added the merchant details.
If the merchant has not received the email in their Primary inbox, please ask them to check it in the Spam folder. If the merchant has not received the email you can use the Resend Email email to send the verification email again.
Email Verified: This means that Merchant has verified their email address, and can now start their KYC verification process.
KYC Status
Min KYC Pending: Merchants must submit the required KYC documents.
Min KYC Submitted: Merchant has submitted their KYC documents and the documents are being reviewed by Cashfree Payments.
Min KYC Approved: Merchant KYC has been approved and Payment Gateway product is activated.
If the merchants have verified their email you can fill out the KYC on behalf of the merchant and activate the account for your merchants.
PG Orders
The PG Orders screen gives you merchant-wise details about the PG transactions. Details available are:
- Merchant Name
- Transaction Count
- Transaction Amount
- Total Commission
By default, the report shows details for the last 7 days. You can filter and view the details as per your requirement. Click on a particular transaction to view more details about it.
Payout Transfer
The Payout Transfer screen gives you details about the payout transactions done by your merchants. Details available are:
- Merchant Name
- Transfer Count
- Transfer Amount
- Total Commission
Click on a particular payout transaction to view more details about it.
Commission
The Commission screen gives you details of all the commissions you have earned month-wise. The volume of transactions made, the total transaction amount, and the commission you have earned will be displayed on this screen. The commission amount will be settled in your account month-wise.
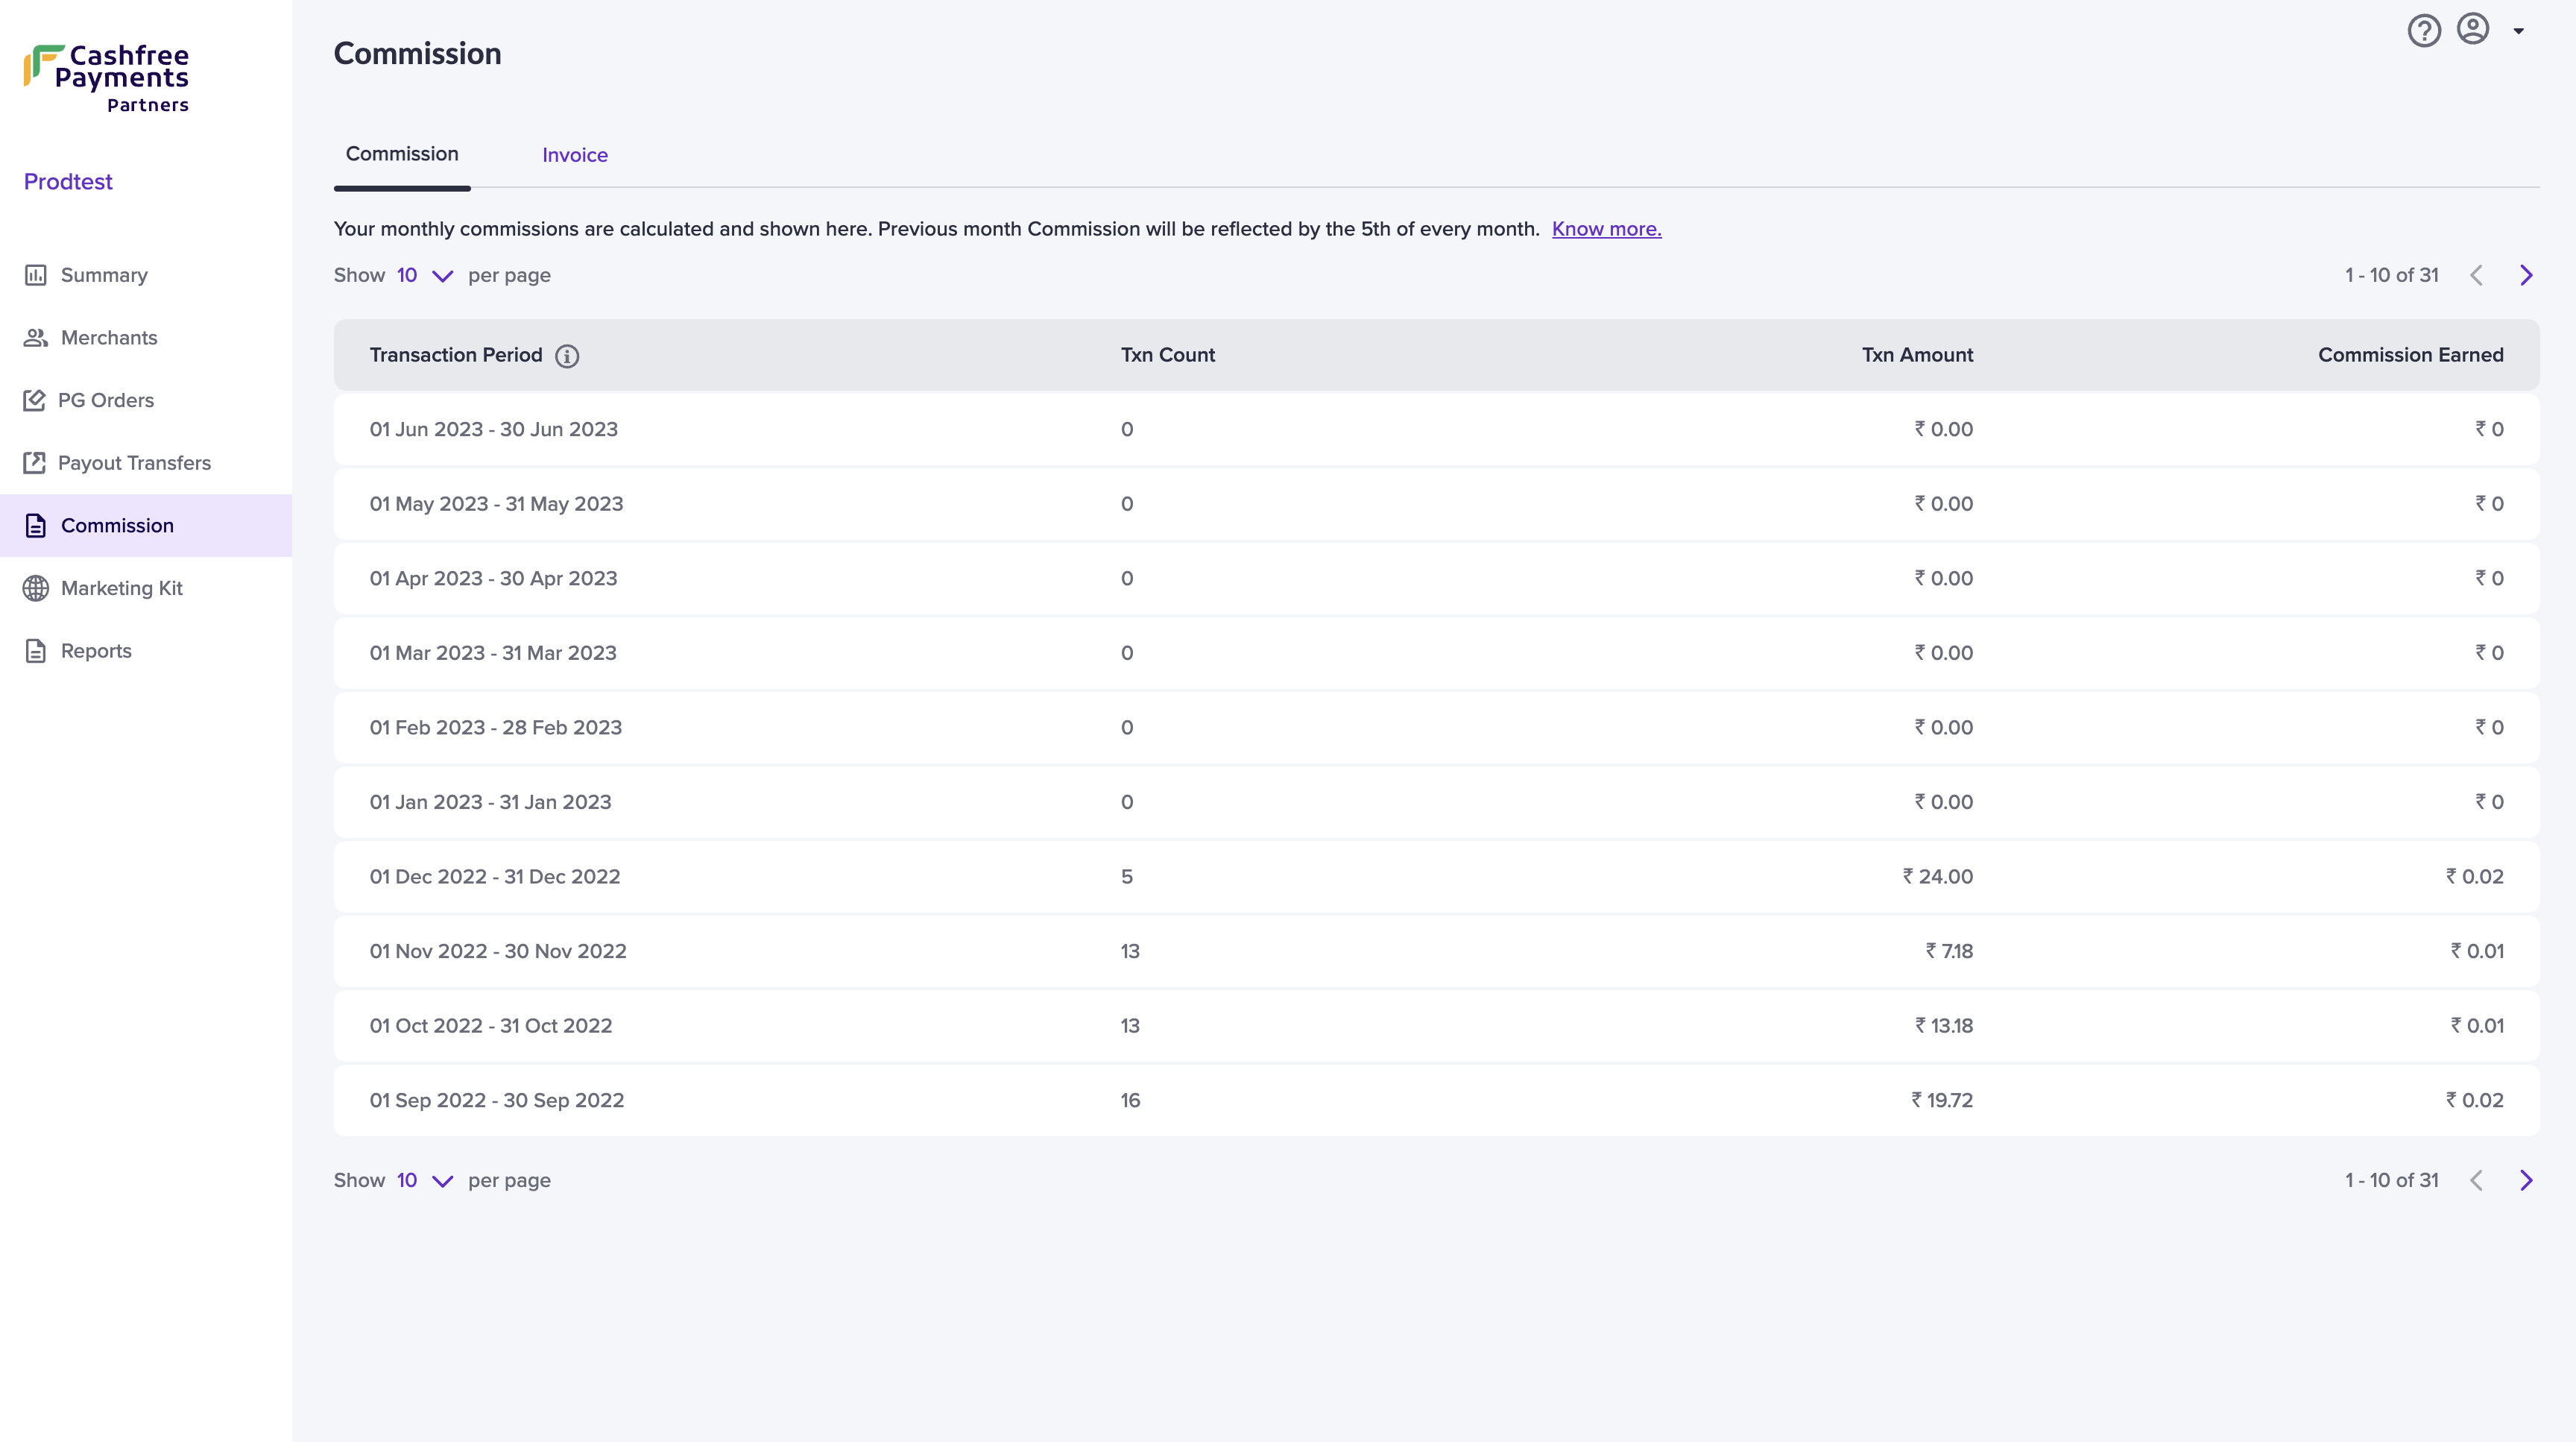
Commission
Click on a particular commission to view more details about it.
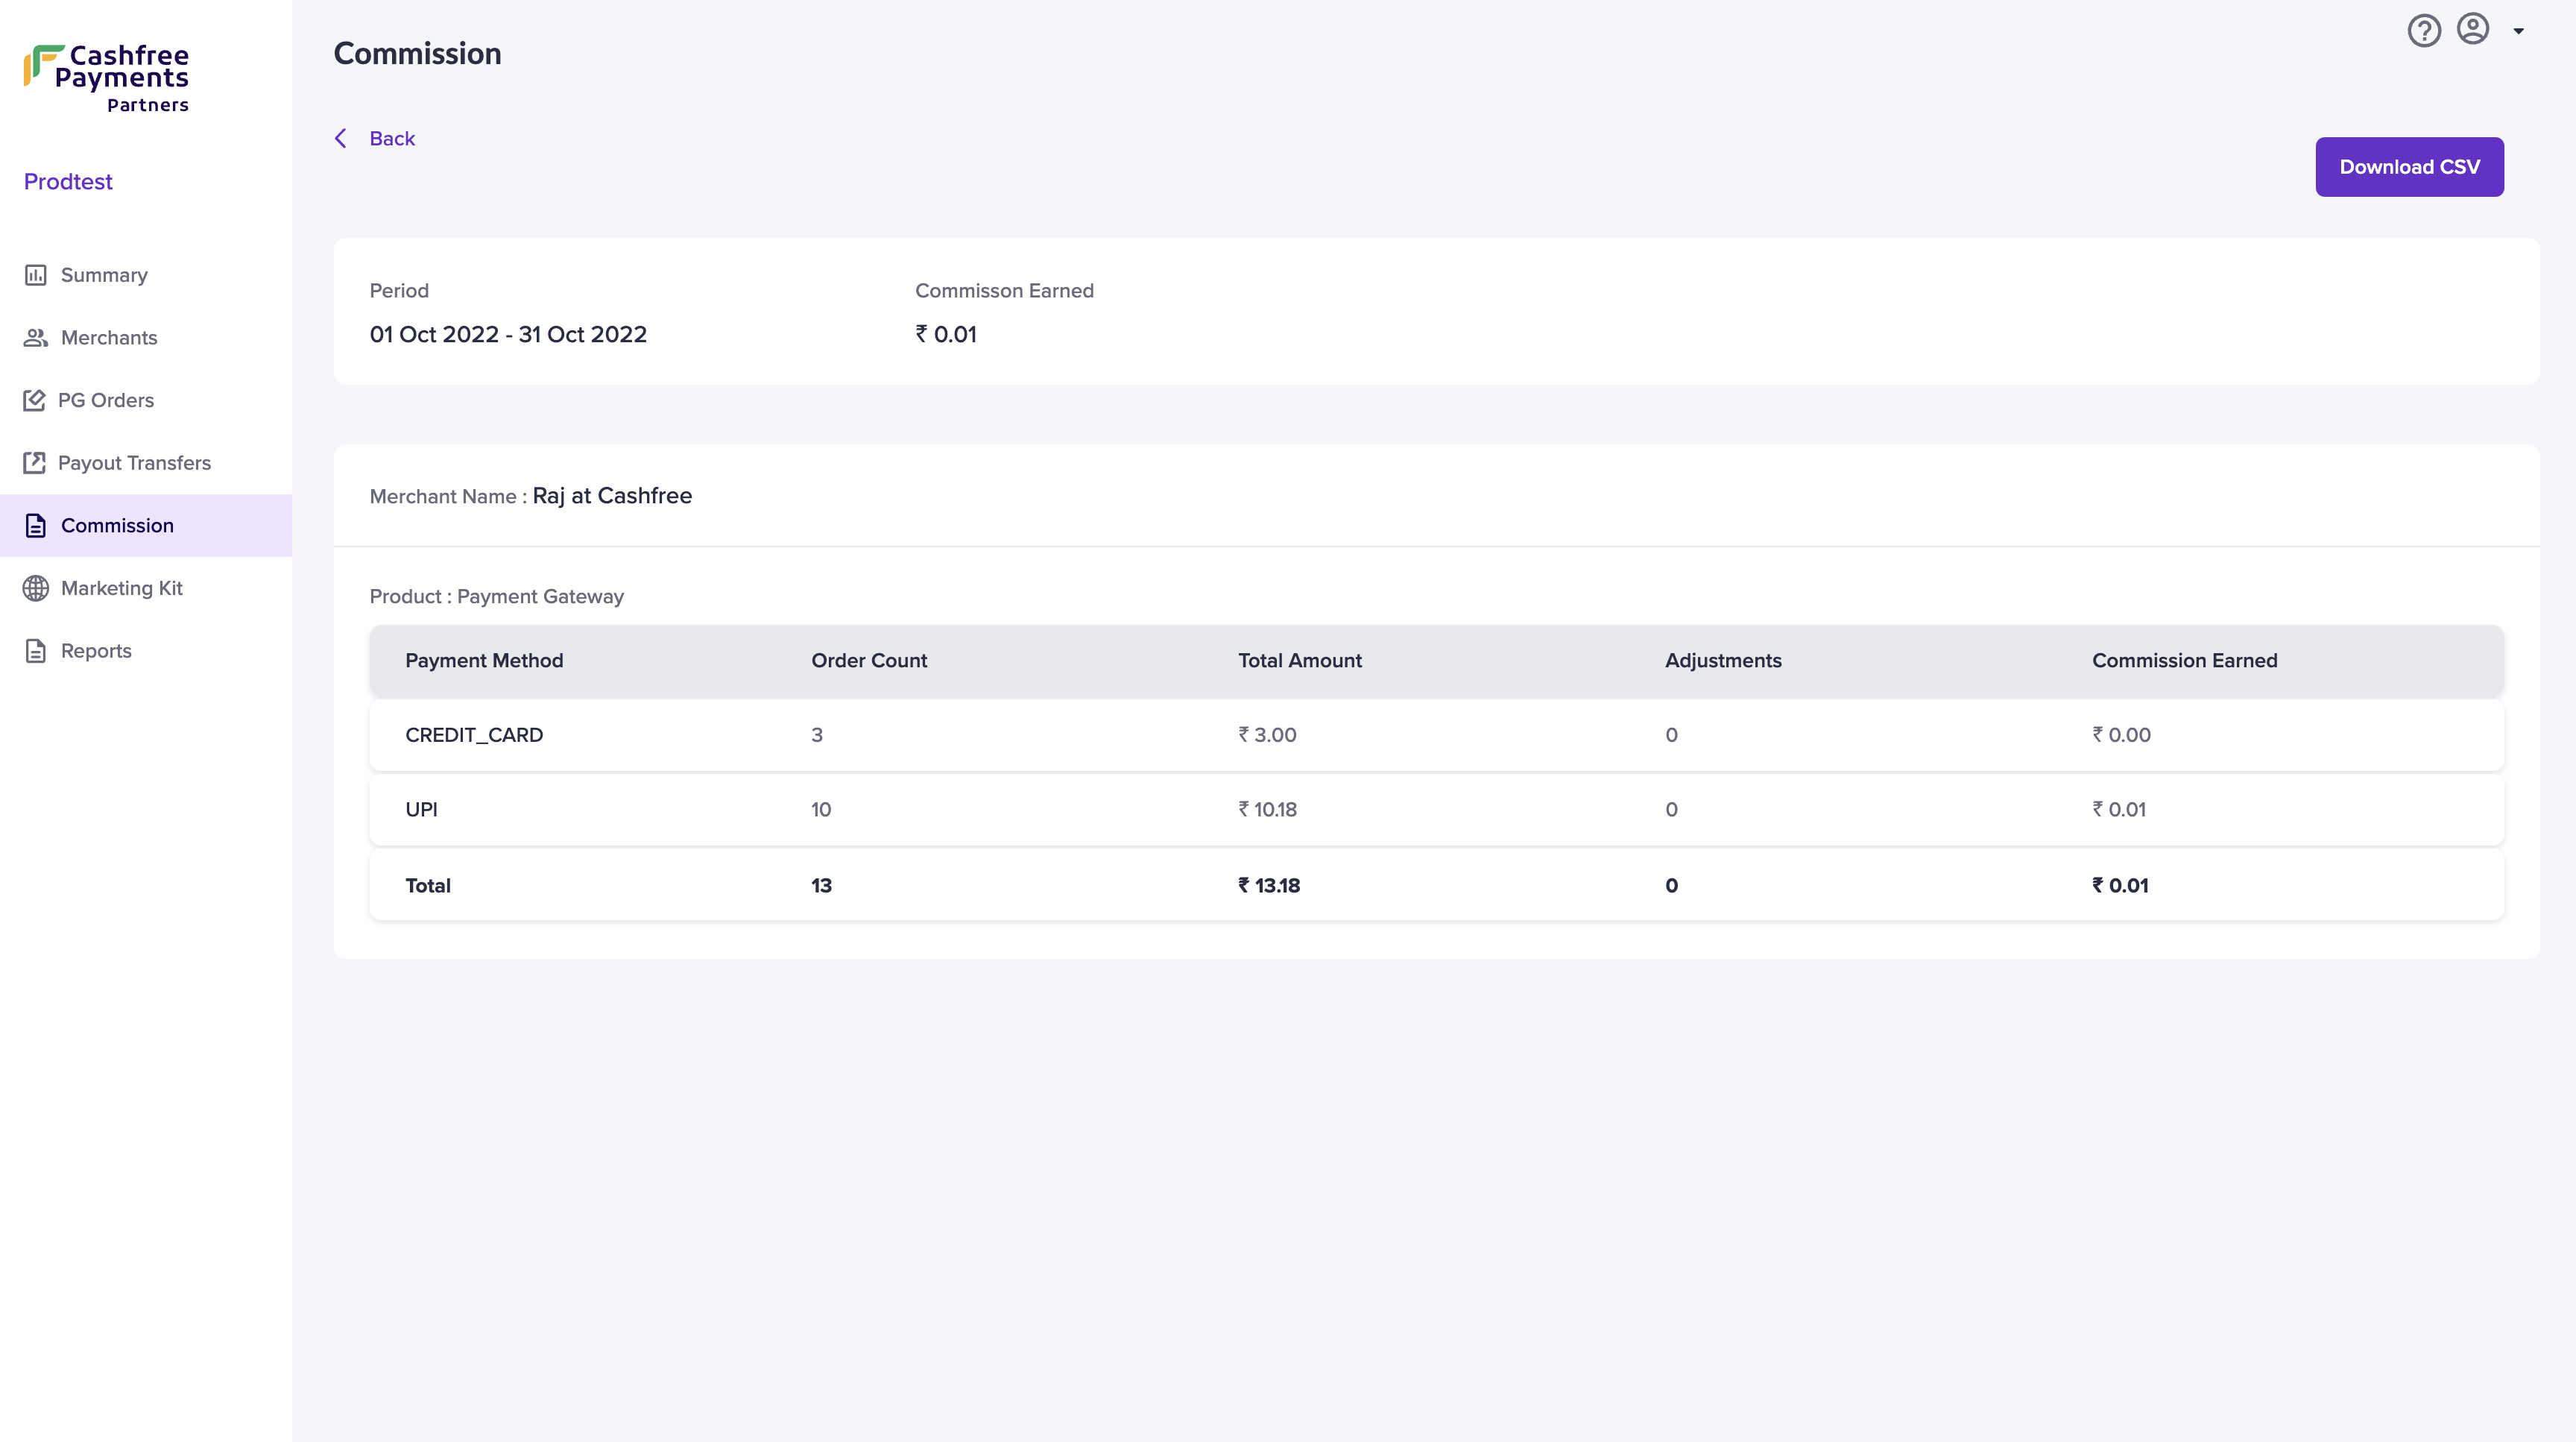
Commission Details
Updated about 2 months ago