Vendor Dashboard
Set up vendor dashboard that enables your vendors to view their transactions, settlements, and reports in one place. This helps vendors track their payments effectively.
The vendor dashboard is a separate dashboard for vendors wherein they are able to view their transactions, settlements, and reports. Your vendors will receive an invitation and can access the vendor dashboard only when you provide dashboard access to them.

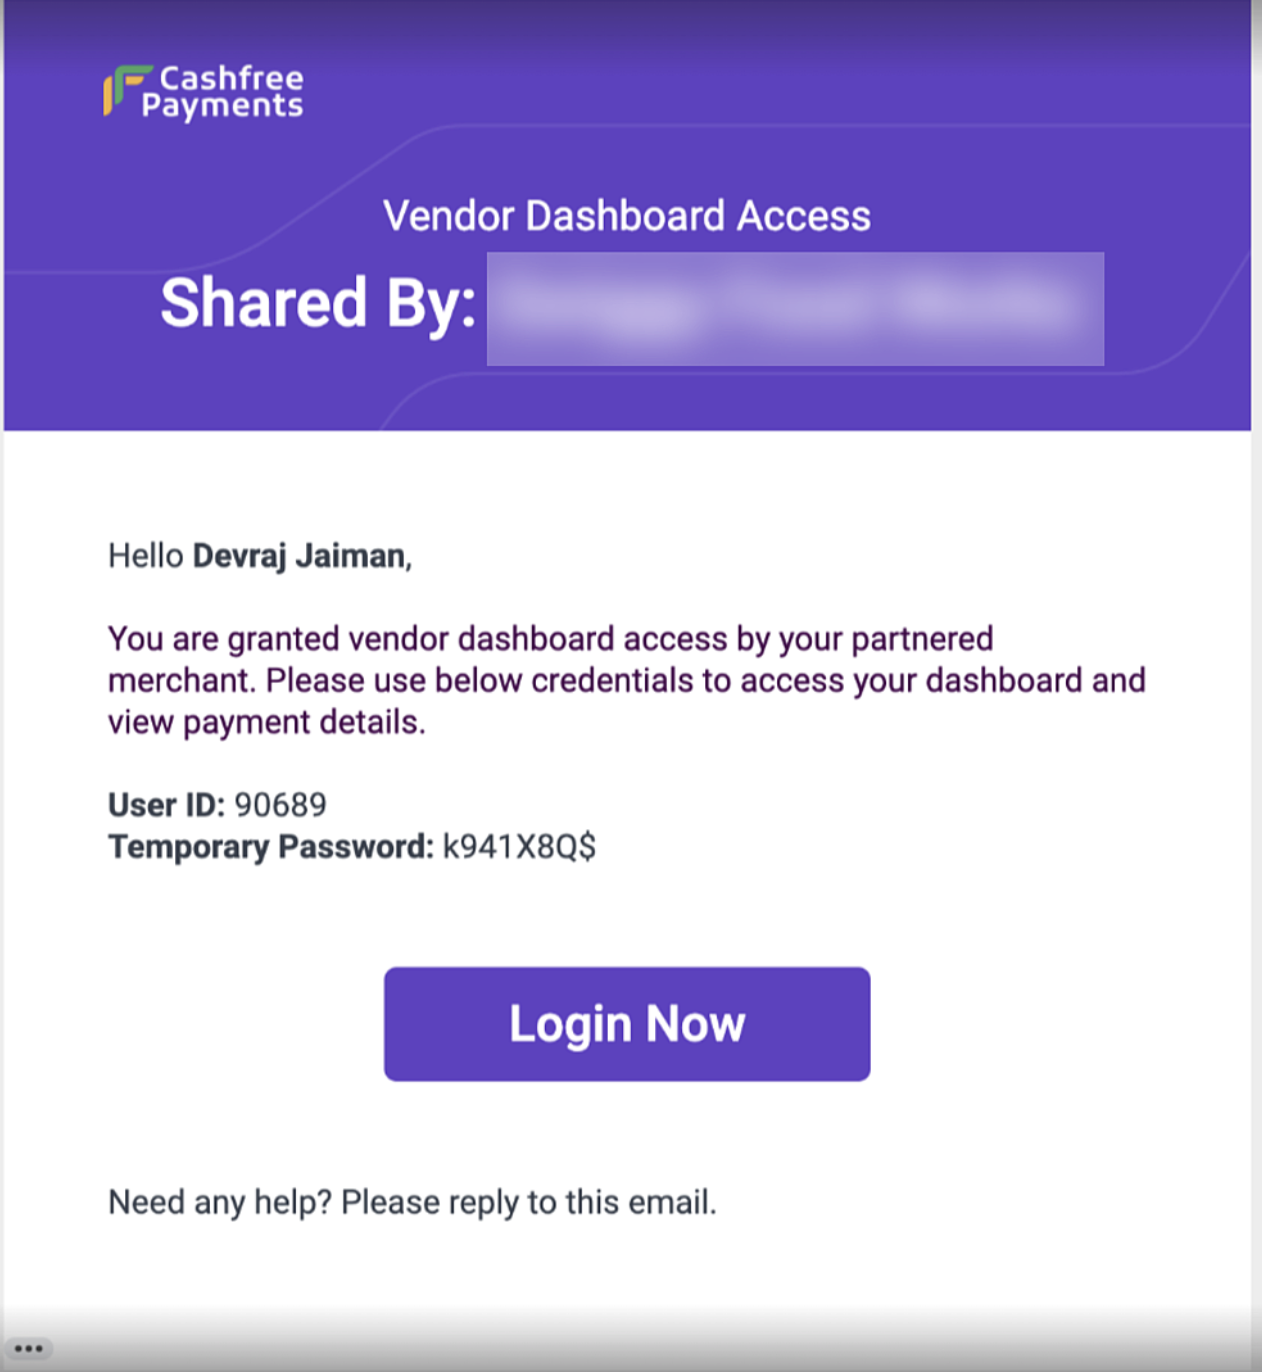
Vendor Dashboard Access Invitation
Below are the steps involved in accessing the vendor dashboard for the first time:
- You get the vendor dashboard feature activated by requesting your account manager.
- You grant vendor dashboard access to the required vendor through the merchant dashboard or through APIs.
- An auto mailer will be triggered to the vendor email.
- Vendor can reset their password and log in with a new password.
Summary
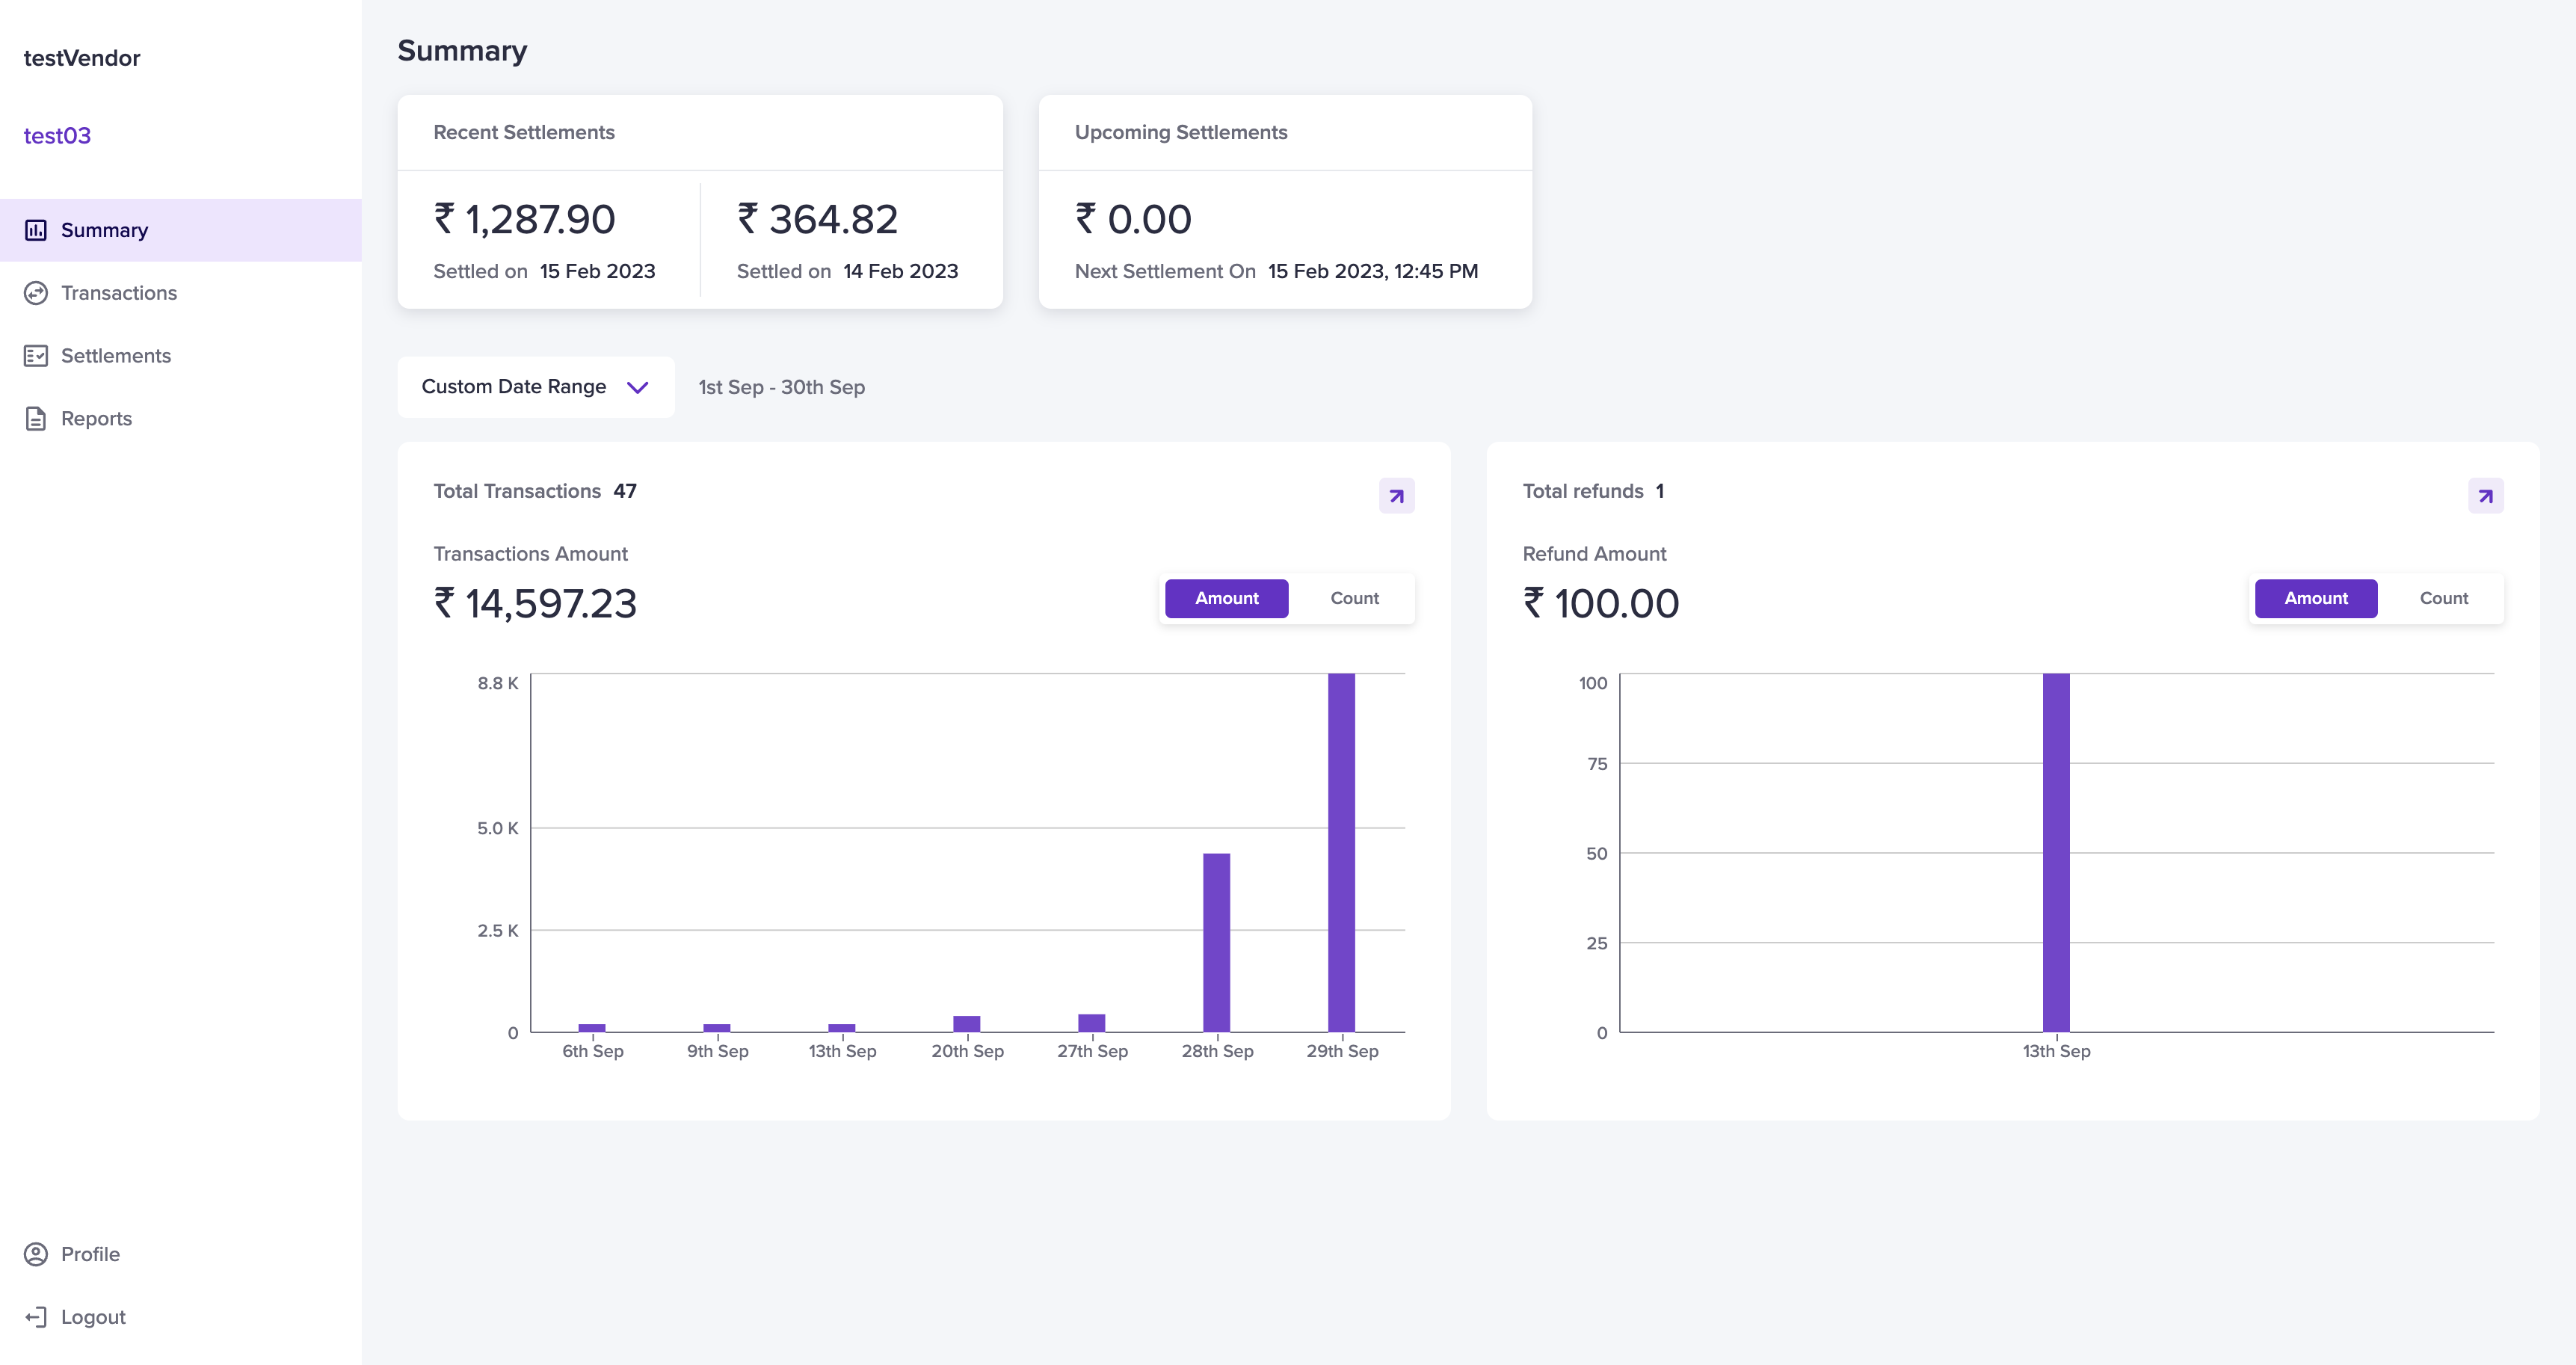
Once the vendor logs in to the vendor dashboard, they can view the summary tab. In this tab, they can view the following:
- The recent settlements
- The upcoming settlements
- Total transactions
- Total refunds

Summary Page
Select a date range from the drop-down menu. Determine the date range if you choose Custom Date Range and click Apply. The transactions and refunds will be displayed based on the date range configured.
Total Transactions
In the Total Transaction section, vendors can view the transaction counts and the total transaction amount that has taken place in that particular time period. Hover the mouse over the dates to view individual transaction amounts. When they click on the arrow mark, they are redirected to the payments section on the transactions page.
Total Refunds
In the Total Refunds section, vendors can view the refund counts and the total refund amount that has been refunded in that particular time period. Hover your mouse over the dates to view individual refund amount. When they click on the arrow mark, they are redirected to the refunds section on the transactions page.
Profile
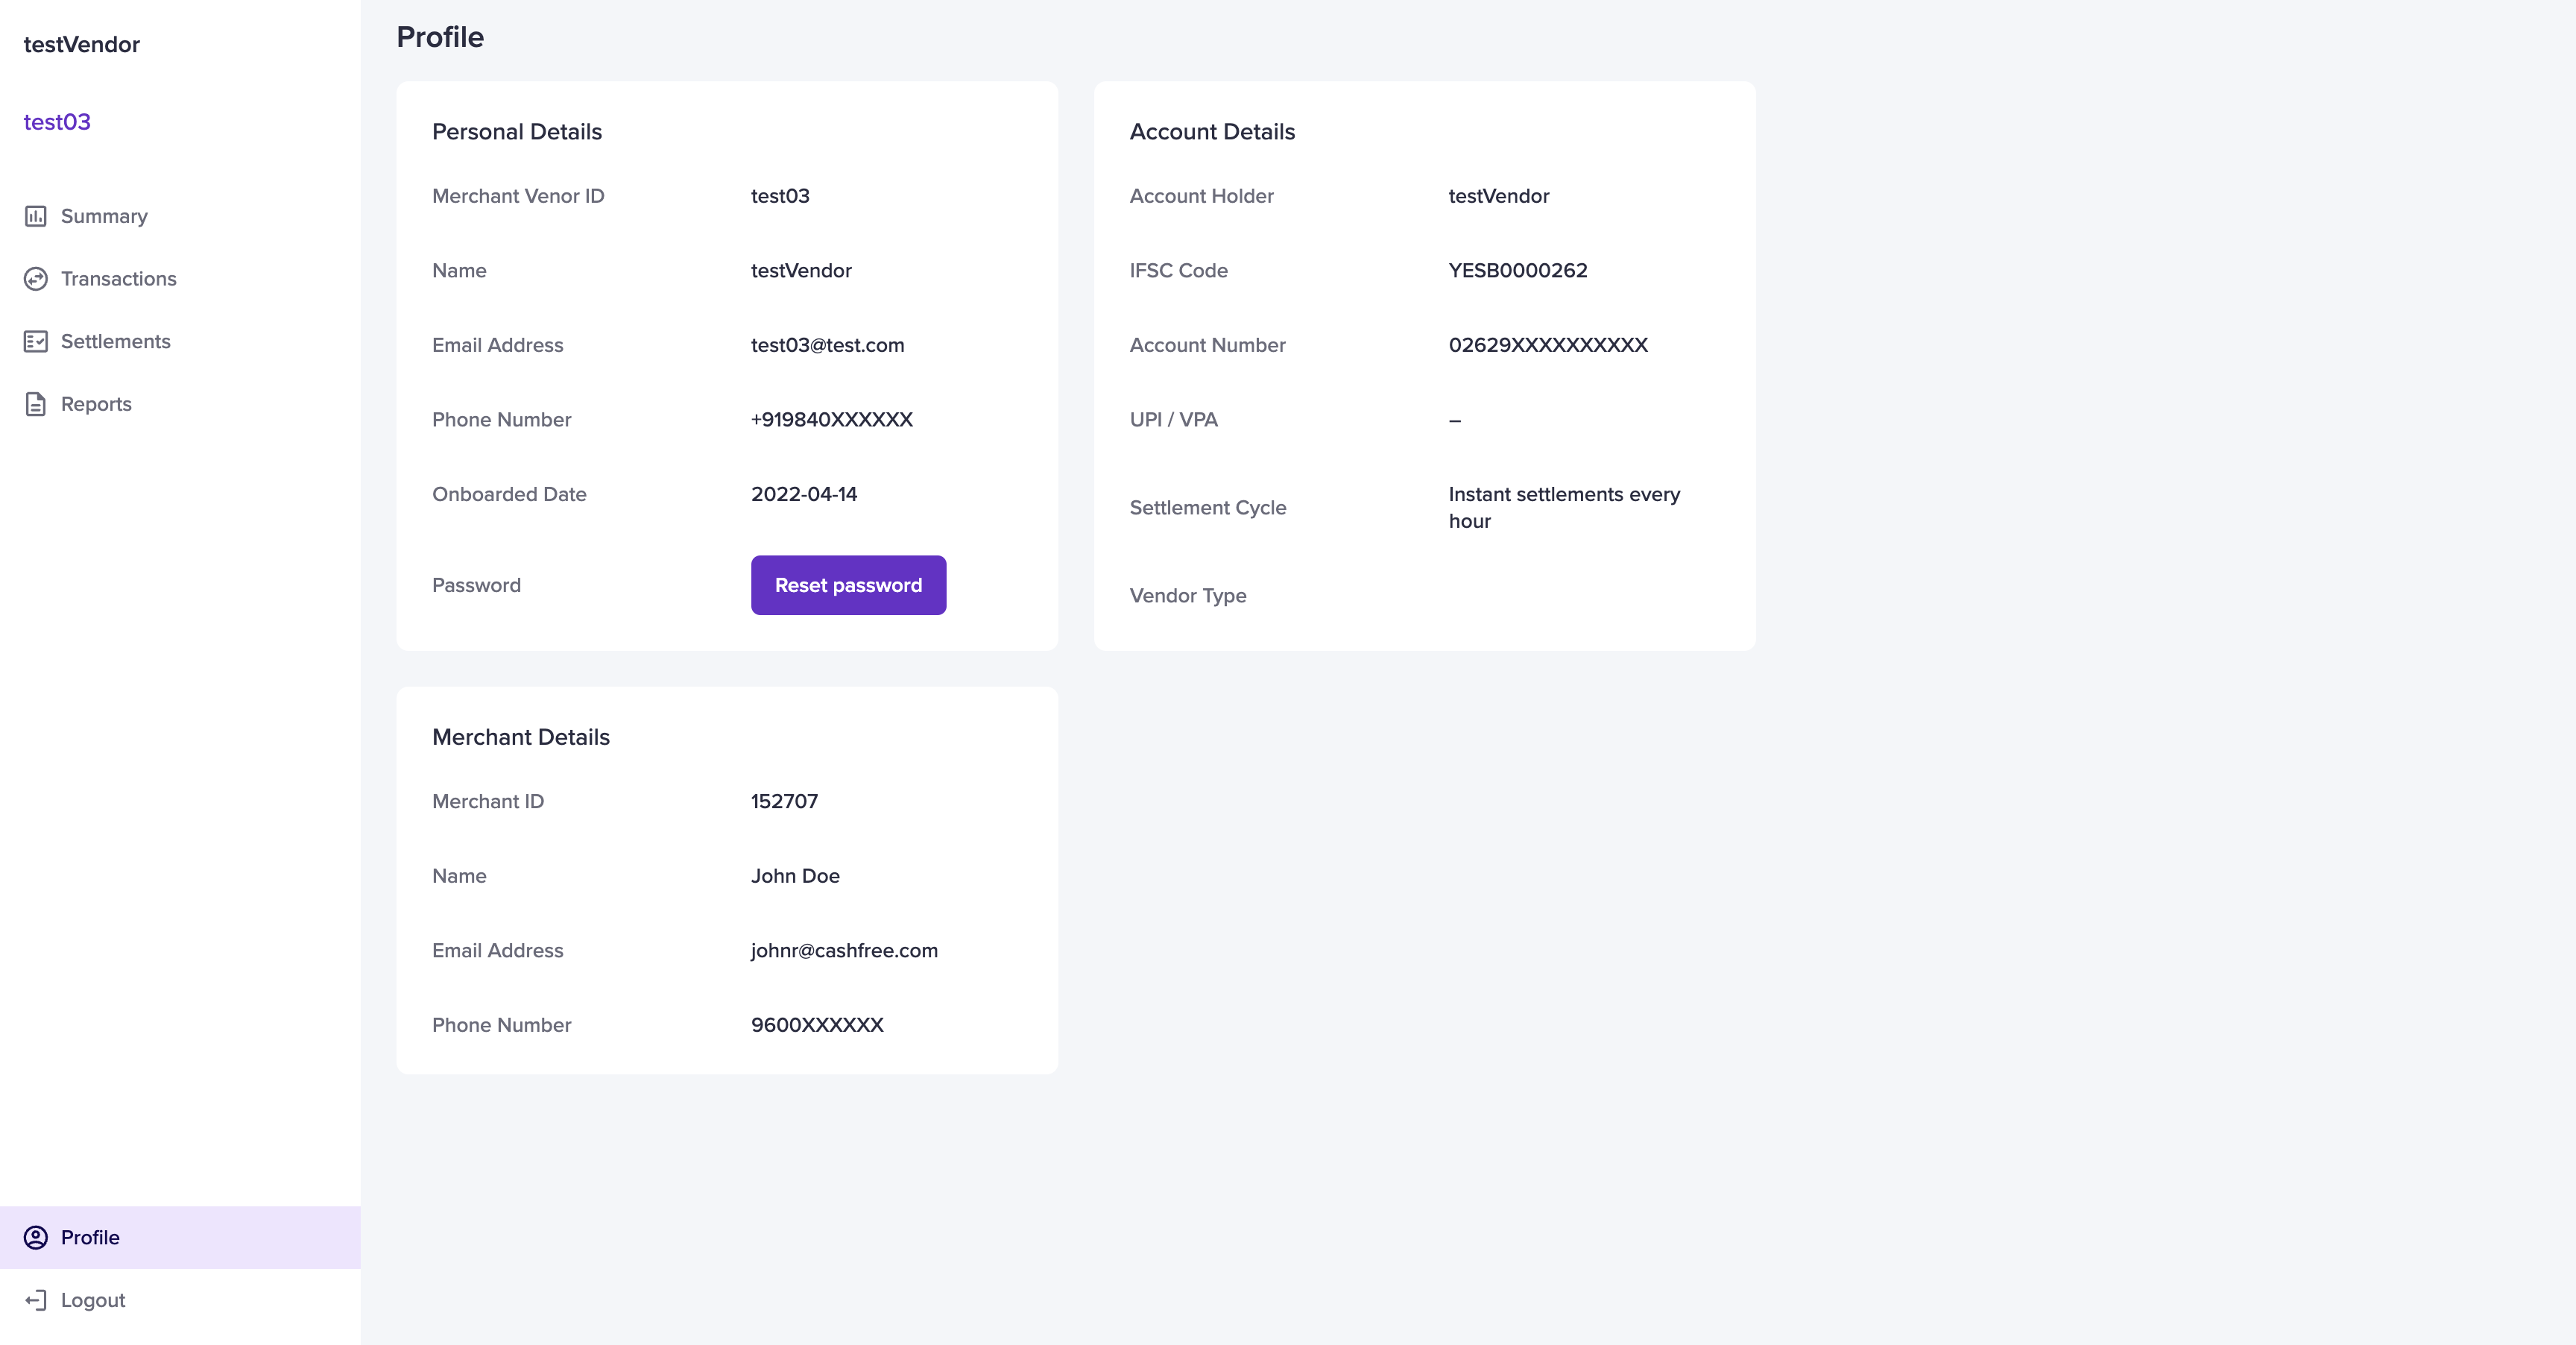
The profile section displays various vendor details.
To view the Profile section,
- Go to Vendor Dashboard > Profile.
The details are split into three sections:
- Personal details
- Account details
- Merchant details

Profile
The personal details section has details such as:
- Merchant Vendor ID - the ID of the vendor
- Name - name of the vendor
- Email Address - vendor email
- Phone Number - vendor phone number
- Onboarded Date - vendor onboarded date
- Password - vendor password
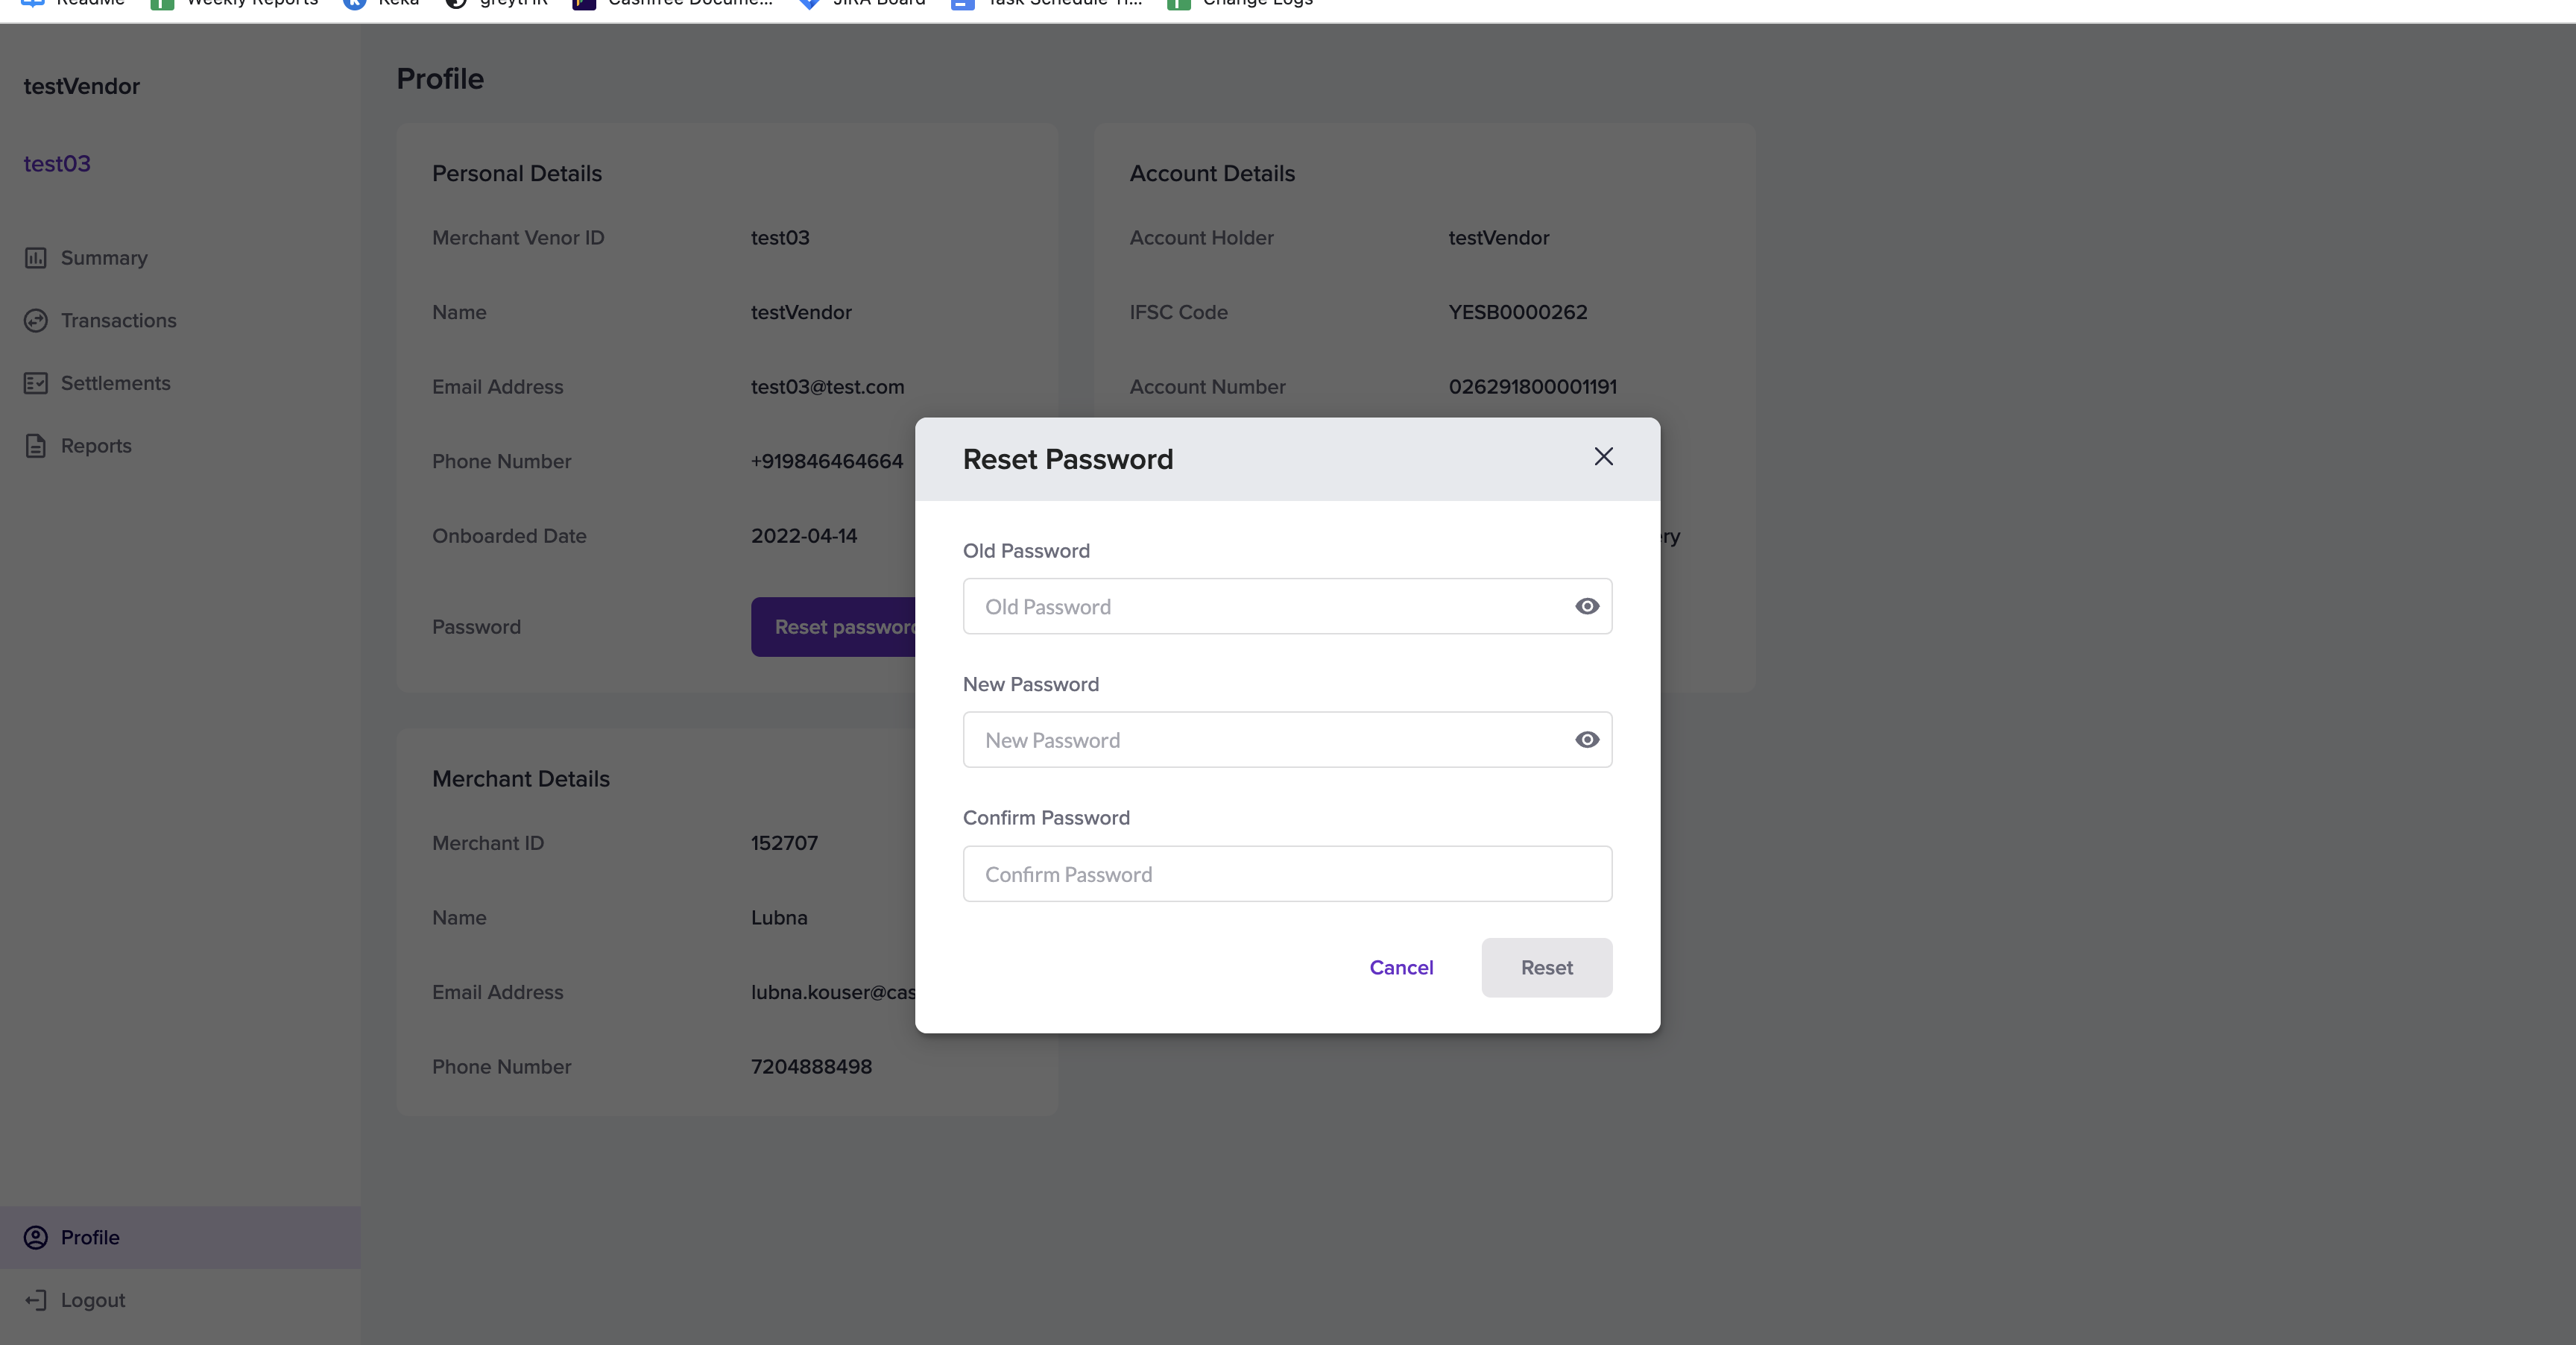
Vendors can reset their password. Click the Reset password option. Provide the old and new passwords and click Reset.

Reset Password
The account details section has details such as:
- Account Holder - the name of the account holder
- IFSC Code - branch IFSC code
- Account Number
- UPI / VPA - UPI ID of the vendor
- Settlement Cycle - schedule option configured
- Vendor Type - the type of vendor: individual or business
The merchant details section has details such as:
- Merchant ID
- Name - the name of the merchant
- Email Address - merchant email ID
- Phone Number - merchant phone number
Updated about 1 year ago