How softPOS Works
Use the Cashfree Payments softPOS application to quickly collect payments digitally or physically from your customers. Give your customers the choice of 100+ digital payment options and accept payments from your phone. Accept payments via, Tap and Pay, QR Code, Payment Links, Cash, Card, Net Banking, Wallets, and more.
To use the softPOS application, you must be an existing Cashfree Payment Gateway merchant, or signup with Cashfree Payments
and complete the activation process.
How softPOS application works?
- Activate softPOS
- Add Agents to Collect Payments
- Install softPOS Application
- Receive Payments and Reconcile
Activate softPOS
To use the SoftPOS application, ensure you have signed up with Cashfree Payments and your Payment Gateway account is active.
To activate softPOS,
- Go to Payment Gateway Dashboard > click softPOS. You will see a screen as shown below:
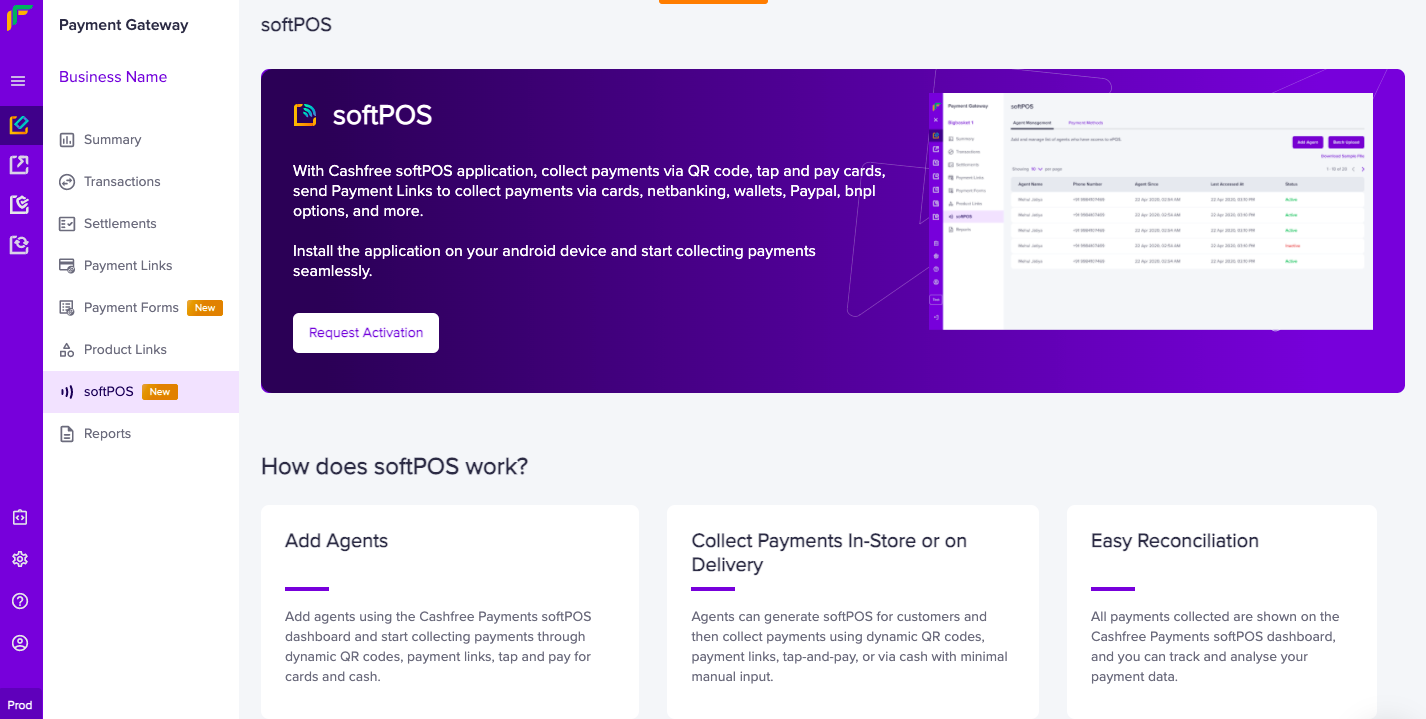
softPOS Activation
- Click Request Activation. Request to activate your account will be sent to Cashfree Account Manager.
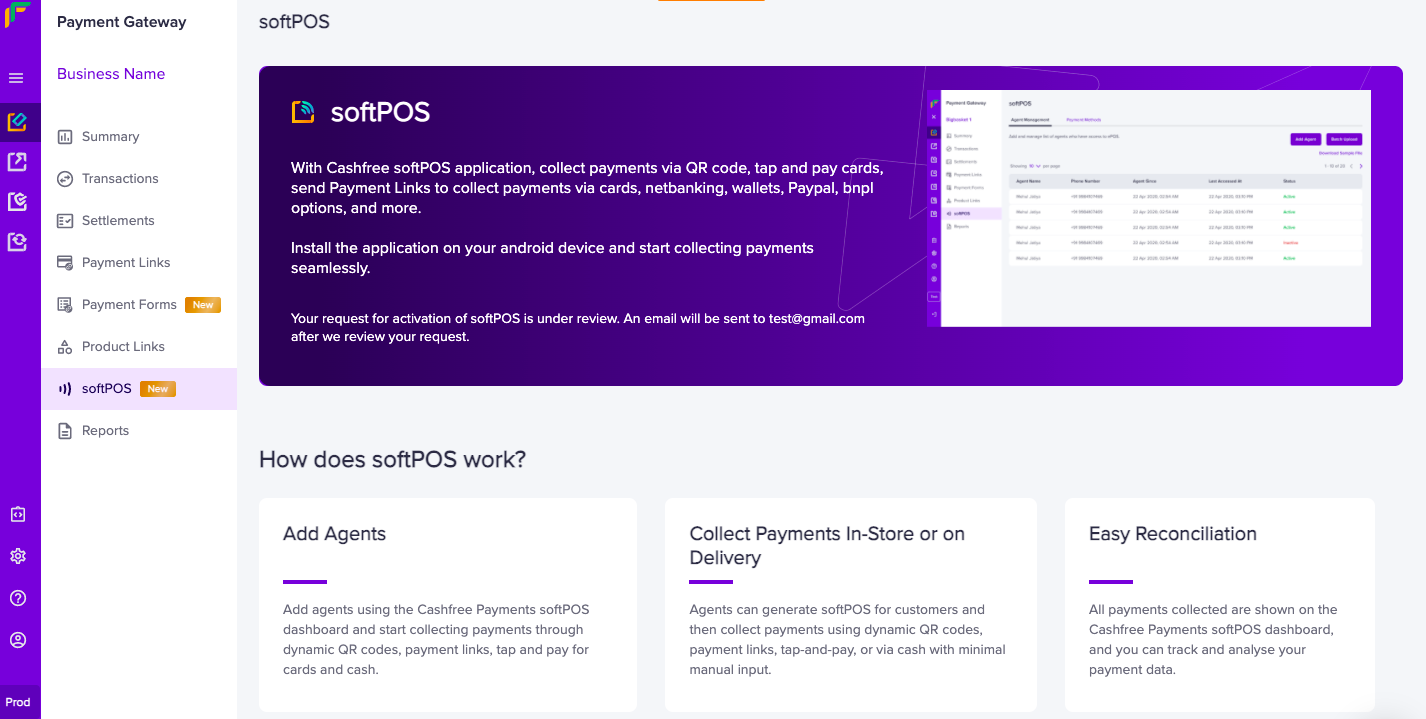
softPOS Activation Request Sent
You will receive an email confirmation after your account is activated. You can add agents, accept payments, track payments received and more with softPOS.
Add Agents
Agents are your employees or business partners who collect payments for your business. To start using softPOS application you must first add your agents. Agent name and phone number are required to add the agents. After your agent details are added, you will see their details in your Payment Gateway Dashboard. An OTP will be sent to the agent on the number provided to access the application.
To add agents,
- Go to Payment Gateway Dashboard > softPOS > click Add Agents.
- In the Add Agents screen, enter the Agent Name and Phone Number.
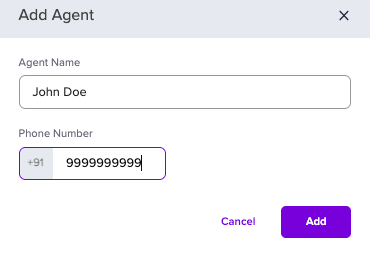
Add Agents
- Click Add. You will a screen as shown below after you add the agent details. An OTP to access the softPOS application will be sent on the phone number you have specified.
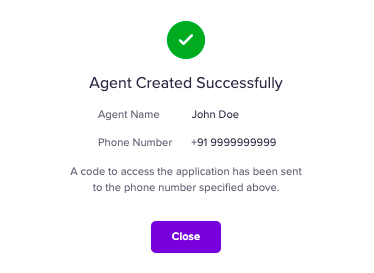
Add Agents - Success
Install softPOS Application
Your Cashfree Payments Account Manager will help you download the application for you and your agents.
To access softPOS application,
- Install the application.
- Launch the application, and enter the phone number that is registered with Cashfree to access softPOS application and click Send OTP.
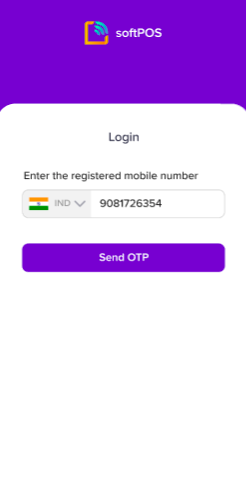
Login
- Enter the OTP you have received on the registered phone number and click Confirm.
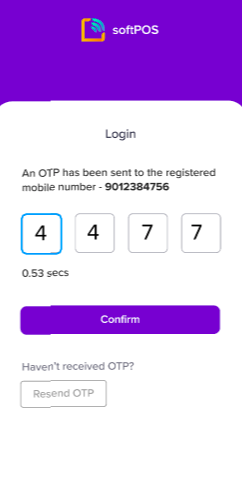
Confirm OTP
After successful login, you will see your details in the Profile section. You can now start collecting payments from your customers.
Receive Payments
You can provide your customers with the flexibility to make payments using one of the 100+ digital payment options that are supported in the softPOS application.
With the Cashfree Payments softPOS solution, you can collect payments using:
- Dynamic QR code
- Status QR code
- Tap and Pay
- Cards
- Payment Links
- Cash
- Net Banking
- Wallets
- Buy Now Pay Later option, and many others.
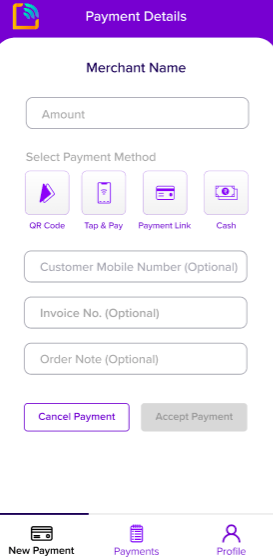
softPOS Application
Note: Currently for card payments, only RuPay cards are supported.
QR Code
You can generate static and dynamic QR codes (unique for a particular order) using the softPOS application. You can generate dynamic QR codes only after you specify the amount in the application.
Static QR Code
To collect multiple payments using a single QR code, or to collect payments in an offline business scenario, you can use the static QR code functionality available in the softPOS application. QR code will be unique for each business. You can simply download the QR code and show it to your customers for making payments or share it with them customers and collect payments. You can collect multiple payments using a single QR code.
To create a static QR code and accept payments,
- Tap the QR Code option in the softPOS application.
- Download or share the QR code with your customers to accept payments.
Customers must scan the QR code and use any of the UPI applications like GPay PhonePe, PayTM, etc., to make the payment. You will be notified when your customers make the payment.
Dynamic QR Code
To create a dynamic QR code and accept payments,
- Tap the QR Code option in the softPOS application.
- To generate the dynamic QR code, enter the amount you want to collect from your customer.
- Enter the Customer Mobile Number to identify who made the payment. This field is optional.
- Enter the unique Invoice No. to identify the payment. This field is optional, it will help you in the accounting and reconciliation process.
- Enter any other details you want to record in the Order Note field. This field is optional.
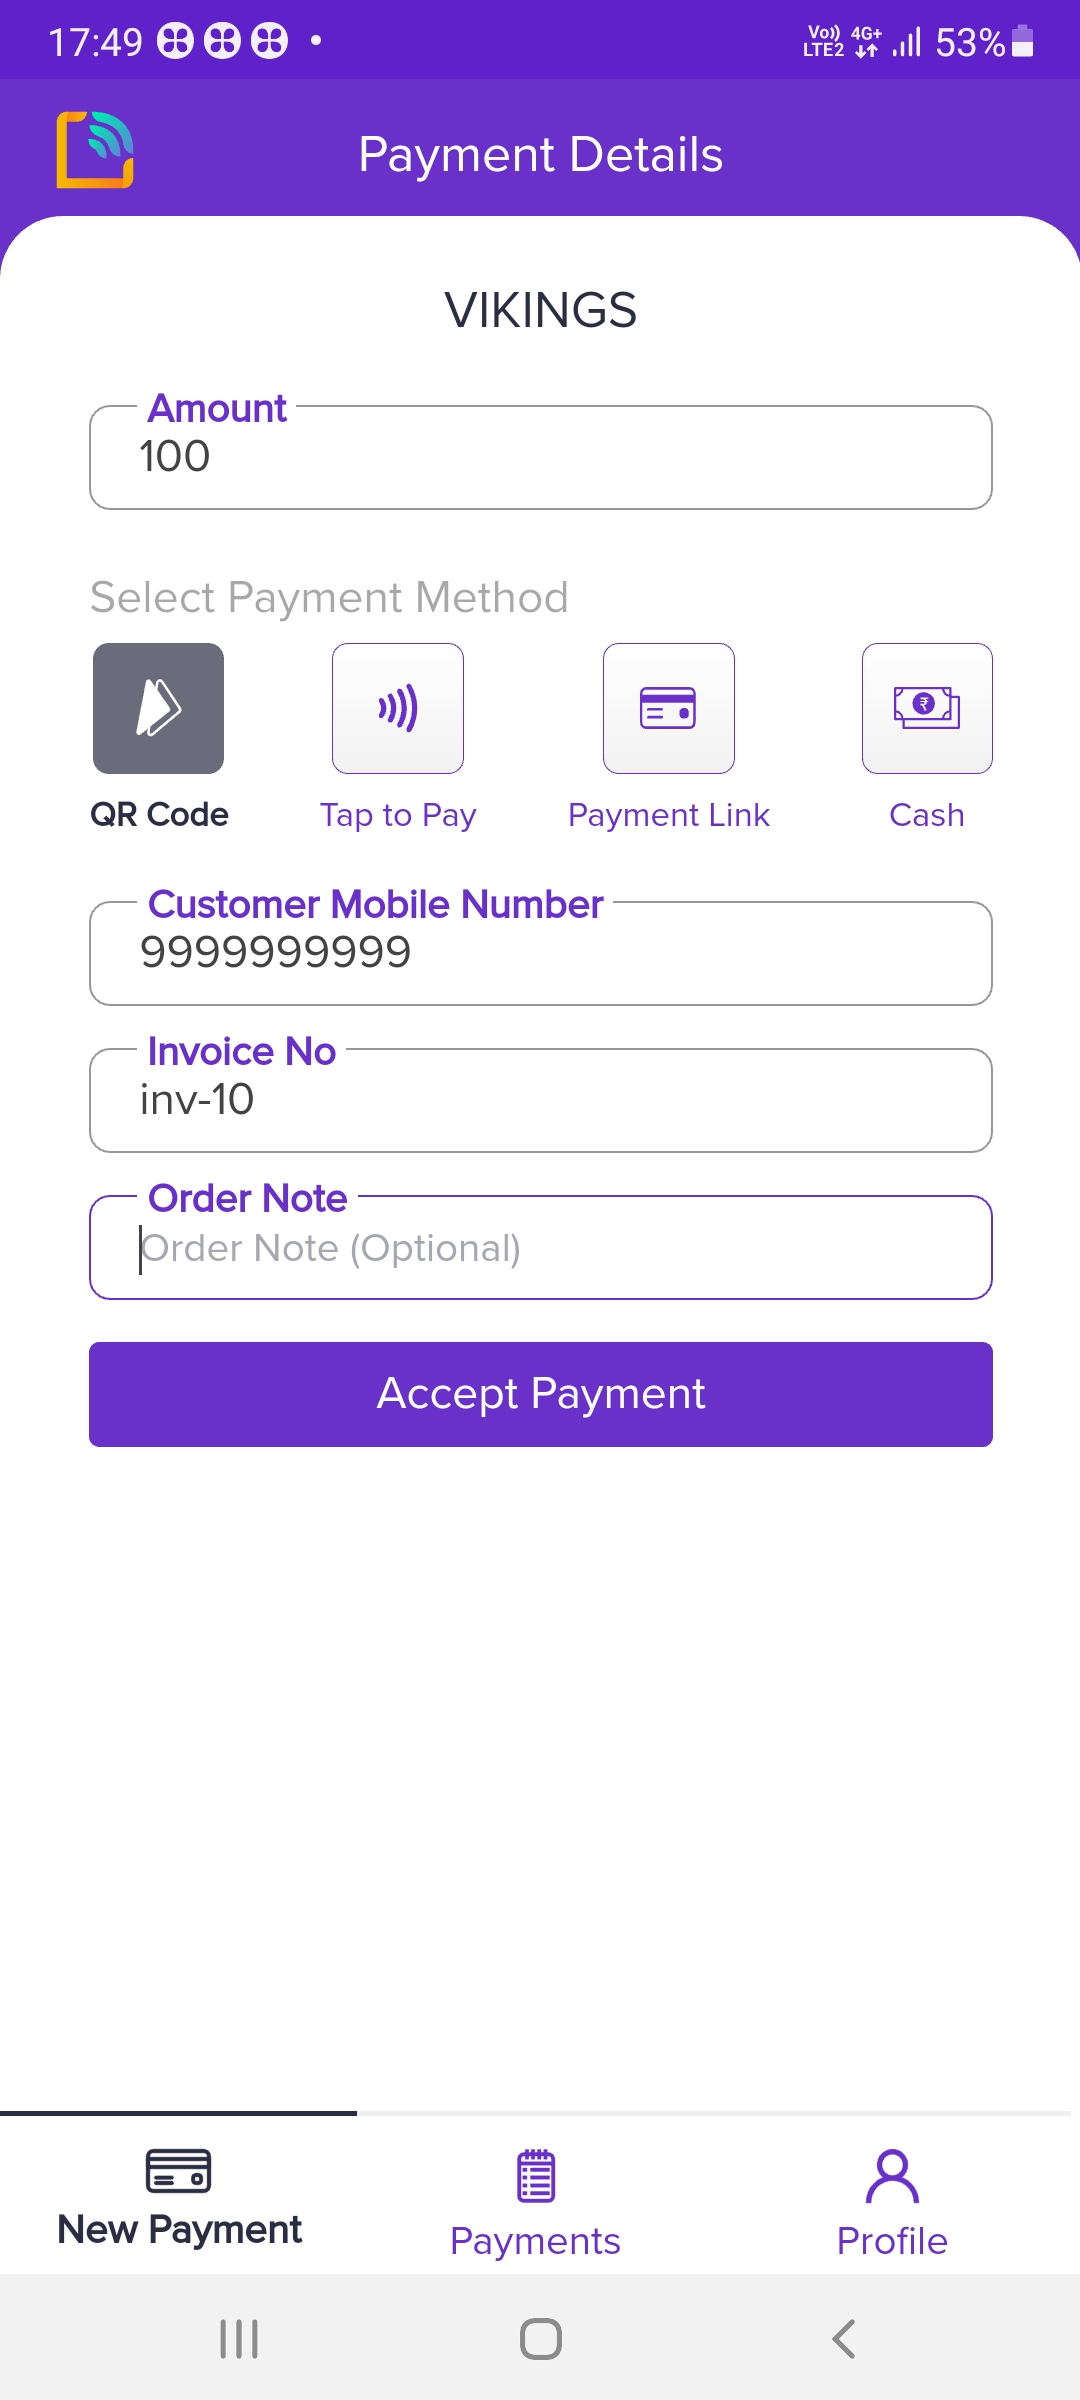
Dynamic QR Code
- Click Accept Payment to generate a QR code.
Customers must scan the generated QR code and use any of the UPI applications like GPay PhonePe, PayTM, etc., to make the payment. You will be notified when your customers make the payment.
Payment Link
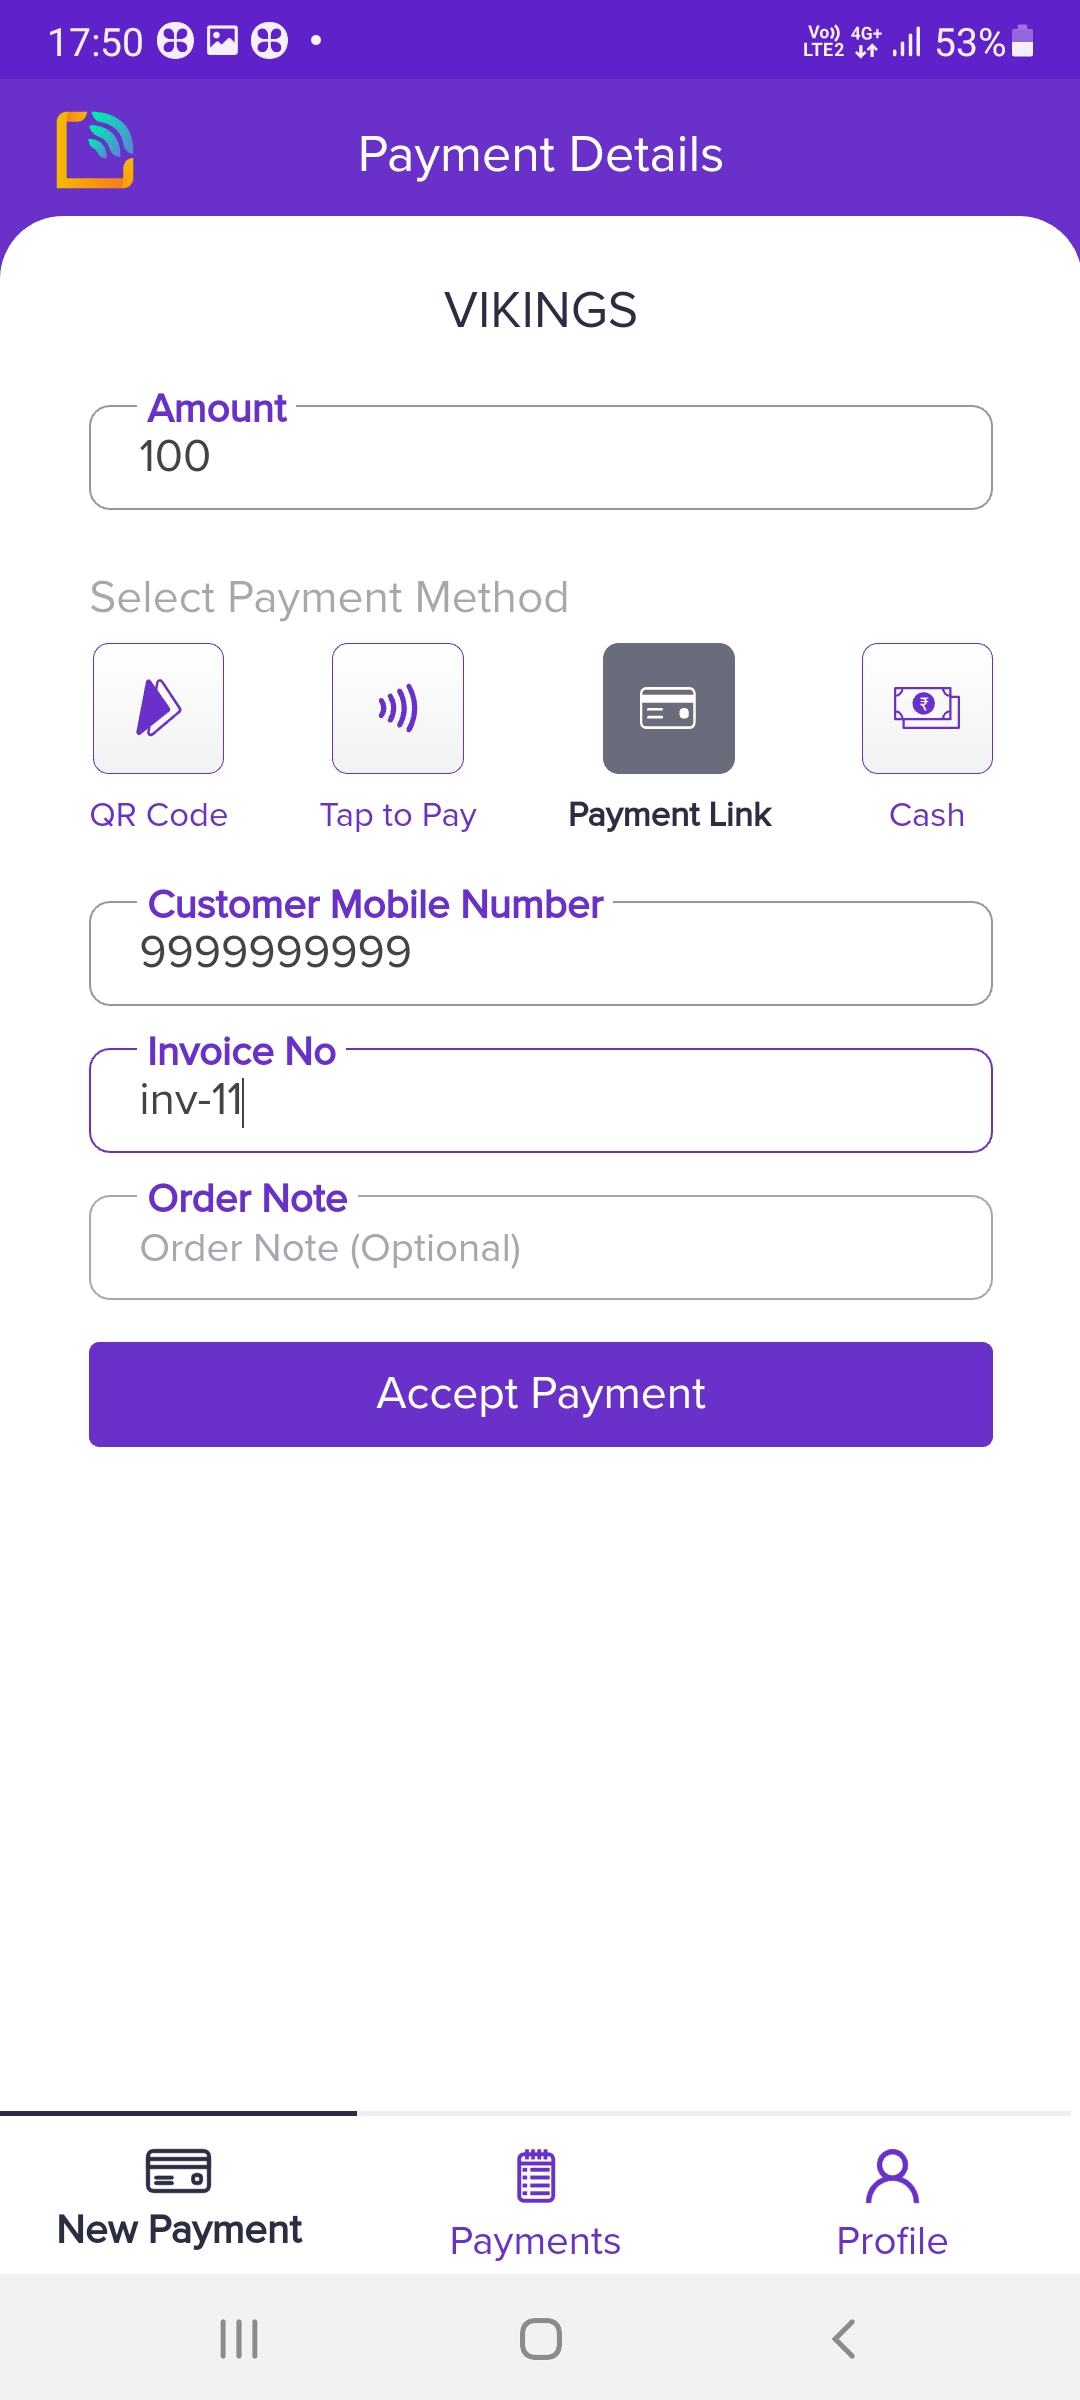
Payment Link allows you to send an SMS to a customer's phone with a link to receive payments. Customers can click the link and make the payment. The link redirects the customer to the payment page where they can choose from a wide variety of payment options such as debit/credit card, UPI, Wallet, Net Banking, Paypal, and Pay Later options.
To accept payments using Payment Link,
- Tap the Payment Link option in the softPOS application.
- To create the payment link, enter the amount you want to collect from your customer.
- Enter the Customer Mobile Number. The payment link will be sent to this number.
- Enter the unique Invoice No. to identify the payment. This field is optional, it will help you in the accounting and reconciliation process.
- Enter any other details you want to record in the Order Note field. This field is optional.
Payment Link
- Click Accept Payment to send the unique payment link to the customer.
The customer receives the payment link in a message as shown below. When they click the link, they will be redirected to the payment page where they can choose their preferred payment method to complete the payment.
Cash
To accept payment via Cash,
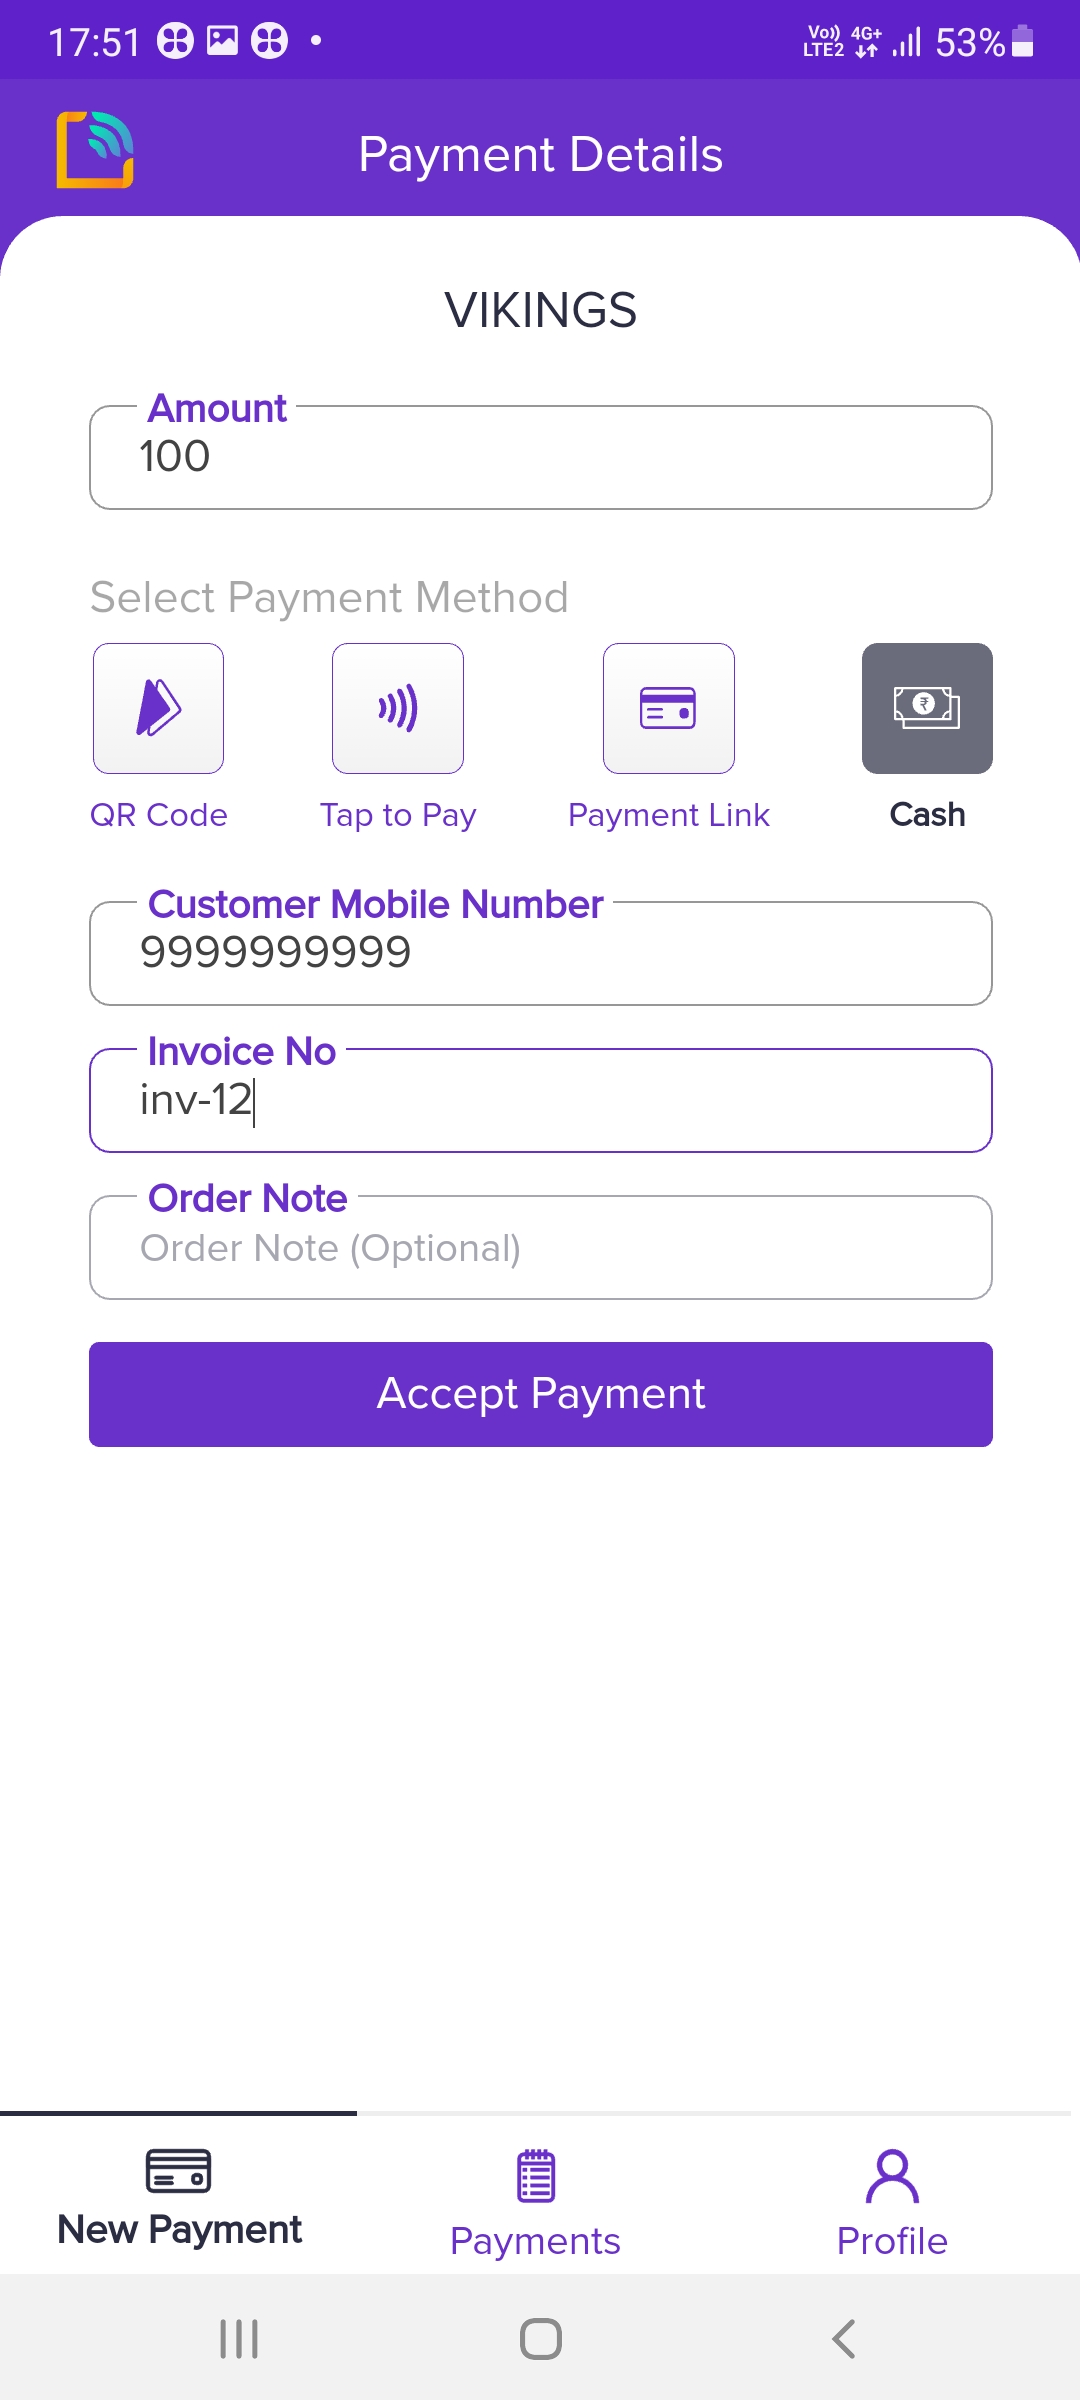
- Tap the Cash option in the softPOS application and enter the amount.
- Enter the Customer Mobile Number to identify who made the payment. This field is optional.
- Enter the unique Invoice No. to identify the payment. It will help you in the accounting and reconciliation process. This field is optional.
- Enter any other details you want to record in the Order Note field. This field is optional.
Cash
- Click Accept Payment. The transaction will automatically be saved as a success. This feature is useful for the reconciliation of cash collection.
Tap and Pay
The Tap and Pay option is available only on NFC (Near-field communication) enabled android devices (Android Pie or above). You can start accepting card payments with a single tap on your mobile phone. The collection limit is set to Rs. 5000 per transaction as per RBI guidelines.
To accept payment via Tap and Pay,
- Tap the Tap and Pay option in the softPOS application and enter the amount.
- Enter the Customer Mobile Number to identify who made the payment. This field is optional.
- Enter the unique Invoice No. to identify the payment. It will help you in the accounting and reconciliation process. This field is optional.
- Enter any other details you want to record in the Order Note field. This field is optional.
- Click Accept Payment and tap the customer's debit or credit card on your android device where softPOS is installed. Once the card is read, a transaction status will be displayed and you will be redirected to the Cashfree Payments status page.
Settlements
All settlements will be made to the bank account that you have provided to Cashfree Payments and based on the schedule option you have configured. Click here to know more.
softPOS API Support
softPOS order and agent management are now supported by the PG next-gen APIs. Using the APIs you can:
- Add agents using terminal APIs
- Create and assign orders to the terminal using terminal phone numbers
- Monitor and receive updates on customer's orders using the APIs
The APIs will help you to:
- Onboard large number of agents easily
- Monitor agent orders and agent productivity
- Get real-time updates on deliveries
- Manage agents and orders using a central system
Sample User Journey in the Production Environment
-
Add the agents using create terminal API.
-
Assign orders to agents using a central system. To do this use the create order API and pass the terminal object.
-
The assigned order then gets reflected in the agent application.
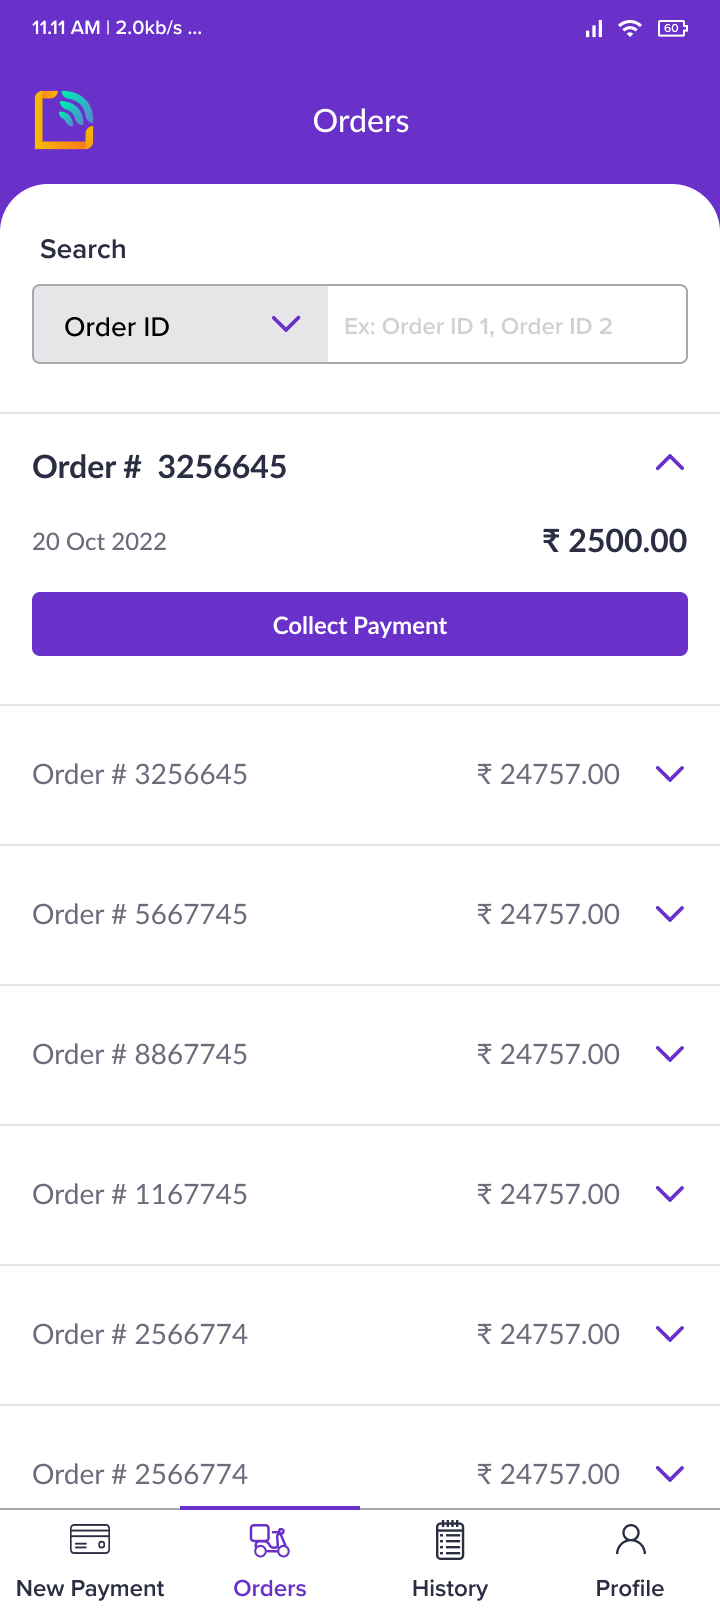
- Agent clicks on the collect payment and is taken to a pre-filled collection form.
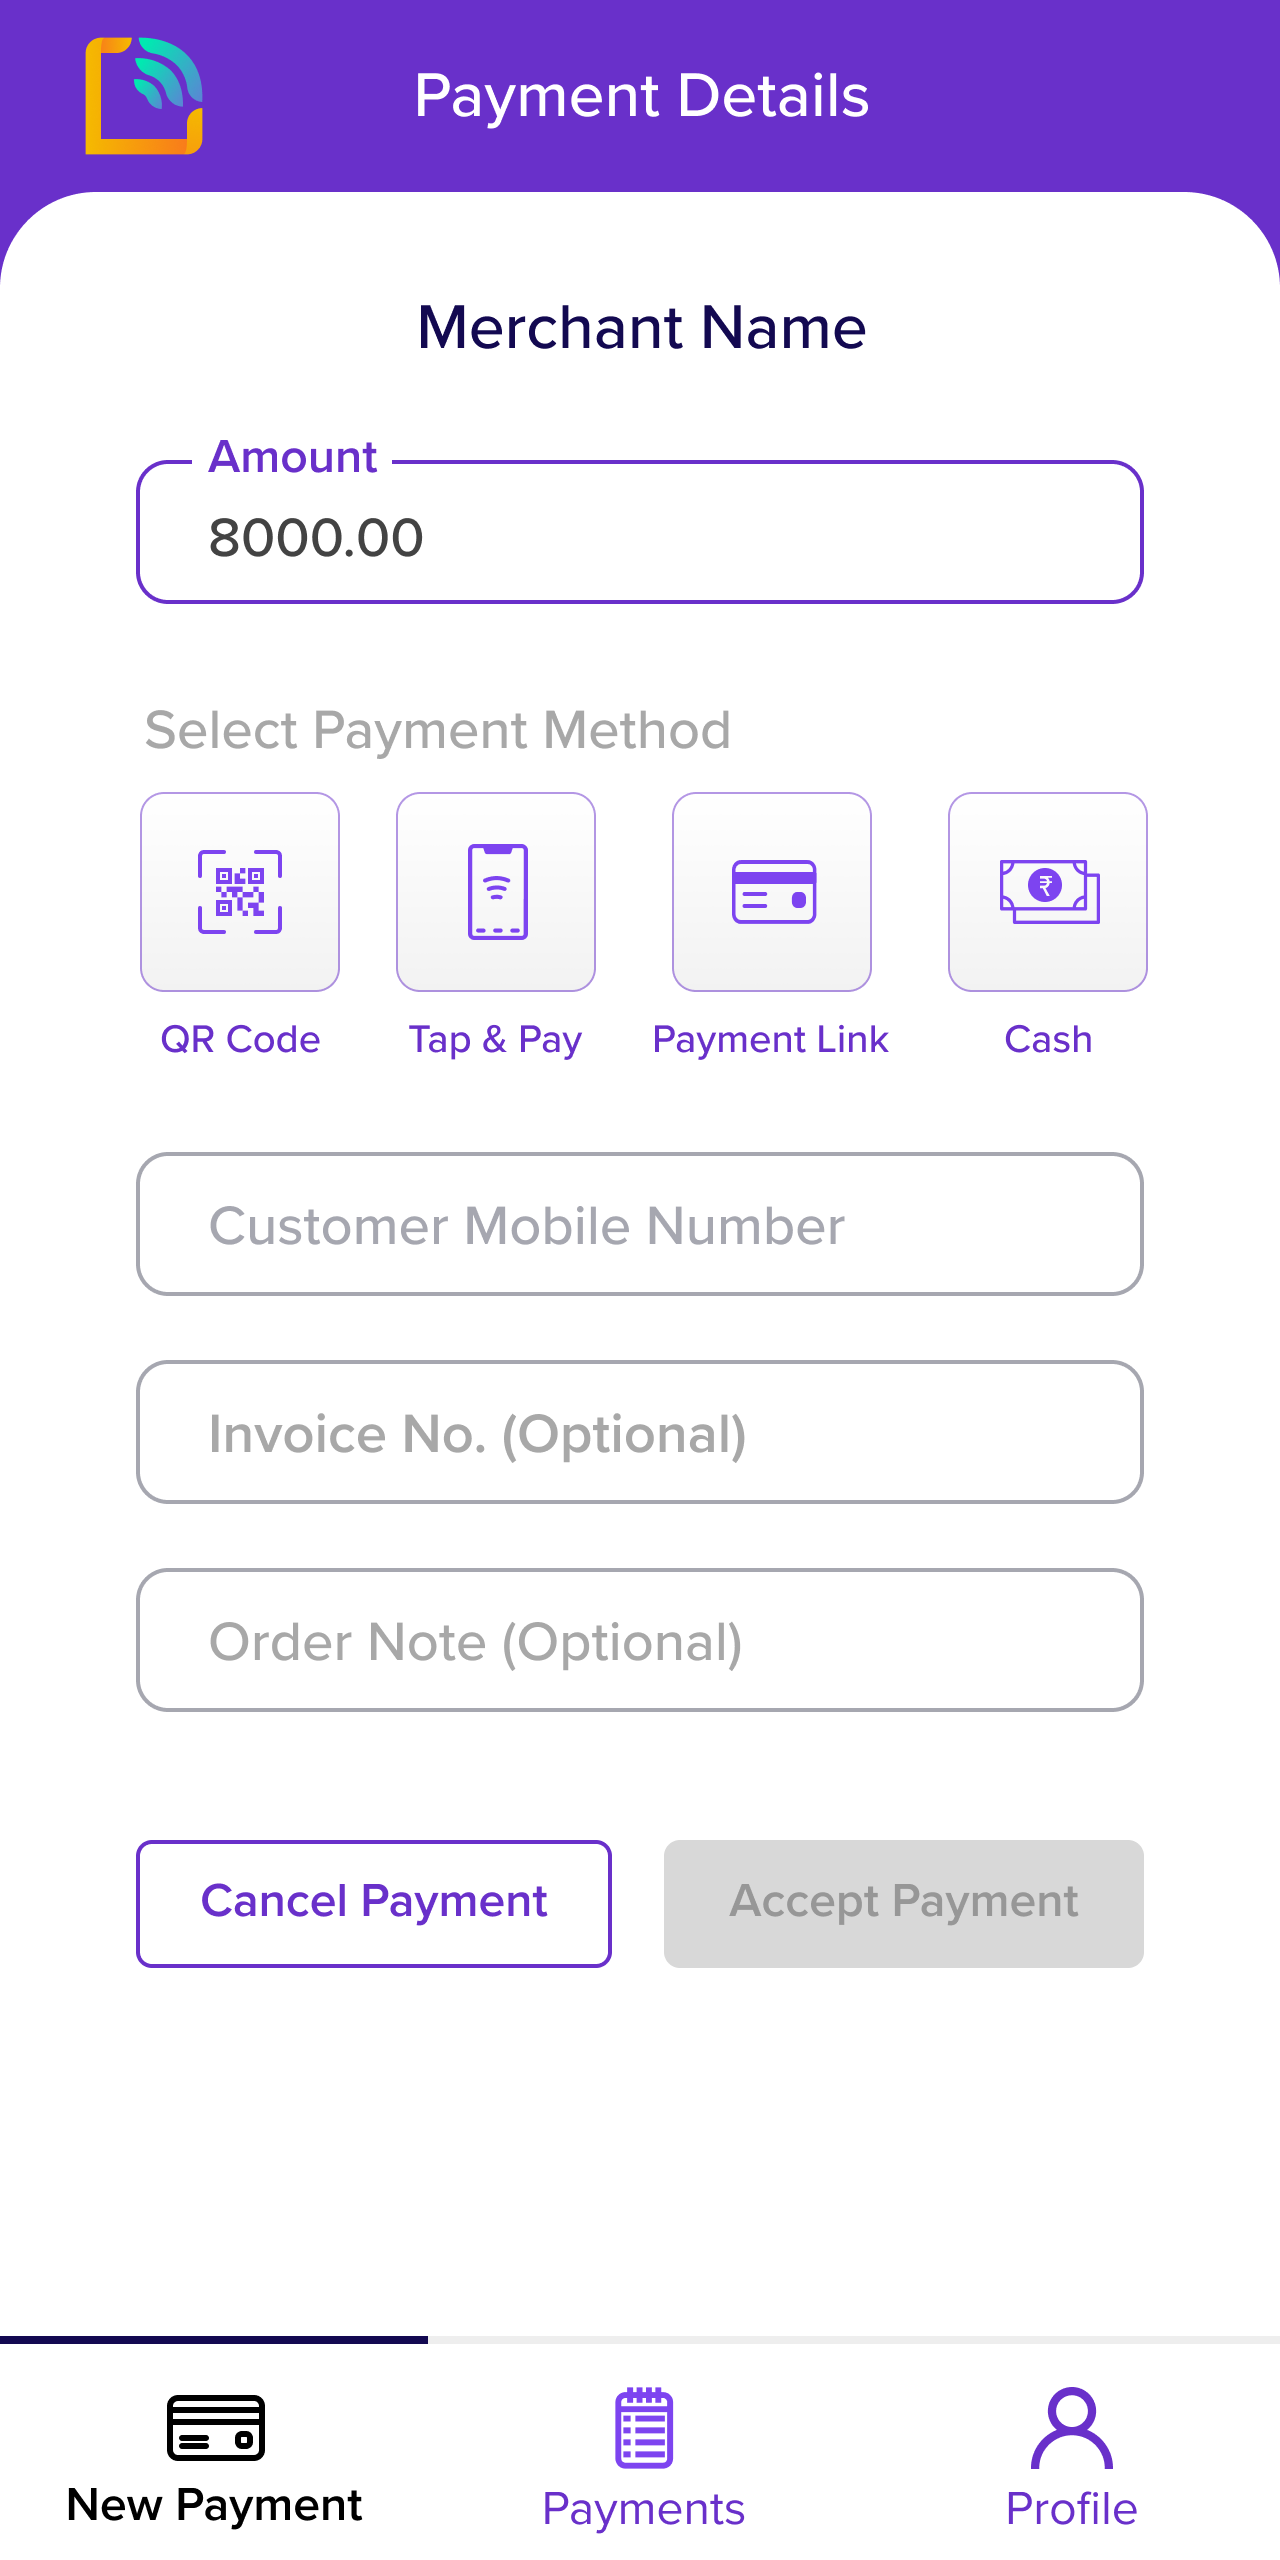
-
Agent selects the payment mode and clicks on accept payment to complete the payment collection.
-
On successful payment, a notification is sent to the notifyURL provided at the time of order creation. On an unsuccessful payment, the order moves back to pending and can be reattempted.
Agents cannot modify preexisting orders. If they want to change any details they can create a new order in “New Payment” section.
Updated about 1 year ago