Activate Account
This article helps you learn how to activate the account with the products that best suit your business needs.
Activating the account allows you to access the production environment where you can collect payments, make payouts, and verify customer's identity. Once you sign up, select the products and activate your account. In the Welcome to Cashfree Payments screen, select the products you want to activate and click Continue with Product activation.
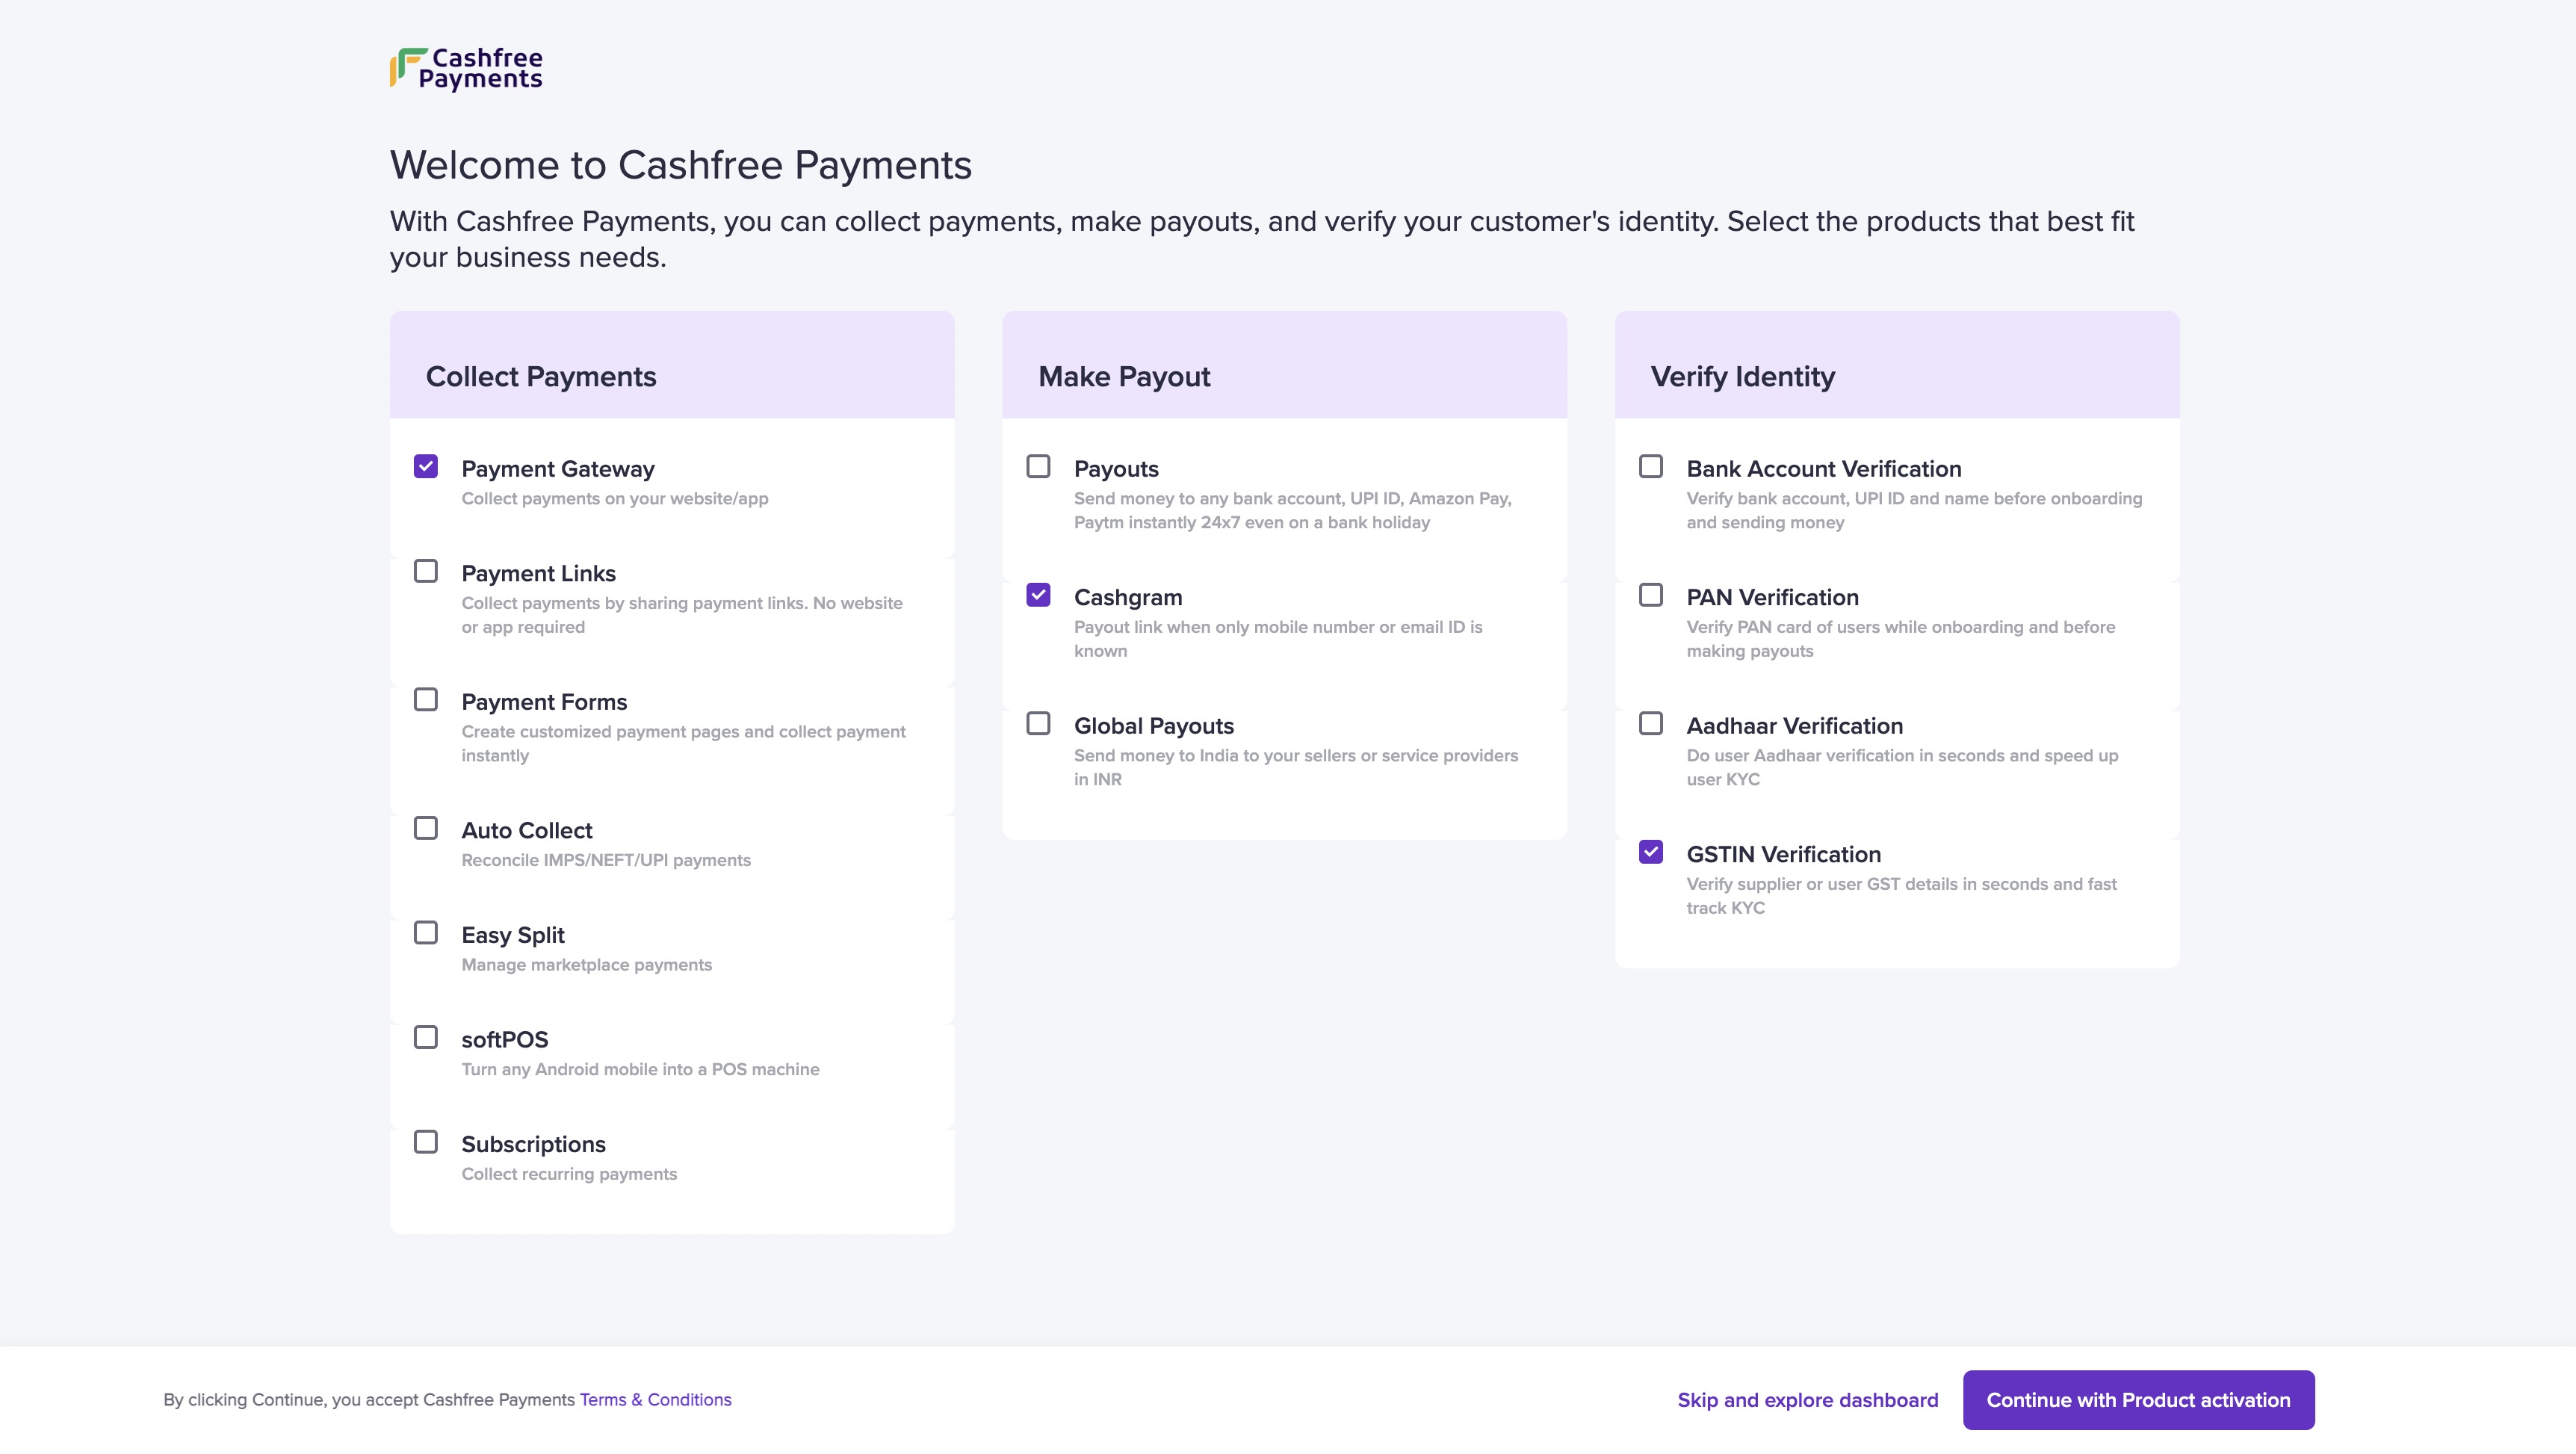
To activate Cashfree Payments account, you need to complete the onboarding process by providing necessary information, uploading mandatory documents, and signing the agreement with us. The details required and the stages might change based on your line of business. This document helps you understand the following stages:
- Contact Information
- Business PAN
- Business Owner PAN
- Business Details
- Business Registration Details
- Website Details
- Bank Account Details
- Business Owner Details
- Upload Documents
- Declaration of Beneficial Ownership
- Service Agreement
Contact Information
We need your contact information to reach out to you for anything related to your account. It could be for clarifications on the information provided, missing information or documents.
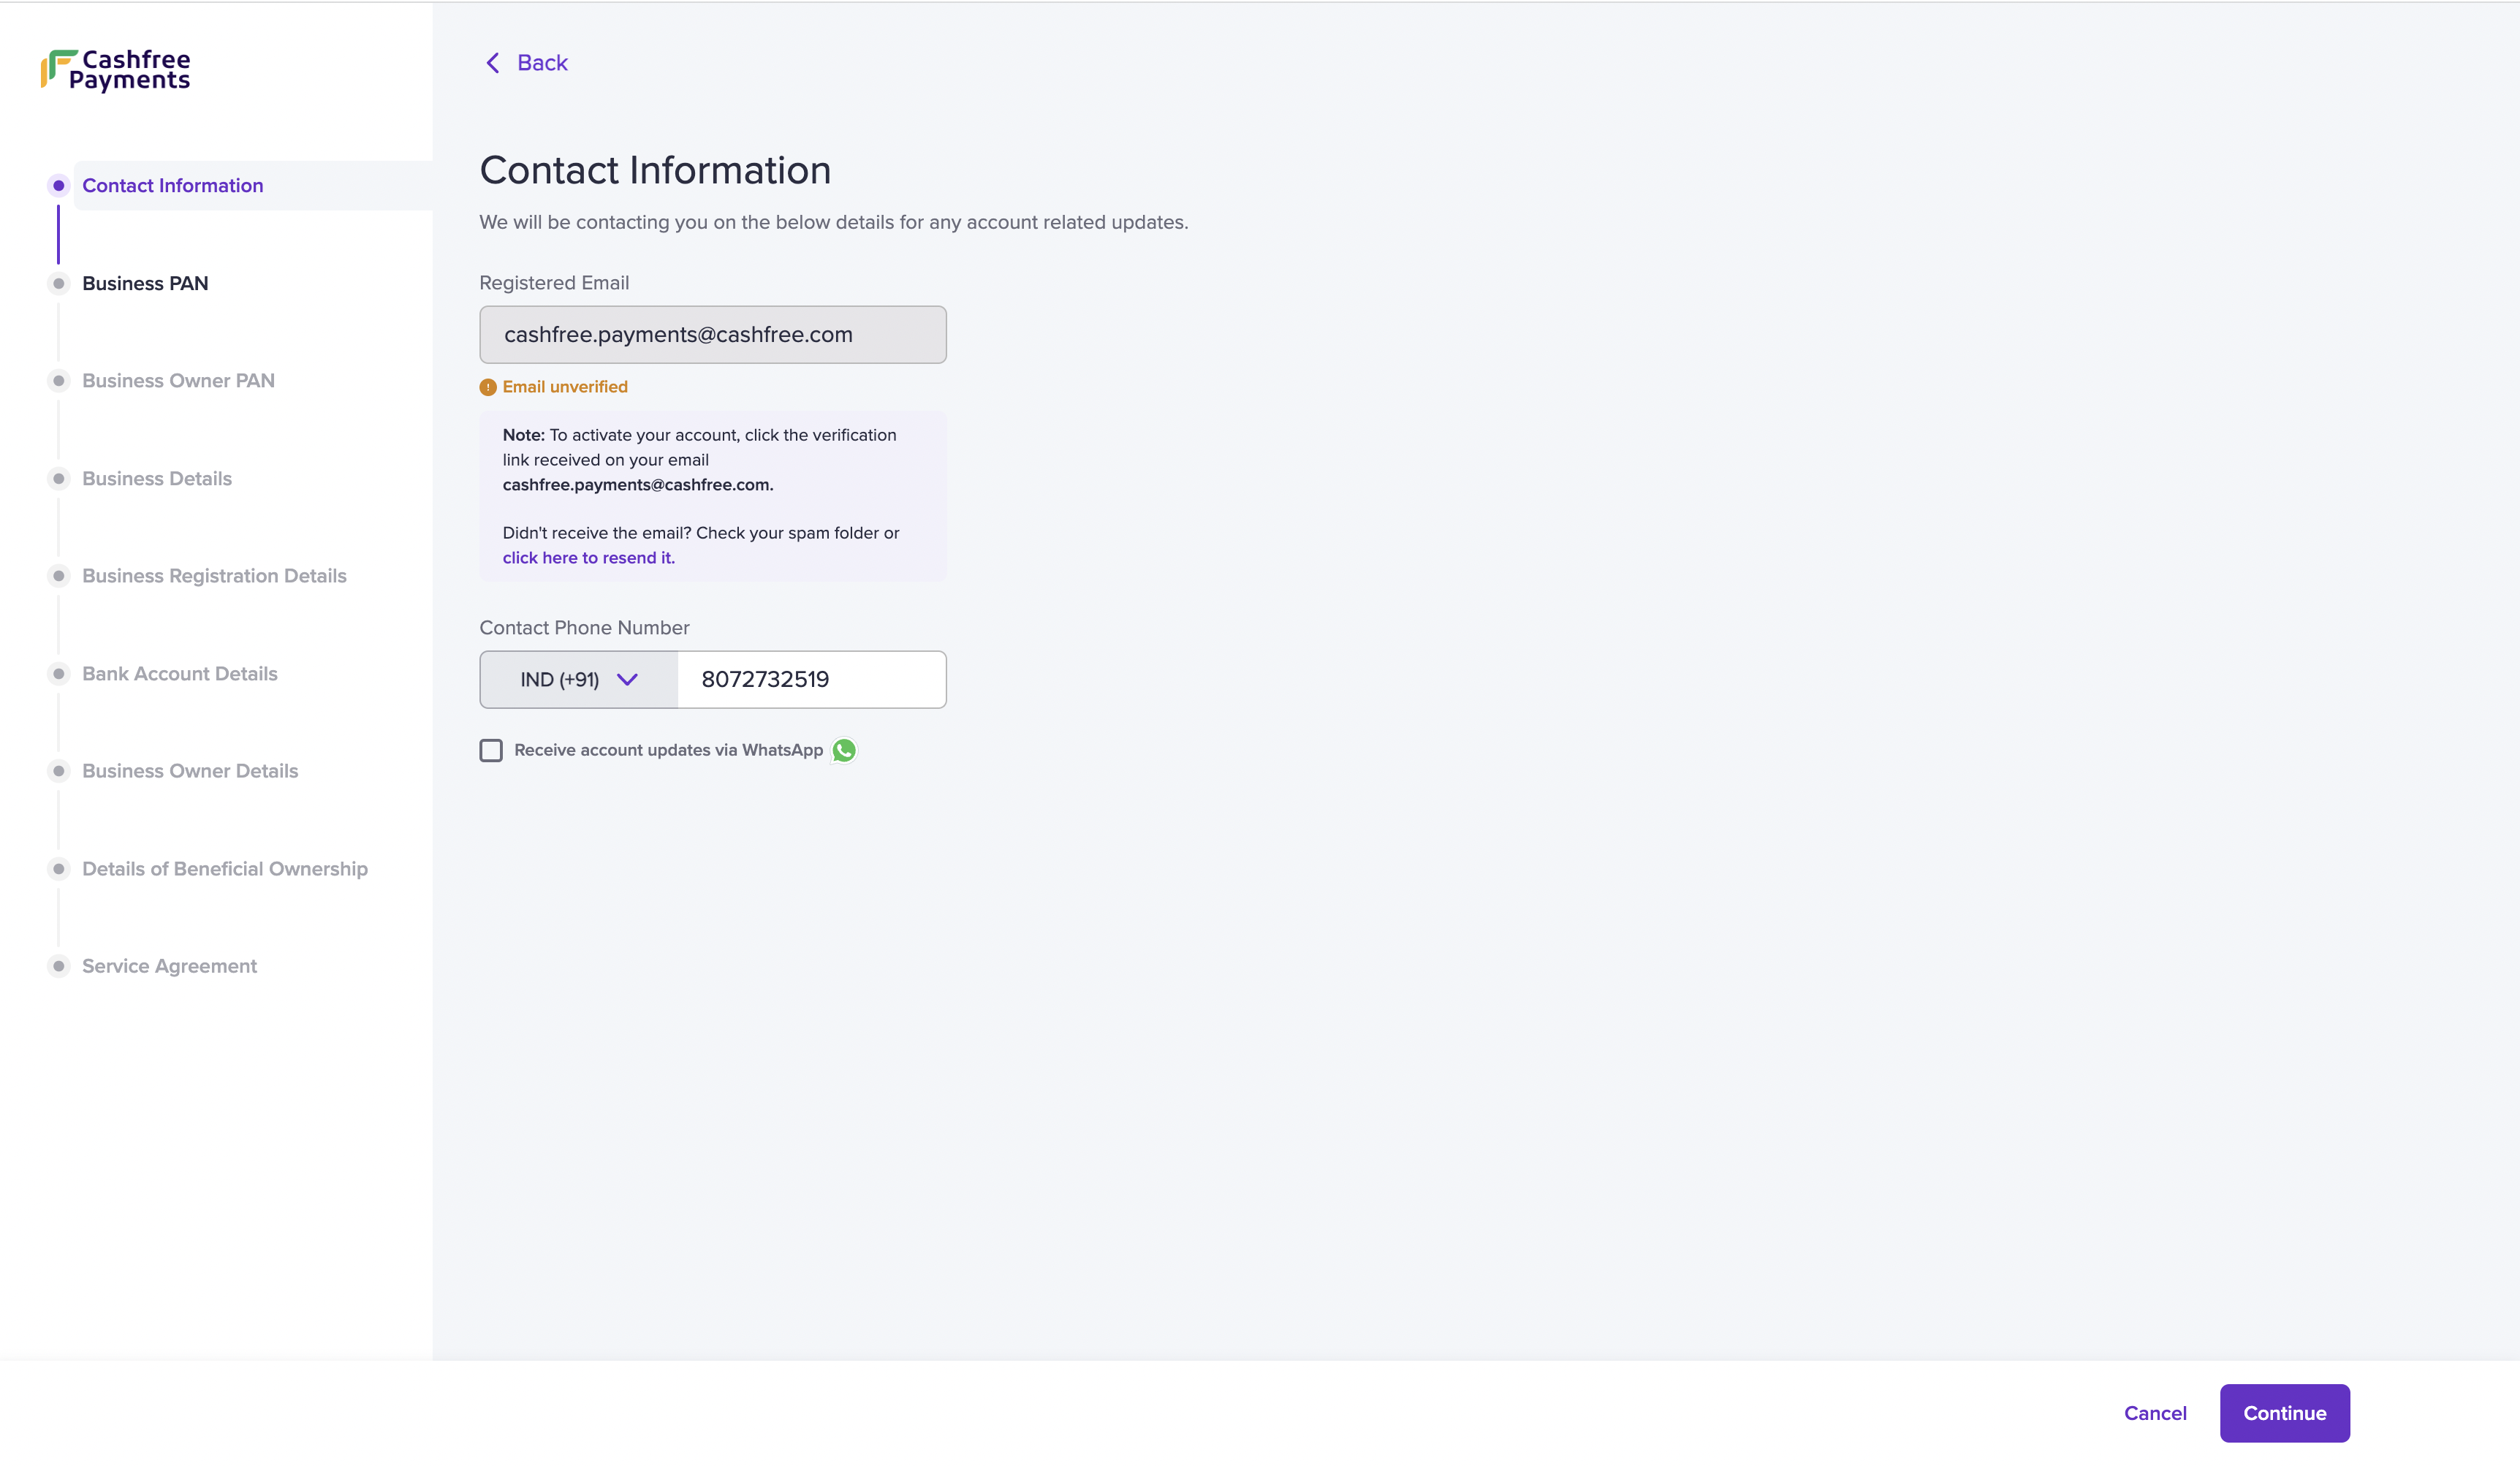
Contact Information
- Fill in the following fields:
- Registered Email - This field is auto-filled with the email address you provided during signup. Contact [email protected] if you wish to edit the registered email address. The registered email address receives a verification link. If you do not find it in your inbox, check the spam folder. Click the link in the email to verify your email account.
- Contact Phone Number - The phone number is auto filled but you can edit the contact number if required.
- Receive account updates via Whatsapp - Check the box if you want notifications regarding promotions, offers, product and account updates on your Whatsapp.
- Click Continue.
Business PAN
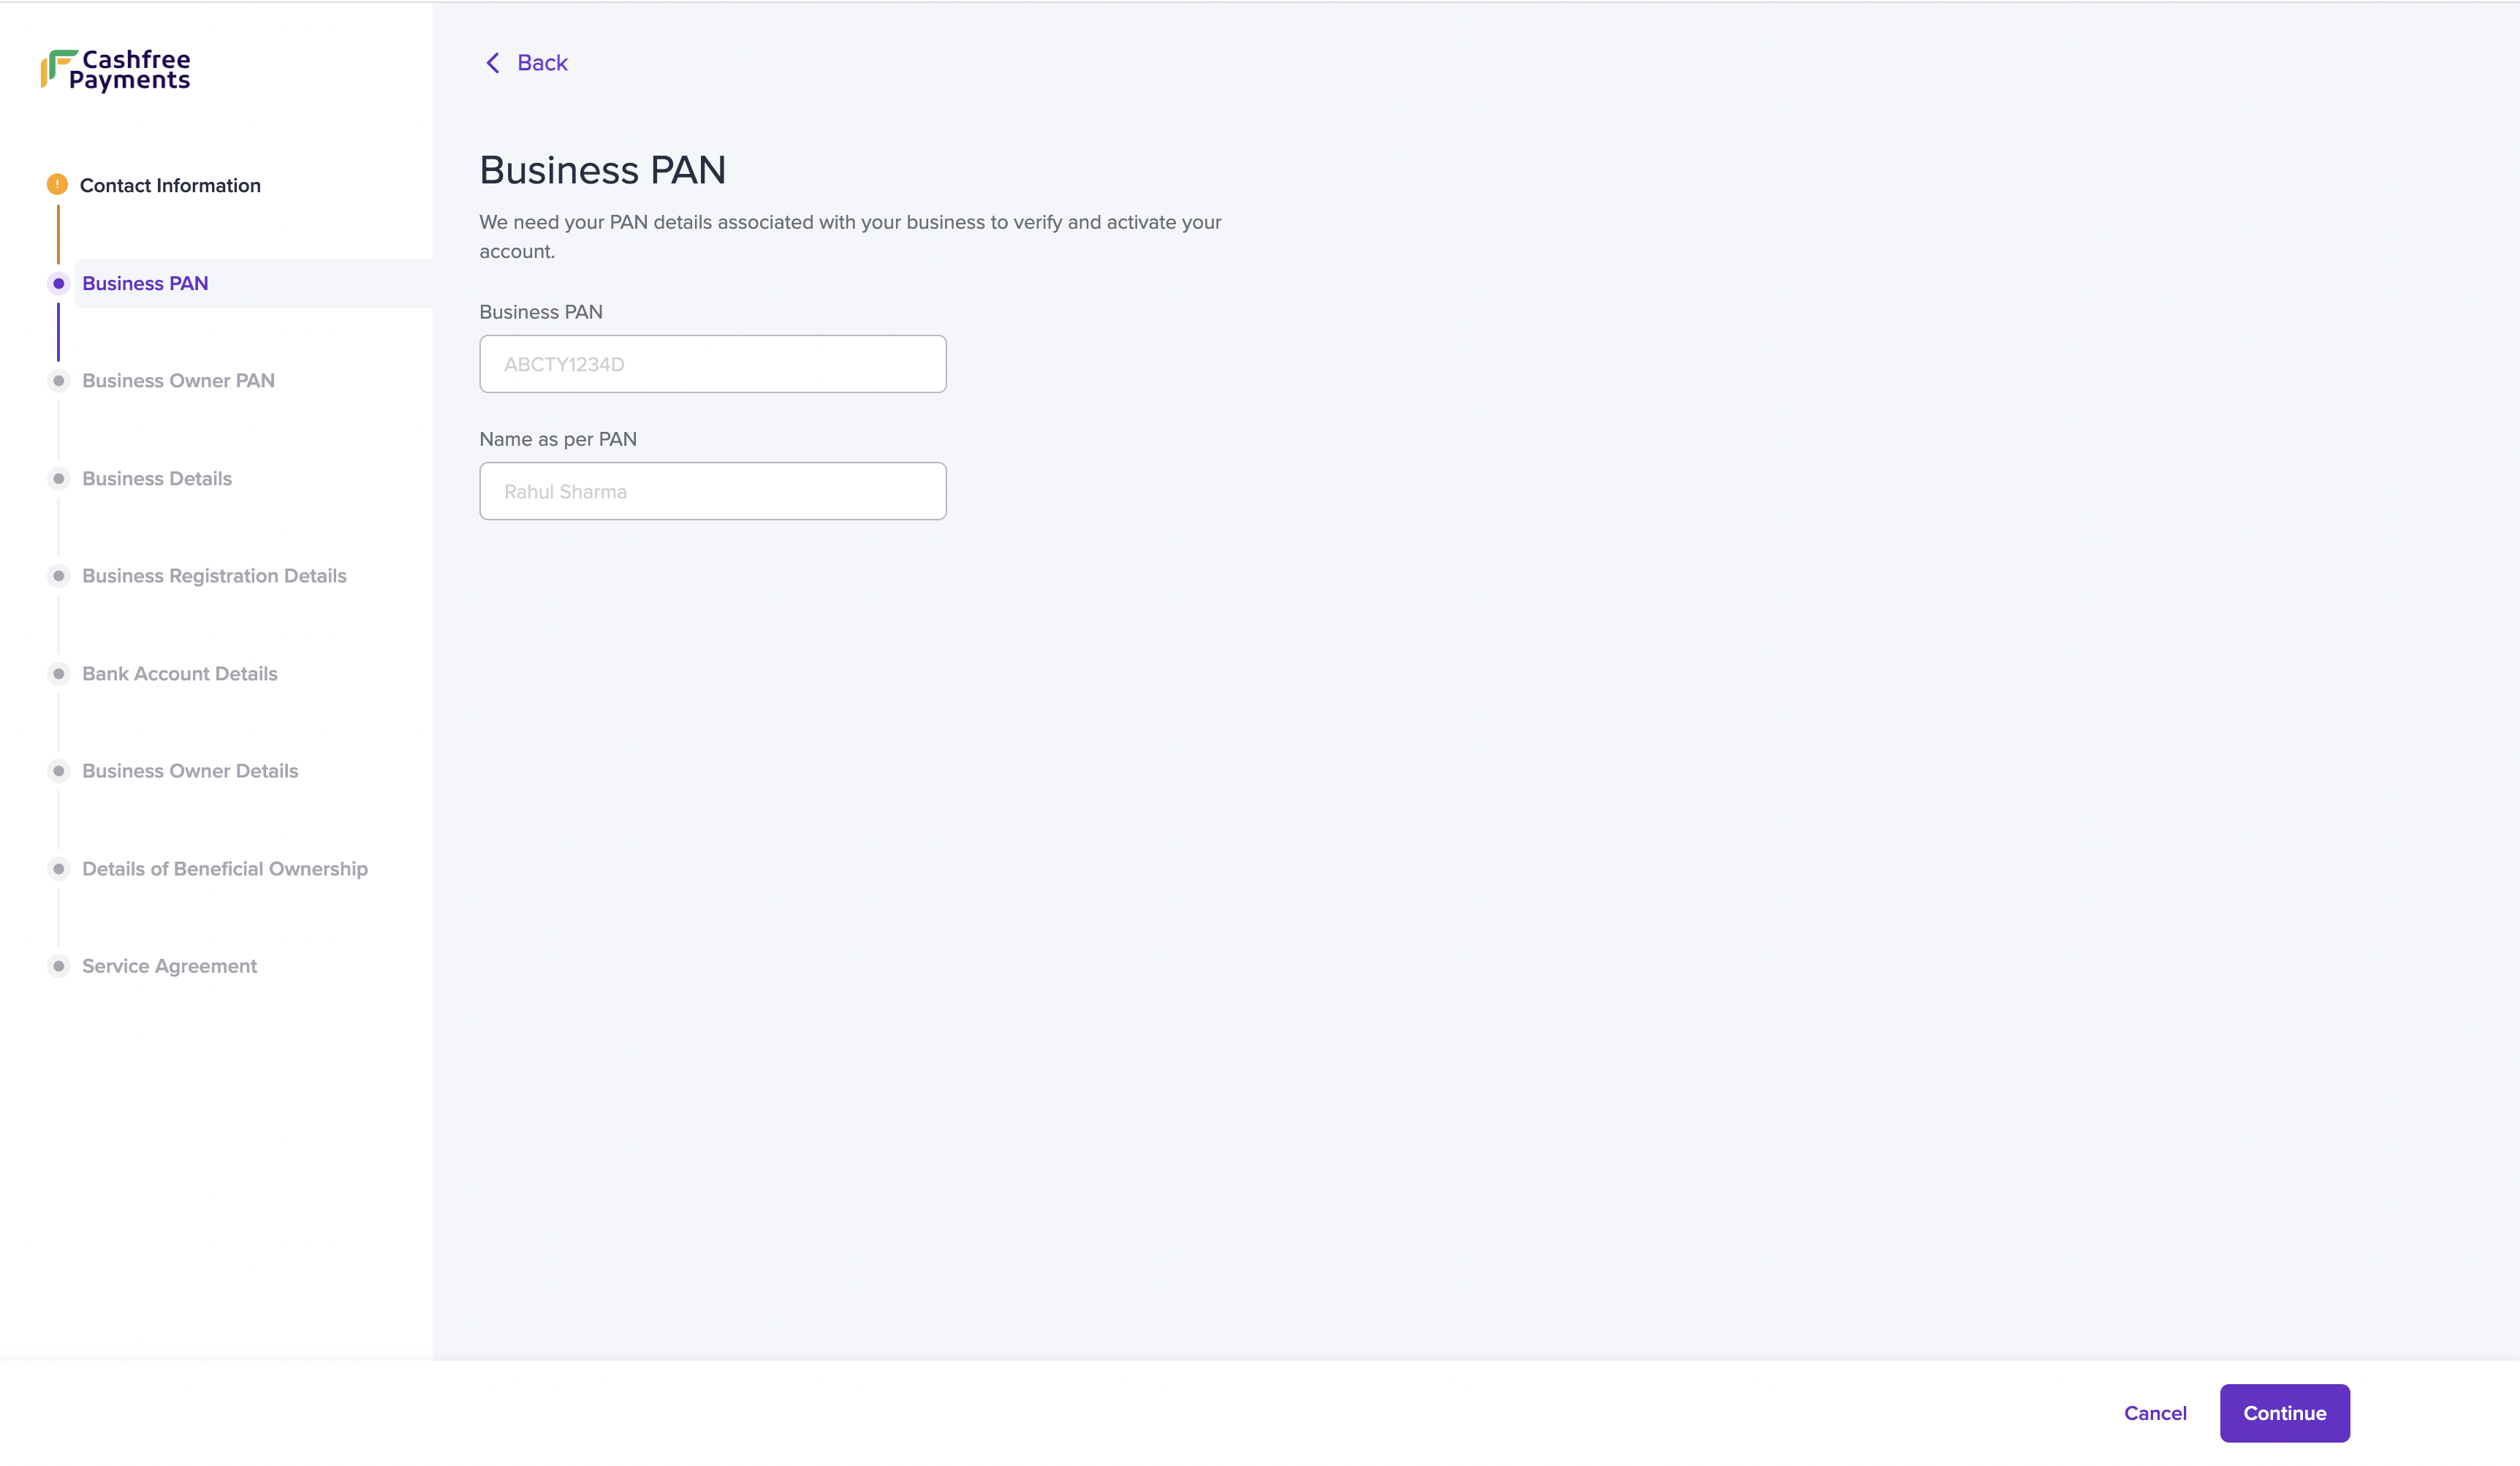
For verification purposes and account activation, we need your business PAN information.
- Enter the information in the following fields:
- Business PAN - Enter your business PAN details. If your business is unregistered or if you are a proprietor, enter your personal PAN information.
- Name as per PAN - Enter the name as per the PAN card.
- Click Continue.
Business Owner PAN
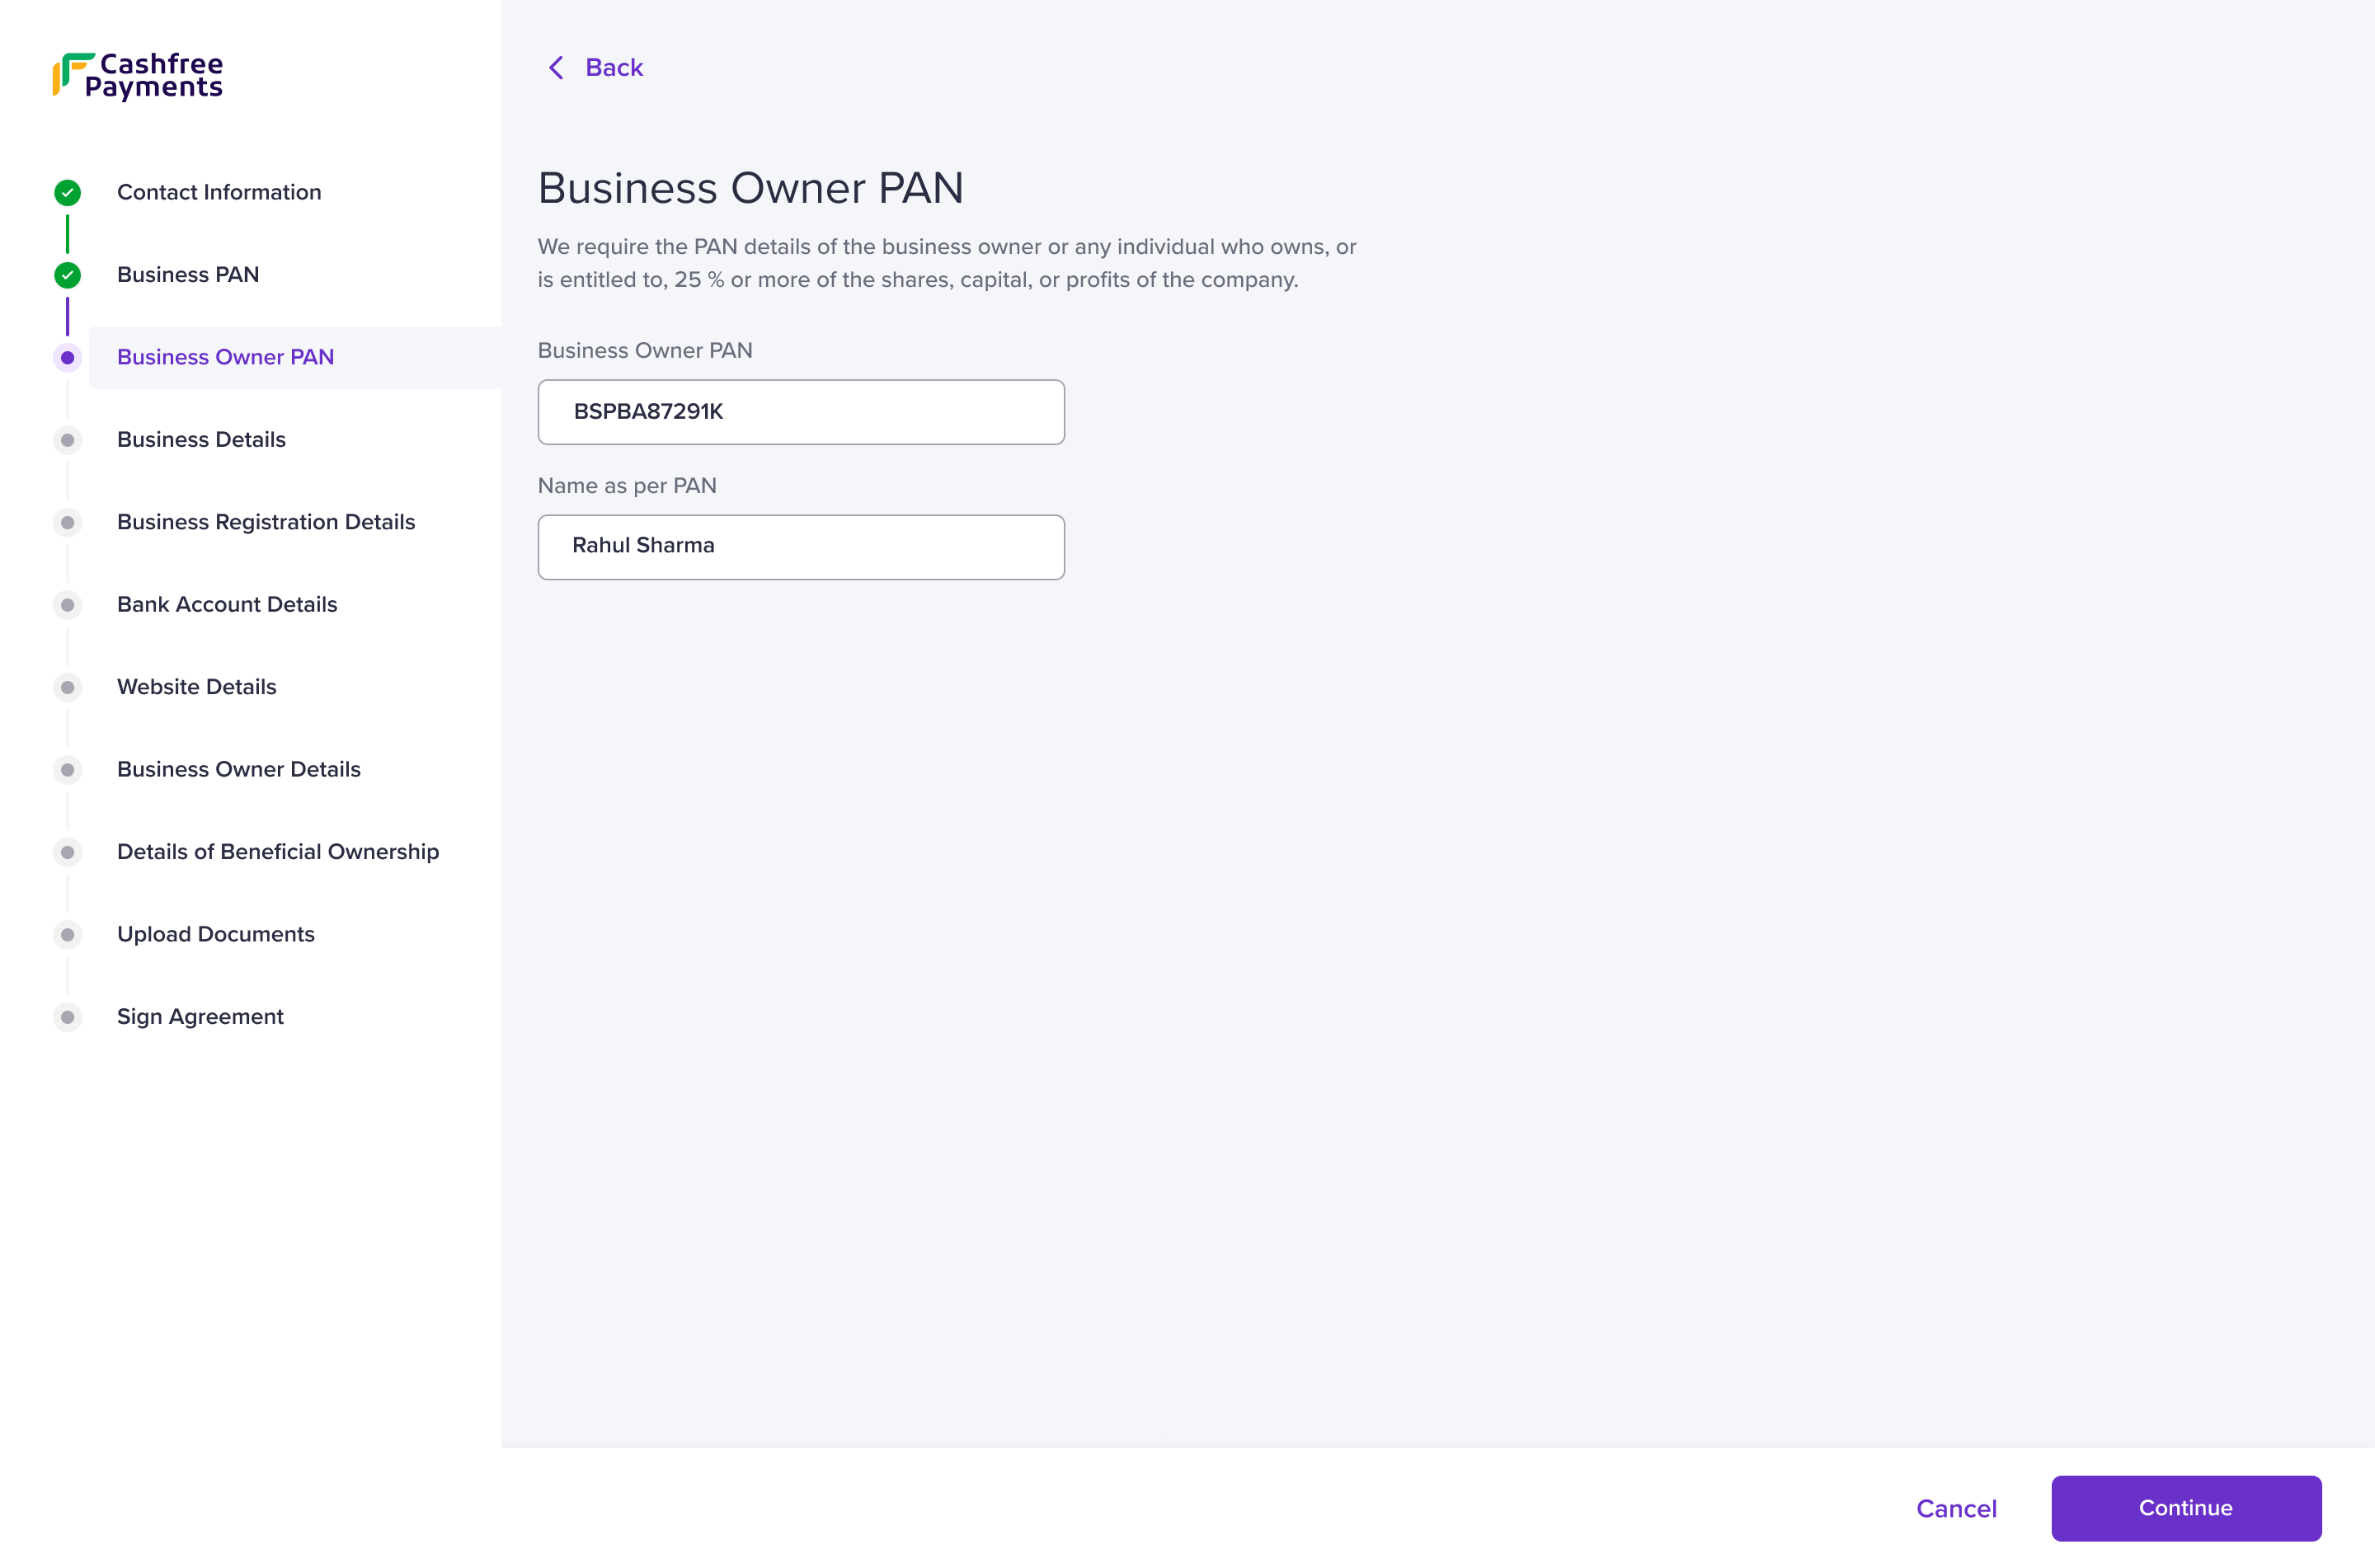
We would require the business PAN details of the business owner or the individual who owns 25% or more of the shares, capital, and company's profile.
Business Owner PAN
- Enter the information in the following fields:
- Business Owner PAN - Enter the business PAN details of the business owner/individual.
- Name as per PAN - Enter the name as per the PAN card.
- Click Continue.
Business Details
Provide the details about your business. It helps us understand the nature of business and help cater services that fit your business requirements.
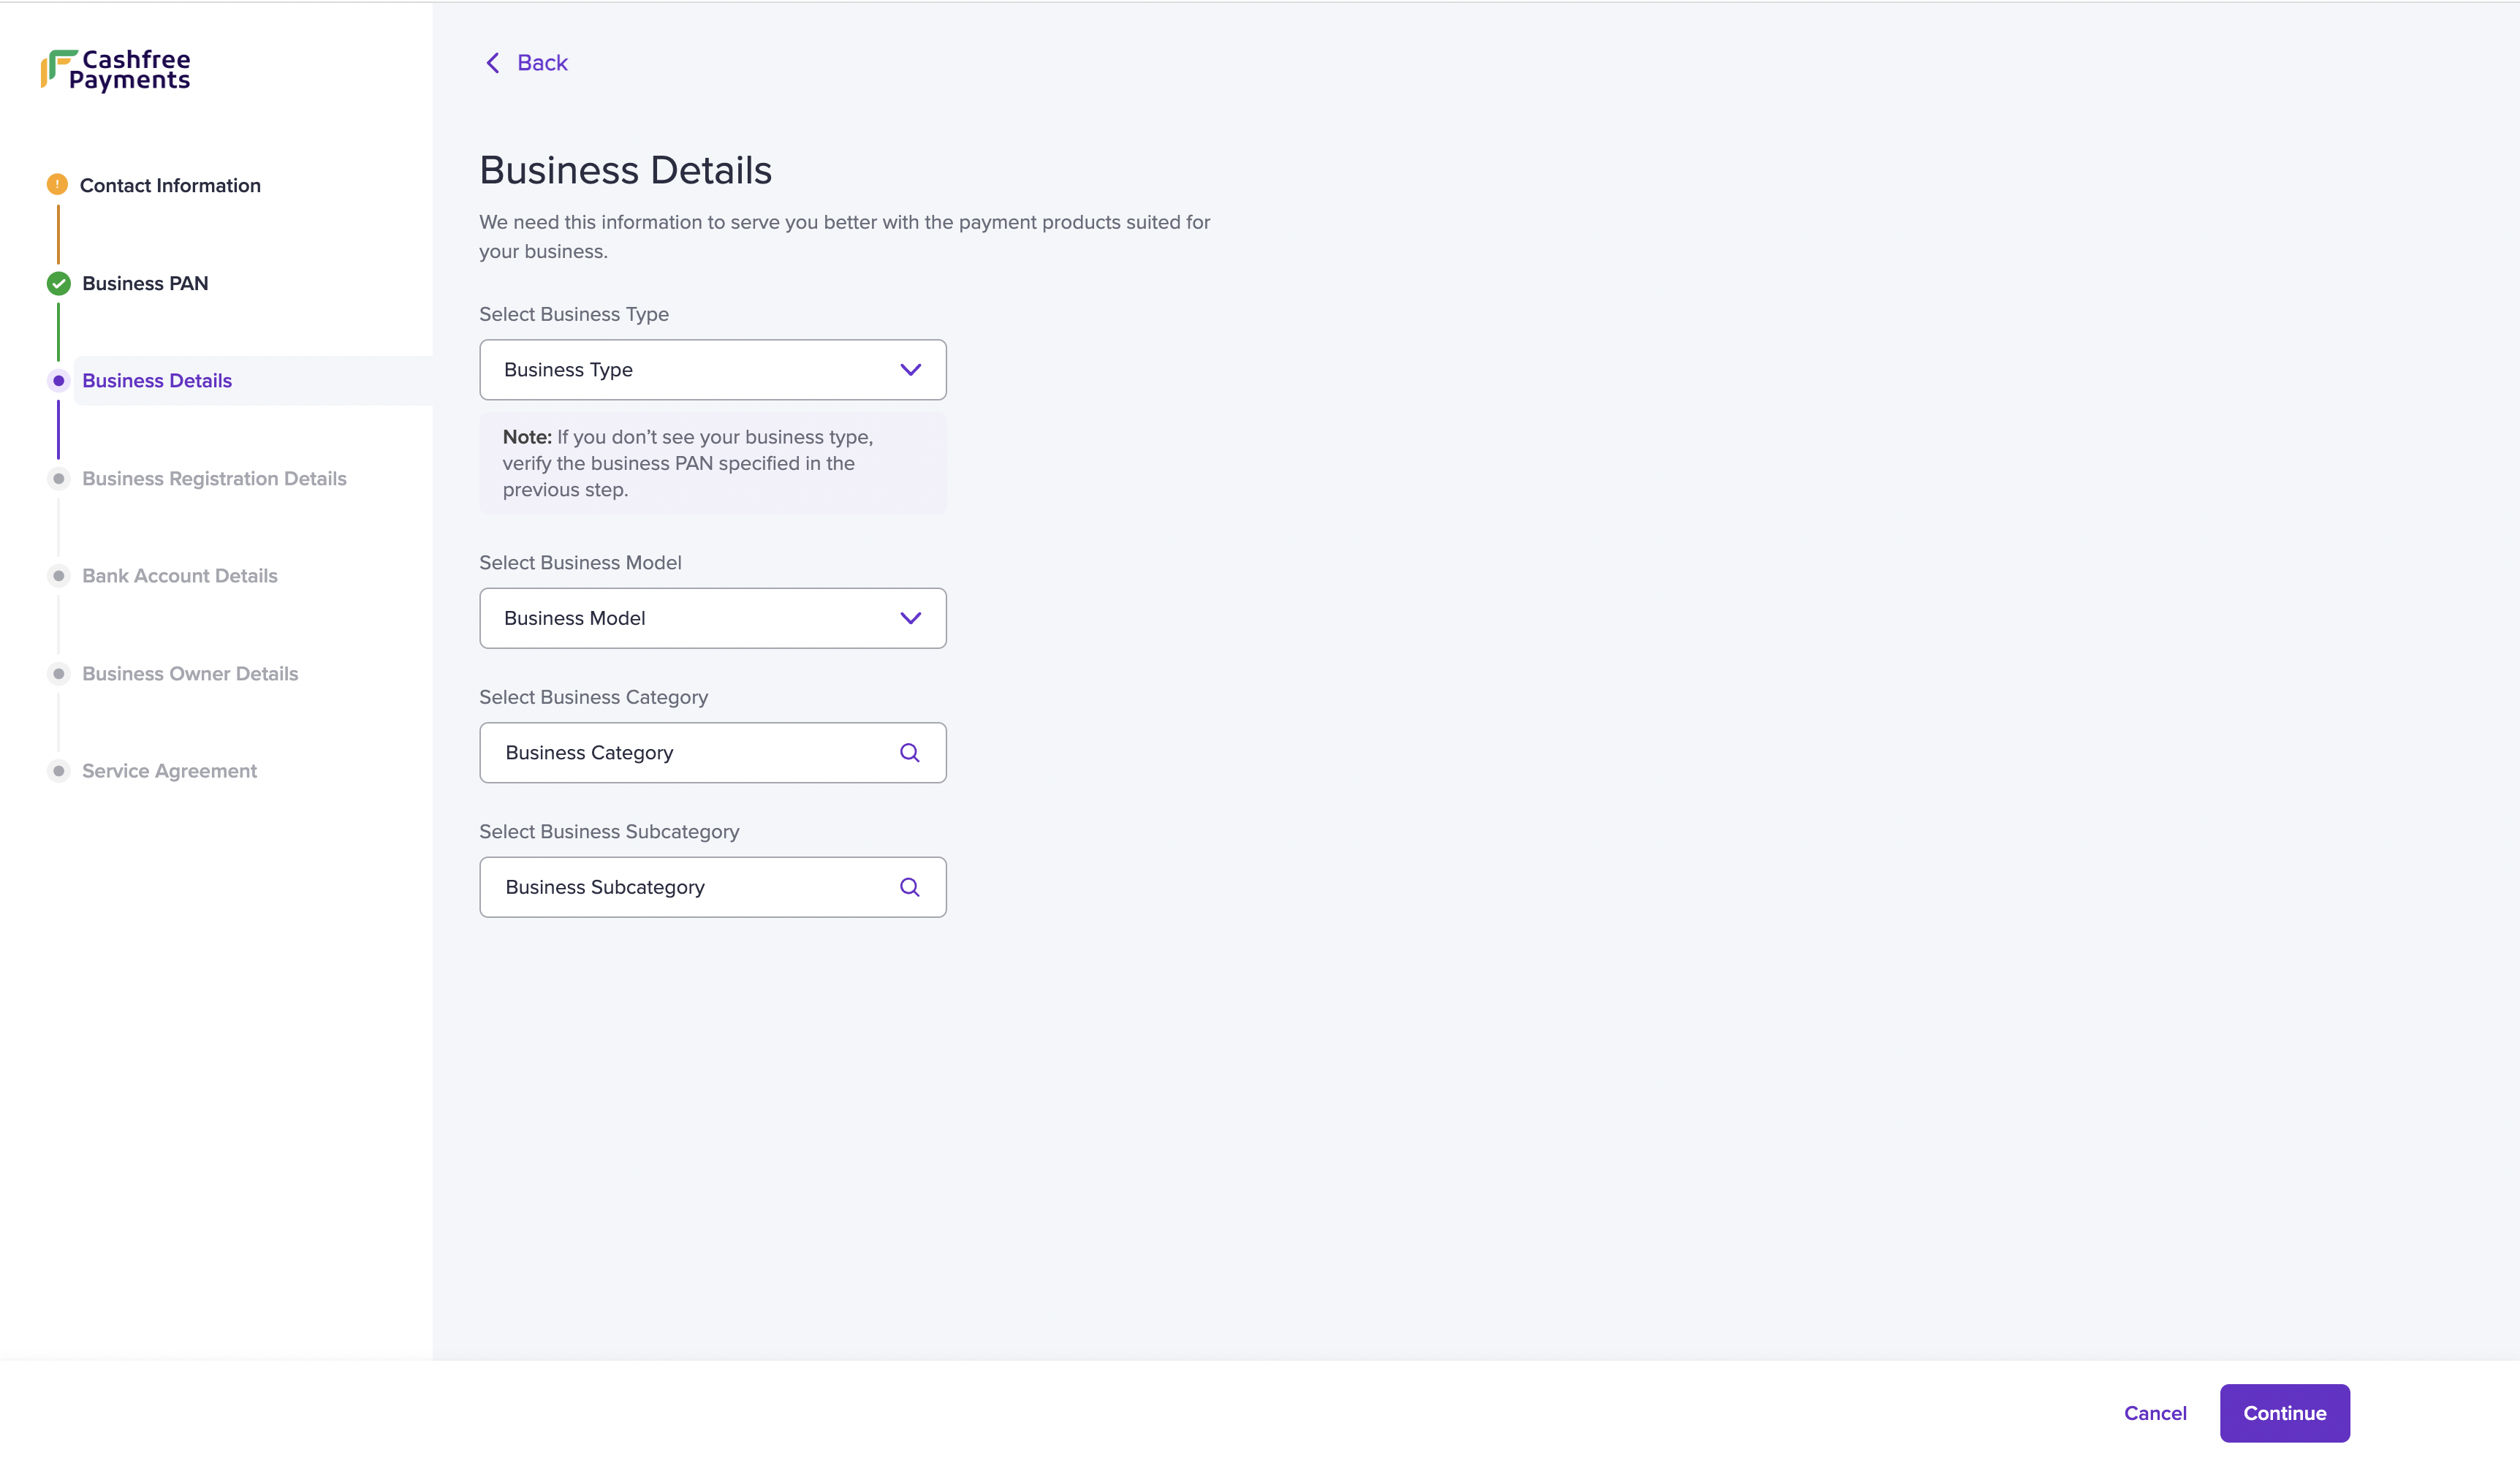
- Enter the following information:
- Select Business Type - Choose your business type from the dropdown menu. Check the list of documents required based on your business type.
- Select Business Model - Choose your business model from the dropdown menu.
- Select Business Category - Choose your business category from the dropdown menu.
- Select Business Subcategory - Choose your business subcategory from the dropdown menu. If you do not find your business subcategory, select Others and describe your business in the text box.
Business categories and subcategories help you define your business from the broadest to the narrowest field. For example, if you are a payment service provider, choose Finance as your business category and Payment Service Provider as your subcategory.
- Click Continue.
Ensure the selected options comply with our terms & conditions. Please read them carefully.
Business Registration Details
Based on the selected business type, we would require your business registration information. Refer to the table below to view the required information for each business type:
| Business Type | Required Information |
|---|---|
| Individual (Unregistered) | Business Operating Address |
| Public Limited / Private Limited | CIN / GSTIN / Business Operating Address |
| LLPIN | LLPIN / GSTIN / Business Operating Address |
| Partnership / Proprietor / Society / Trust / NGO | GSTIN / Business Operating Address |
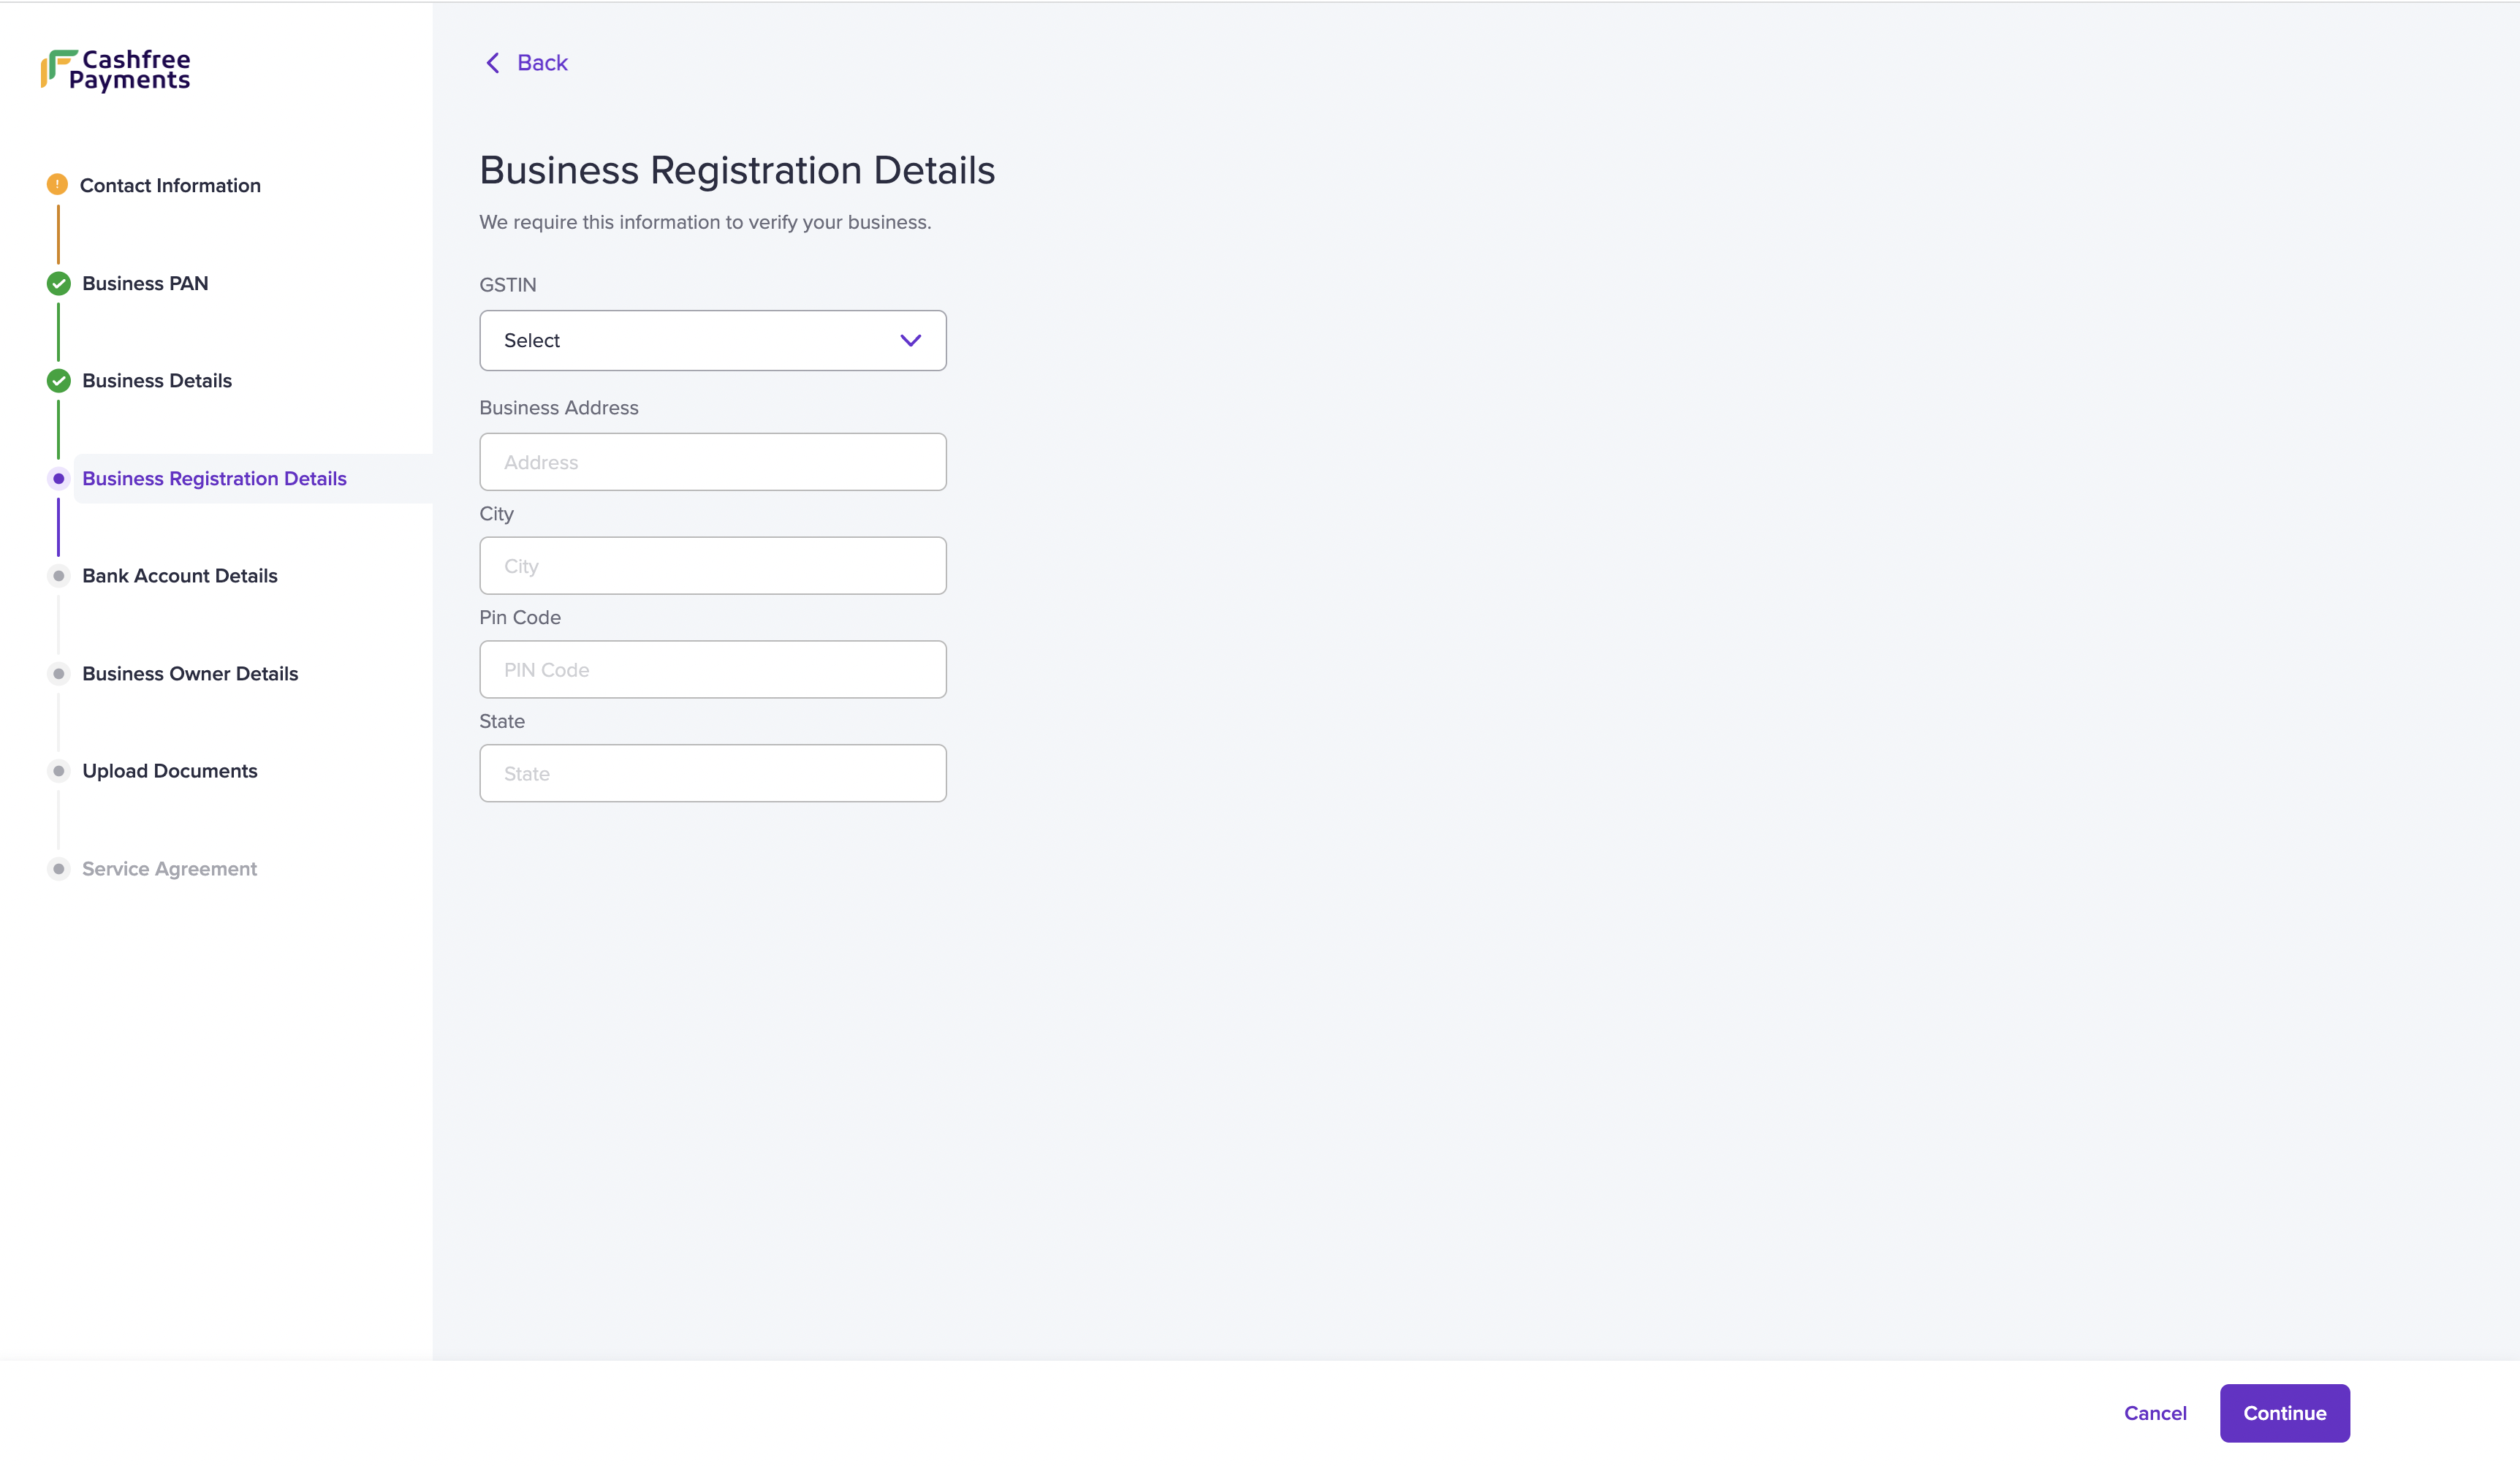
- Fill in the information for the following fields:
- GSTIN - Enter your GSTIN details if your business is GST registered. If not, choose I do not have GSTIN from the dropdown.
- CIN - Enter your corporate identification number (CIN).
- LLPIN - Enter your limited liability partnership identification number (LLPIN).
- Business Address - Enter the address of your business location in the respective fields.
- Same as GST Address - If the address of your business location is the same as the GST registration, check this box.
- Click Continue.
Bank Account Details
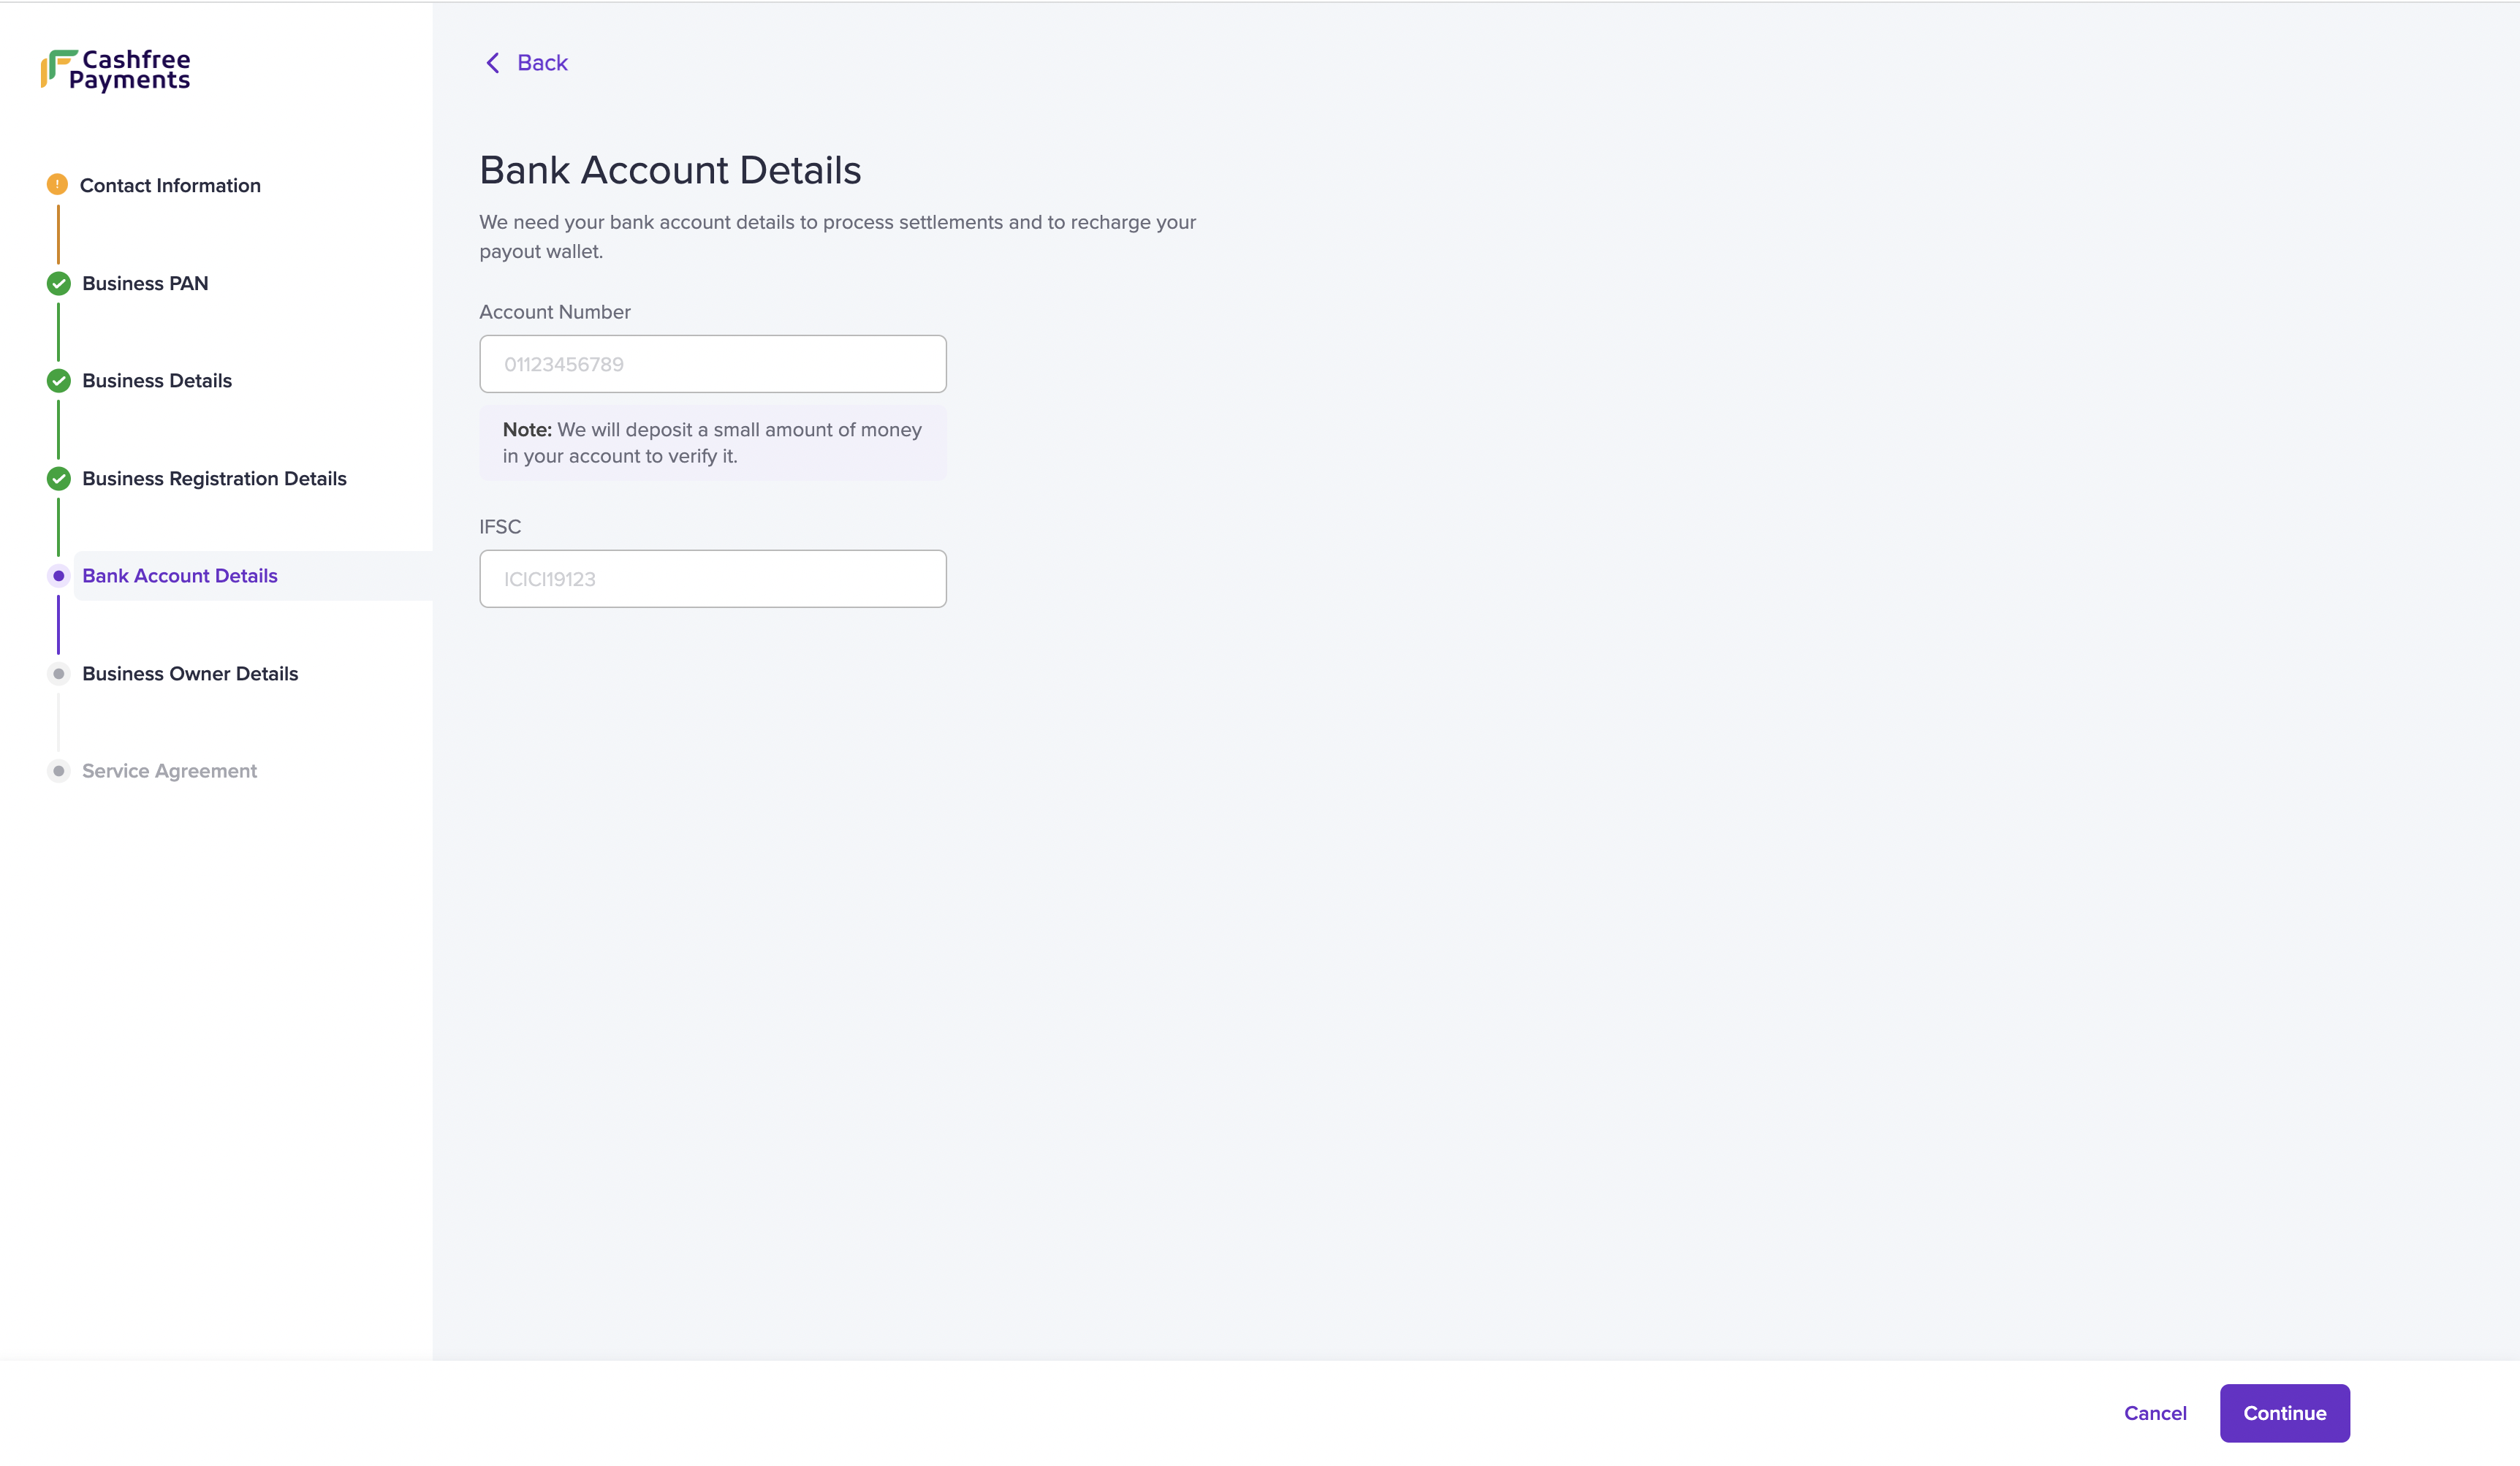
We require your bank account details to process settlements.
- Enter the following information:
- Account Number - Enter your bank account number. Ensure the bank account holder name is the same as the name in the GST or PAN registration.
- IFSC - Enter the IFSC of the bank branch where the account is active.
- Upload - Alternatively, you can upload a cancelled cheque if you do not have your bank account information or due to an unsuccessful verification.
- Click Continue.
Website Details
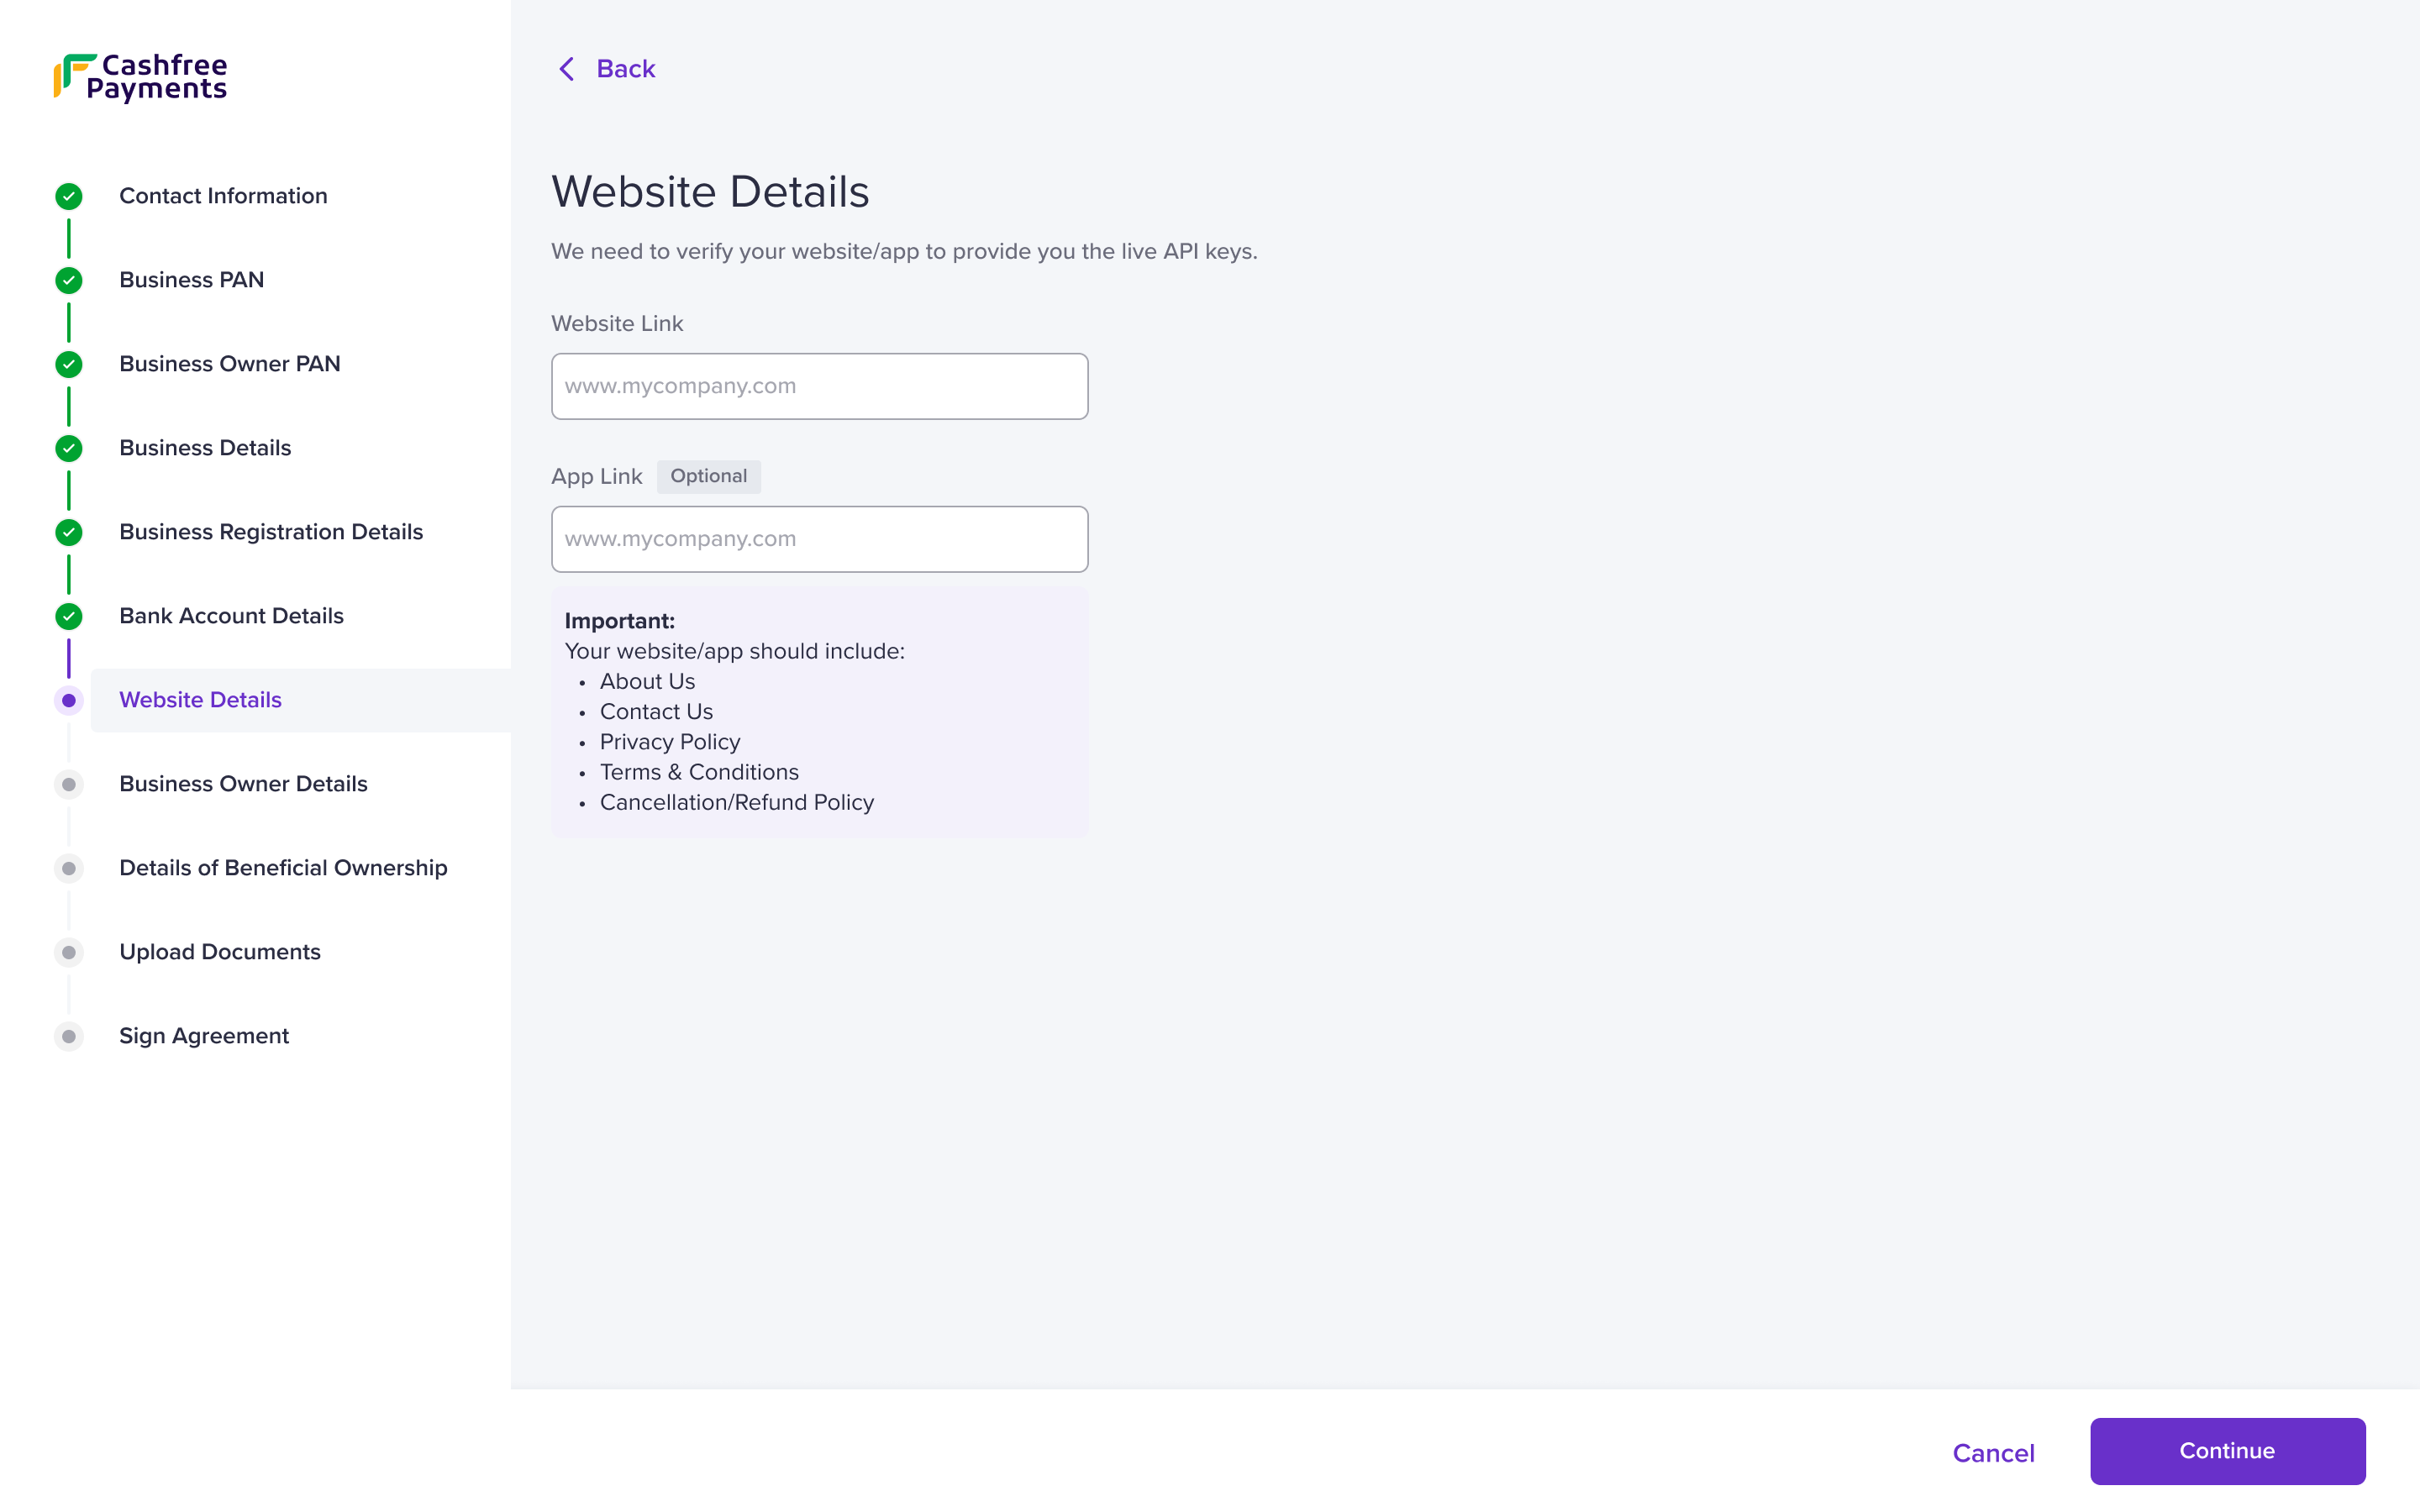
We require your website details to enable live API keys for your business. This enables you to accept payments.
Website Details
- Enter the information in the following fields:
- Website Link - Enter your website link in this field. This is a required field.
- App Link - Enter your app link. This is optional.
- Click Continue.
The following details must be on your website/app: nature of your business, business contact information, privacy policy, terms and conditions, and cancellation/refund policy.
Business Owner Details
We require government ID information of the business owner to activate your Cashfree Payments account. Ensure that the details match the submitted owner PAN information.
- Fill in the following fields:
- Aadhaar Number - Enter your aadhaar number. Enter the OTP received on your mobile number in the One Time Password popup.
- I do not have my mobile number linked to this aadhaar. - In case the entered mobile number is not the registered mobile number for aadhaar, you can verify by uploading any of the government IDs: aadhaar, driving licence, voter ID, and passport.
- Select ID Proof and Upload - Use the dropdown menu to select an ID proof.
- Upload - Upload the selected document.
- Click Continue.
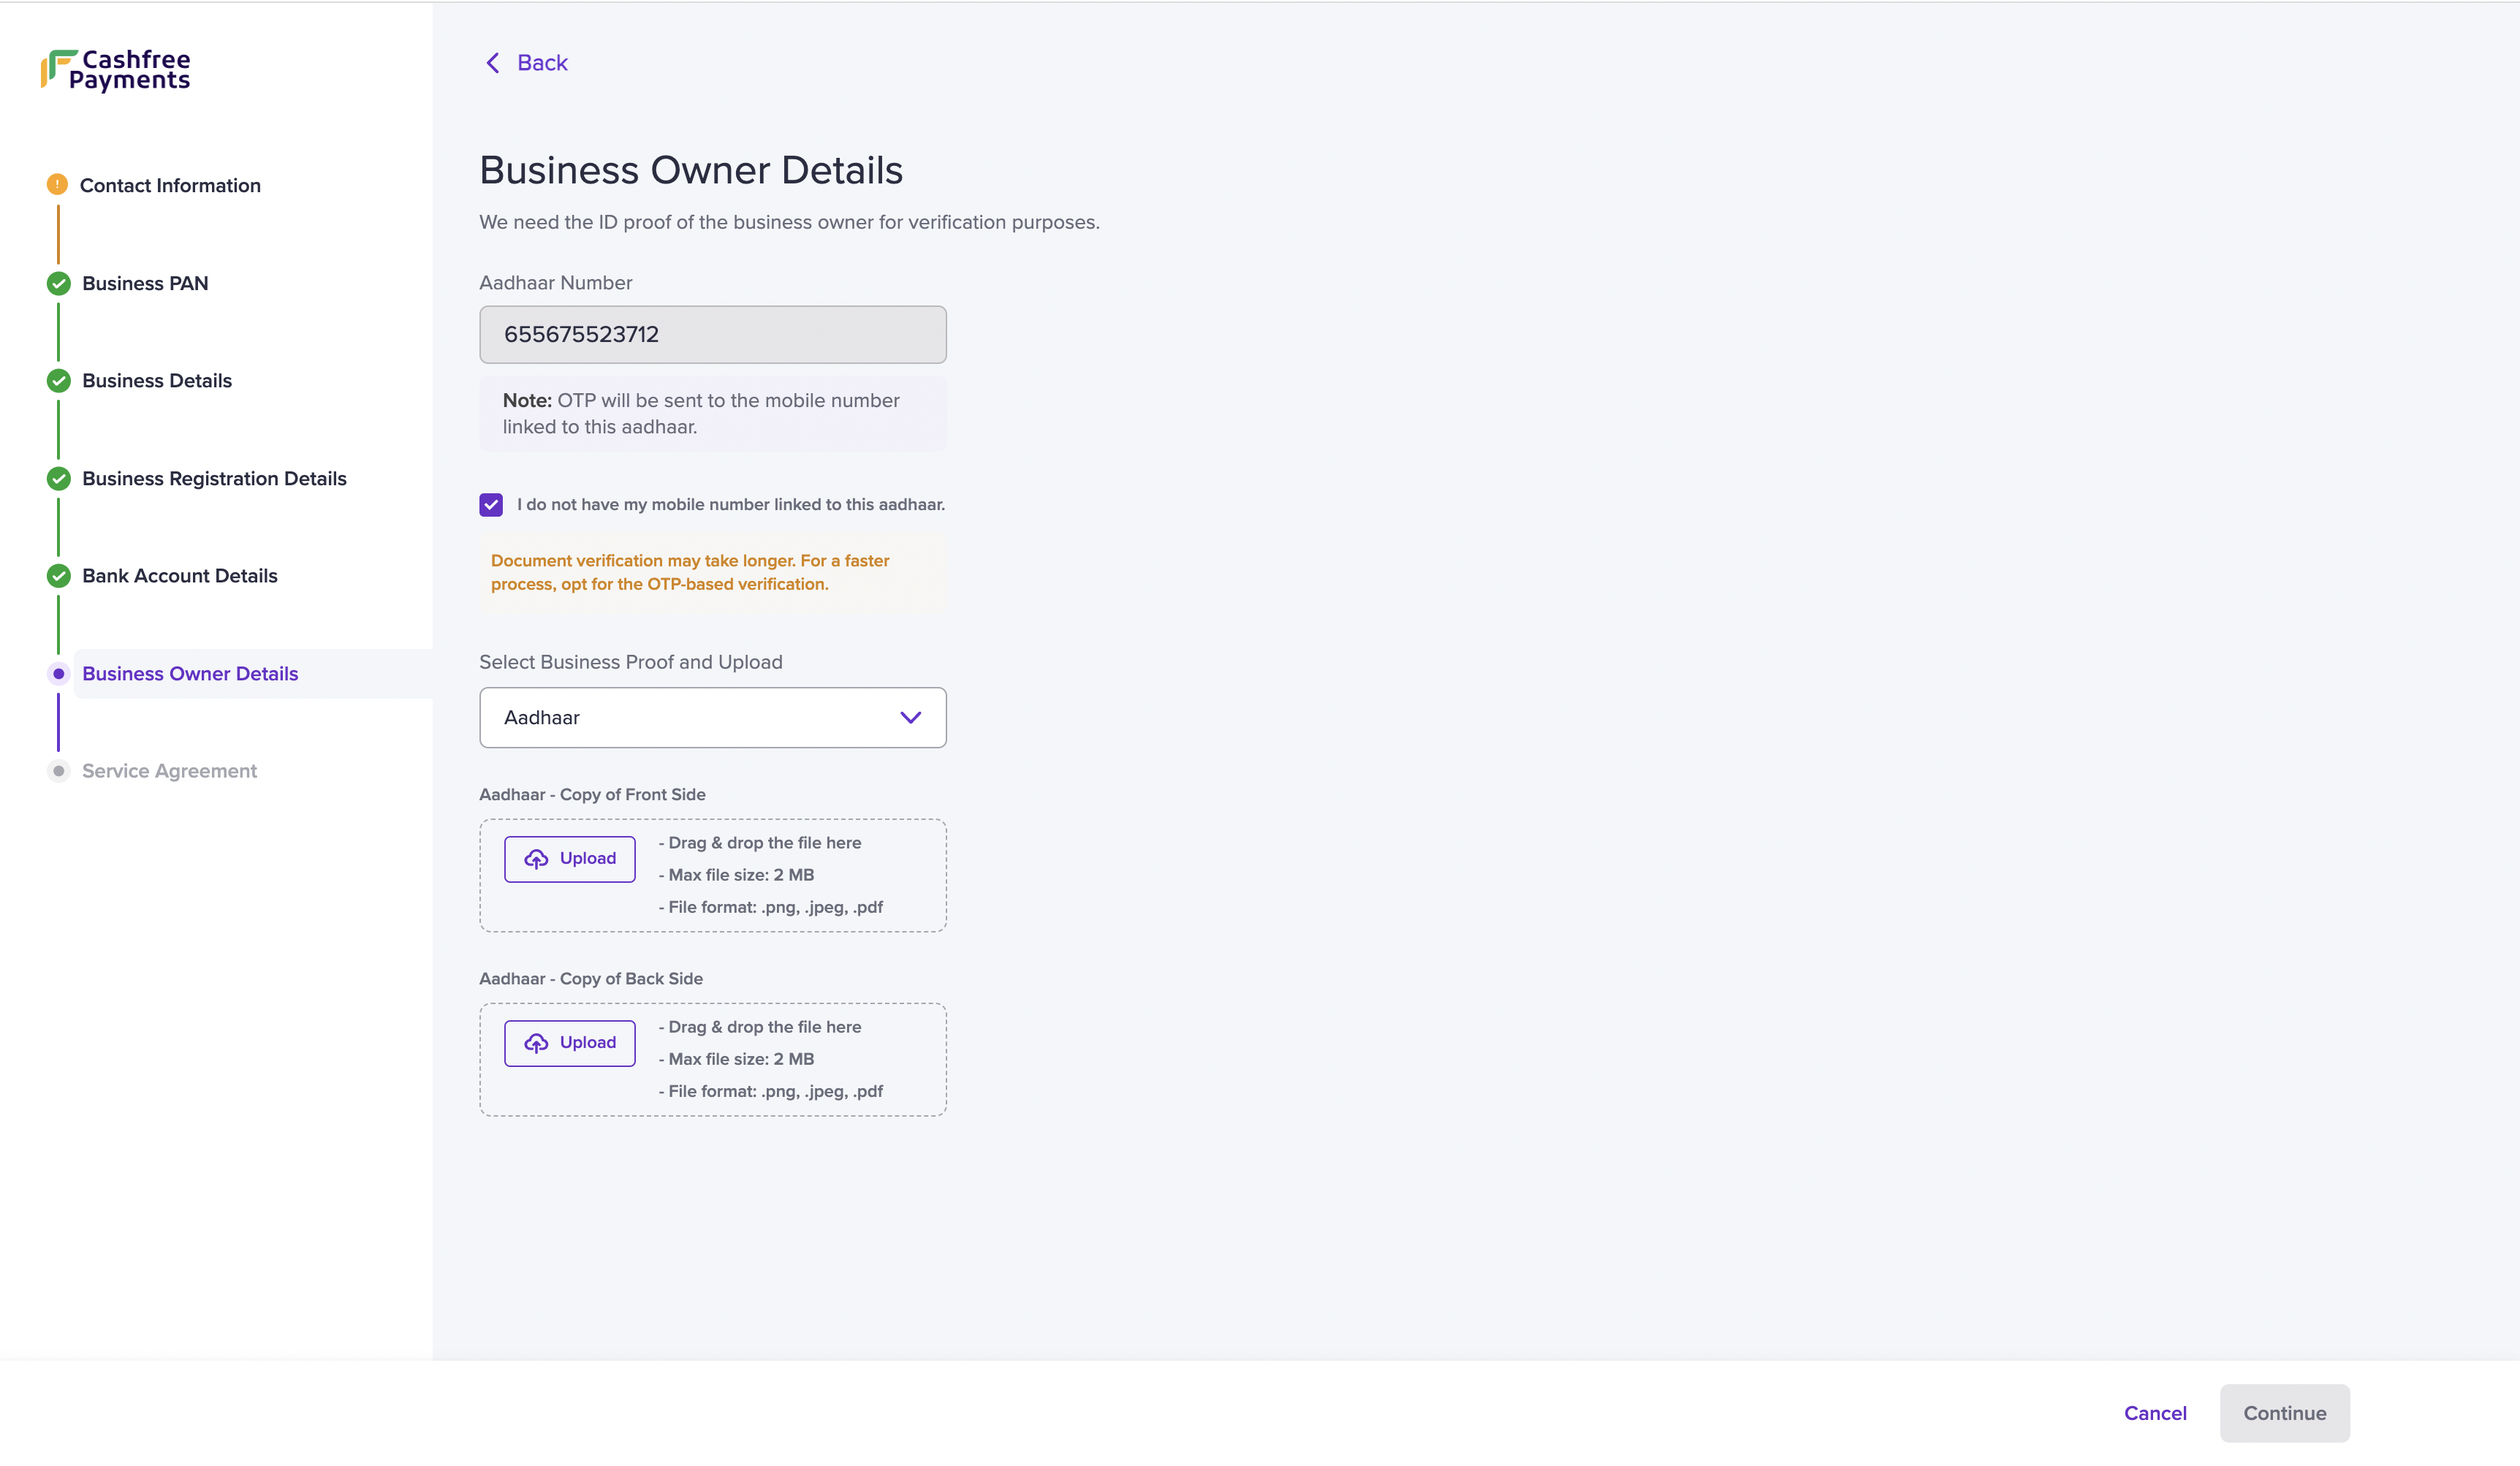
Business Owner Details
Upload Documents
To verify your business, we need specific documents based on the provided information. Refer to the table below to view the required documents for each business type:
| Business Type | Required Documents |
|---|---|
| Proprietor (Without GSTIN) | Any of the business proof below:
|
| Partnership | Any of the business proof below:
|
| Society / Trust / NGO | Any of the business proof below:
|
Refer to the table below to view the documents required for your line of business (LOB). The documents vary based on your business category and sub category.
| Category | Sub Category | Documents |
|---|---|---|
| SaaS | Software as a service (SaaS) | AOC for PCI-DSS compliance |
| SaaS | Food, Health & Beauty Supplements | FSSAI |
| Education |
| UGC certificate/ICSE/CBSE/AICTE |
| Finance | Forex | FEMA registration, FFMC certificate : FFMC state wise |
| Finance | Payment Service Provider | PA PG License , Nodal Account |
| Finance | Stock brokerage and trading | SEBI Certificate (Mandatory for Financial Advisors and Stock Brokers/Trading) |
| Finance | Lending | NBFCs / Service Level Agreements with RBI approved NBFCs / List of Nidhi limit companies |
| Open & Semi Open Wallet | Open & Semi Open Wallet | Bank PPI License / Non Bank PPI |
| Mutual Funds | Mutual Funds | AMFI Certificate |
| NBFC | NBFC | NBFCs / Service Level Agreements with RBI approved NBFCs |
| Insurance | Insurance | IRDA: Life insurance, General insurance, Health insurance or SLA with the insurer if this is being issued by a different party. |
| Government |
| Registration dependent on Sub LOB |
| Government | Nutritionist or dietitian | Ayush (Manufacturing license - Form 24D) |
| Jewellery |
| BIS Certificate /916 Hallmark/ 925 Hallmark / GII Certificate |
| Non-Profit | Charitable and Social Service Organisations | 1. Domestic: 80 G, 12 A 2. International: FCRA |
| Online Gaming | Digital Goods – Games | RNG Certificate (If Applicable), legal opinion |
| Pharmacy | Drugs, Drug Proprietary's, and Druggists' Sundries | Pharmacy License, Retail/wholesale Drug License, Undertaking of authorised signatory under Drugs G Cosmetics Act – 1940, Declaration (Form 20, Form 21, From 21B, Form 20B |
| Pharmacy | Drug Stores and Pharmacies | Pharmacy License, Retail/wholesale Drug License, Undertaking of authorized signatory under Drugs G Cosmetics Act – 1940, Declaration (Form 20, Form 21, From 21B, Form 20B |
| Utilities | Utilities-Electric, Gas, Water, and Sanitary | BBPS certificate |
| Travel and Hospitality |
| IATA Certificate / IRCTC agency certificate |
- Use the Upload button to upload the specific document.
- Click Continue to proceed.
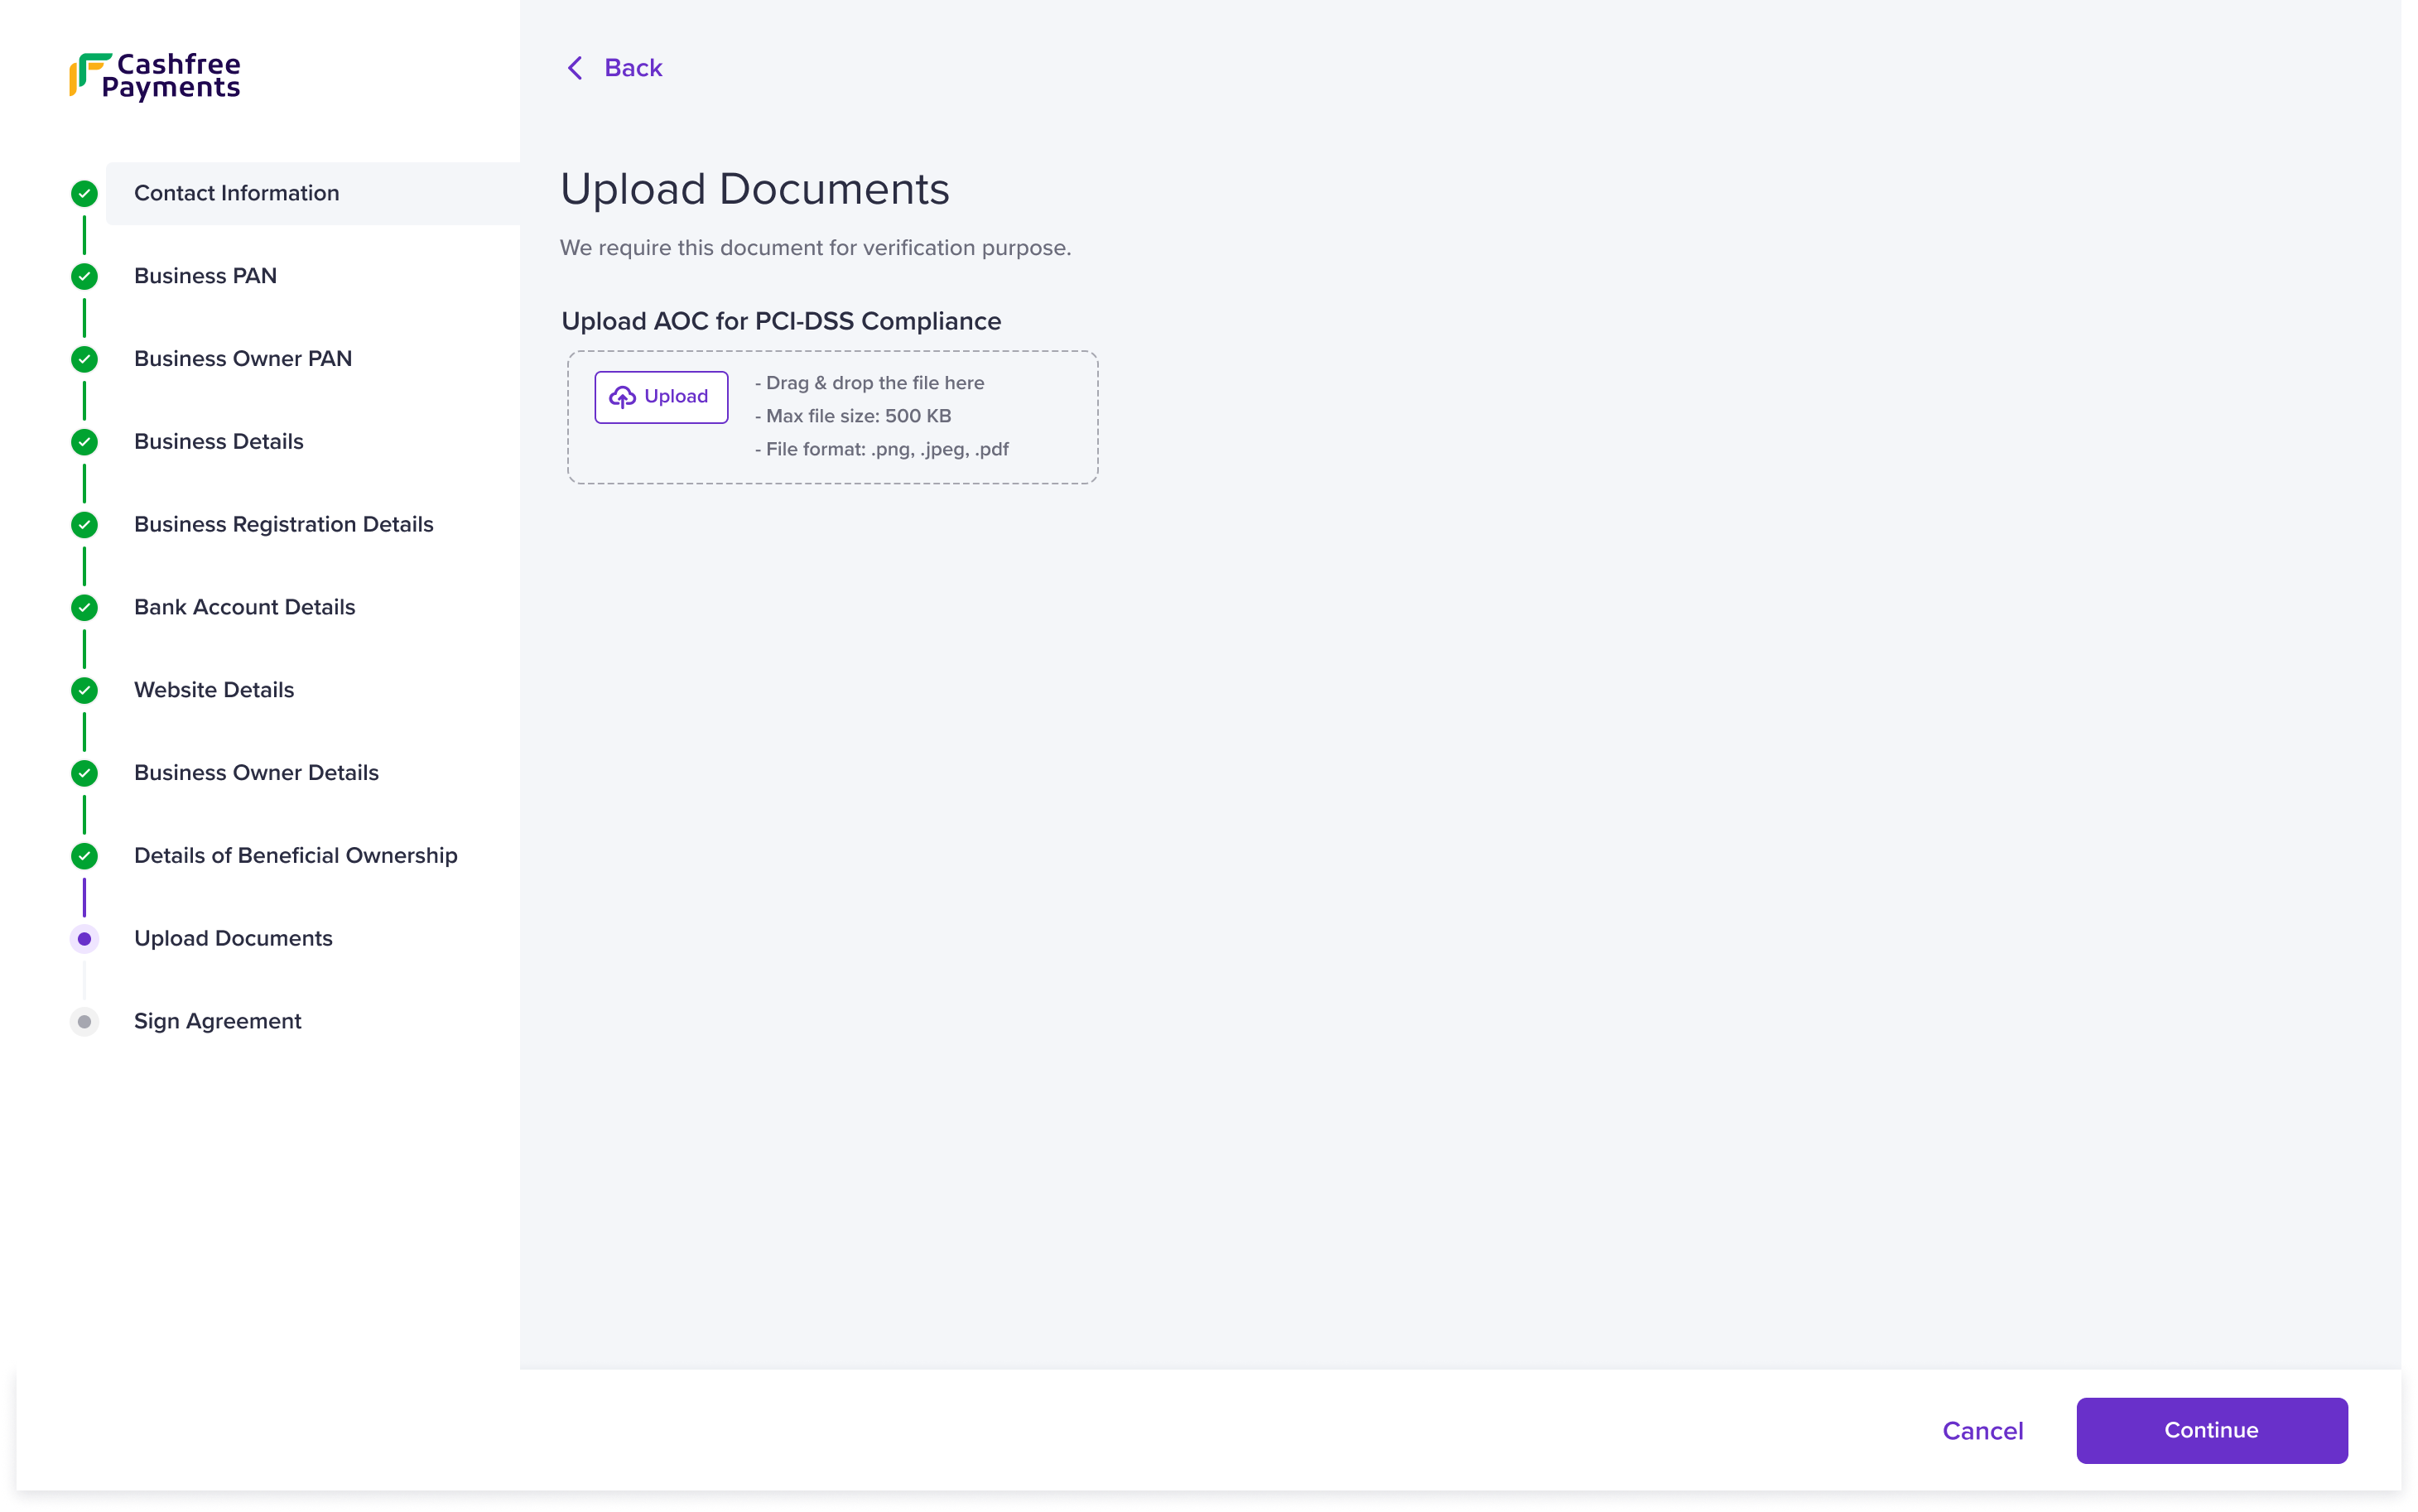
Upload Documents
Declaration of Beneficial Ownership
The declaration of beneficial ownership is to verify the individual or individuals who owns all or part of the business' share capital.
You can declare the beneficial ownership in two ways:
- Get it signed instantly
- Download template and upload signed copy of the declaration
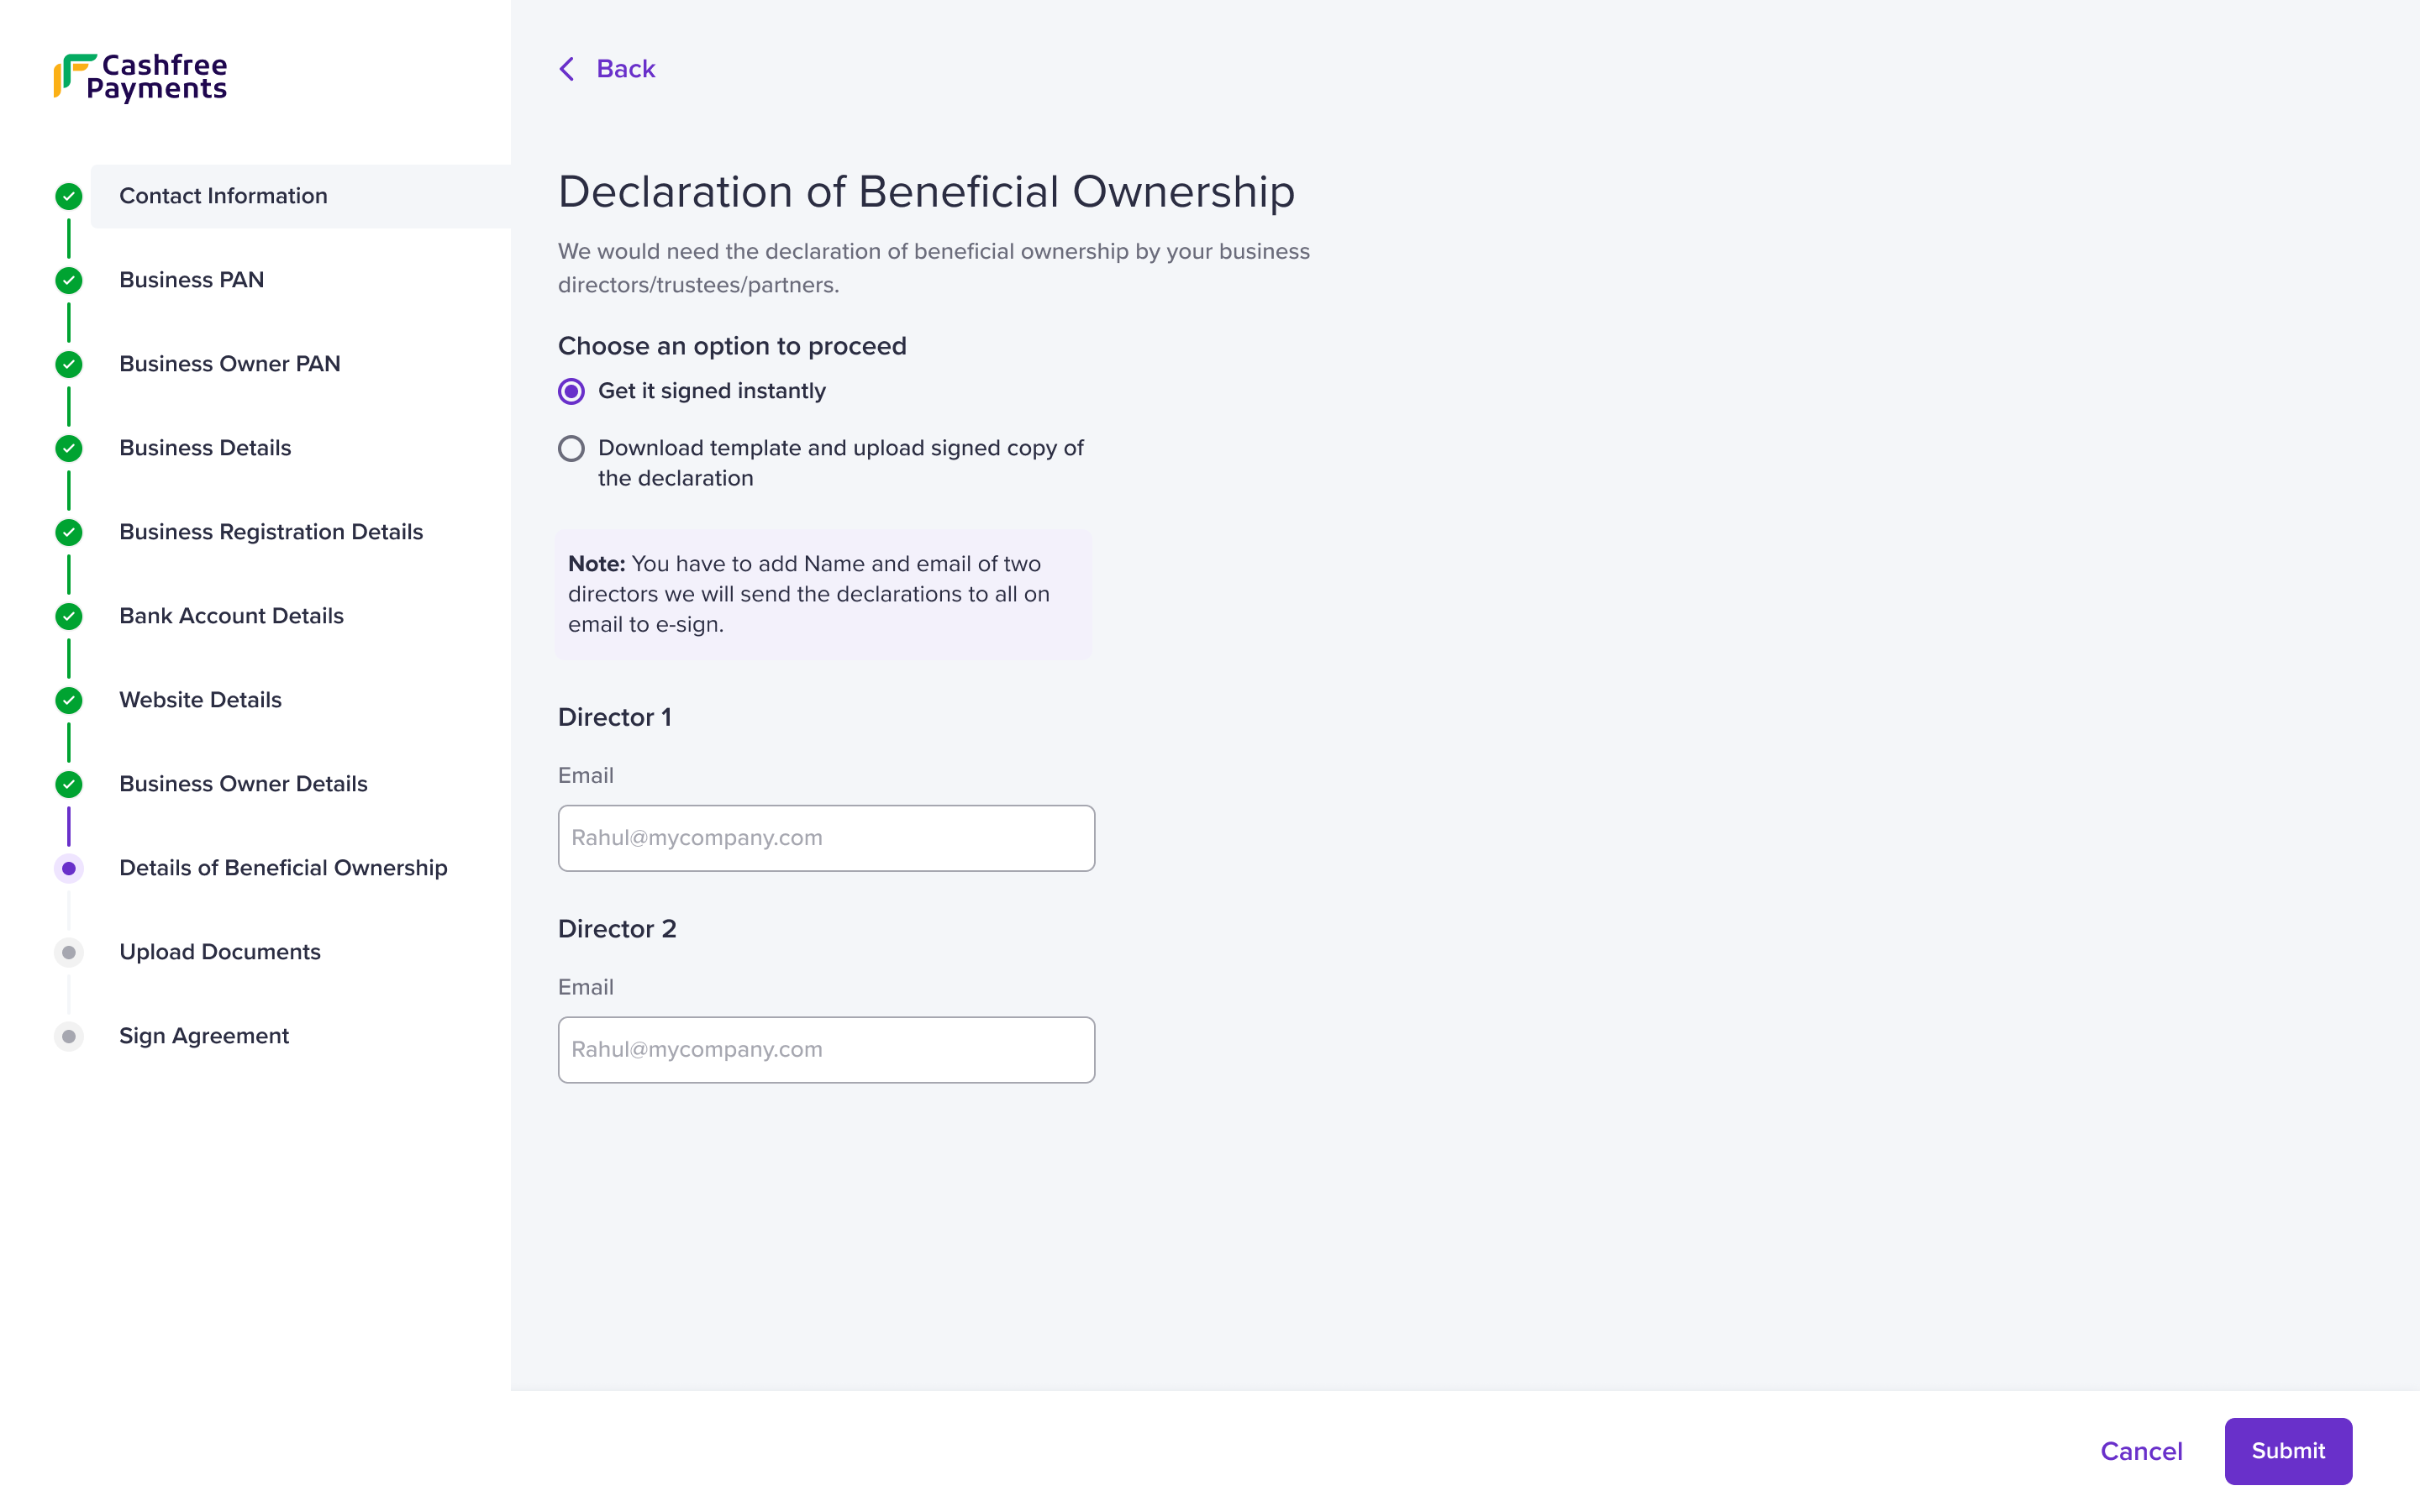
Declaration of Beneficial Ownership
Get it signed instantly
- Enter the following information:
Director 1 - Enter the name and email address of the director in the respective fields.
Director 2 - Enter the name and email address of the director in the respective fields. - Click Submit.
You need to enter the information of two directors, but one director's signature is sufficient in the declaration of beneficial ownership.
Download template and upload signed copy of the declaration
- Click Download Document Template to download the template.
- Sign the document and use the Upload button to upload it.
- Click Submit.
The onboarding process is now complete. Our team reviews the submitted documents and activates the selected products in 24-48 hours. We might contact you for any queries regarding the submitted information over email or call.
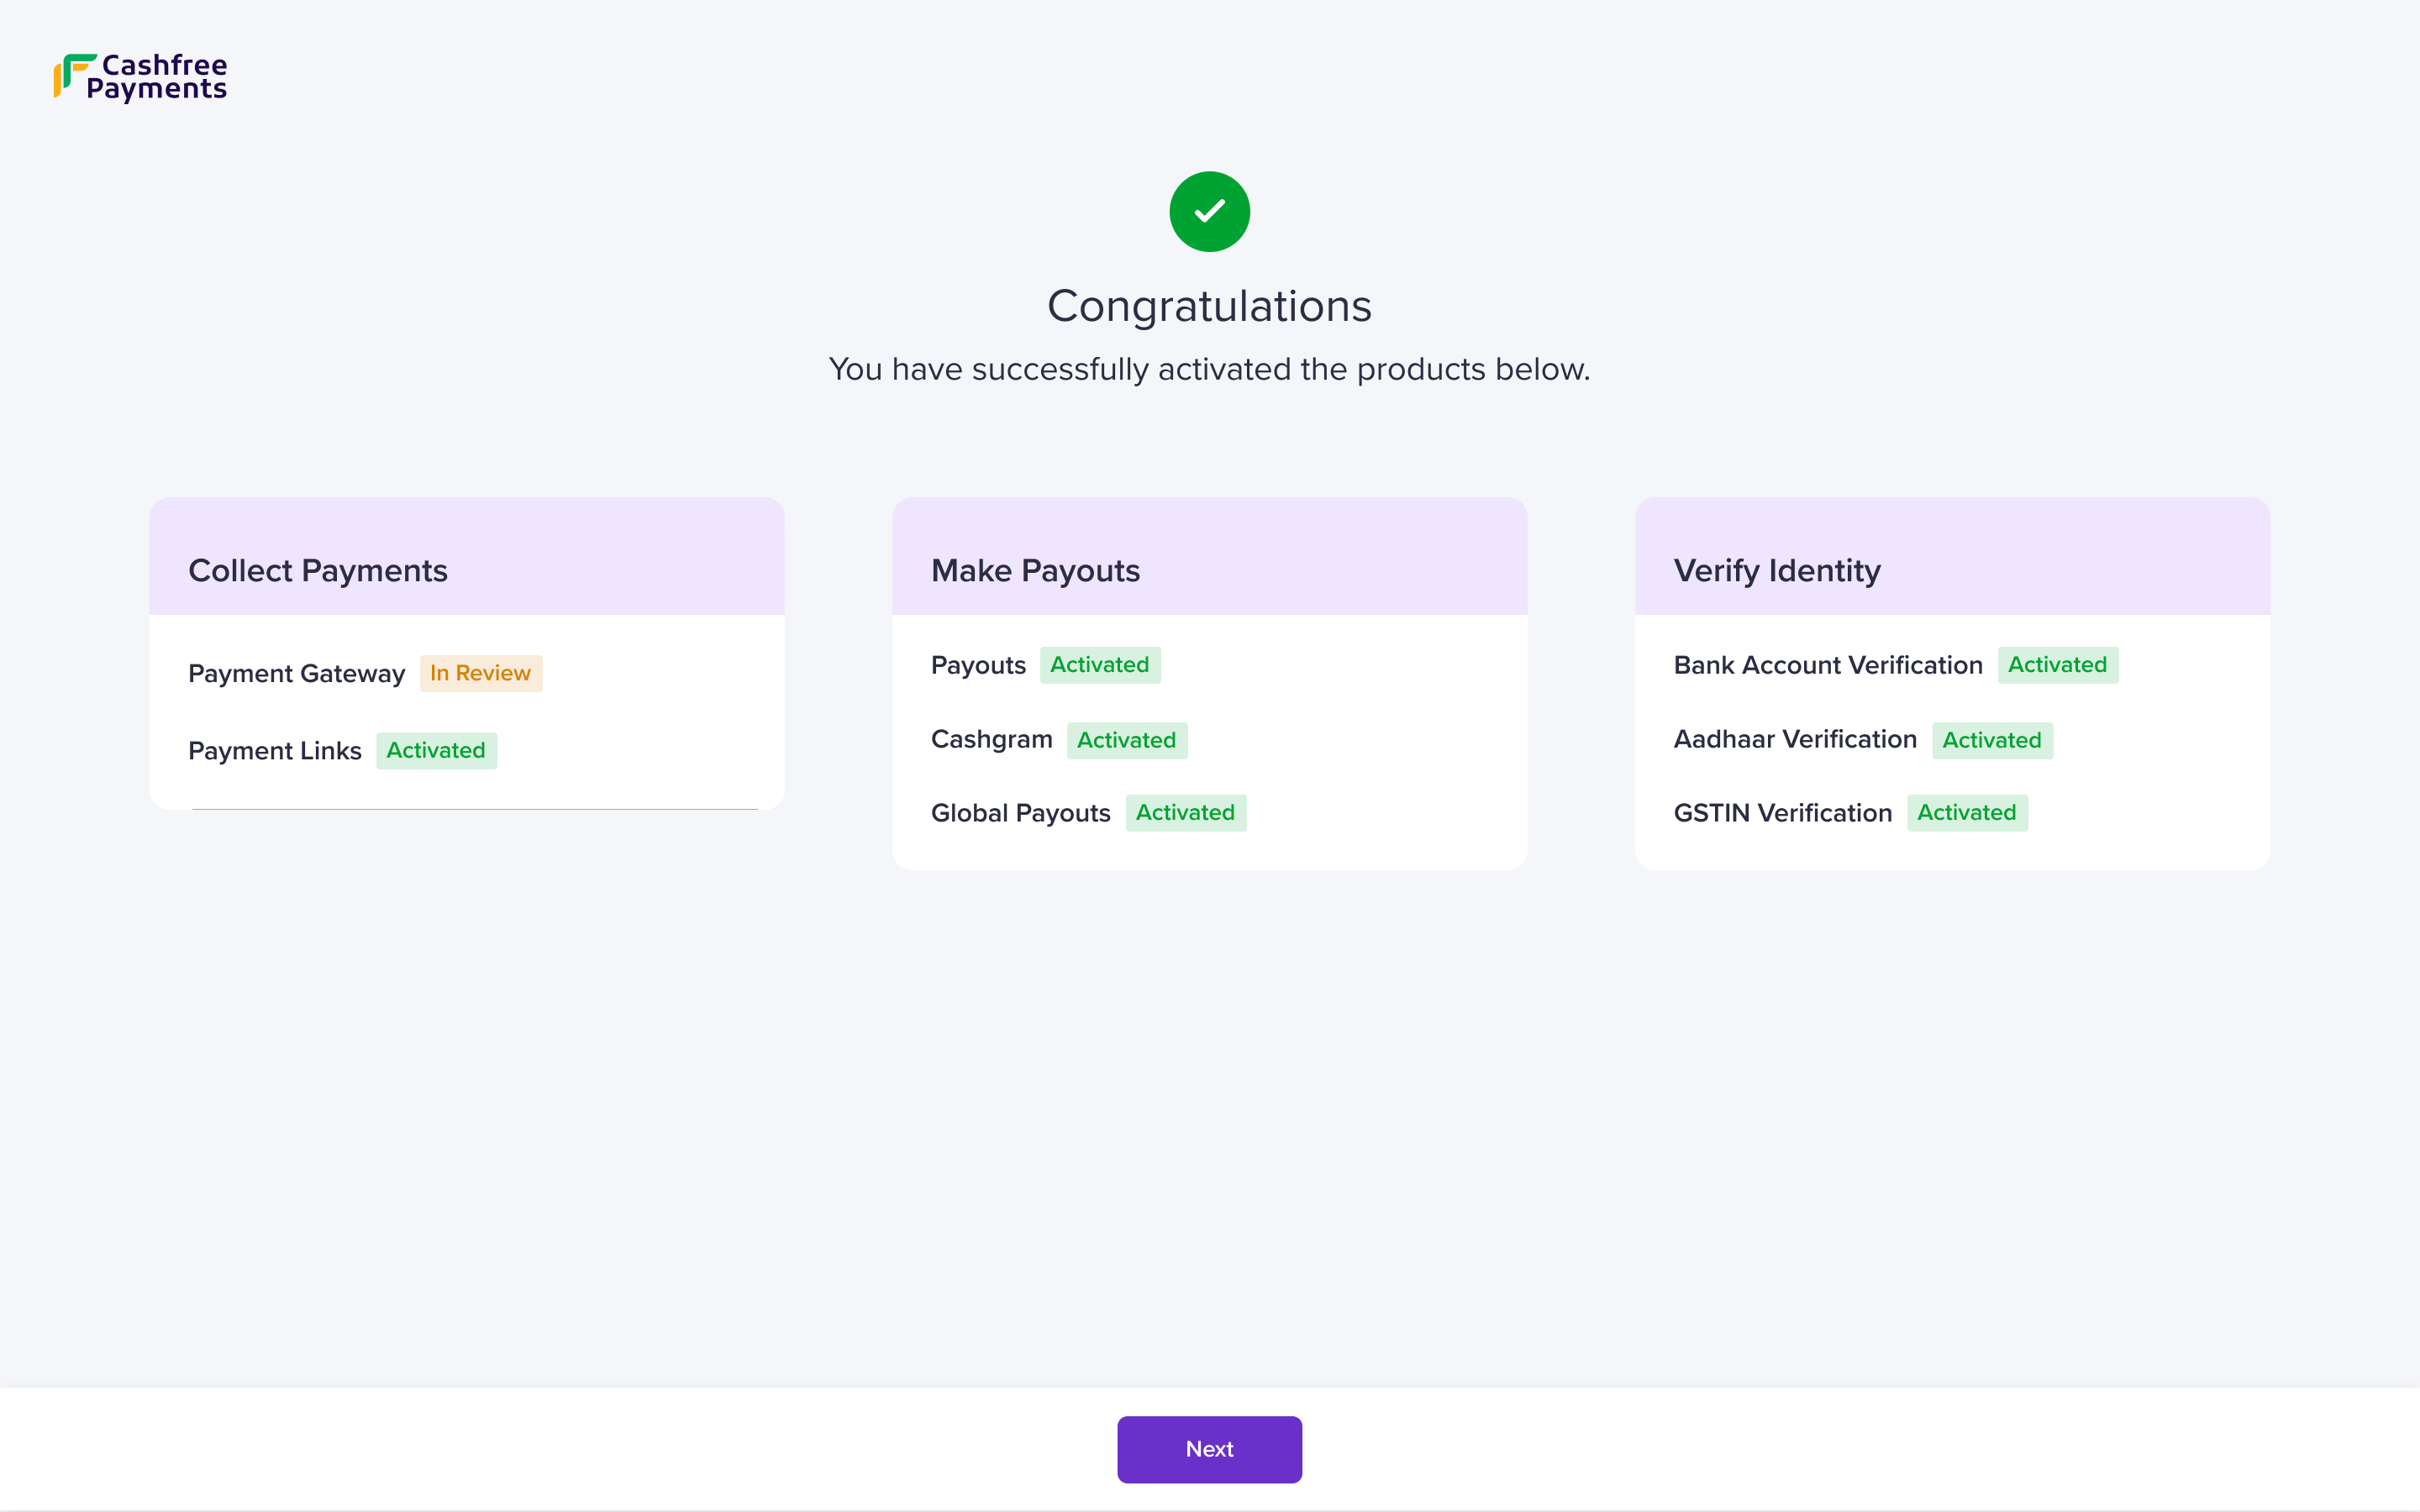
Congratulations
You can view the activated products on the Congratulations screen. You can transact up to ₹25,00,000. Click Next to sign the agreement and transact limit free.
Service Agreement
The agreement is between you and Cashfree Payments. Read the document carefully before signing it.
You can sign the agreement in two ways:
- Instant Agreement Signing
- Download Template and Upload
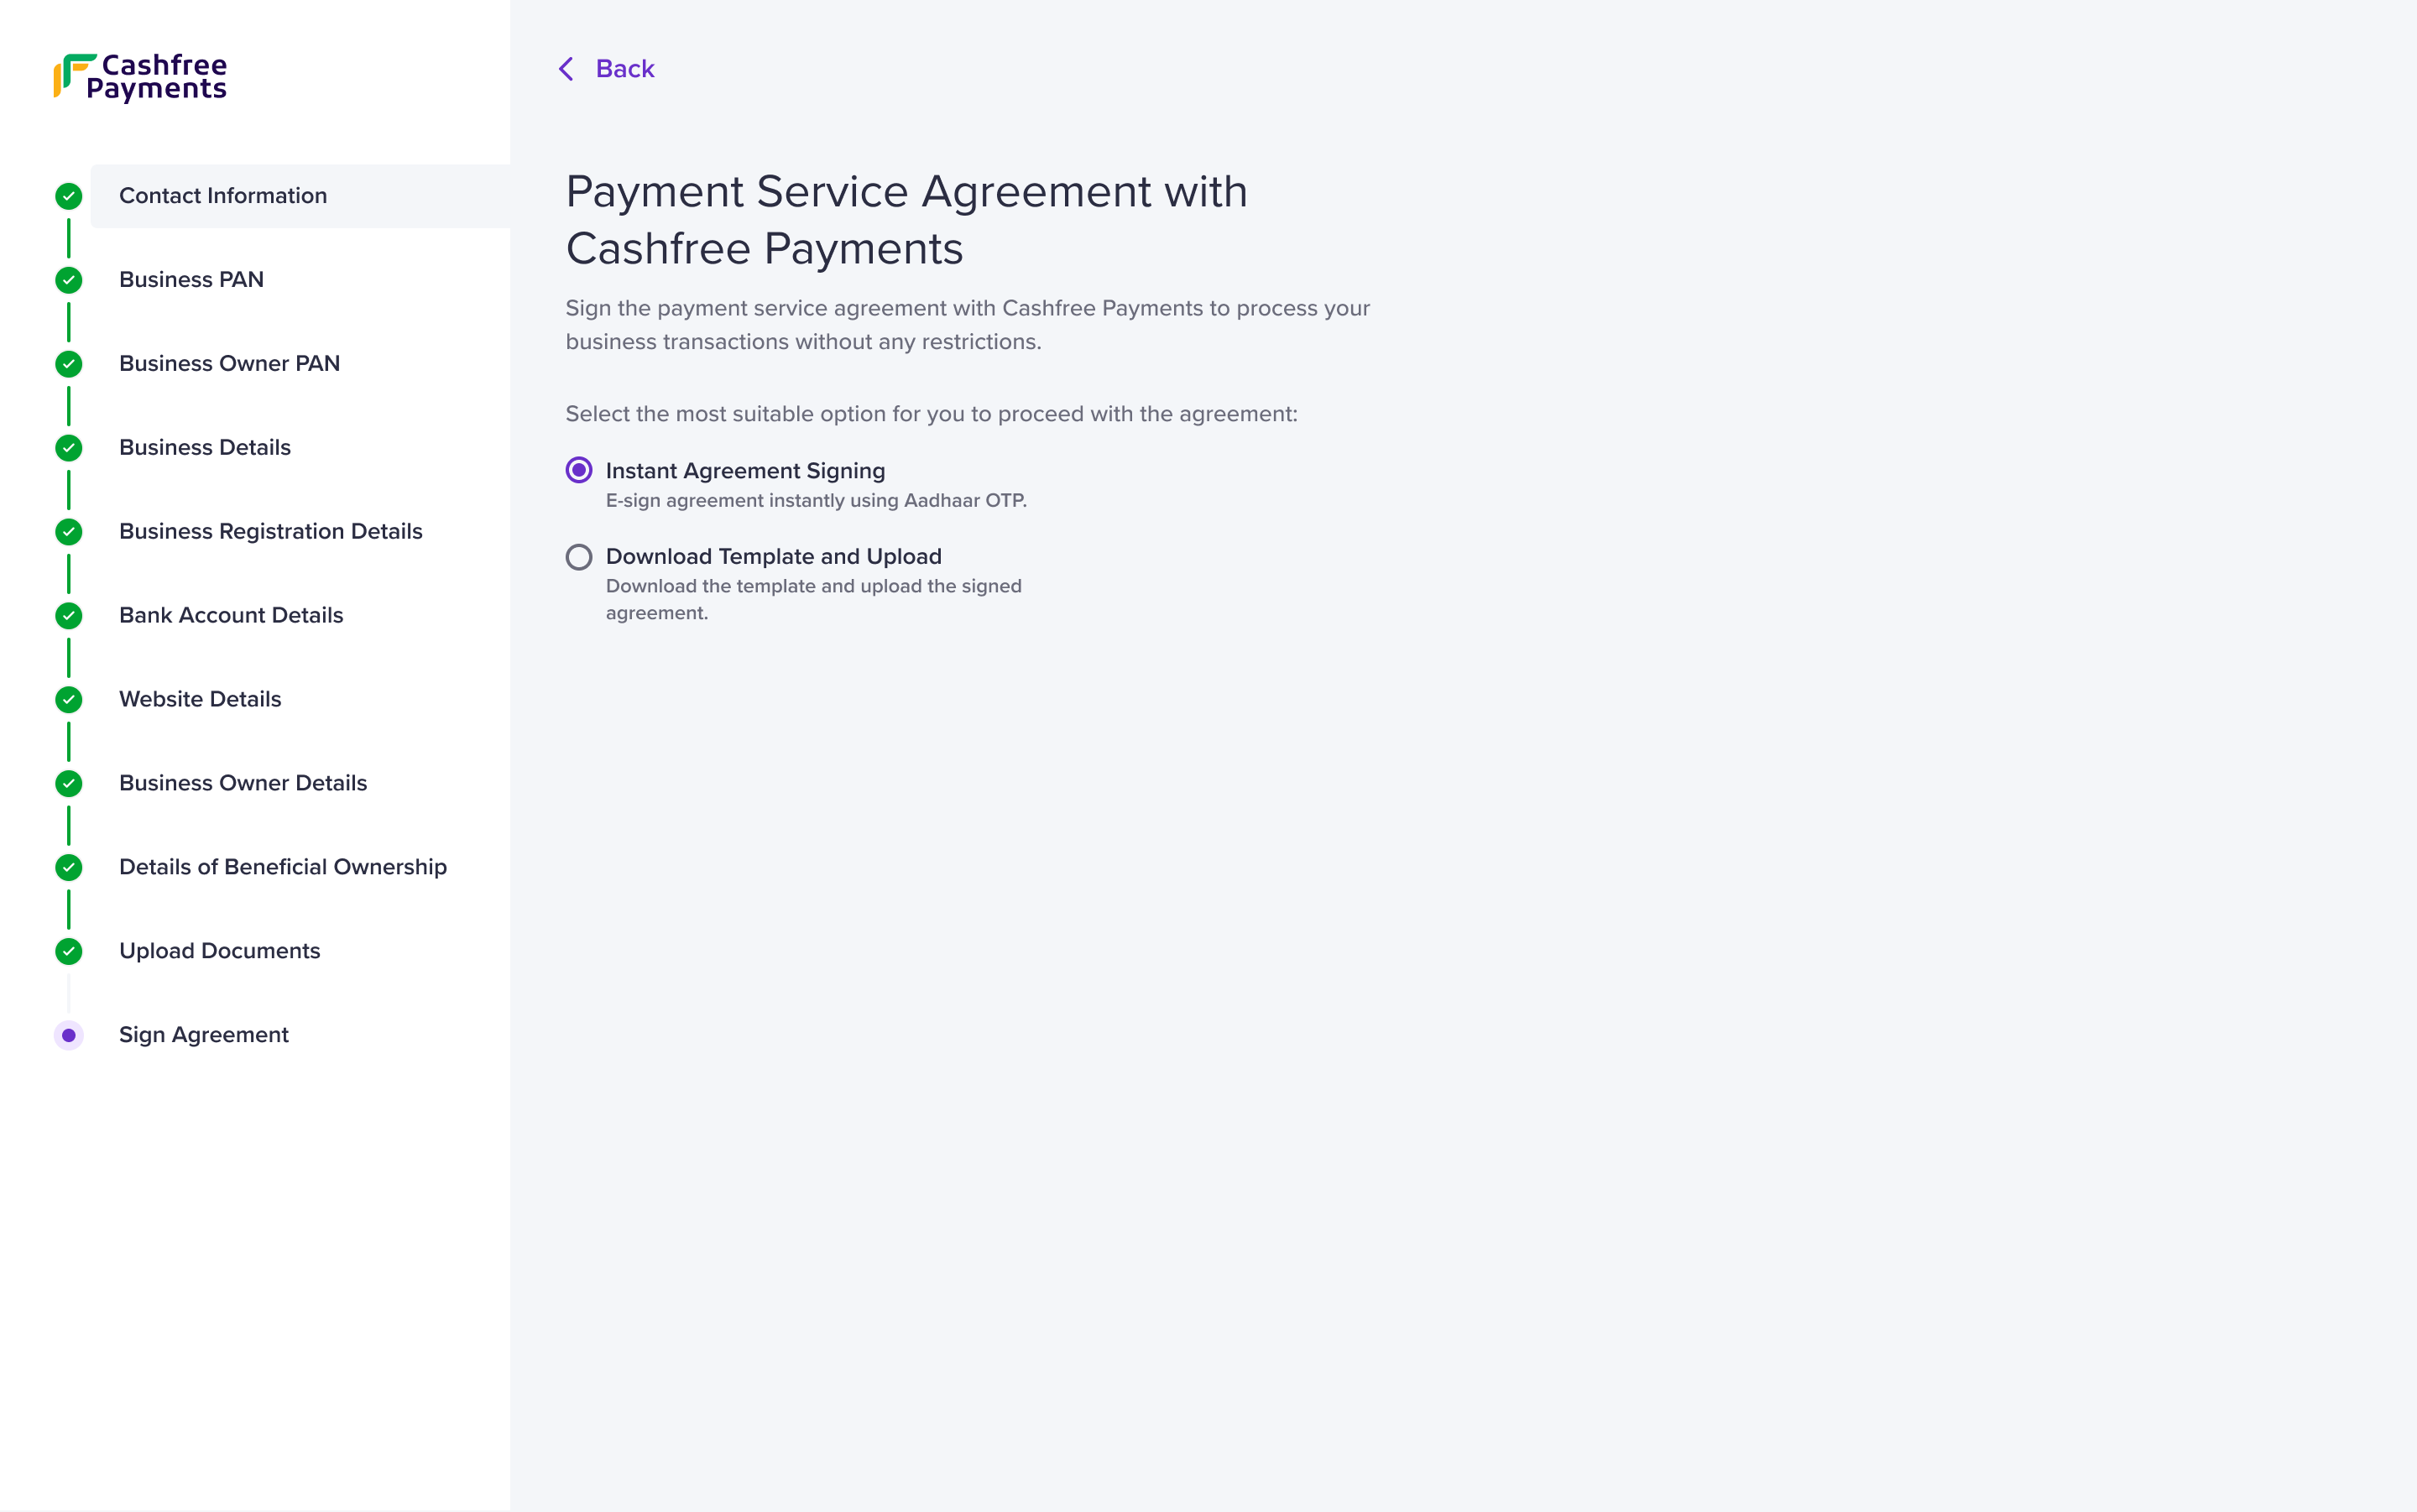
Payment Service Agreement with Cashfree Payments
Instant Agreement Signing
- Enter either of the following details:
- Email ID - Enter the email address of the business owner.
- Mobile Number - Enter the mobile number of the business owner.
- Click Send Agreement.
- The email ID or the mobile number receives the link to the agreement details. You can use Aadhaar OTP to instantly sign the agreement.
Download Template and Upload
- Click Generate and Download Agreement and sign the generated agreement.
- Upload the following files:
- Upload signed agreement - Use the Upload button to upload the signed agreement.
- Upload PAN card copy of the business owner - Use the Upload button to upload PAN of the business owner.
Our team reviews the uploaded agreement and updates the status in 24-48 hours.
Subscribe to Developer Updates
Updated 6 months ago