Initiate Refunds
Learn how to initiate refunds.
Easily initiate refunds from the Payment Gateway Dashboard when customers request for return of products. In some scenarios when you have a large number of refunds to be made, you can use the [Batch Refunds] feature to process the refunds in one go.
The Refunds tab lists all the refunds that are initiated for the date range selected. You can use the Search and Filter options to search for any particular refund or filter for refunds based on the statuses.
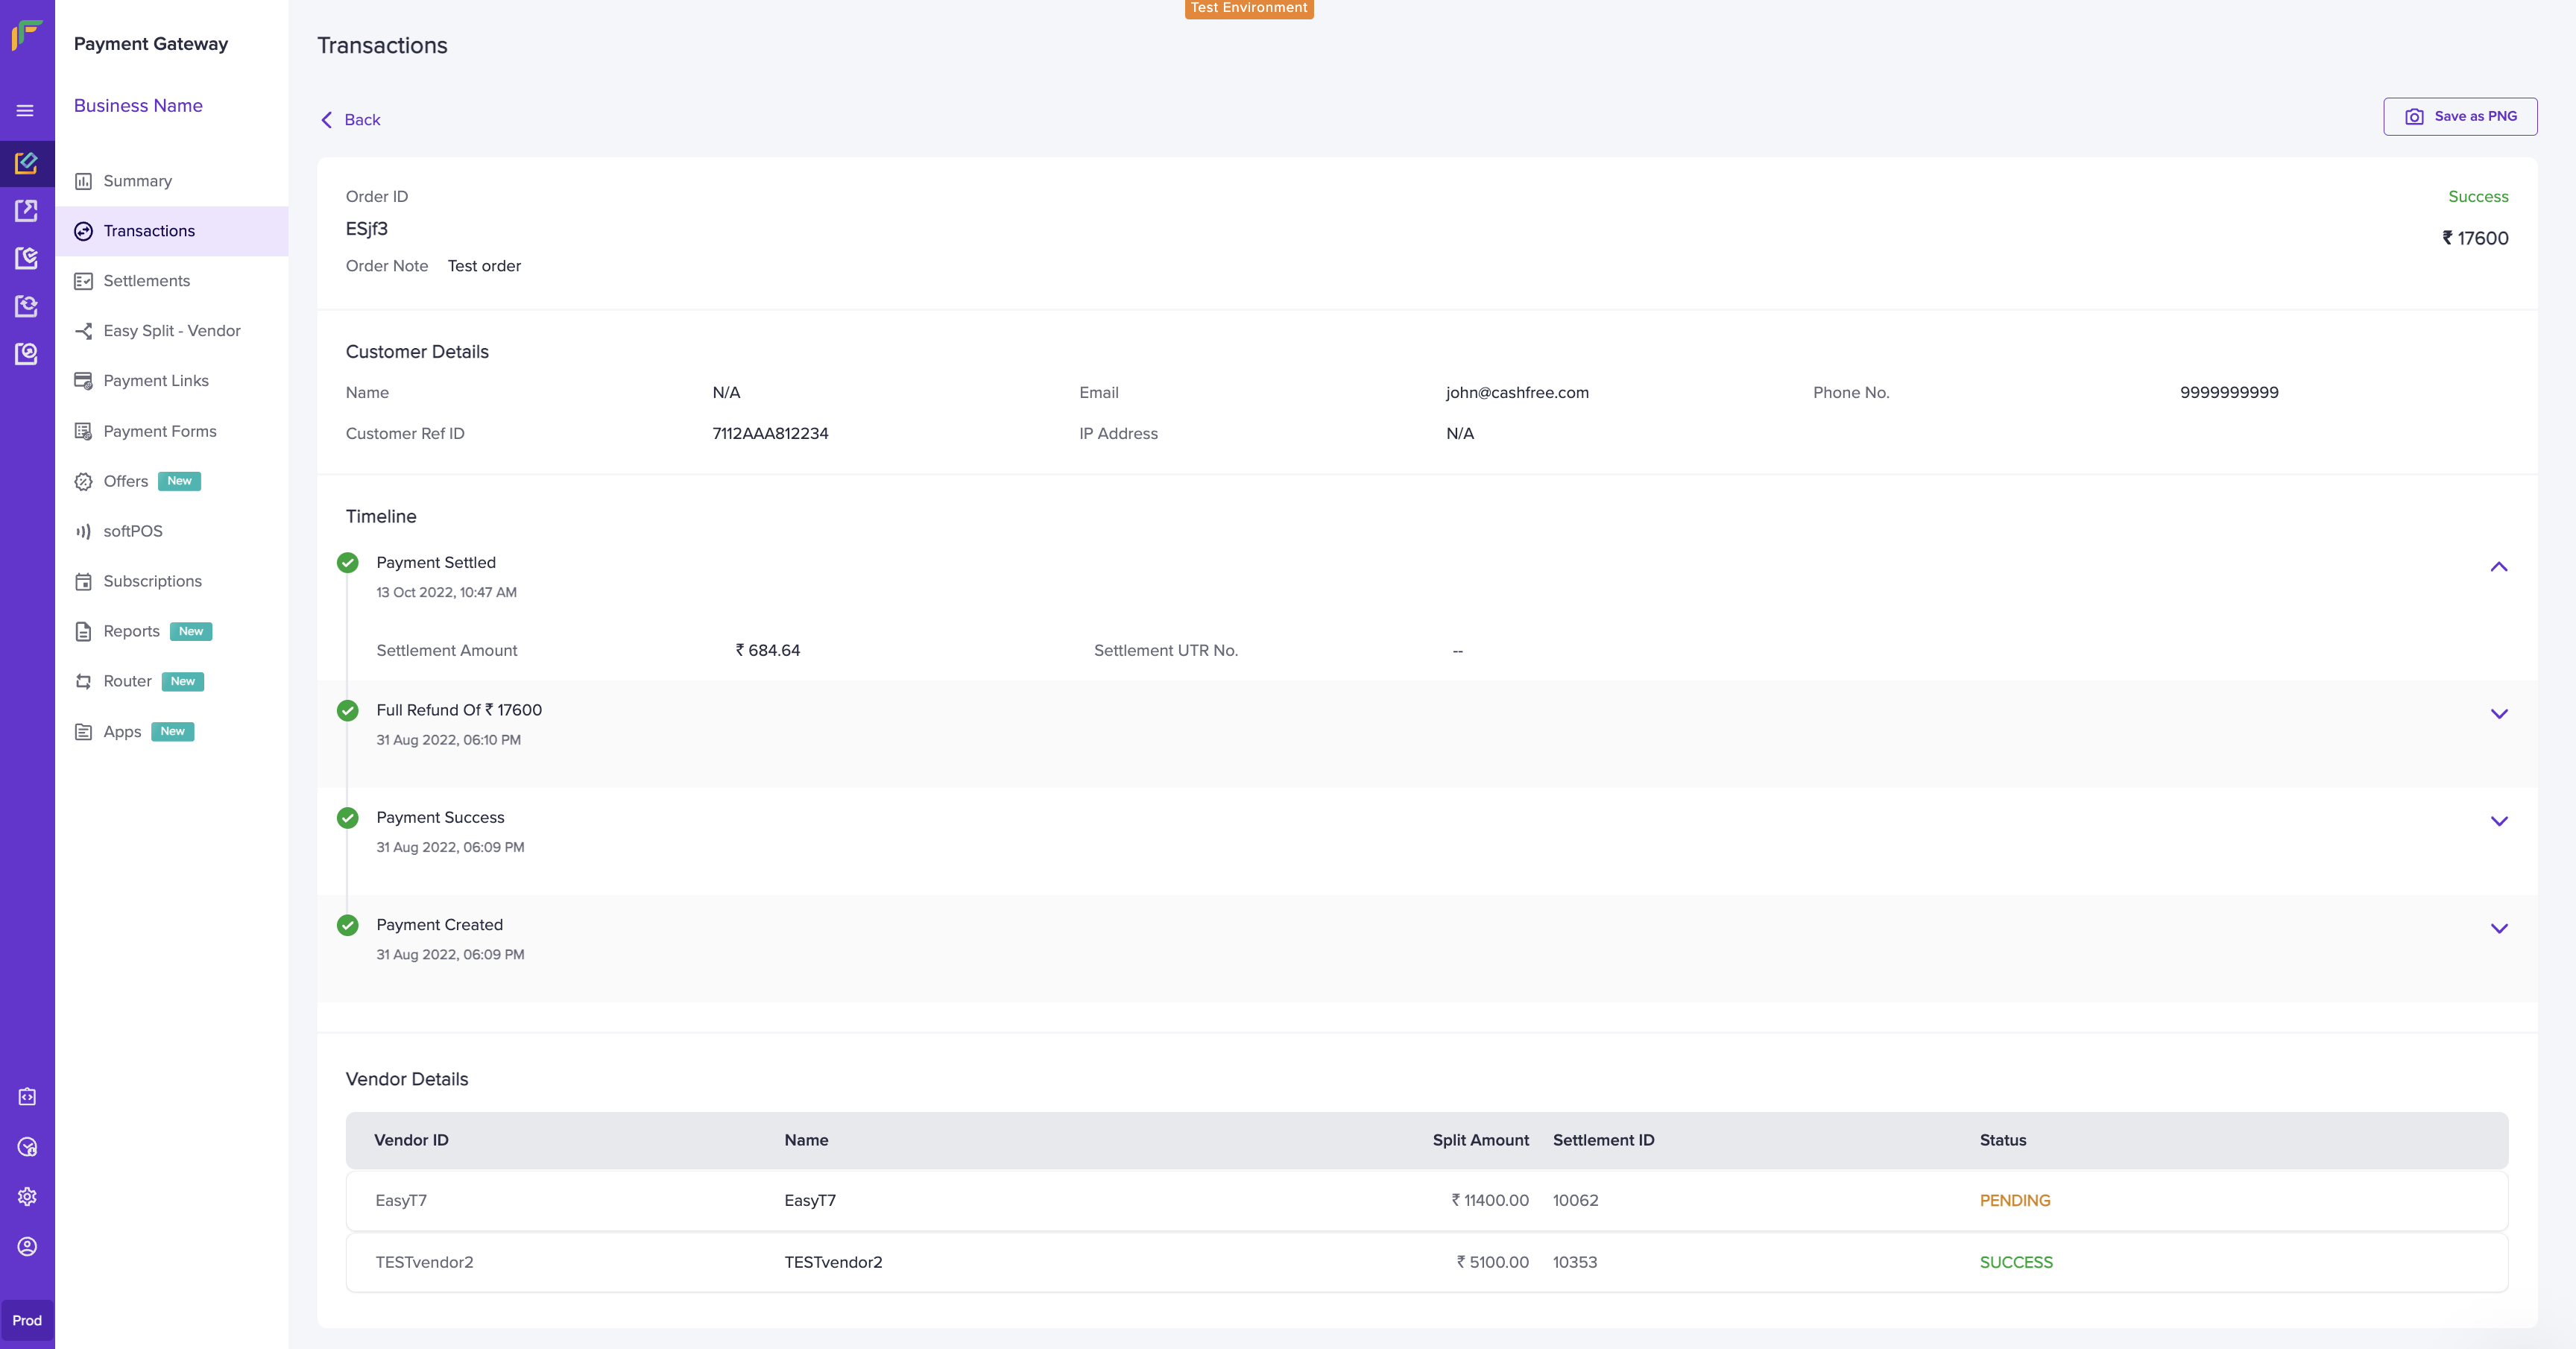
To view more details about the refund, click on a particular transaction where a refund has been initiated. The detailed screen appears as shown below:
To initiate a refund,
- Go to Payment Gateway Dashboard > Transactions > click Payments.
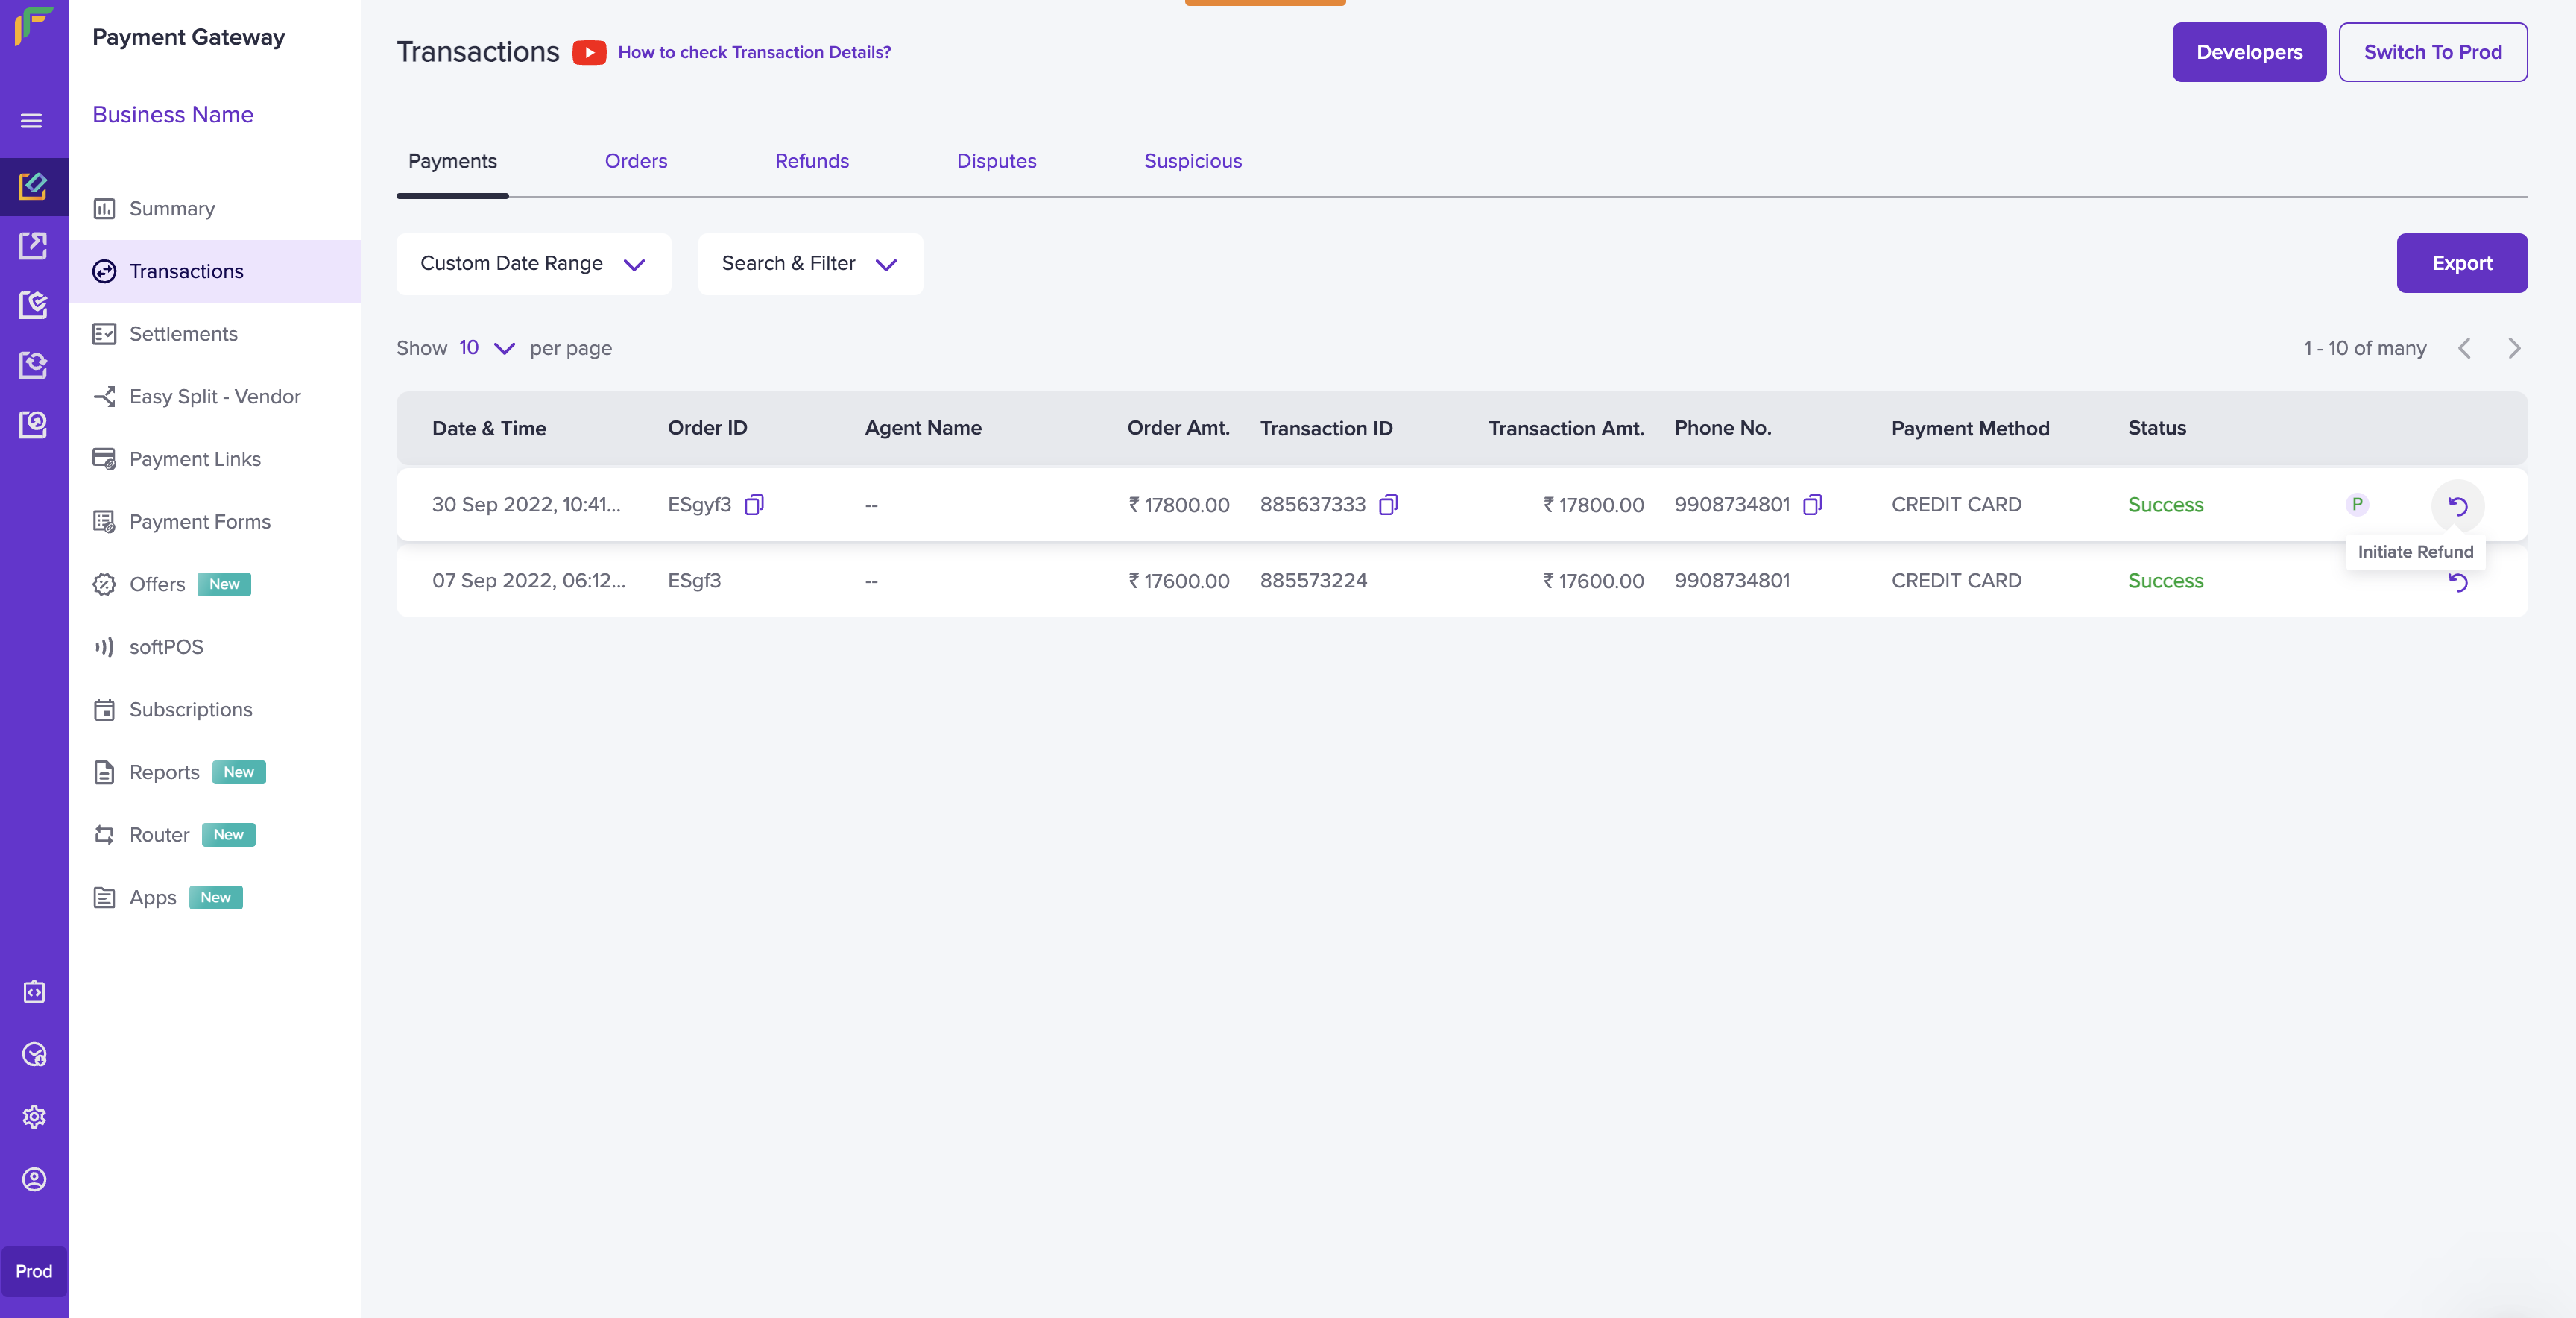
- Search for the transaction you want to refund and click the Initiate Refund option.

InitiateRefundHomePage
-
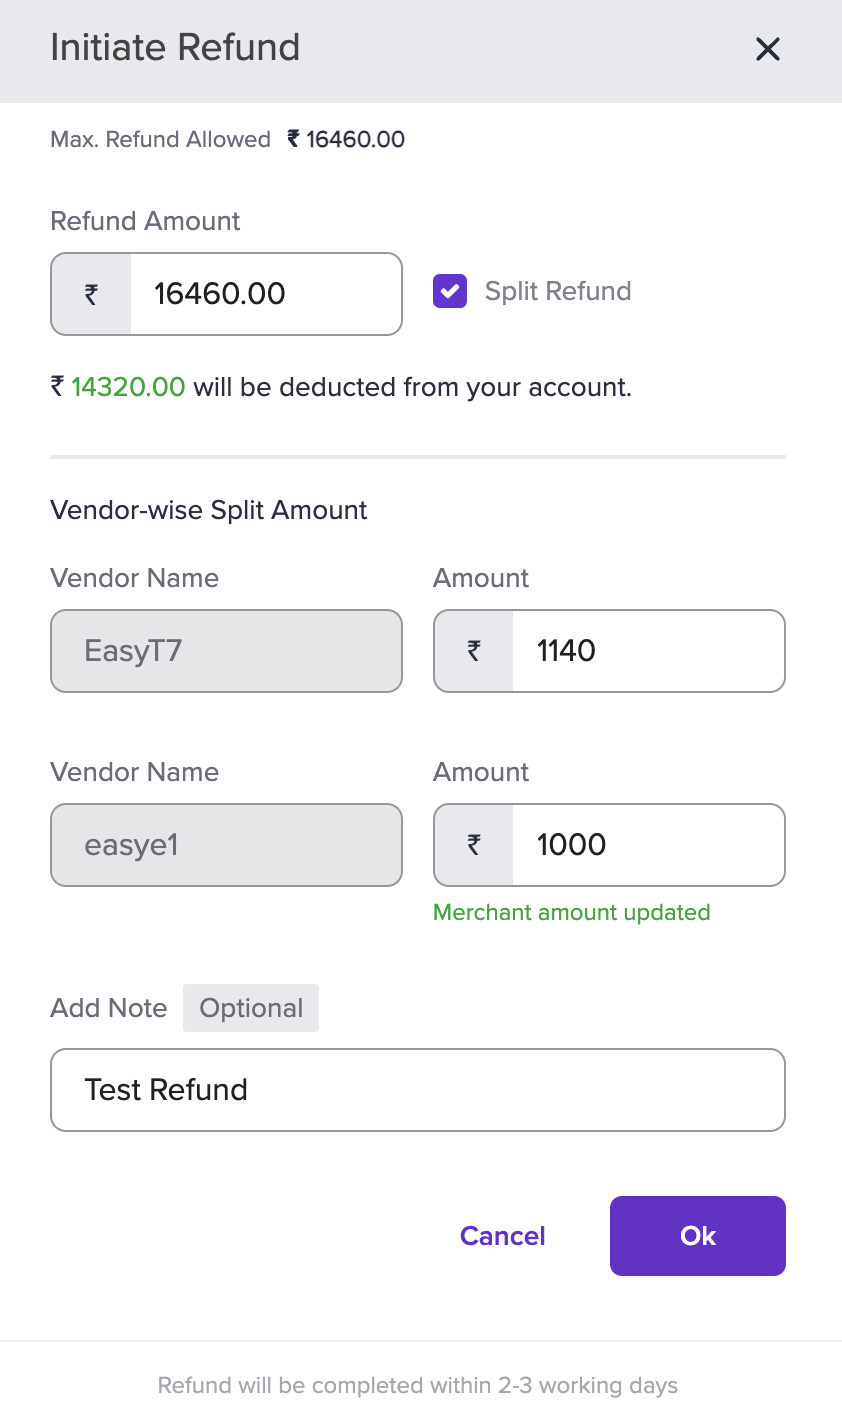
In the Initiate Refund screen, specify the Refund Amount. Ensure the Split Refund option is selected if it is a split refund.
Note: The split amount cannot exceed refund amount. -
Specify the refund amount for the respective vendors, and click OK to initiate a refund. If it a standard refund, refunds are processed within 2-3 working days. If it is an instant refunds, refunds are processed instantly to the customer account.
Note: You cannot debit a vendor marked as DELETED.

InitiateRefund
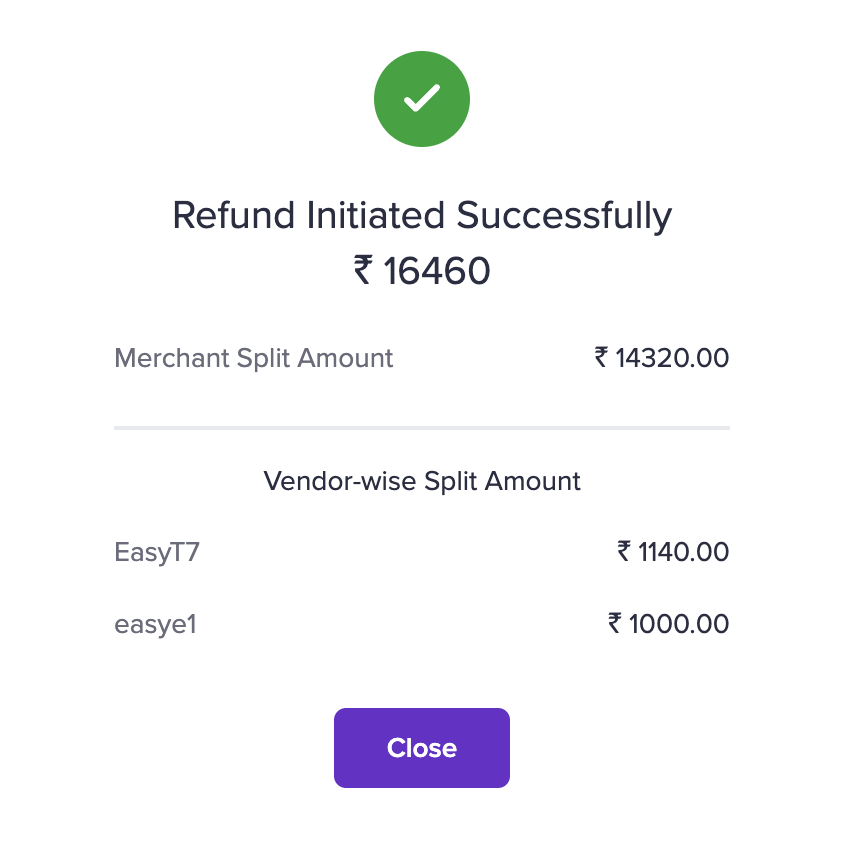
You will get a success message confirming the refund initiation.

InitiateRefundSuccess
View Vendor Split Information and Refund Status
To view vendor split information and the refund status,
Go to Payment Gateway Dashboard > Transactions > select the transaction you want to see the details for. A screen appears as shown below:

Refund Details Screen
Watch this video to learn how to initiate a refund through the merchant dashboard
Subscribe to Developer Updates
Updated 5 months ago