UPI
In this article, we will learn how to verify UPI ID of any beneficiary using UPI ID Verification API or dashboard.
UPI ID Verification helps to ensure that the UPI VPA is valid or not and checks the name of the UPI ID holder as per the bank records. In order to transfer money through UPI (Unified Payments Interface), it is important to ensure that the UPI ID of the beneficiary is correct and valid. This is where UPI ID verification comes into play. By verifying the UPI ID of the beneficiary, you can increase the success rate of the money transfer and ensure that the money is transferred to the intended recipient.
You can use the UPI ID Verification API or dashboard to confirm whether the entered UPI VPA is valid or invalid, the tool helps to prevent errors and reduce the risk of money being transferred to the wrong person.
Verify UPI VPA for Free!
You can verify UPI ID of your beneficiary for free using UPI ID Verification API or Dashboard using the Free Trial Credits. With this limited-time offer, experience and test the feature without paying any verification charges
A banner displays the offer for you on the Verification Suite - UPI VPA page (Verification Suite Dashboard > Verification Suite - UPI VPA). Click Claim Free Credits and instantly redeem the credits to your account.
Verify UPI VPA
To verify the beneficiary UPI details, you can integrate with UPI ID Verification API or use the dashboard. Here is how you can verify UPI ID using Dashboard
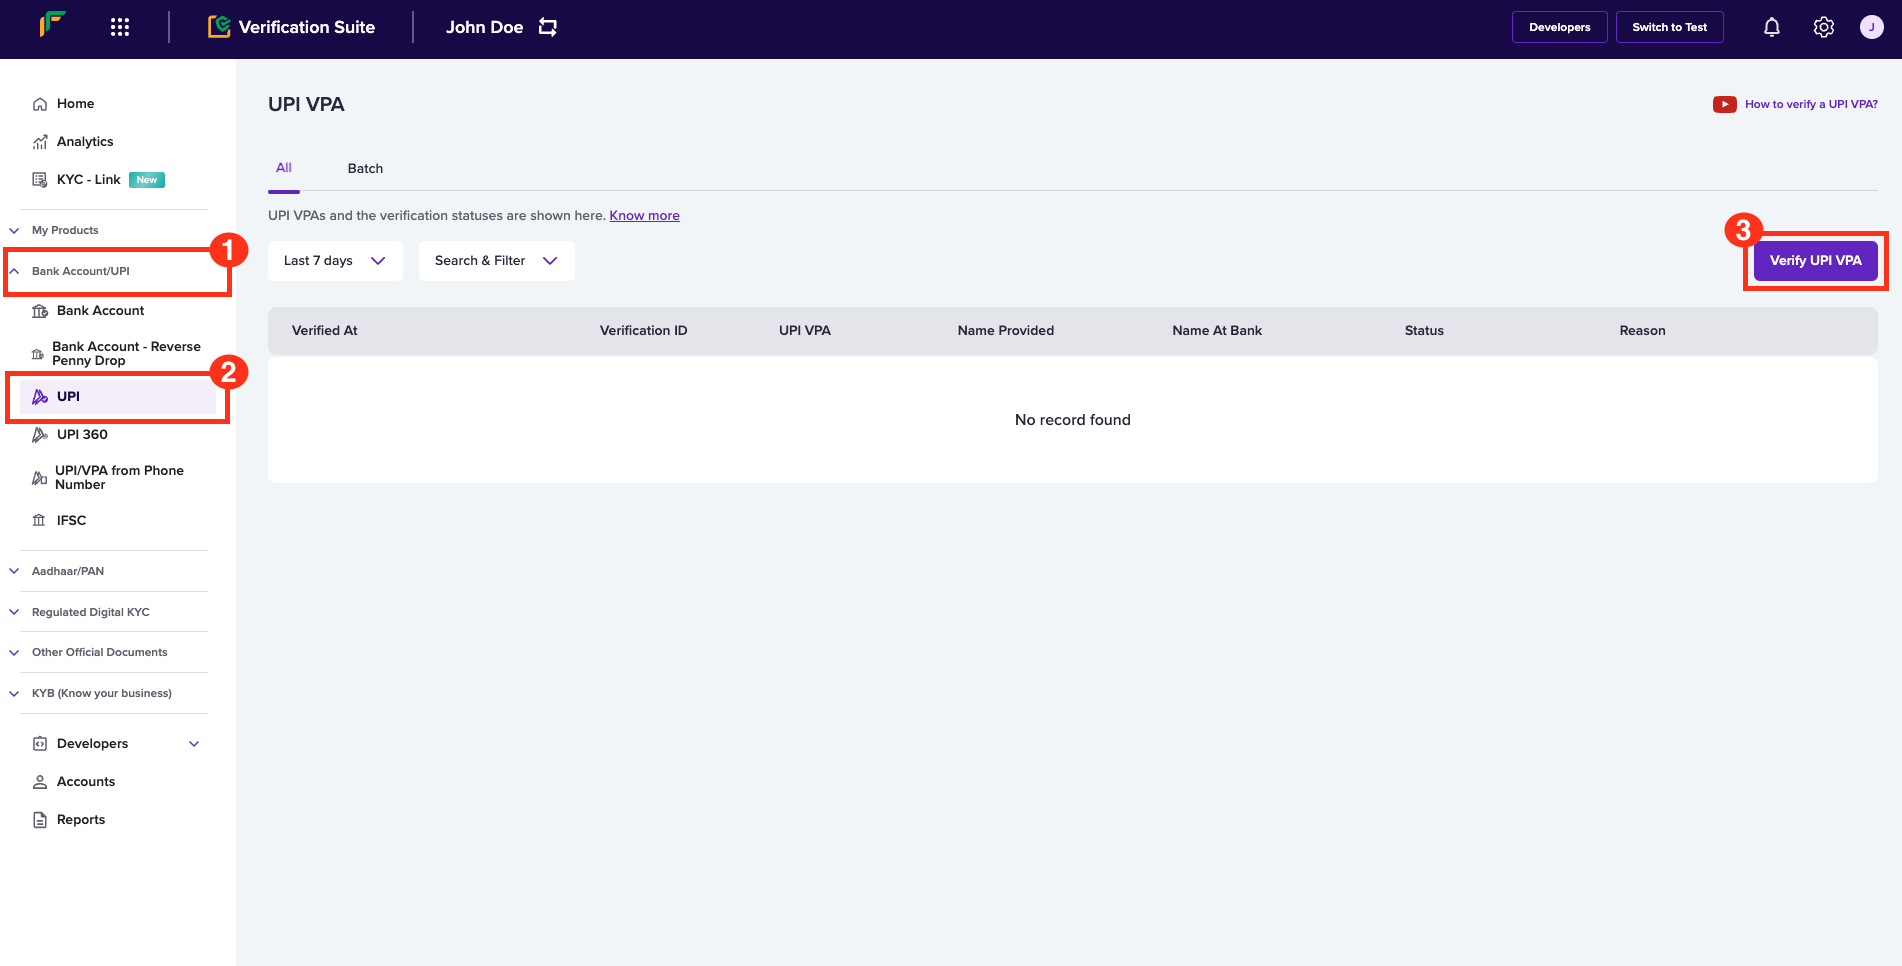
Verify UPI VPA
- Go to Verification Suite Dashboard > Bank Account/UPI > UPI > Verify UPI VPA.
- In the Verify UPI VPA popup, enter the following information:
- VPA - Enter the UPI VPA detail in this field.
- Account Holder Name - Enter the name of the account holder. This is an optional field. When the verification is complete, the account holder's name is displayed as registered in the bank, even unentered.
- Click Verify. A success message displays if the details exist.
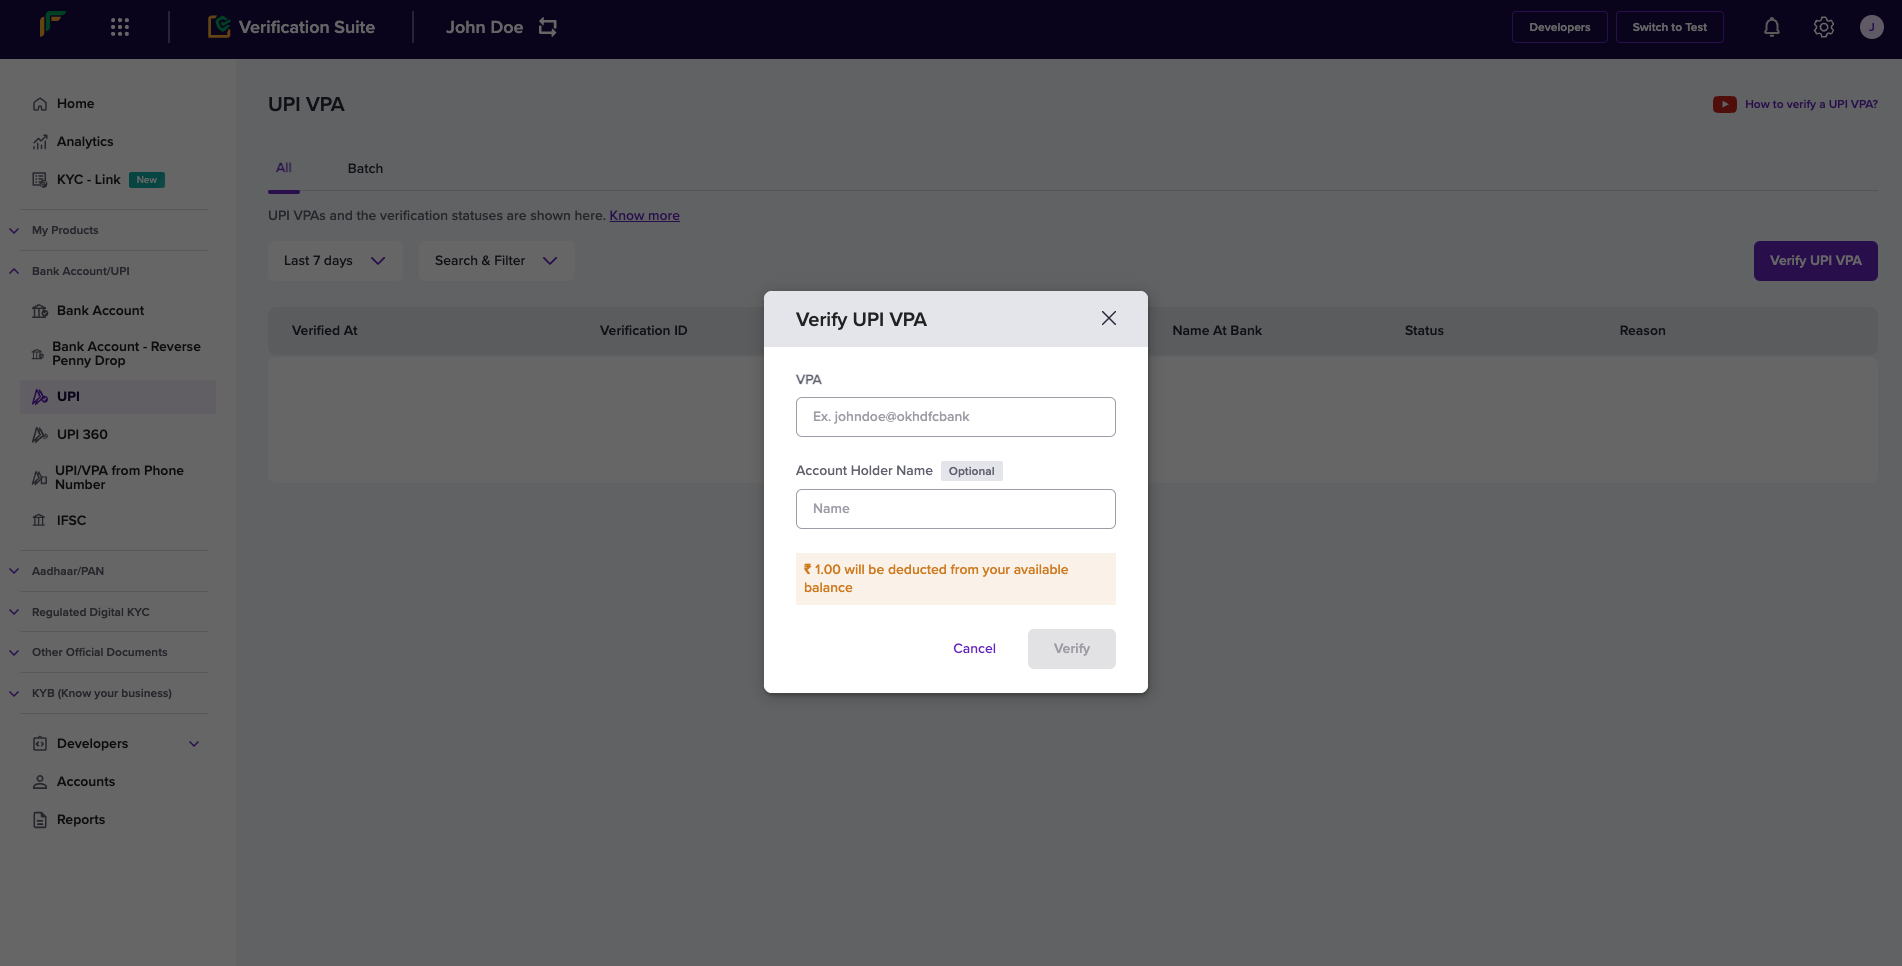
Verify UPI VPA popup
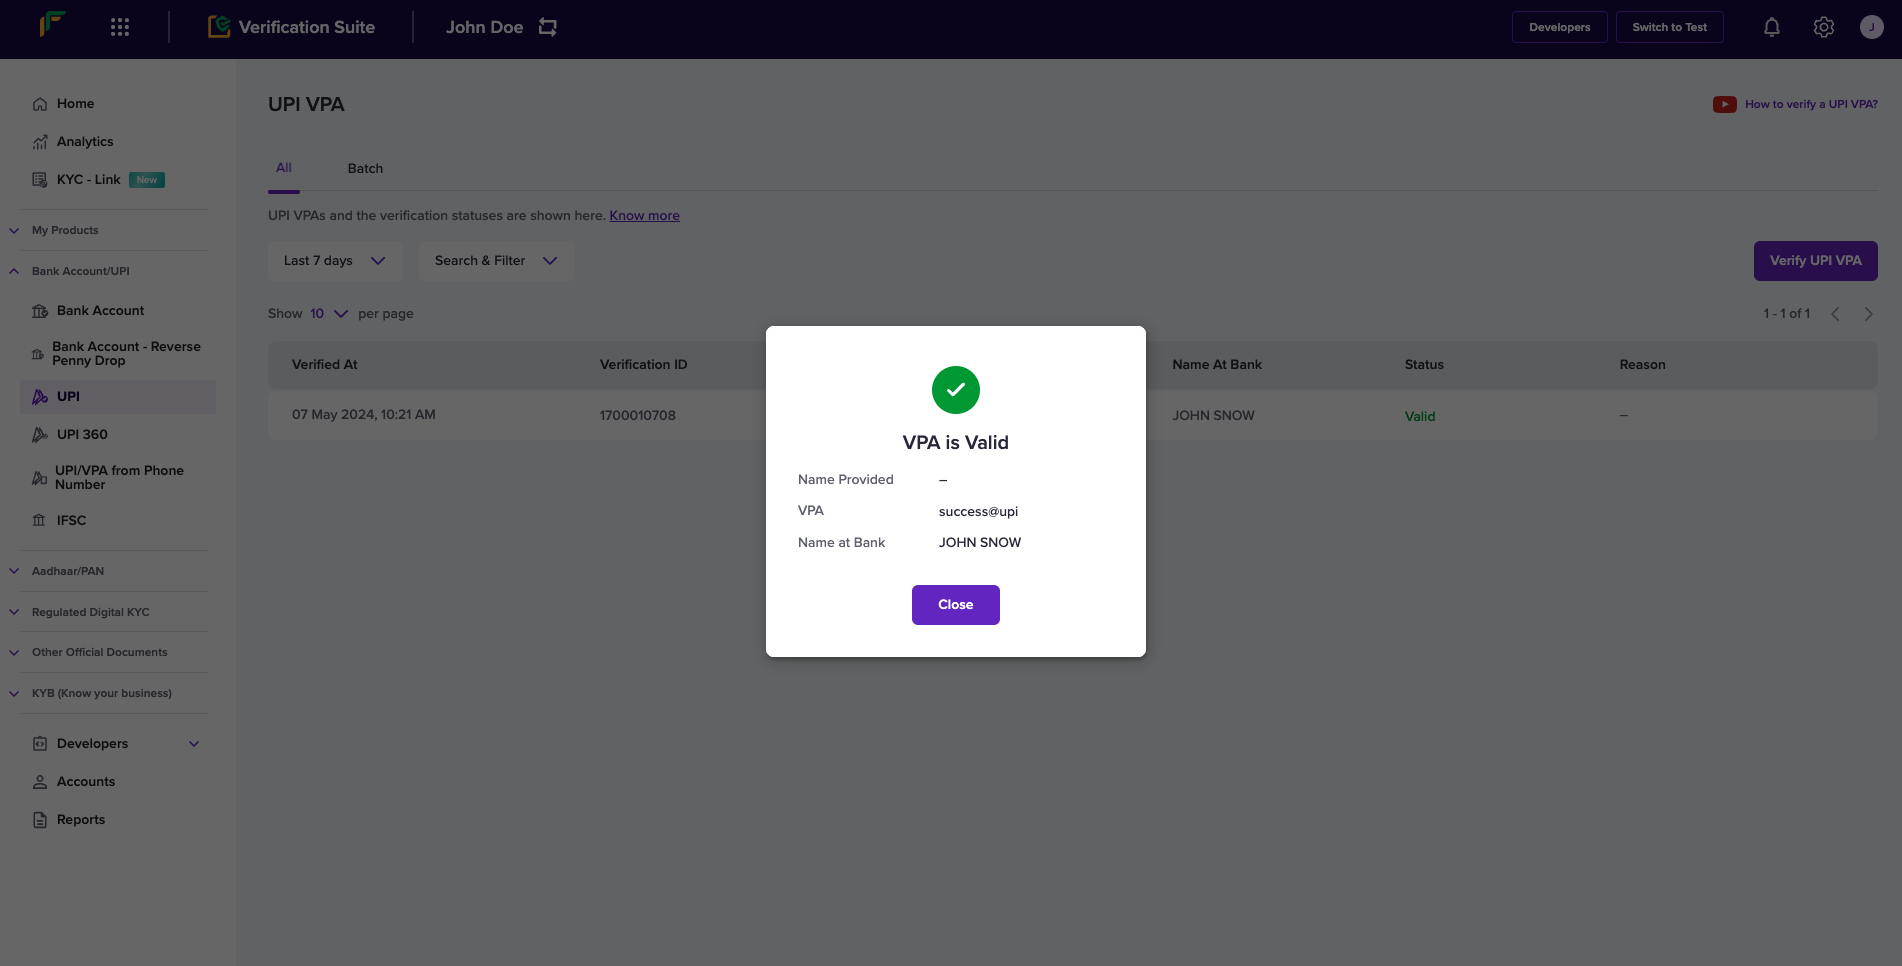
Verification Success
All the UPI VPA details you verify are available for your reference in the Verification Suite - UPI VPA screen. Use the available options to search and filter for specific details:
- Last 7 days - Select a date range from the drop-down menu. Determine the date range if you choose Custom Date Range and click Apply.
- Search & Filter - Use this drop-down menu to set the search filter.
- Search - Use this drop-down menu to determine the search value and enter the value in the field. For example, if you choose Instrument ID, enter the specific instrument ID in the field.
- Filters - Use the checkboxes to filter based on the available statuses.
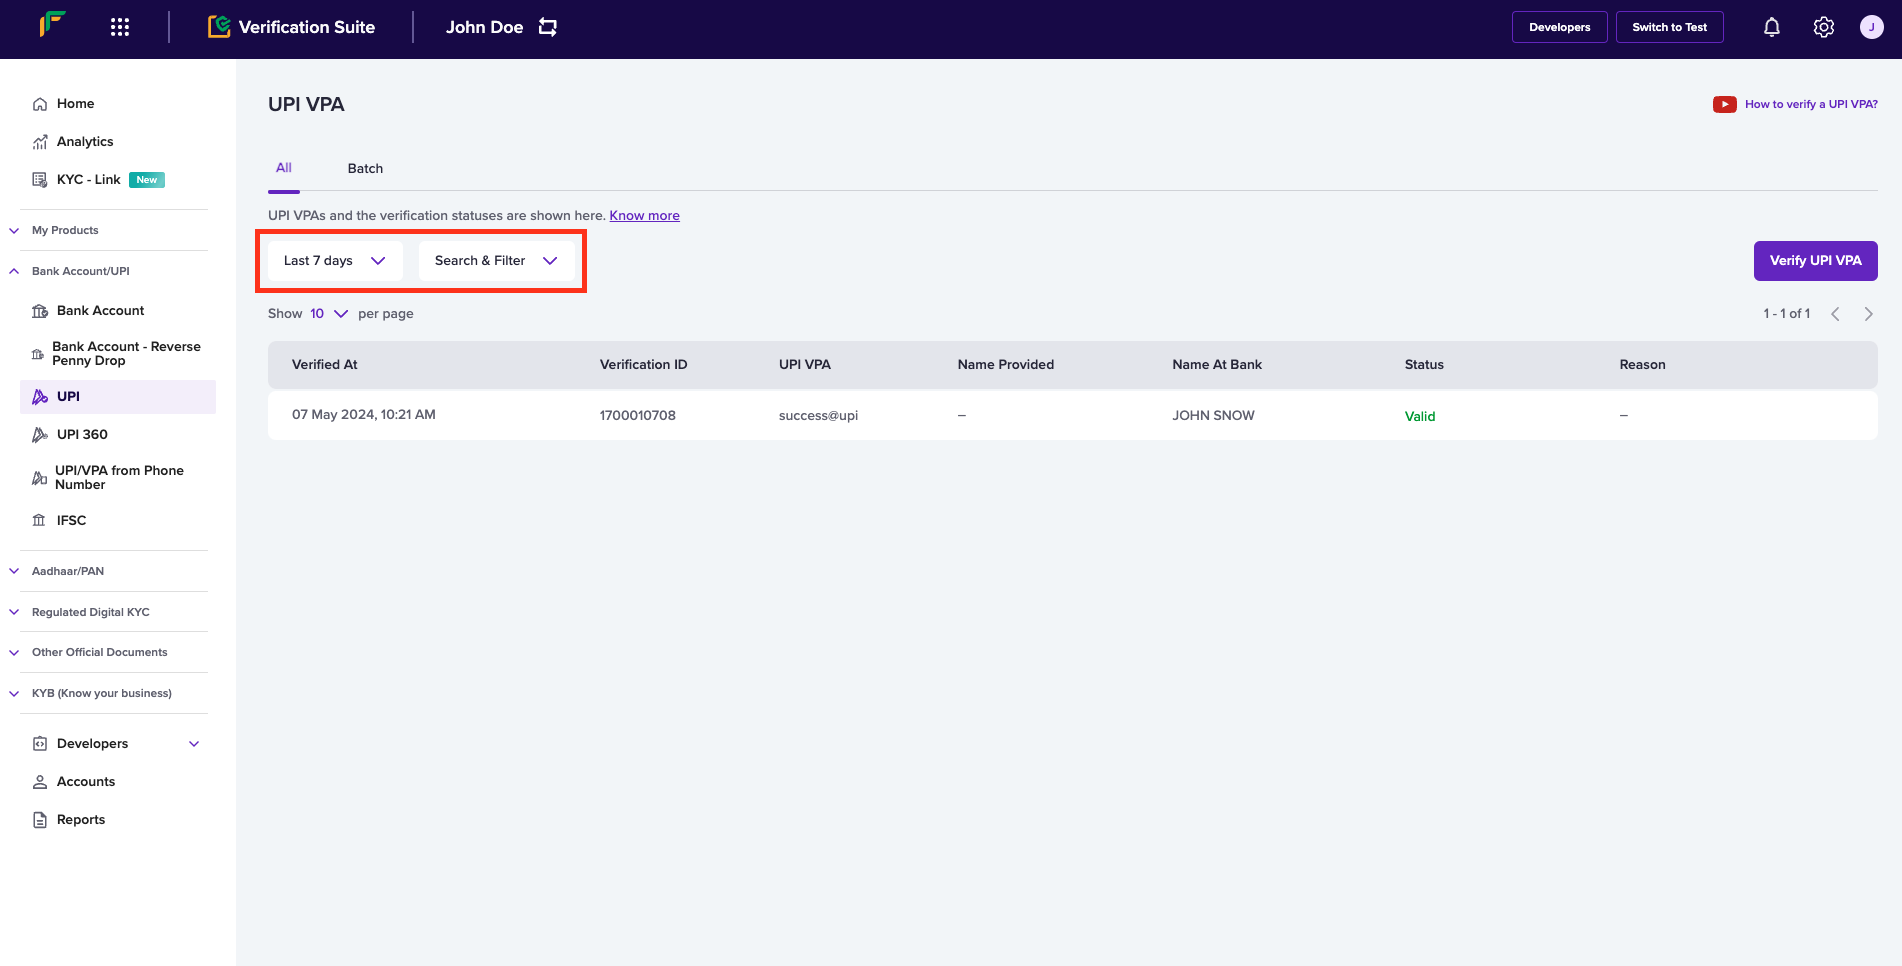
Search & Filter
You can use our API to verify UPI details.
Verify UPI VPA in Batch
To verify UPI VPA information in bulk, follow the instructions below:
- Go to Verification Suite Dashboard > UPI > and click VPA.
- Click the Batch tab.
- Click the Download sample file button to download the sample format for batch UPI VPA upload in .csv or .xls formats.
- Use the sample file to fill in the information in bulk and click Upload File to upload.
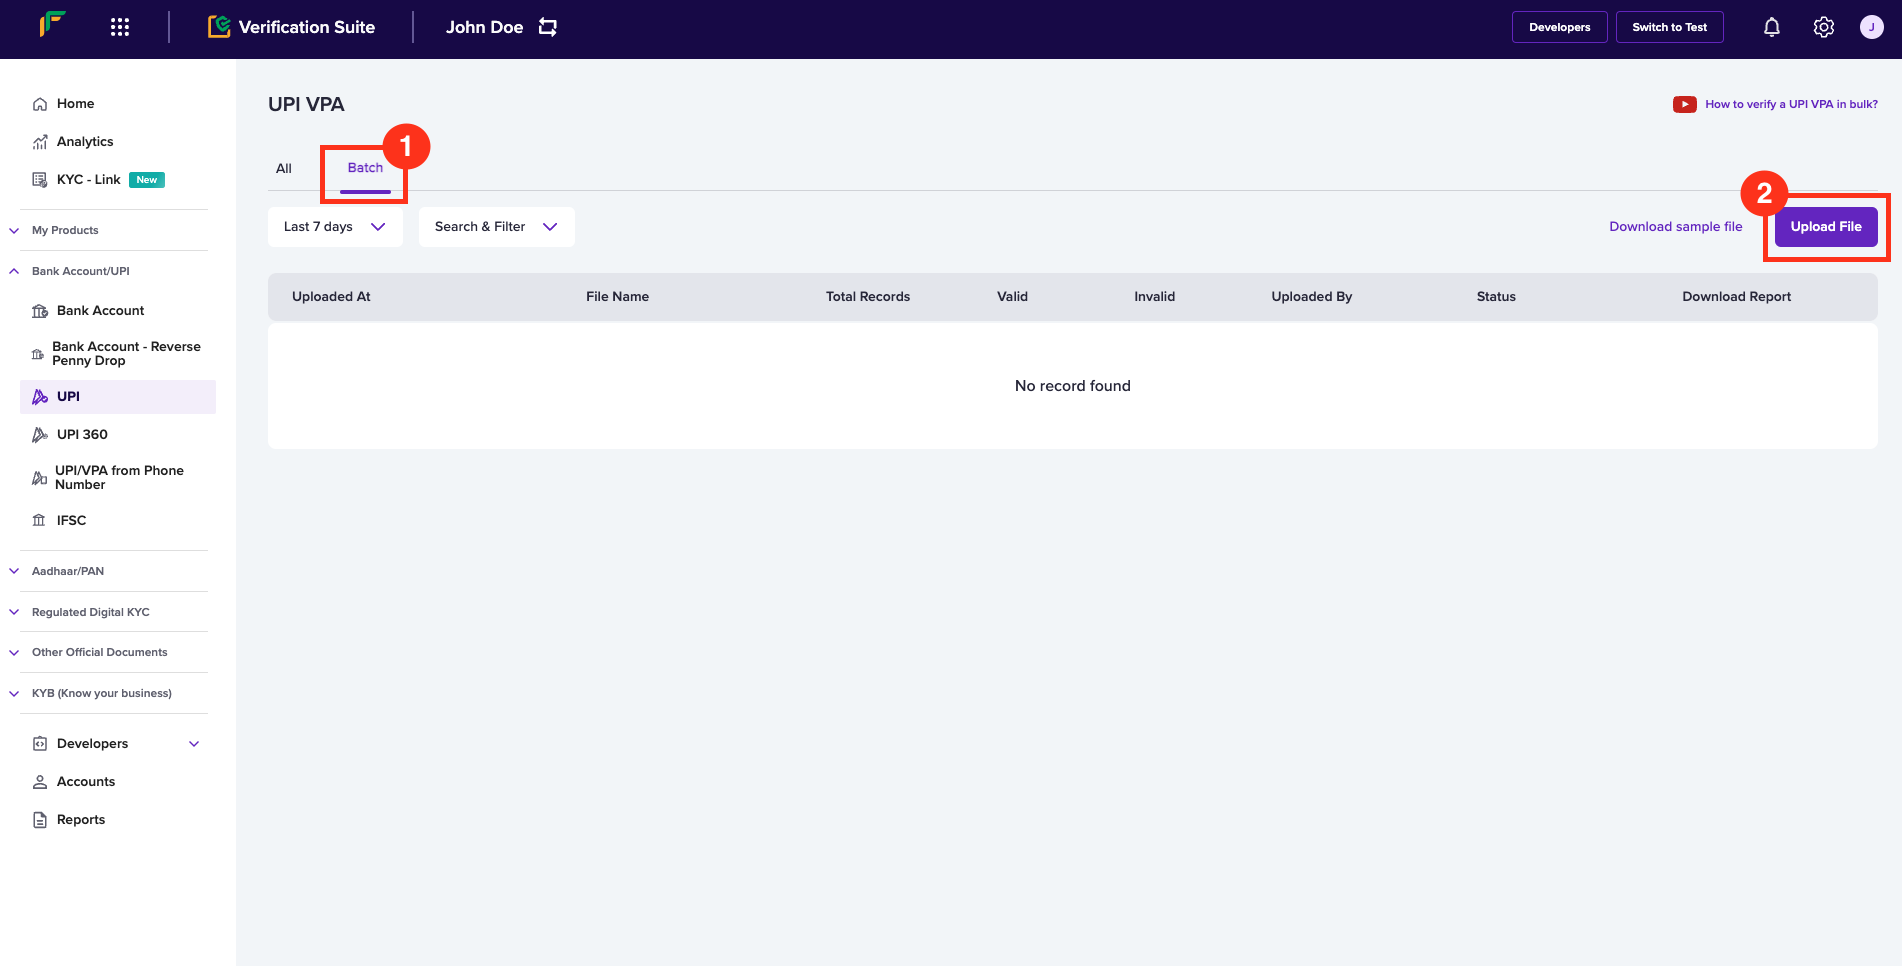
Verify UPI VPA in Batch
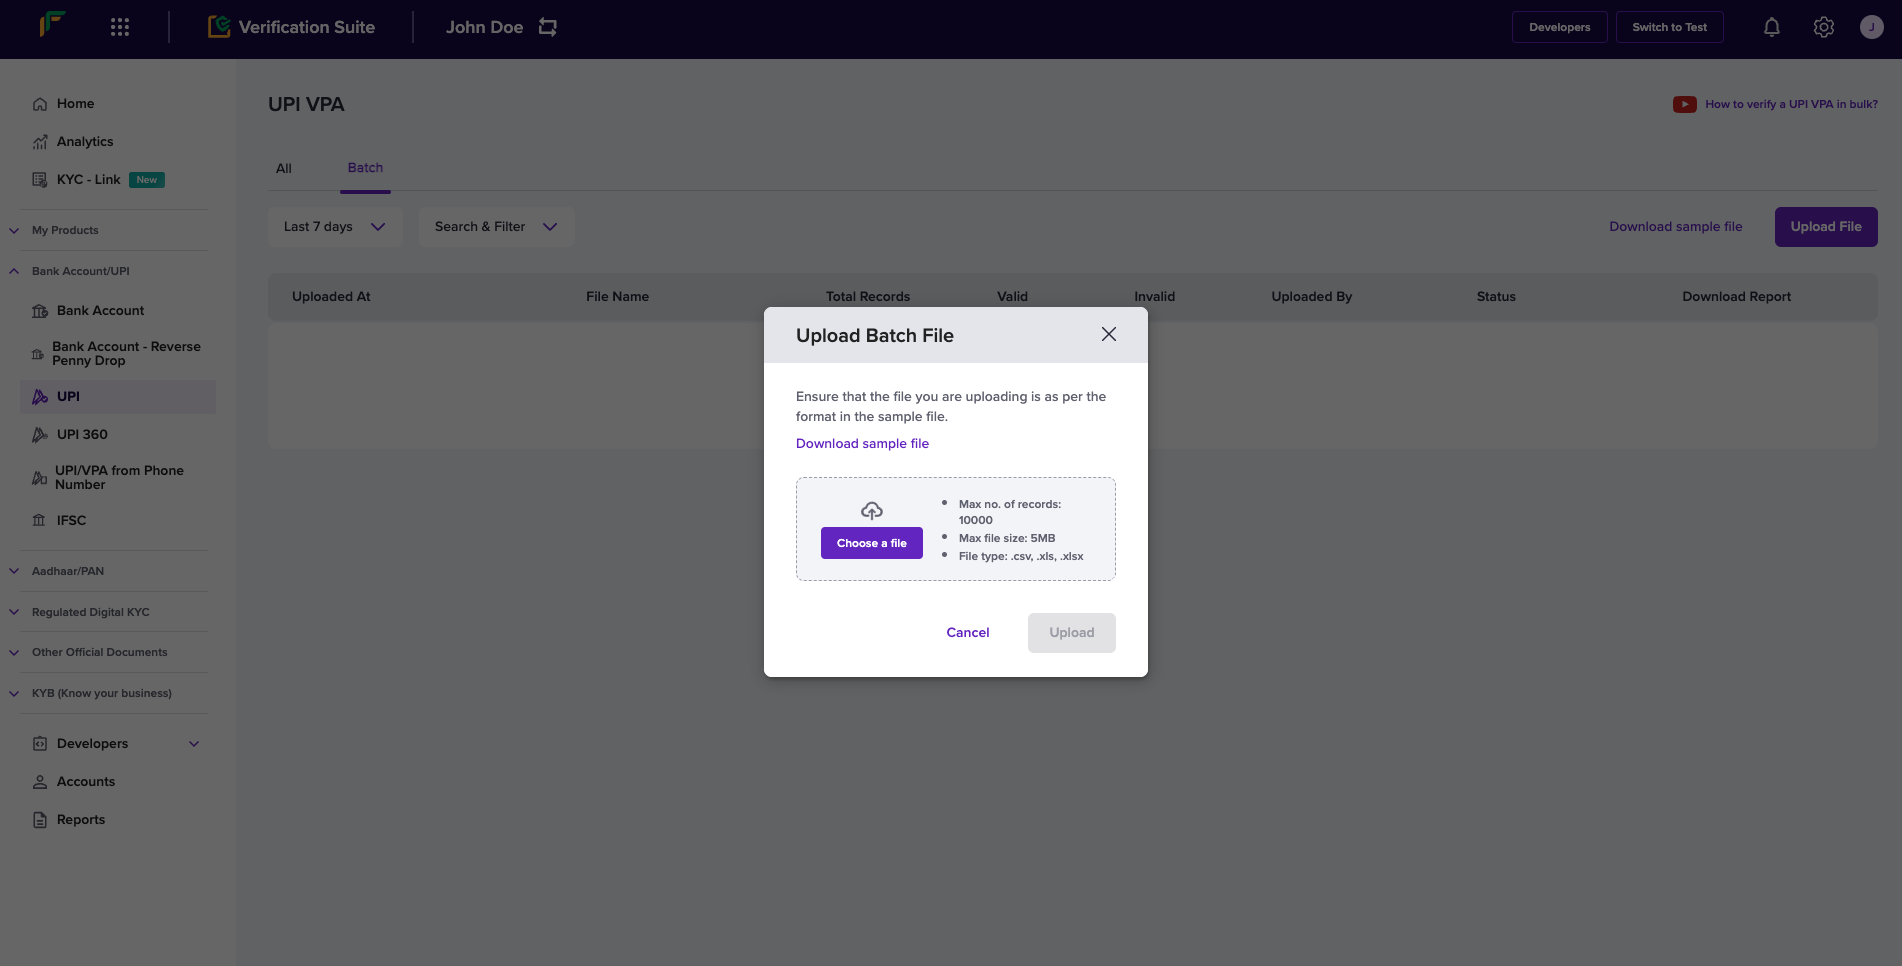
Upload Batch File
Updated 6 months ago