New Improved Dashboard
The all-new improved Payment Gateway Dashboard is a feature-rich user interface that helps you manage and monitor your account effectively. It gives you easy access to all the features, better categorisation and helps you manage payments, refunds, and settlements all in one place.
In the new dashboard design, we have enhanced the experience of some common workflows like tracking payments, issuing refunds, managing settlements, and more to make managing business easier for you. The new dashboard will help you with detailed analytics about your day-to-day business and enables you to make better and informed decisions for your business.
We have increased the visibility of useful information and made it easily available for you as per your need. You will see the complete transaction timeline for each payment received, that is, from the time the order was raised to the time it is complete. Details of any refunds that were processed against a particular payment are also visible within the payment screen. Also, the payment methods enabled for your account and other available payment methods are easily visible.
Some tasks in the old dashboard required multiple steps to be done to complete a particular task. We have enhanced all such experiences in the new design. For example, you can initiate refunds from within the payments screen itself. We have focused on common workflows to make them faster and easier for you.
The search and filter functionality is enhanced, and you can search for a particular transaction or a type of transaction seamlessly.
Click here to watch the video and understand more about Cashfree Payment Gateway.
Summary
The summary section provides an overview of your business. It gives you details about your daily, weekly, and monthly transactions. You can see your recent settlements, unsettled amount, disputed and suspicious transactions if any. You can also view payment-related metrics like the total number of transactions and refund amount (amount-wise or transactions count-wise).
If your business accepts multiple payment methods, you get a view of your customers' most preferred payment methods.

Summary
Transactions
In the Transactions section, you can view details of Payments, Refunds, Batch Refunds, Disputes, and Suspicious transactions. You can seamlessly navigate between each of these sections. The status of each transaction is also available.
Various filters are supported to give you the flexibility to search and filter for the required transactions.

Transactions
Payments
The Payments tab displays all the payments made by your customers. In this section, you can also see the customer details, amount, payment status, payment method used, and more against the order.
With the new dashboard, you can easily initiate full or partial refunds from the same screen. There are various filters supported to help you analyse the payments.
To view the payments,
- Go to Payment Gateway Dashboard > Transactions > Payments.
- Specify the date range to view payments for a particular period. You also have the option to search and filter for the required transactions.
Search & Filter - Using this option you can search by specifying Order ID, Transaction ID, Phone Number, and Email ID. You can also filter based on transaction status, payment method used, and order amount. You will see only those filtered transactions.
Click on a particular transaction to view more details about the payment. The detailed screen appears as shown below:

Payment Details
In the payment details screen, you can see:
- Customer details like name, phone number, email ID, customer reference ID, and IP address from where the payment was made is available.
- Payment timeline - Payment status, payment method used to complete the transaction, card details, currency used to make payment is available. The various statuses a transaction may go through is,
Success,Failed,Incomplete,Pending Flagged,Cancelled,Void, andUser Dropped.
You can also initiate refunds from the Payments screen. Click the Refunds icon to make full or partial refunds.
Refunds
Easily initiate refunds from the Payment Gateway Dashboard when customers request for return of products. In some scenarios when you have a large number of refunds to be made, you can use the Batch Refunds feature to process the refunds in one go.
Read more on refunds here.
Disputes
When customers do not receive products or services they had paid for and contact Cashfree to raise a dispute, such transactions will be marked as disputed transactions by Cashfree. Also, any fraudulent transactions that are reported will be marked as disputed transactions. Merchants should process such orders or submit supporting documents to get these disputes resolved.
Read more on disputes here.
Suspicious
Transactions that may potentially attract a customer dispute or a chargeback are identified by Cashfree and our banking partners. Such transactions are marked as Suspicious transactions and will be analysed by Cashfree. Settlements against such transactions will be put on hold until the issue is resolved. Click here to know more.
Settlements
Settlement is the process through which you receive money paid by your customers via Cashfree Payment Gateway for the products or services provided. The settlement will be made as per the settlement schedule. By default, the schedule option is t + 2 days, where 't' is the day the transaction happened. Settlements will not be processed on bank holidays.
If your business requires instant settlements, write to [email protected] to enable the instant settlement feature.
All settlements will be made after deducting the refund charges (if any) and service charges that are agreed upon. If any disputes were raised, those charges would also be deducted from the settlement amount.
The Settlement tab gives you details of all the settlements you have received against all the orders - Instant Settlements, Standard Settlements, and Vendor Settlements.
To view settlements,
- Go to Payment Gateway Dashboard > Transactions > Settlements.
- Click Instant, to view details about the settlements you have received instantly.
- Click Standard, to view details about the settlements you have received as per the standard schedule option.
- Click Vendor to view details of all the settlements made to the vendors as part of easy split.
Click the download icon against each settlement to download and view the details of all the settled transactions and adjustments.

Settlements
Available Schedule Options:
| ID | Description |
|---|---|
| 1 | T+1 settlement at 11:00 AM |
| 2 | T+2 settlement at 11:00 AM |
| 3 | All transactions from 4:30 PM T-1 to 10:30 AM T+0 settled at 11AM T+0, and, 10:30 AM T+0 to 4:30PM T+0 at 5:00PM T+0 |
| 4 | All transactions from 2:00 PM T-1 to 2:00 PM T+0 settled at 3PM T+0 |
| 5 | All transactions till 5.30 at 6 |
| 6 | Instant Settlement Every Hour between 7:00 AM and 5:00 PM on working days |
| 7 | Instant Settlement Every 3 hours between 8:00 AM and 5:00 PM on working days |
| 8 | Instant Settlement Every Hour 24*7 |
| 9 | Instant Settlement Every 3 Hours 24*7 |
| 11 | Weekly Every 1st Working day |
| 12 | Monthly Every 1st Working day |
Settlement Eligibility - You will be eligible for settlements as per the settlement schedule. By default, the schedule option is T+2 days, where 'T' is the day the transaction happened. Settlements will not be processed on bank holidays.
The minimum settlement amount is Rs 1.
Easy Split
Easy Split feature automates the splitting of payments with vendors and partners on time. With Easy Split, you can collect payments, set up a flexible schedule option and simplify customer refund management.
Seamlessly split payments to all associated vendors (payable entities), manage settlements and reconcile with ease. With this feature, you can disburse payments to multiple vendors involved in a transaction in one go.
Integrate with our Payment Gateway using web checkout or our mobile SDKs to split payments to vendors. We support both product dashboard and API-based operations to meet your requirements related to vendor or split.
Contact your account manager to enable this feature. Click here to know more.

Easy Split Workflow
Payment Links
Cashfree Payment Links are the easiest way to receive payments from your customers for any goods or services, without taking them to any app or website. Create a payment link with the details of the product and share it with the customer via SMS, email, WhatsApp, Instagram, or other platforms and receive payments. Payment Links is a no-code payment solution. You do not have to integrate with a payment gateway or write any code. You can easily start accepting payments in minutes.
You can create payment links using the dashboard. The link is sent to the customer via SMS and email. The customer can pay via their preferred payment method. All major payment methods are supported. More than 120 payment modes including UPI, debit and credit cards, net banking, wallets, etc are supported. Customers can choose from a wide range of payment options to make the payment. Click here to know more about Payment Links.

Payment Link Workflow
Payment Forms
Payment Forms are the easiest way to receive payments for any goods or services you provide to your customers. You can create a personalised payment form that suits your business without any code or payment gateway integration and instantly receive domestic and international payments.
You can create a Payment Form from your Dashboard and share the form link with your customers to start accepting domestic and international payments. If you have a website or an application, you can easily embed the payment form URL and manage payments. You can create an unlimited number of payment forms and share them with your customers. Click here to know more about Payment Forms.

Payment Form Workflow
Reports
There are various reports that Cashfree provides you that help you reconcile transactions, view adjustments and settlements made, and analyse your business transactions.
The new improved design supports specific reports for payment links, product links, vendor settlements, and more. You can view these reports day-wise, week-wise or for a custom date range. You can also download generated reports and use them for further analysis.
To view the reports,
- Go to Payment Gateway Dashboard > Reports.
- In the Report Type field, select the report you want to view, and click Generate.
You also have the option to download the report (in .xls or .csv format) for any further analysis.
Available reports:
- Transactions
- Settlements
- Refunds
- Ledger
- Paytm
- Product Link Orders
- Payment Link Transactions
- Vendor Settlements
Click here to view more about Reports.
Settings
Customise payment methods, set up email notifications for yourself and your customers, view your bank account details registered with us and also customise the payment screen to reflect your brand. Customise the payment page by including your logo, and your brand colour.
Preferences
You can set up the Order Expiry Time and the Transaction Complete Time from the Preferences option on the Settings page.
Order Expiry Time:
Using the order expiry time you can set a maximum time beyond which you do not want to still accept payments for your orders. Configure the days and set the time. Once this is set you can no longer receive payments when this value is reached. By default, the number of days value is set to "30 days". Once you set the configurations, click Save Changes.
The minimum order expiry value in terms of days is "1 day" and the maximum days configurable is "30 days". Similarly the minimum order expiry value in terms of time is "5 mins" and the maximum time is "24 hrs".
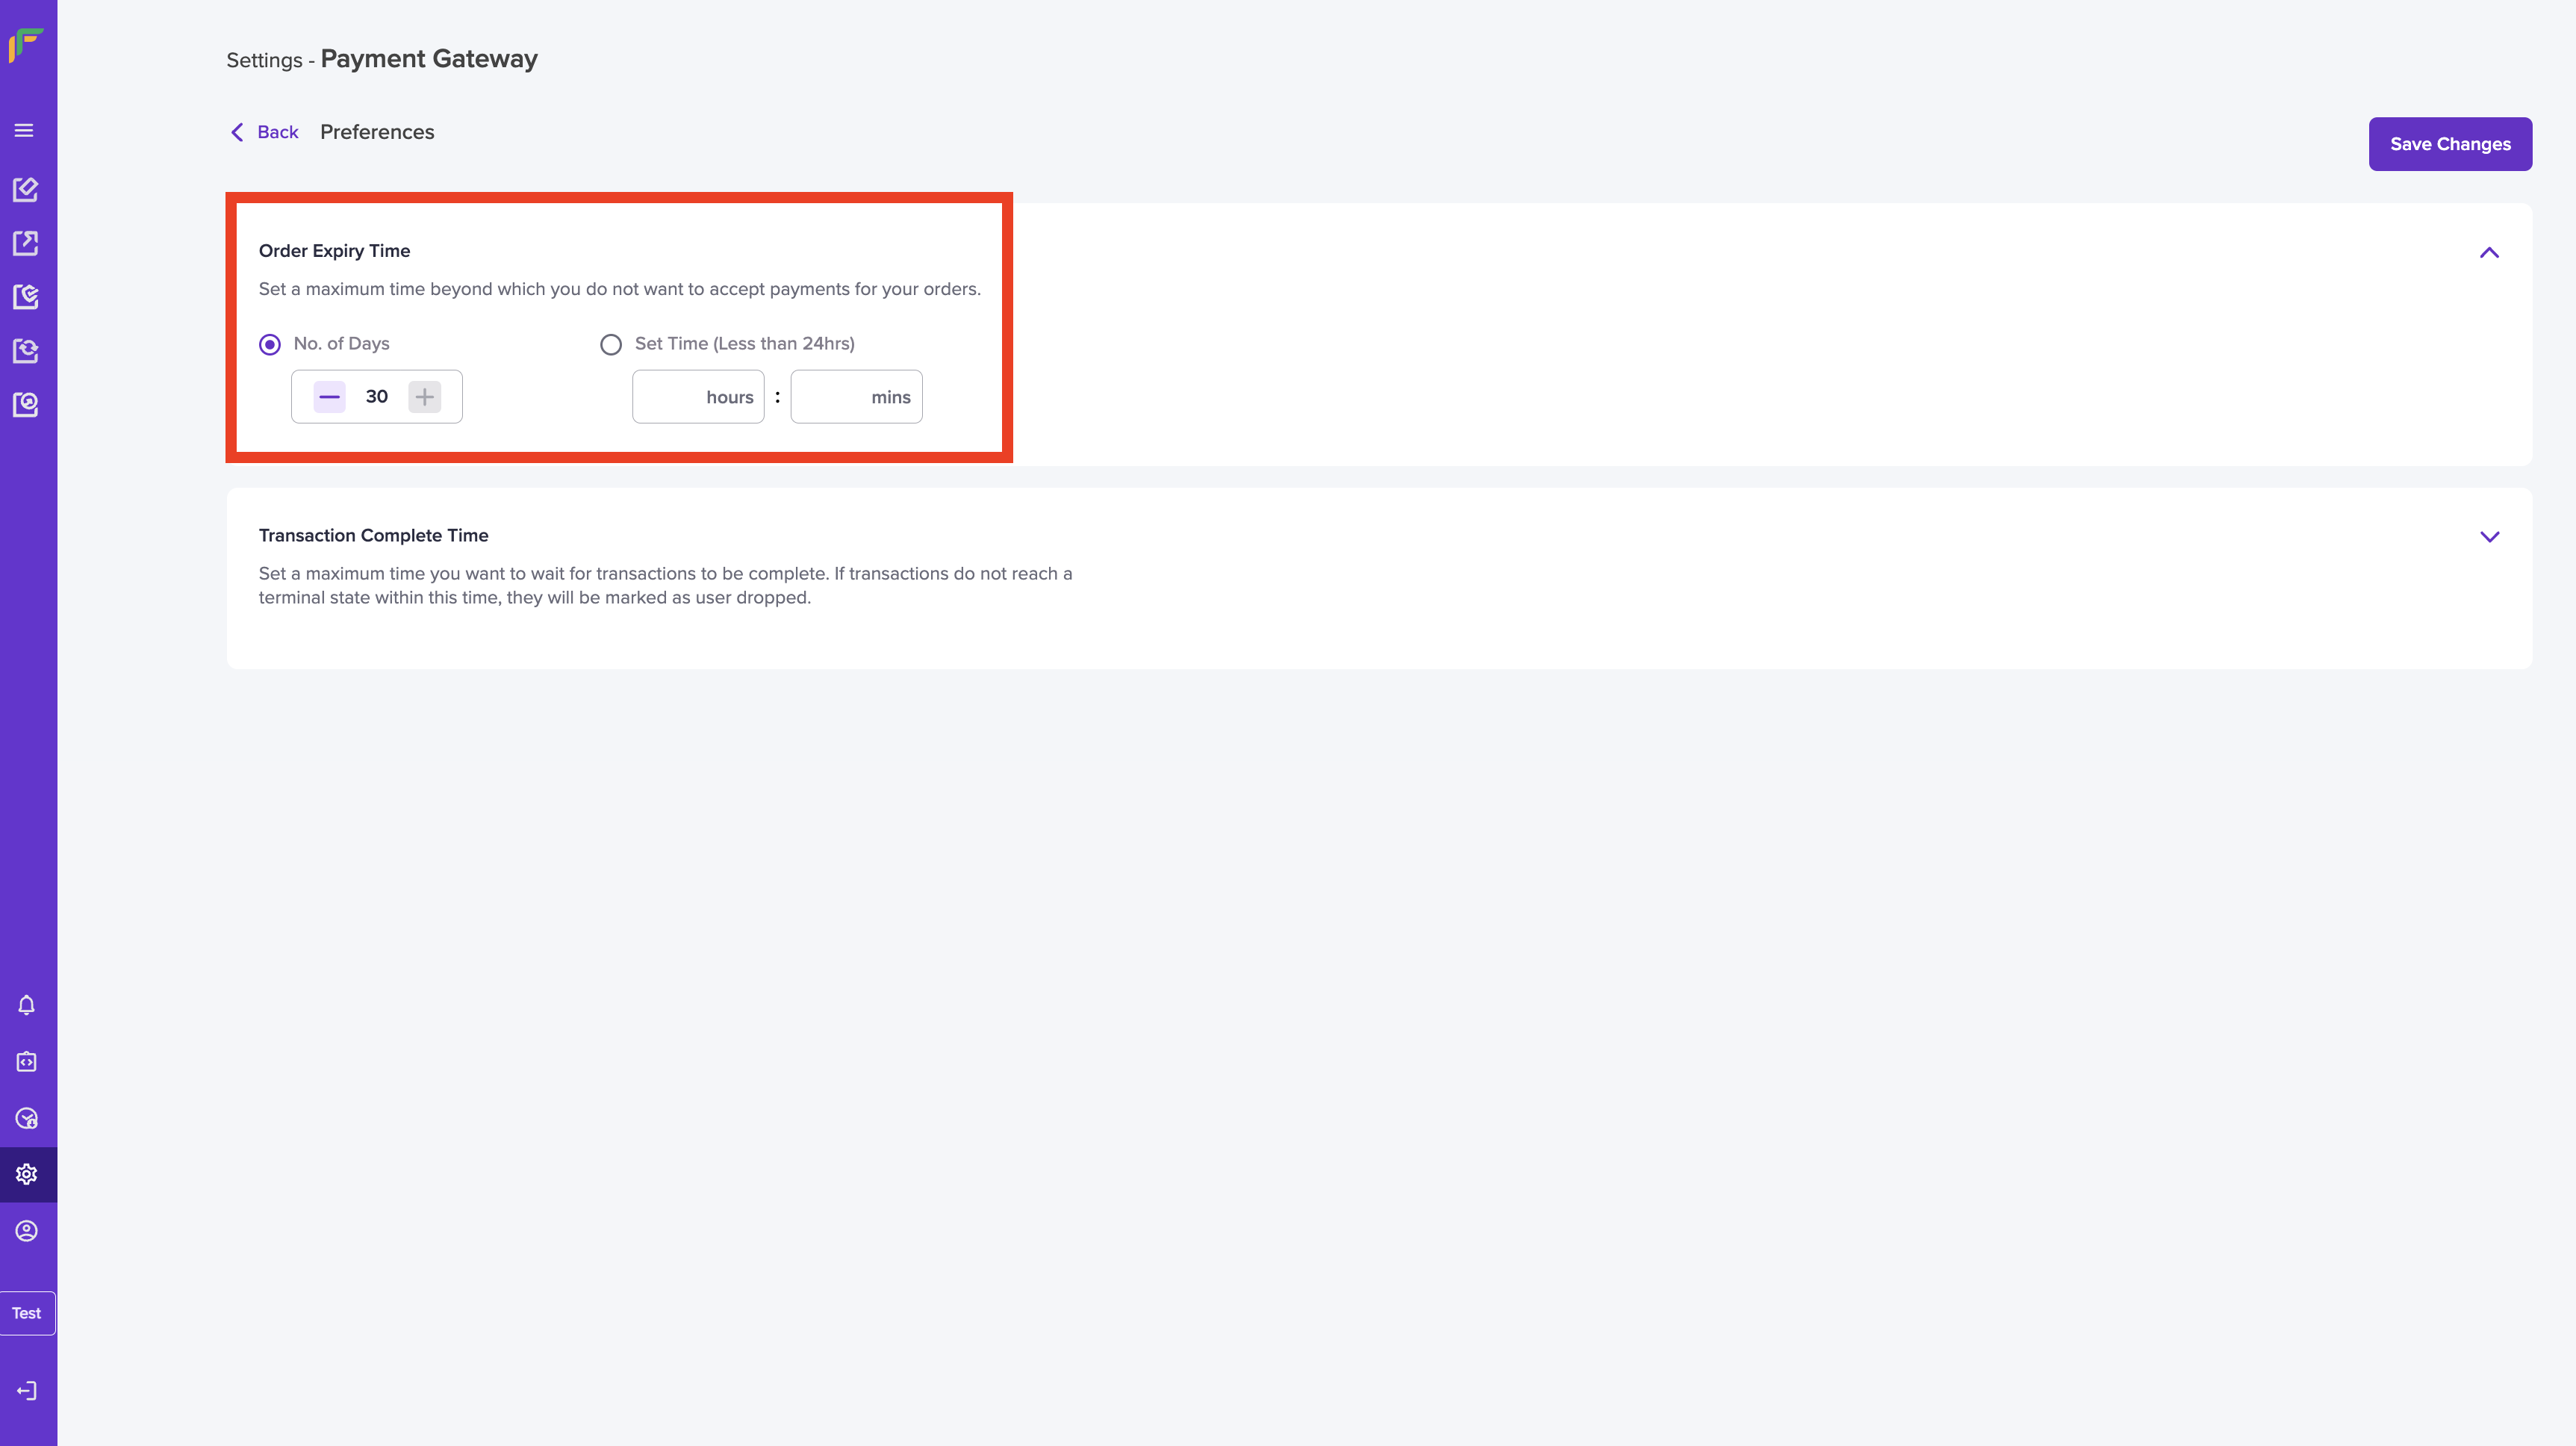
Order Expiry Time
Transaction Complete Time:
Using the transaction complete time option, you can set the maximum time within which the transaction should be completed. Say for example you set the transaction complete time value to - "24hrs", if the transactions are not complete within 24 hours, they will be marked as "User Dropped". By default, the time configured is "24hrs". Once you set the configurations, click Save Changes.
The minimum transaction time value is "10 mins" and the maximum time configurable is "24 hrs".
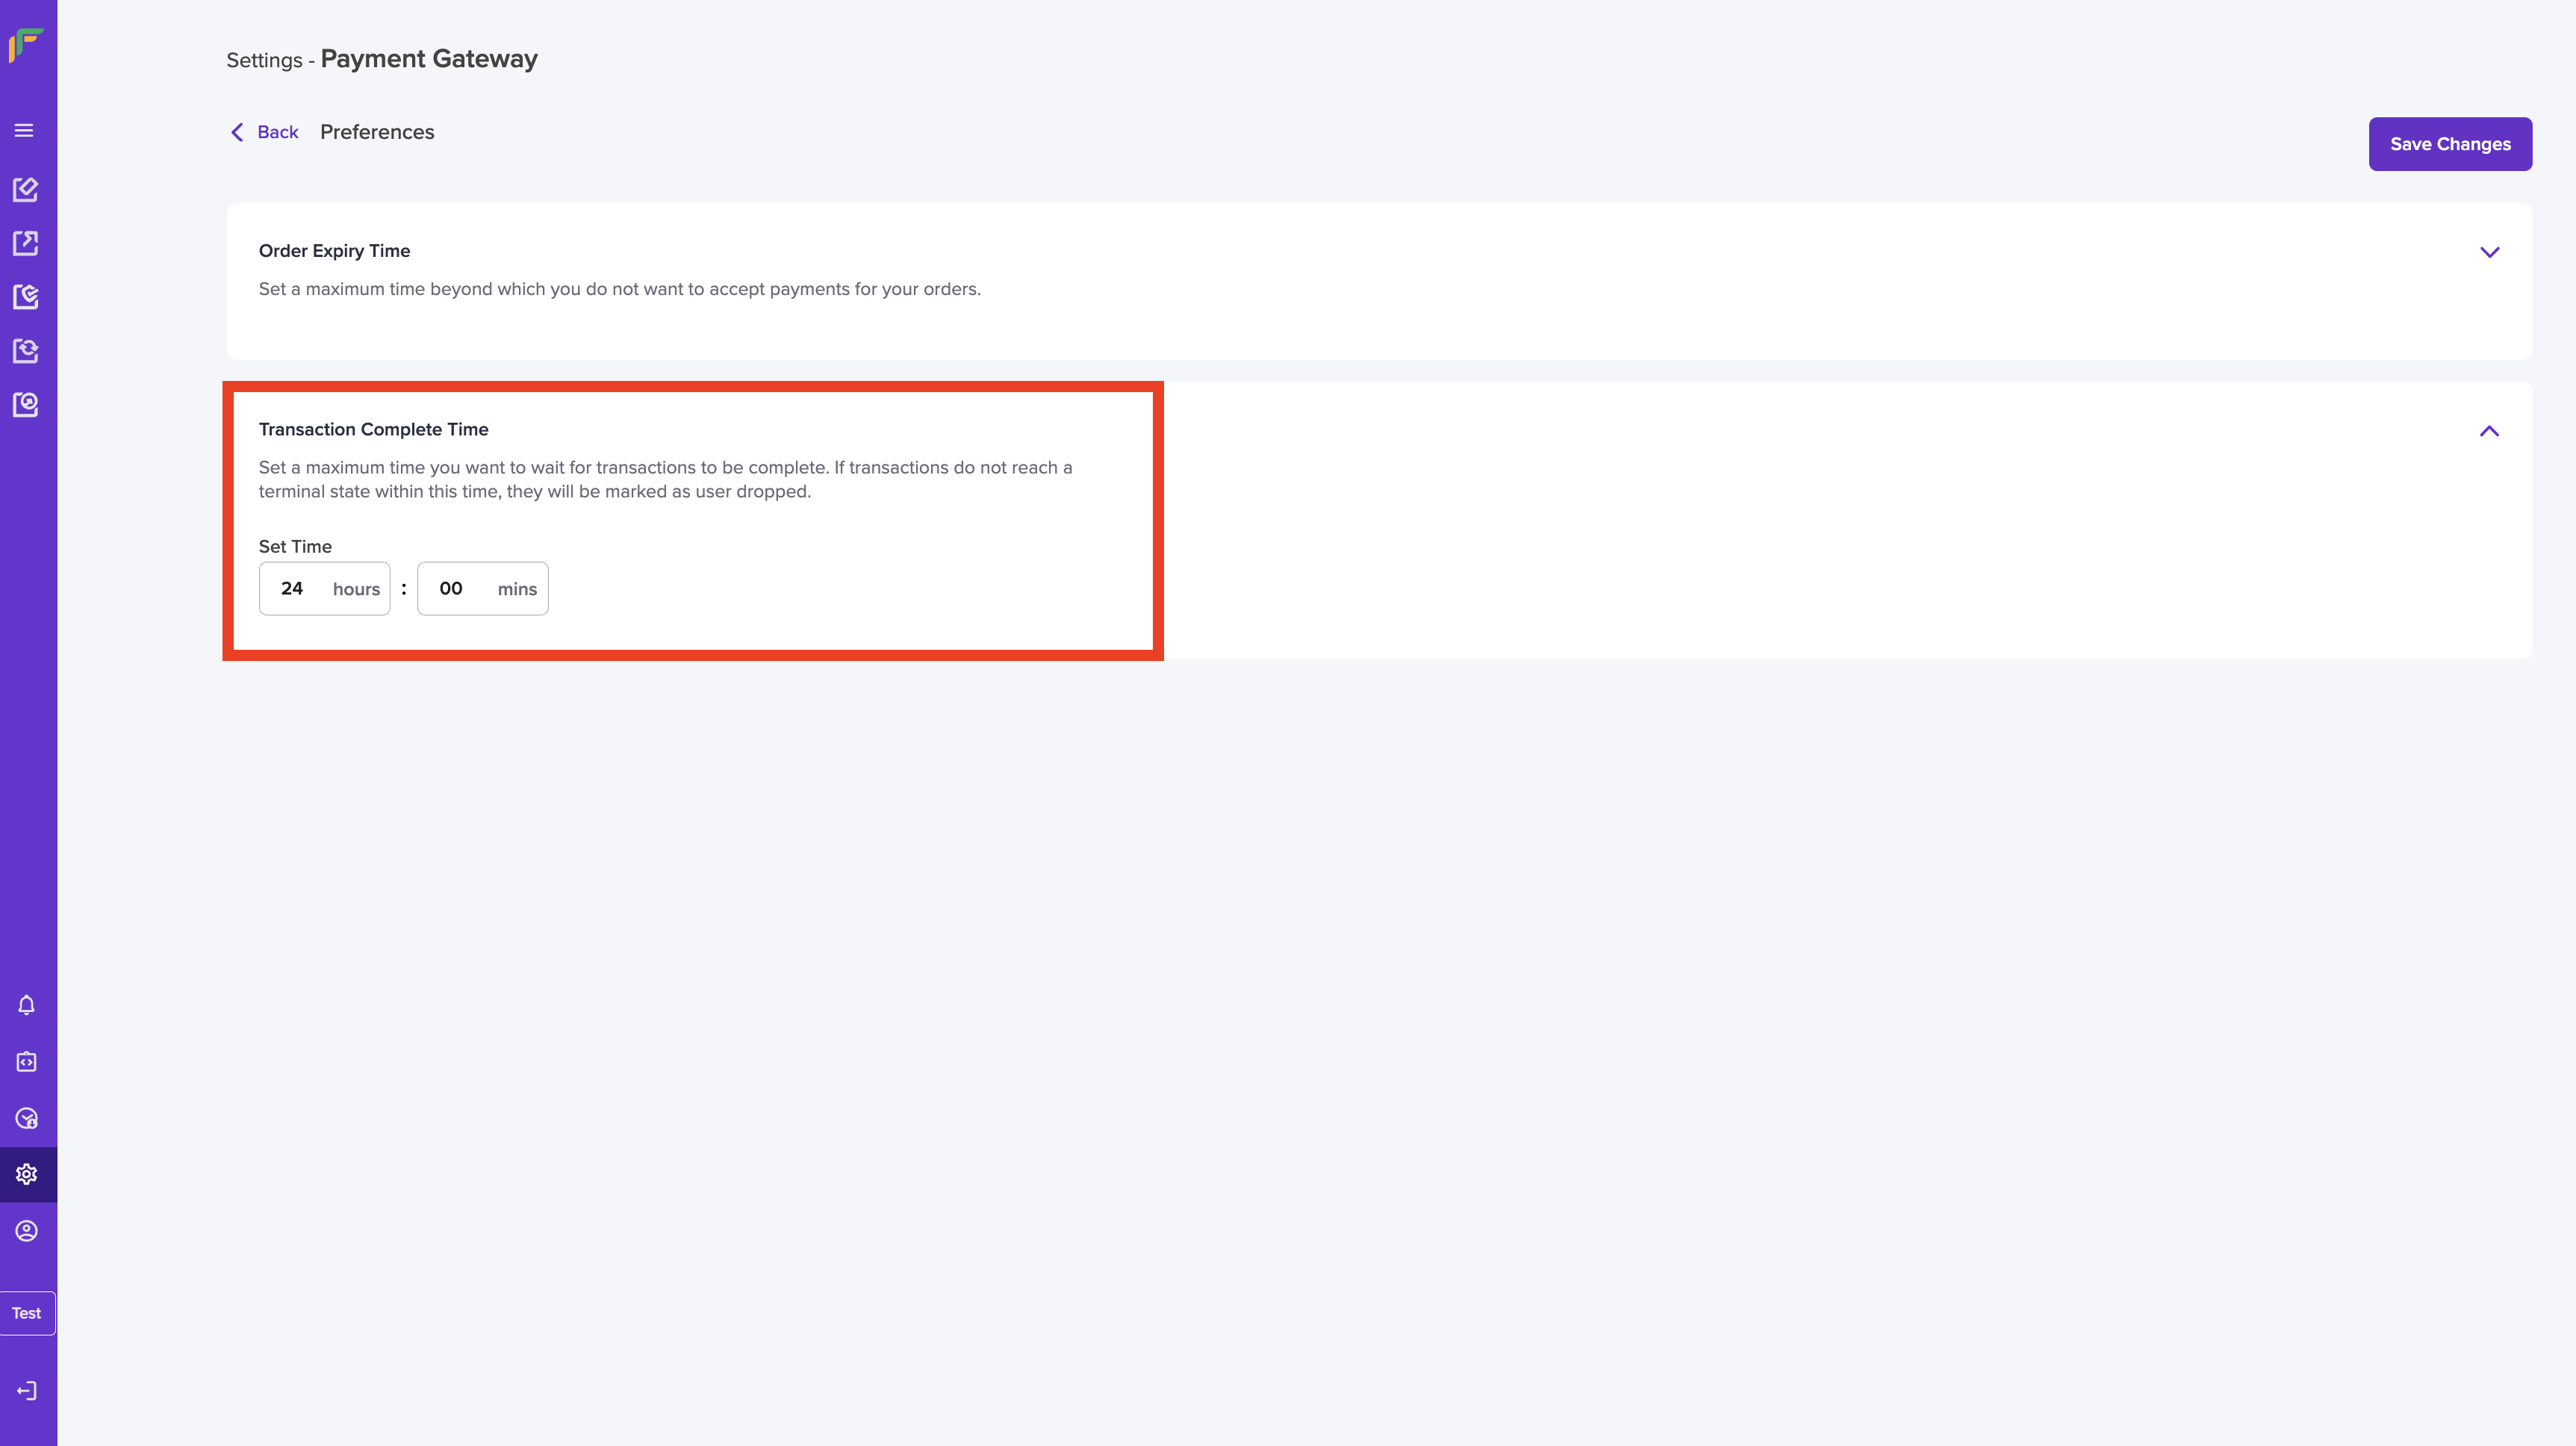
Transaction Complete Time
Payment Methods
Cashfree supports multiple payment methods, you can configure what is relevant for your business. Contact your account manager to enable the required payment methods.
All the payment methods that are activated for your account and the methods that are available will be displayed in the Payment Methods screen.
To view the activated payment methods, go to Payment Gateway Dashboard > in the left navigation bar click Settings > select Payment Methods. A sample Payment Methods screen is shown below:

Payment Methods
If PayPal is activated for your account, you will see the details at the bottom of the Payment Methods screen as shown below:

Payment Methods - PayPal
Bank Account
Your registered bank account details with Cashfree where you will receive settlements are shown here. Also, the recharge account and any accounts that are inactive currently will also be shown here.
Contact your account manager to update any of the details shown in the Bank Account screen.
Customise Payment Screen
You can customise your payment checkout screen and emails sent from your account easily using the Payment Gateway Dashboard. You can add your company logo, change the theme colour, and add colour of your choice to the payment screen.
Adding your company logo may help customers get familiarised with identifying your company with the logo as well.
To customise the payment screen,
- Go to Payment Gateway Dashboard > in the left navigation bar select Settings.
- In the Settings screen, select Branding.
- Upload your brand logo and set the brand colour.
- Click Apply to save the changes. The preview is shown on the right side of the screen. You can modify it as per your company brand.
Developers - API Keys and Service Alerts
Configure API keys and service alerts from the Developers section. Read more on that here.
Profile
The Profile section gives you details about your account. You can add, delete, manage alias users from this section. You can set up two-factor authentication methods, change your security preferences, view your account login history, and much more in the Profile section. Click here for more information.
Updated about 1 year ago