Payment Forms Webhooks
In this article, you will learn about Payment Form Webhooks and how to configure them from the Payment Gateway Dashboard.
The Payment Form webhook will be triggered when your customers make a complete payment using the payment form you shared.
Configure Webhooks
To start receiving webhook event notifications,
- Go to Payment Gateway Dashboard > click Developers in the left navigation.
- Select Webhooks in the Payment Gateway section.
- Click Add Webhook URL and select the event you want to be notified about.
- Enter the URL where you want to receive the webhook notifications, and click Add.
You will start to receive webhook event notifications on the URLs you have specified. You can use one URL to handle several different event types at once or specify individual URLs for specific events.
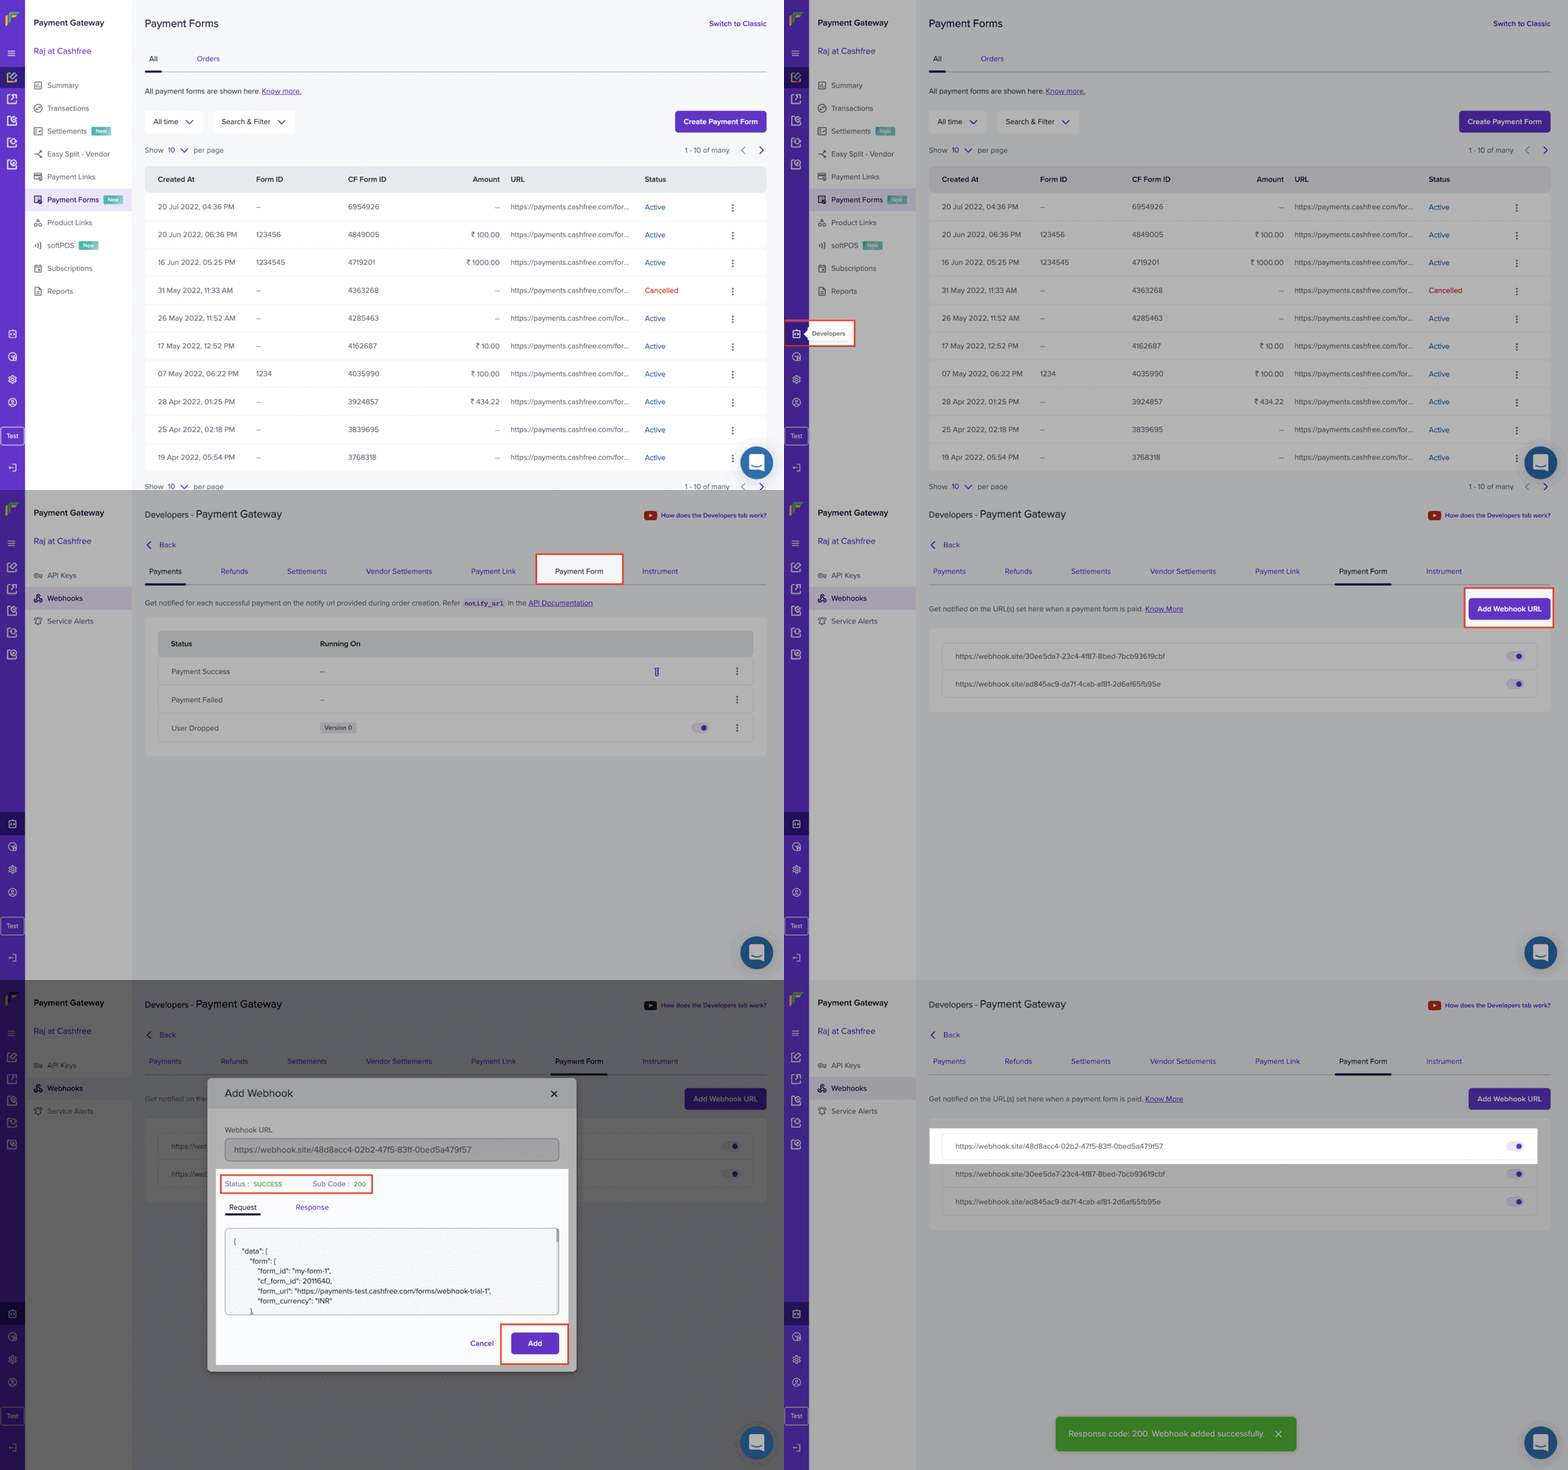
Configure Webhooks
Payment Forms Sample Payload
{
    "data": {
        "form": {
            "form_id": "my-form-1",
            "cf_form_id": 2011640,
            "form_url": "https://payments-test.cashfree.com/forms/webhook-trial-1",
            "form_currency": "INR"
        },
        "order": {
            "order_amount": 22.00,
            "order_id": "CFPay_U1mgll3c0e9g_ehdcjjbtckf",
            "order_status": "PAID",
            "transaction_id": 1021206,
            "customer_details": {
                "customer_phone": "9999999999",
                "customer_email": "[email protected]",
                "customer_name": "John Doe",
                "customer_fields": [
                    {
                        "title": "Zoom ID",
                        "value": "john"
                    },
                    {
                        "title": "Company Designation",
                        "value": ""
                    }
                ]
            },
            "amount_details": [
                {
                    "title": "Webinar Tickets",
                    "value": 398,
                    "quantity": 2
                },
                {
                    "title": "Zoom Platform Fee",
                    "value": 10
                },
                {
                    "title": "Buy me a coffee :)",
                    "value": 0
                },
                {
                    "title": "Amount Dropdown Trial",
                    "value": 50,
                    "selectedoption": "Option 1"
                }
            ]

        }
    },
    "event_time": "2021-04-16T14:10:36+05:30",
    "type": "PAYMENT_FORM_ORDER_WEBHOOK",
    "version": 1
}
Payload Field Description
| Field | Description | Example |
|---|---|---|
| cf_form_id | Unique Identifier (generated by Cashfree) for this Form. | 1543566 |
| form_id | Unique Identifier (provided by merchant) for the Form. Only for merchant reference. Use this for other form-related APIs. | payment_1psw |
| form_url | Unique URL created to accept payments. Customers can click this URL to make the payment. | https://payments-test.cashfree.com/forms/webhook-trial-1 |
| form_currency | Default is INR. International currencies are supported. | INR |
| order_amount | The amount paid by the customer. | 250.00 |
| order_id | Unique order ID generated for the payment received. | 124847 |
| order_status | Status is PAID | PAID |
| transaction_id | Unique transaction ID generated for the payment received. | 43437 |
| customer_details | Customer object, it contains customer details. | |
| customer_name | Name of the customer | John |
| customer_phone | Phone number of the customer | 9000000000 |
| customer_email | Email ID of the customer | [email protected] |
| customer_fields | Customer fields is an array. It contains the values filled by the customer against the custom fields created for the form. | |
| title | Label defined for the field during form creation. | |
| value | Value entered by the customer against the field. | |
| amount_details | Amount details is an array. It contains the amount and quantity value filled by the customer against the amount fields created for the form. | |
| title | Label defined for the field during form creation. | |
| value | Value entered by the customer against the field. | |
| quantity | Quantity entered by the customer against the field. | |
| type | Type of the webhook. PAYMENT_FORM_ORDER_WEBHOOK | PAYMENT_FORM_ORDER_WEBHOOK |
| version | The version of webhook. You should build your parsing logic considering this version. | 1 |
| event_time | Time when this webhook was created. | 2021-04-16T14:10:36+05:30 |
Use Webhooks with No-Code Integration Platforms
Cashfree Payments supports configuring webhook with the below no-code integration platforms to receive automatic notifications about the payments.
- Zapier
- make
- Pabbly
Zapier
You can create a webhook URL on Zapier, configure the URL on Cashfree Payments Dashboard, and receive notifications automatically. Zapier provides a no-code integration solution for Webhooks.
To create a Webhook URL using Zapier,
- Create a Zapier account or sign in using your existing credentials.
- Select Webhooks by Zapier and complete the setup.
- Click Create Zap.
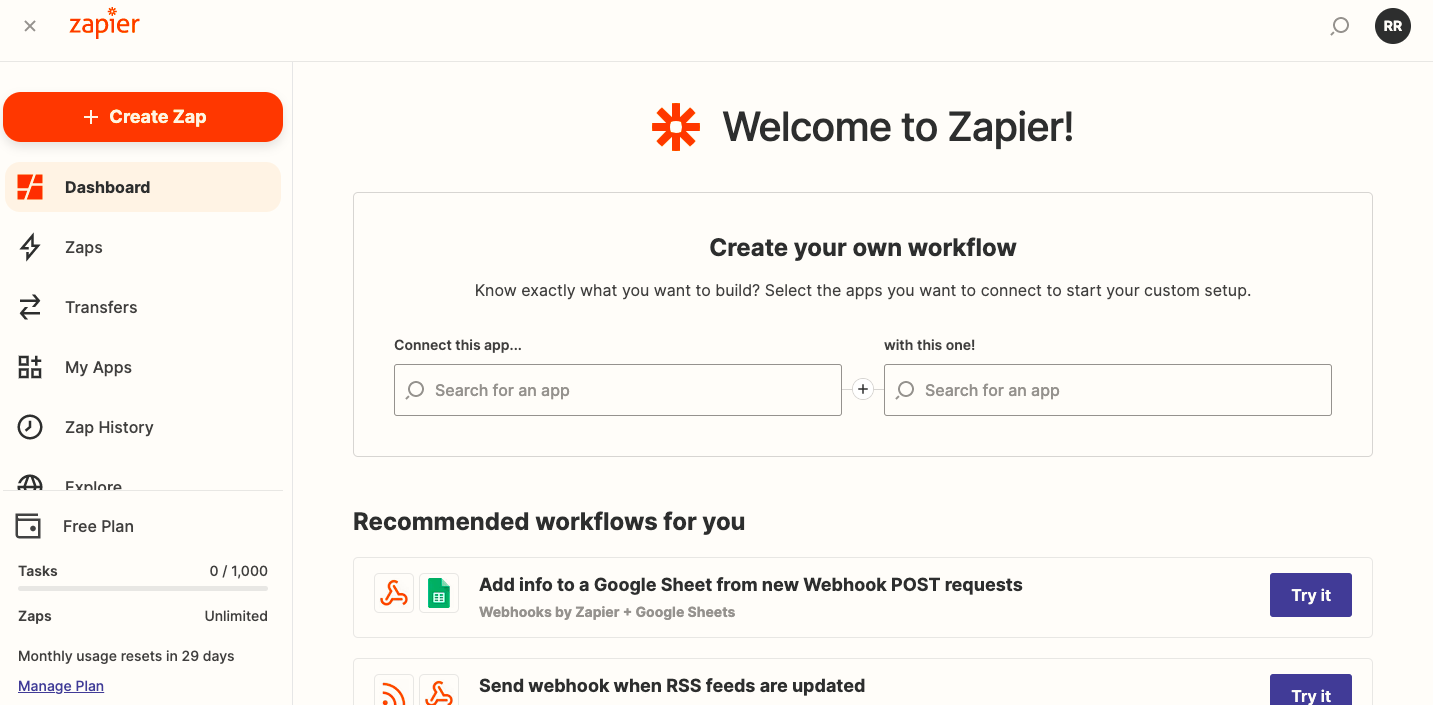
Create Zap
- Select Webhooks by Zapier as the Trigger App, and Catch Raw Hook as the Trigger Event.
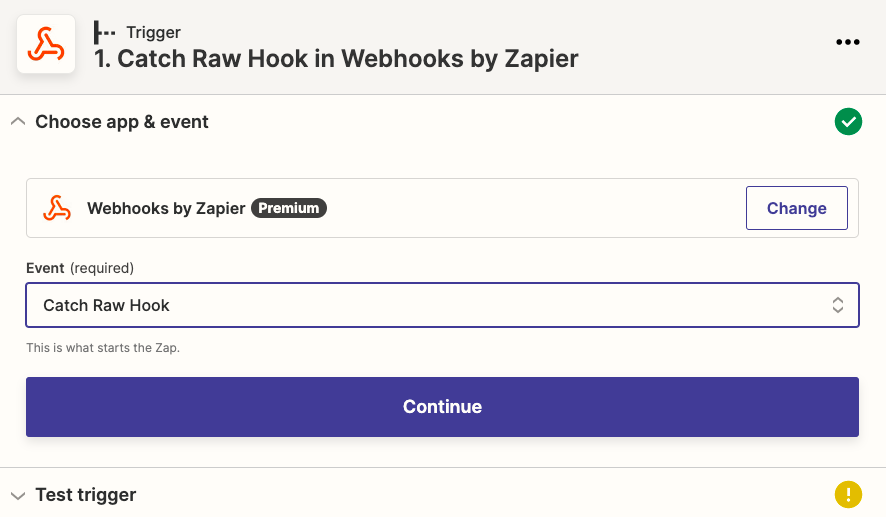
Trigger App and Event
- Click Continue.
- Copy the Webhook URL provided and add it as the Payment Form webhook URL on the Cashfree Payments Dashboard webhook screen as the URL to receive notifications.
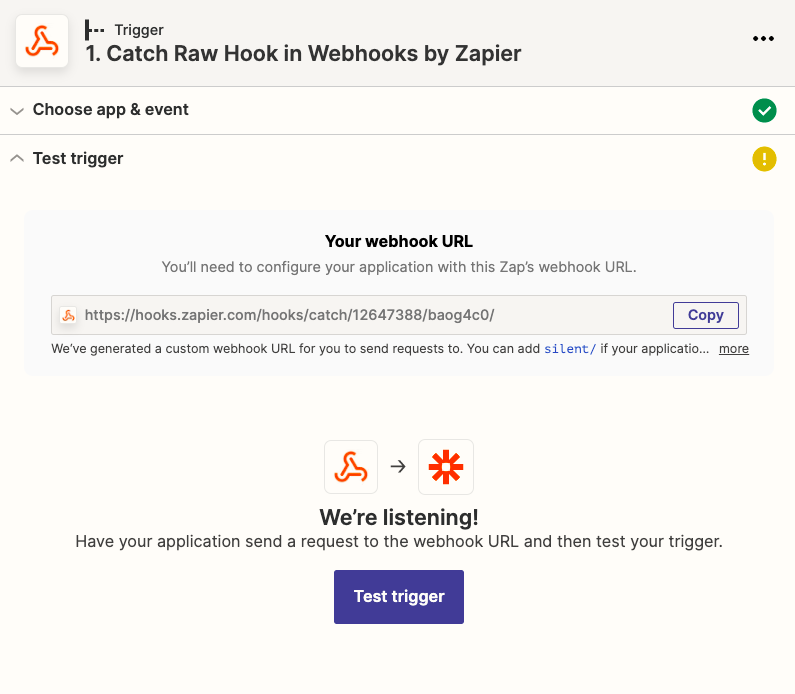
Custom Webhook URL
- Click Test Trigger to verify the configuration.
- In the Action screen, select Code by Zapier as the next Trigger App, Run Javascript as the Trigger Event, and click Continue.
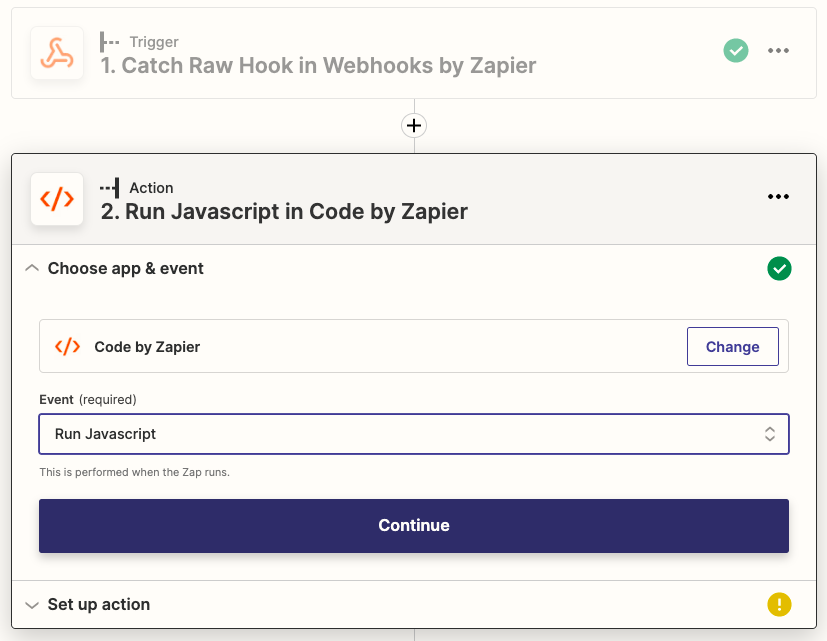
Run Javascript Code by Zapier
- Add data as the key in Input Data field, Raw Body as the value. Copy the code below to the Code section, and click Continue.
// this is wrapped in an `async` function
// you can use await throughout the function
var obj = {}, data = JSON.parse(inputData.data)

obj.form = data.data.form
obj.order= {
  "order_amount": data.data.order.order_amount,
  "order_id": data.data.order.order_id,
  "order_status": data.data.order.order_status,
  "transaction_id": data.data.order.transaction_id
}

obj.order.customer_details = {
  "customer_phone": data.data.order.customer_details.customer_phone,
  "customer_email": data.data.order.customer_details.customer_email,
  "customer_name": data.data.order.customer_details.customer_name
}

if (data.data.order.customer_details.customer_fields && data.data.order.customer_details.customer_fields.length) {
  data.data.order.customer_details.customer_fields.map((mapObj) => {
    obj.order.customer_details["customer_"+mapObj.title] = mapObj.value
  })
}

if (data.data.order.amount_details && data.data.order.amount_details.length) {
  obj.order.amount_details = {};
  data.data.order.amount_details.map((mapObj) => {
    obj.order.amount_details["amount_"+mapObj.title] = mapObj.value
    if (mapObj.quantity) { //reads quantity for Item field type
      obj.order.amount_details["amount_"+mapObj.title+"_quantity"] = mapObj.quantity
    }
  })
}

output = obj
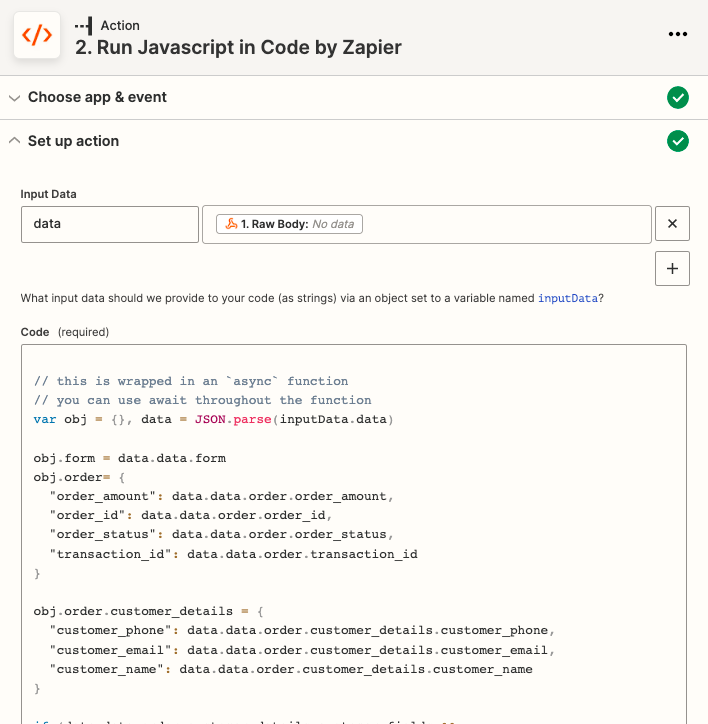
Set up Action
- Test the configuration and click Publish Zap. For confirmation, click Publish & Turn On. Connect to any app on Zapier to transfer the data and use it for further analysis.
make
To create a Webhook URL using make,
- Create an account with make or sign in using your existing make account credentials.
- Click Create a new scenario.
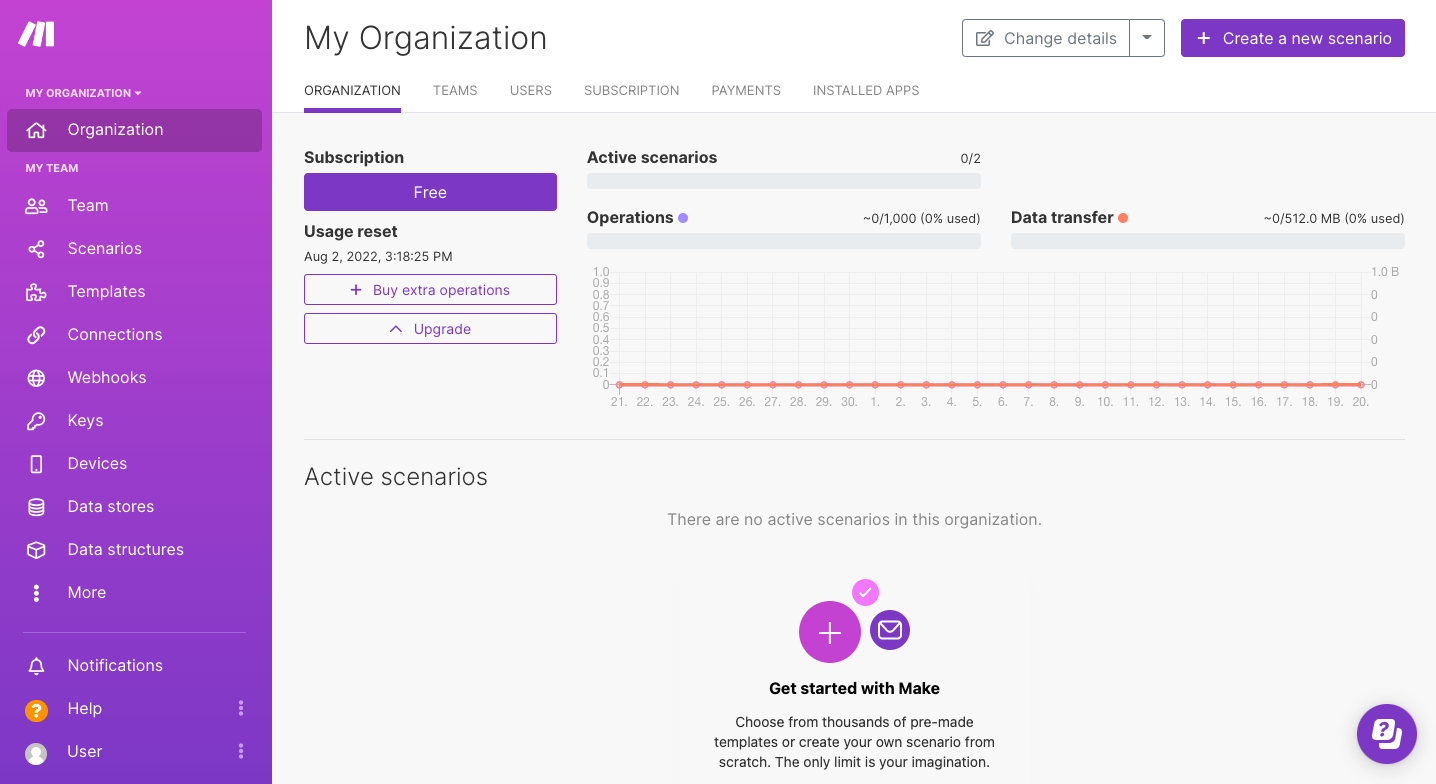
Create new scenario
- Search for webhooks and select Webhooks from the options shown.
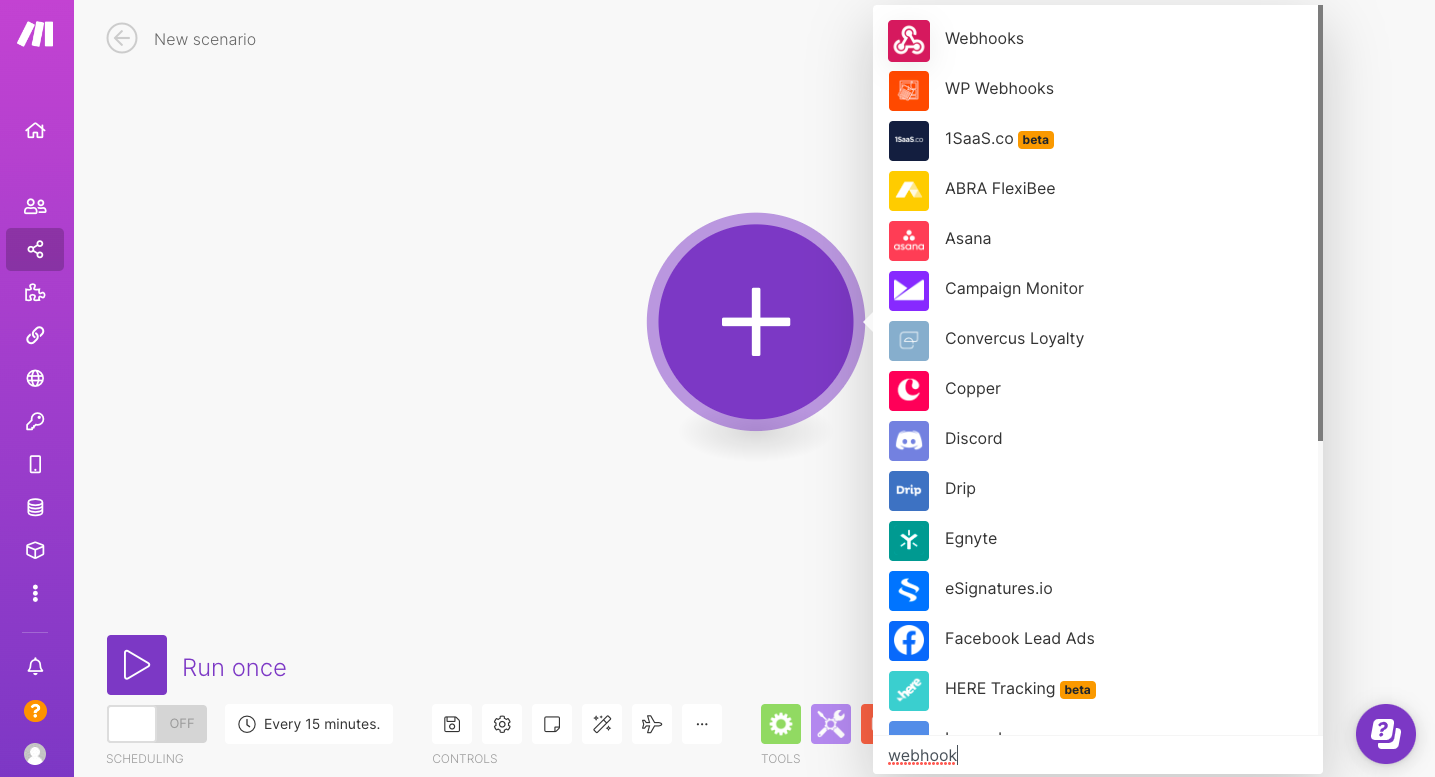
Select Webhooks
- Select Custom Webhook. Enter a name for the webhook, and click Save.
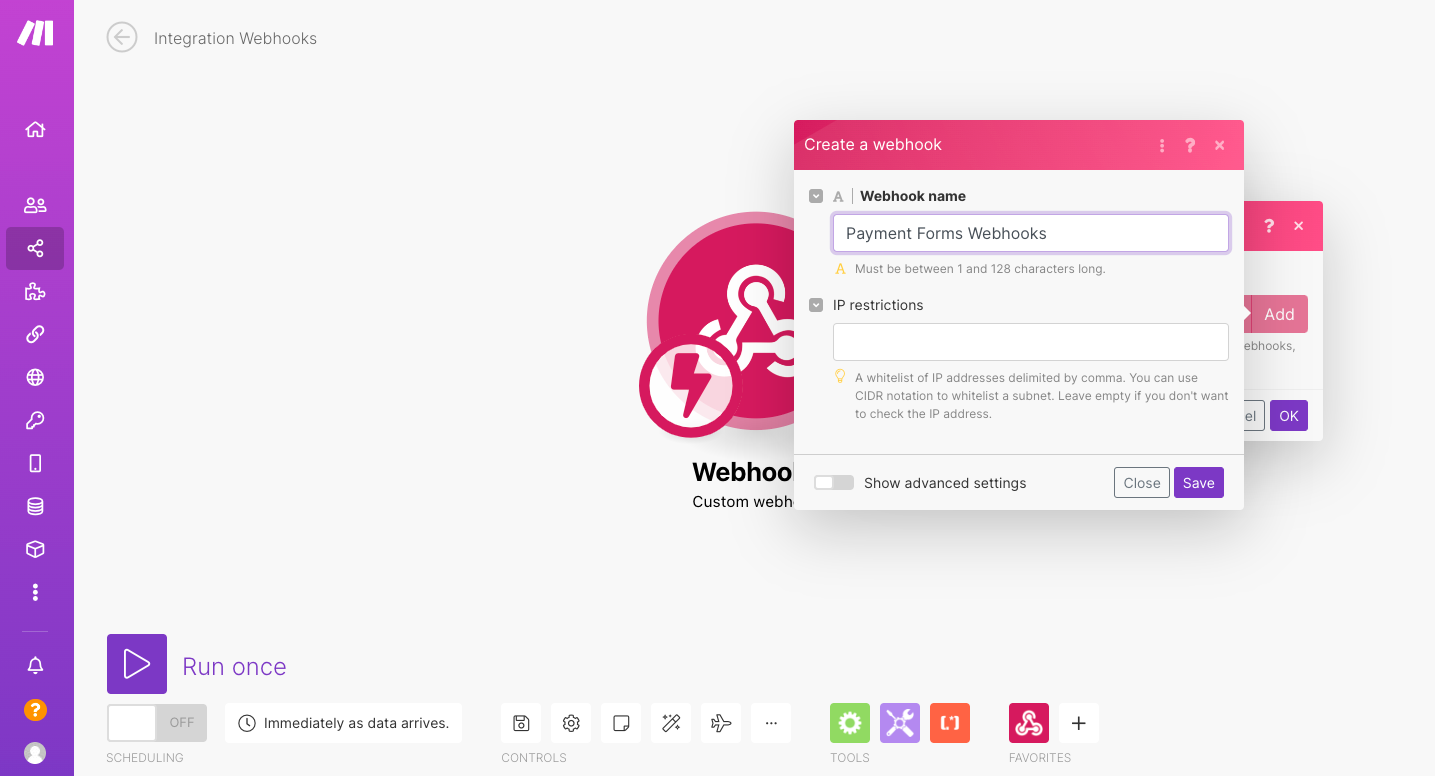
Create Webhook
- A webhook URL will be generated as shown in the image below. Copy the webhook URL shown and add it as the Payment Form webhook URL on the Cashfree Payments Dashboard webhook screen as the URL to receive notifications. You can trigger and check. You will start receiving payment-related notifications via this webhook URL.
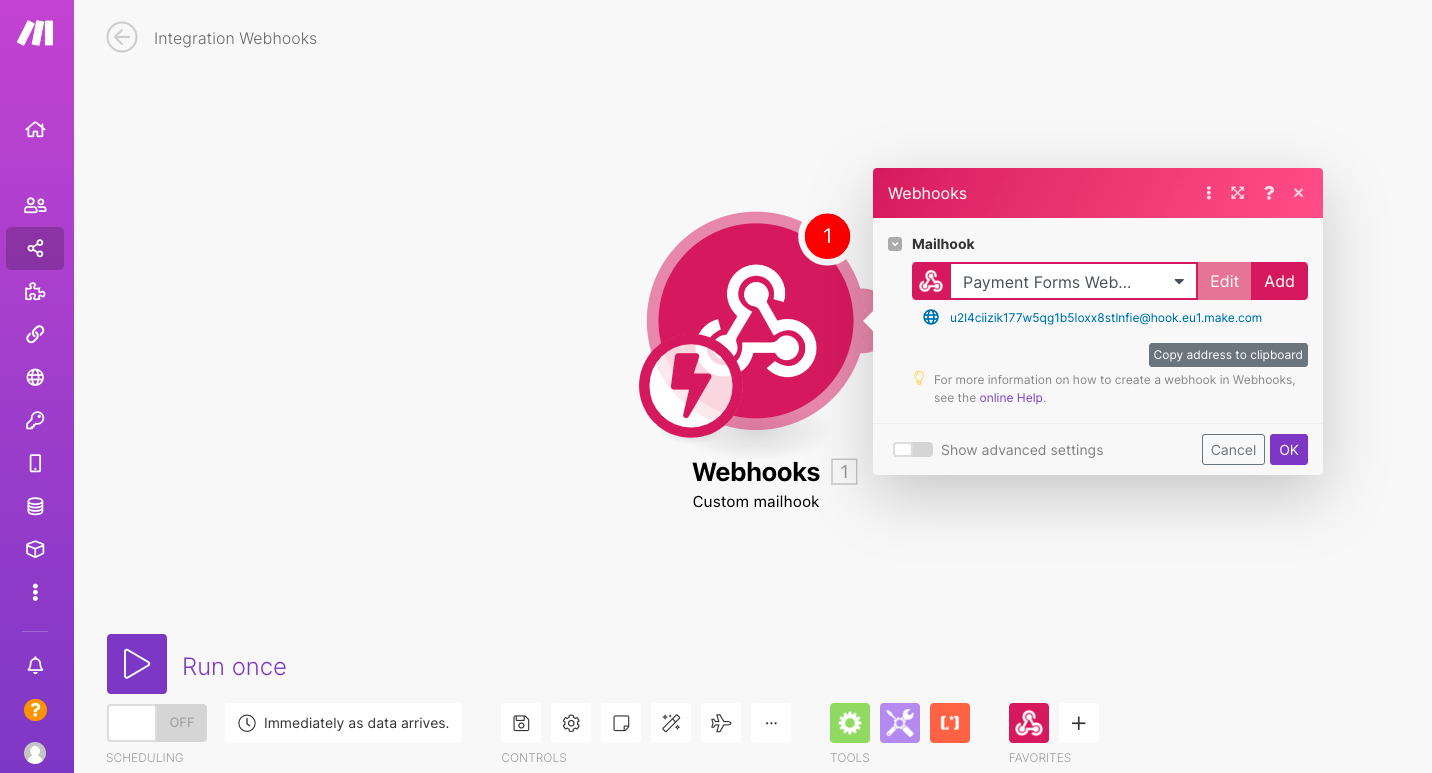
Copy Webhok URL
You can click Add Another Module and connect to any app on make to transfer the data and use it for further analysis. When you want to add the payment details to a google sheet whenever you receive payment from payments forms, you can click Add Another Module and select Google Sheets. Then add your Google account and select Google Sheets, details will be saved in this sheet.
Pabbly
To create a Webhook URL using Pabbly,
- Create an account with Pabbly or sign in using your existing make account credentials.
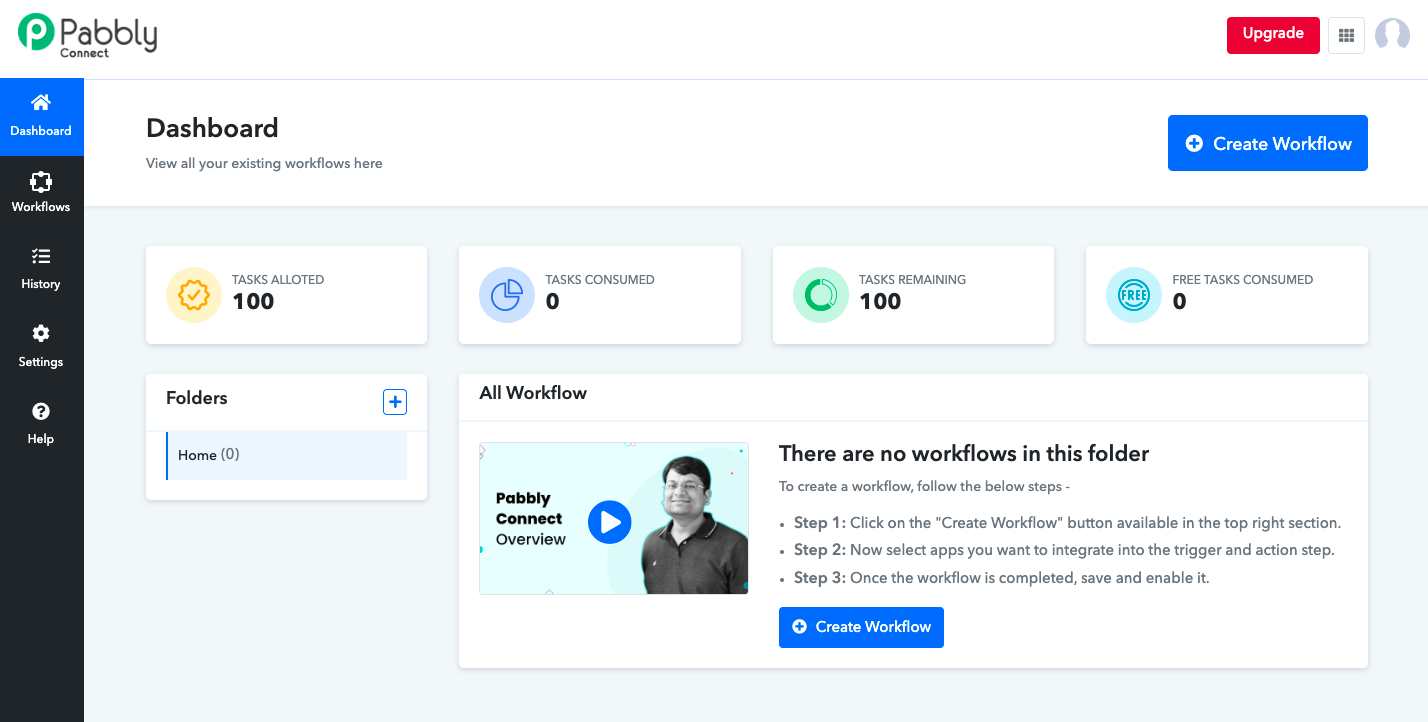
Pabbly Dashboard
- Click Create Workflow and specify a name.
- In the Choose App field select Webhook. Copy the webhook URL shown on the screen and add it as the Payment Form webhook URL on the Cashfree Payments Dashboard webhook screen as the URL to receive notifications. You will start receiving payment-related notifications via this webhook URL.
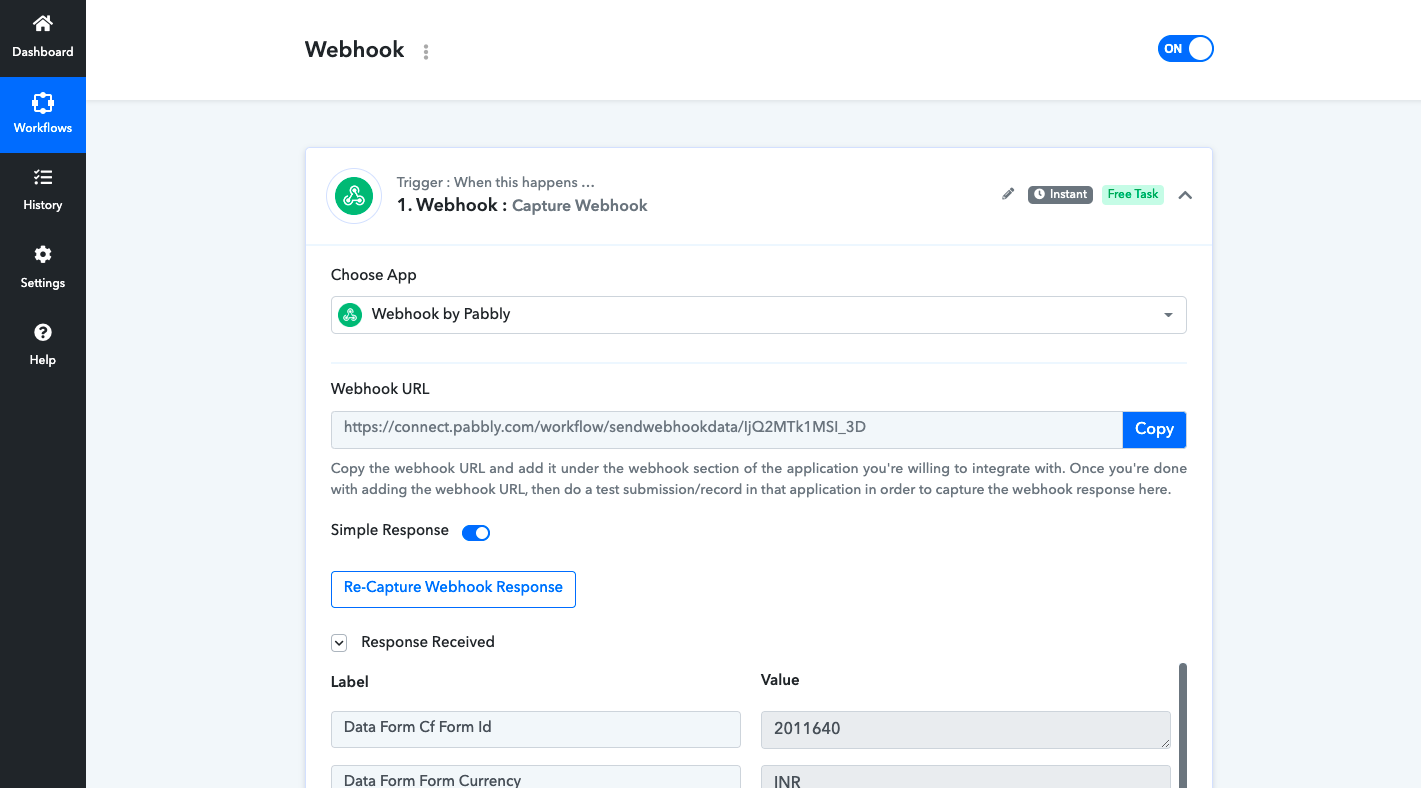
Capture Webhook
You can also save payment notifications in a Google Sheet. To do this, select Google Sheets as the application and add rows/columns as per your requirement and capture data in the Google Sheet.
Updated about 1 year ago