Activate Payment Methods
In this article, you will learn the various payment methods supported by Cashfree Payments, and how to enable them.
Cashfree Payments supports multiple payment methods, and you can configure what is relevant to your business. By default, Cashfree Payments auto-enables a few payment modes when you activate Payment Gateway. This helps you to start accepting payments immediately from your customers.
To view and configure payment methods, go to Payment Gateway Dashboard in the left navigation bar and click Settings > Payment Methods.
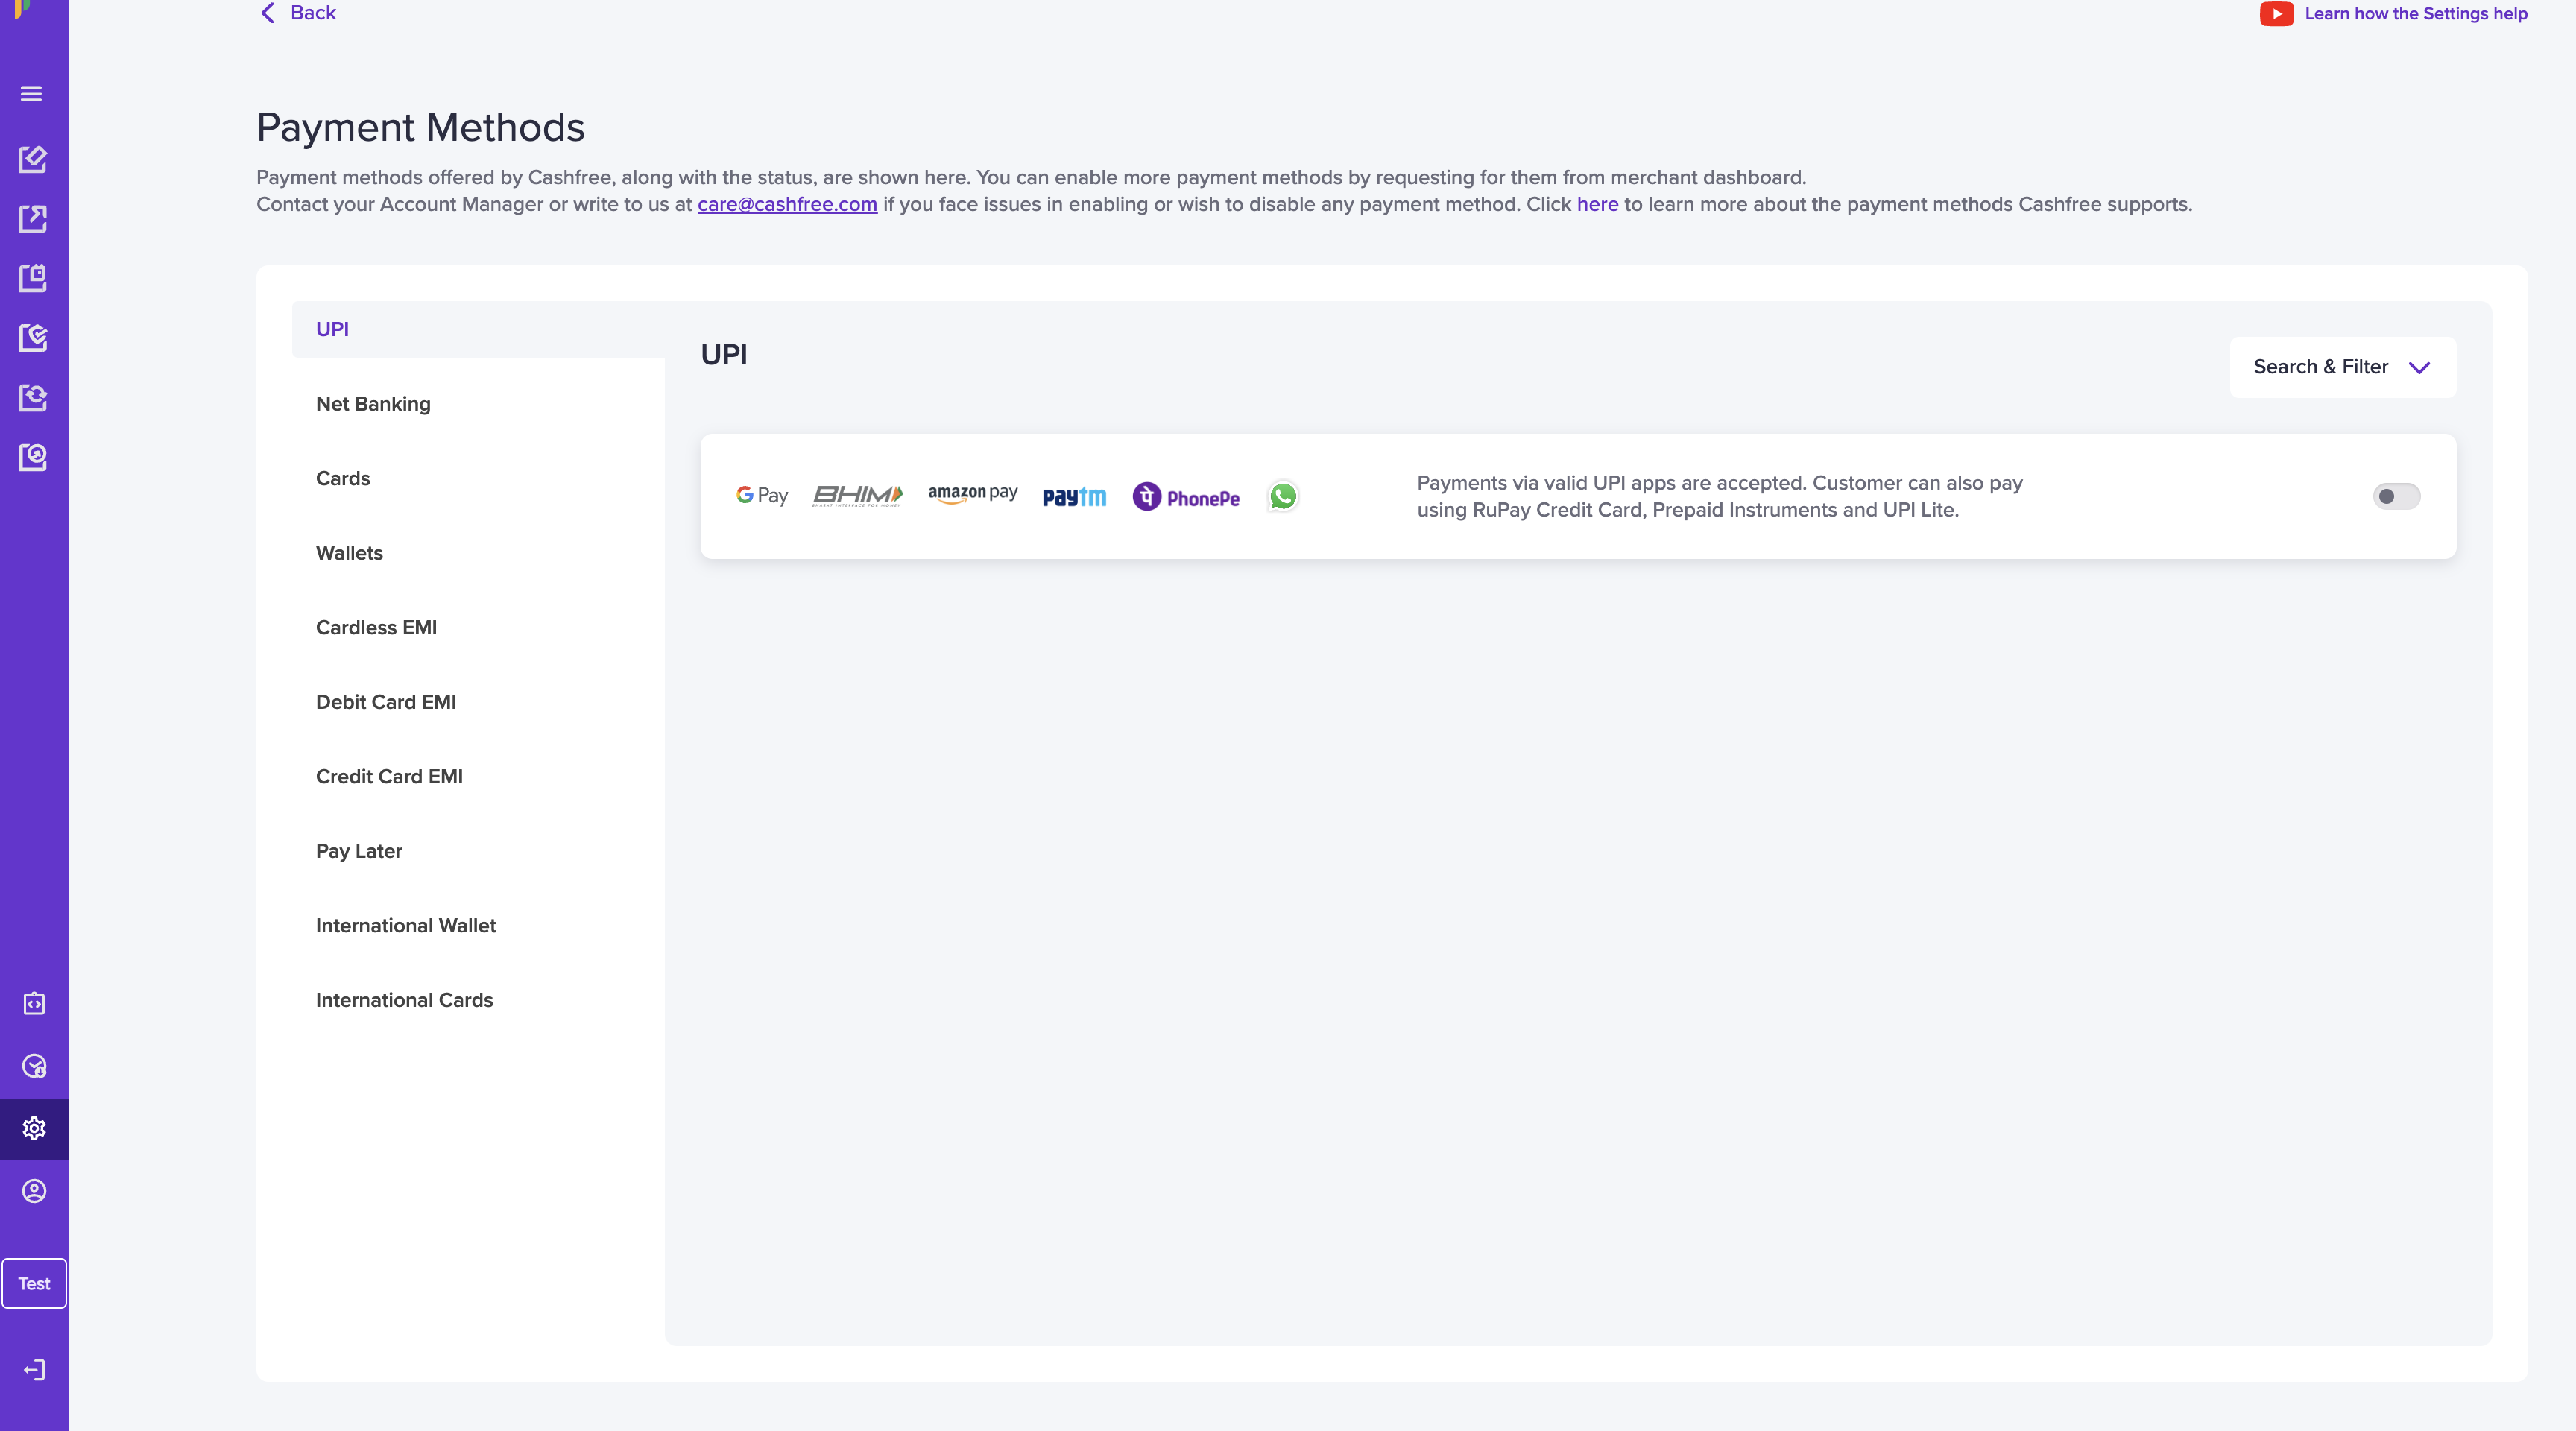
Payment Methods
You have the option to enable the following payment modes directly from the Payment Gateway Dashboard:
- UPI
- Net Banking
- Cards
- Wallets
- Cardless EMI
- Debit Card EMI
- Credit Card EMI
- Pay Later
- International Wallet
- International Cards
This page shows all modes offered by Cashfree Payments but you will only be able to request modes that are eligible for you based on your business type.
The following steps are to activate payment modes in production environment, i.e. when your Payment Gateway product is activated. However, to activate payment modes in test/sandbox environment or in case of any other issues, please write to your Account Manager or to [email protected].
Activating Payment Mode
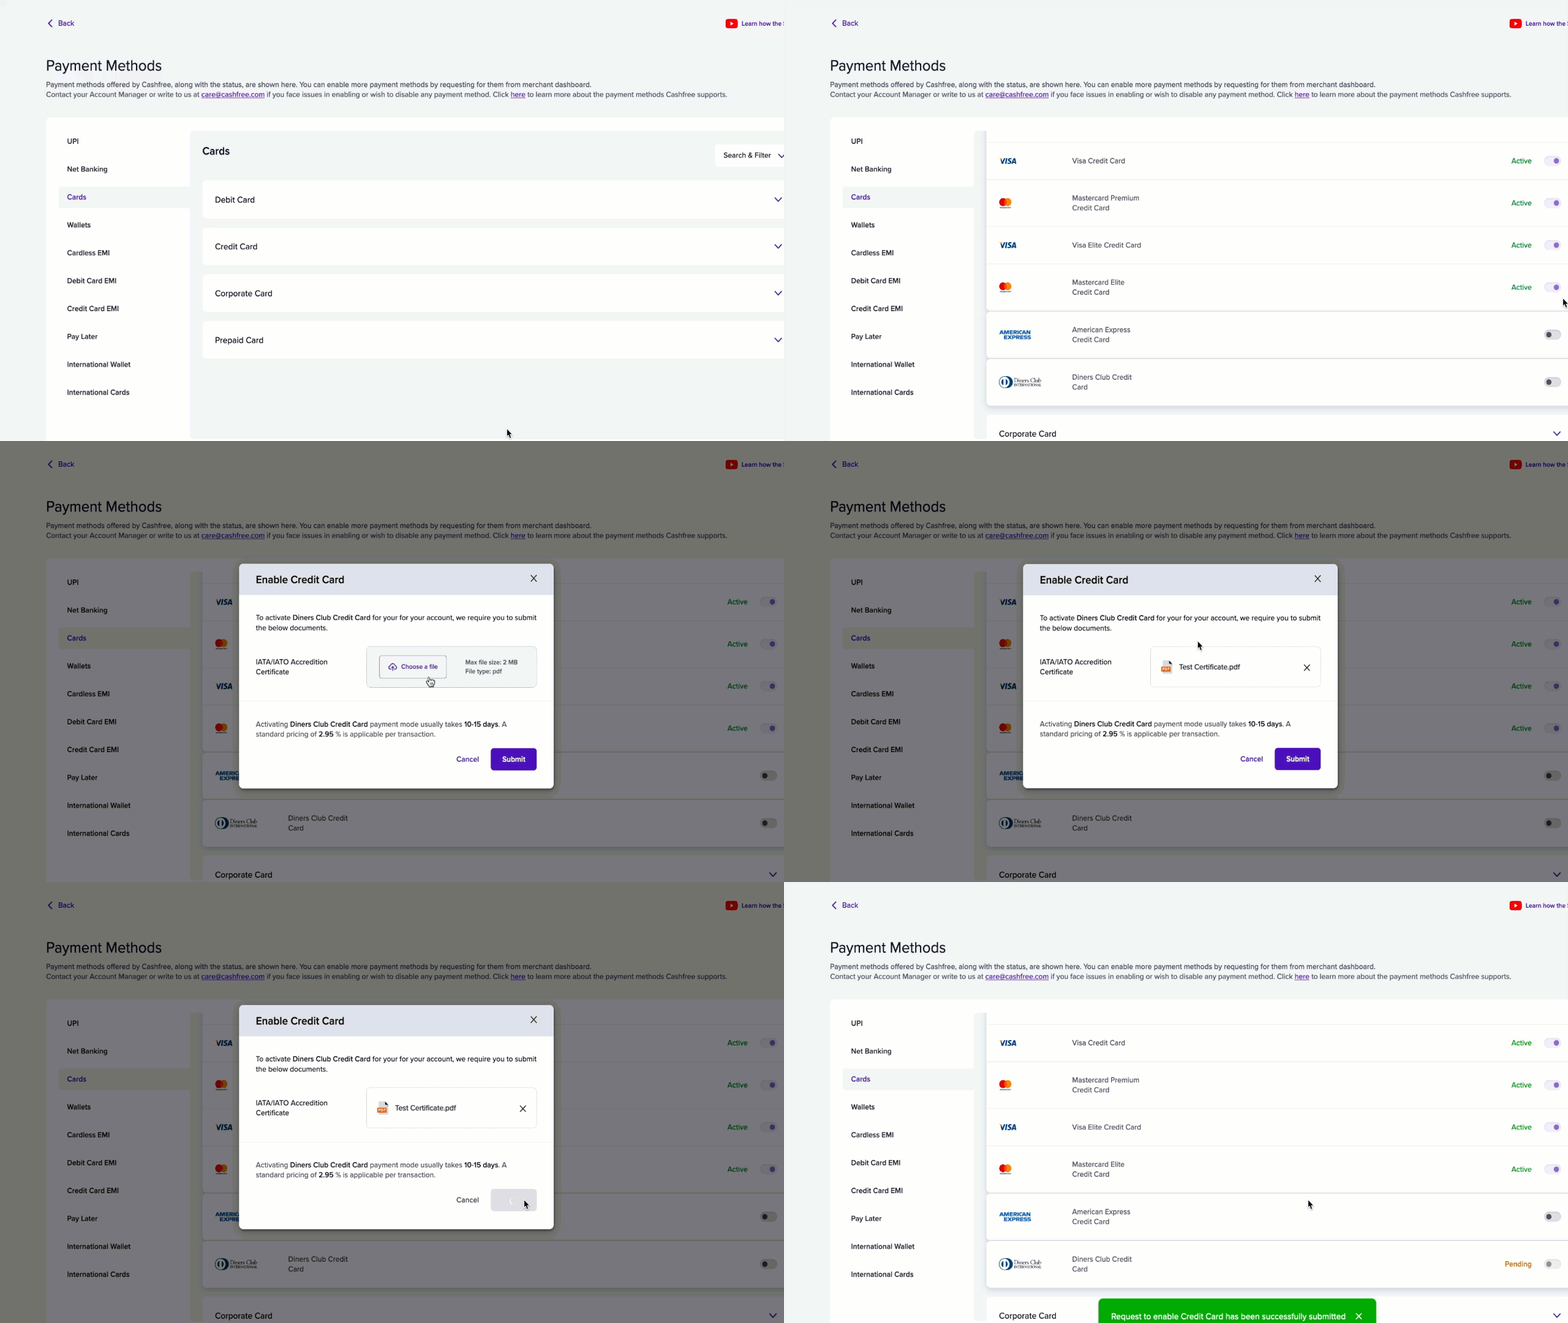
Watch the GIF below that shows how to activate a payment mode.
Activate Payment Mode
To request for activating a new payment mode,
- Go to Payment Gateway Dashboard in the left navigation bar, click Settings > Payment Methods and select a payment group, like Cards shown in the snip below. From the list of Cards, select a payment method.
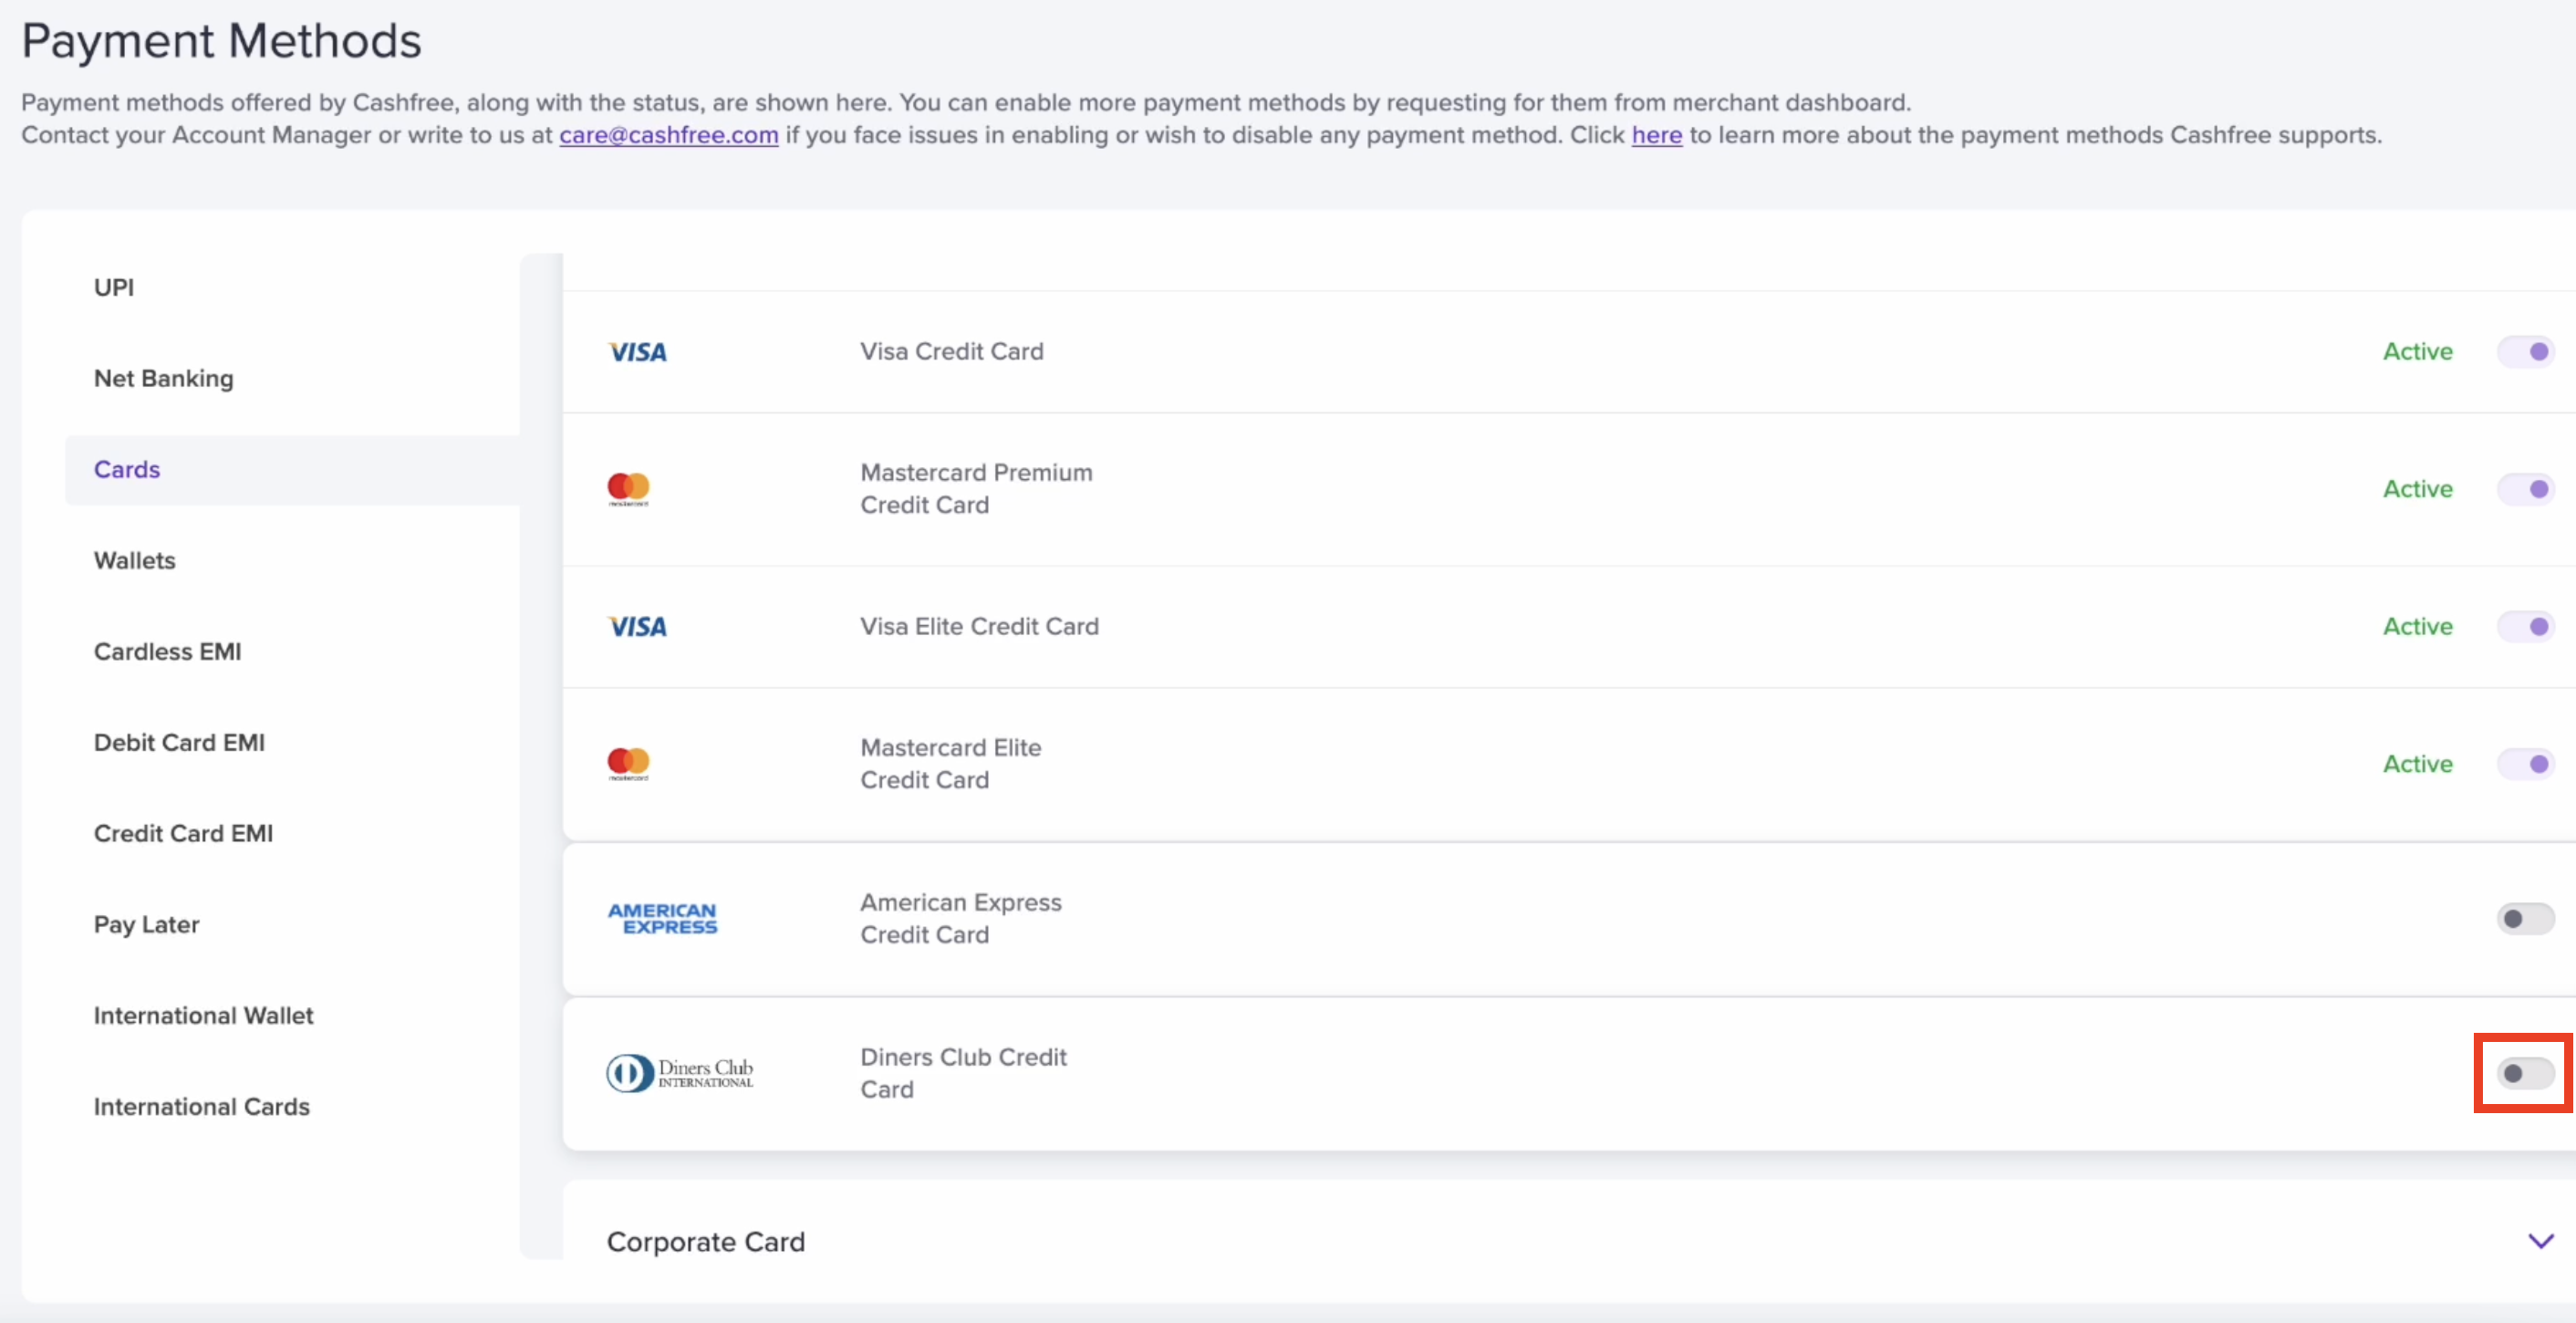
Enable Payment Method
- The payment mode may take some TAT to get enabled. And you maybe required to submit some additional documents/details to enable that payment mode. You can also see the standard pricing that will be applicable per transaction. Click Submit and proceed further.
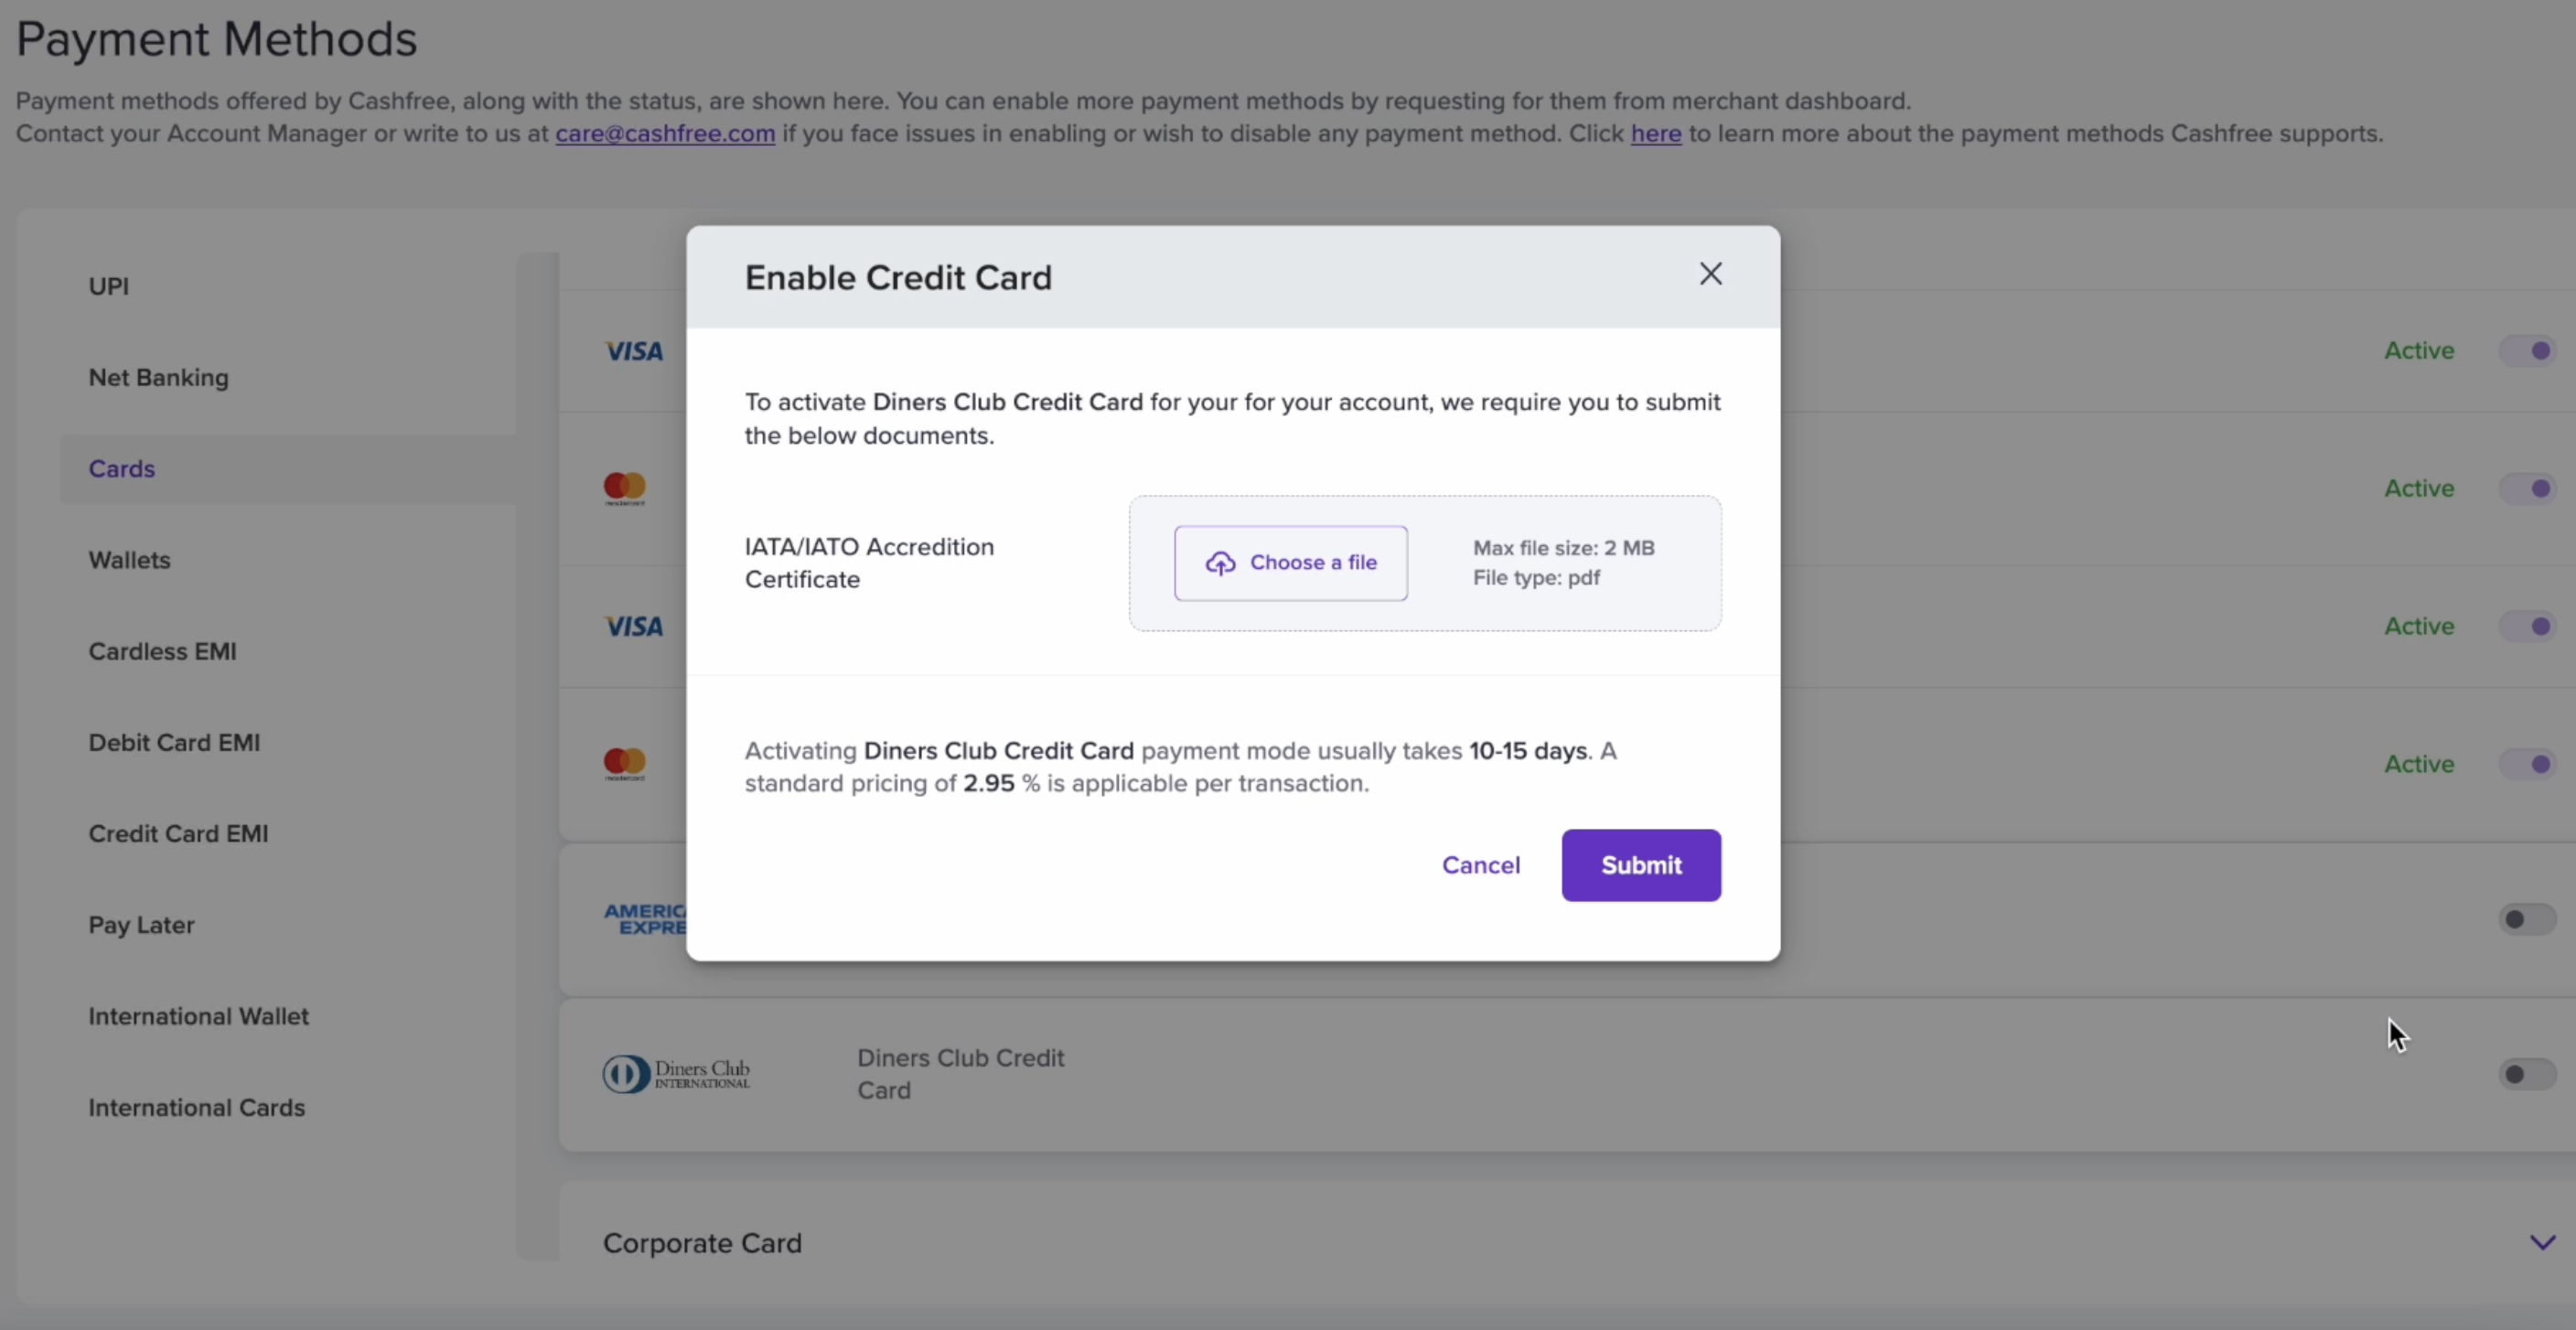
Submit Request to Enable Payment Method
- You will then get a message stating that the request to enable the payment mode is submitted successfully. Our team will work on enabling the payment mode within specified TAT. Once enabled, you can start accepting payments from your customers using this payment mode.
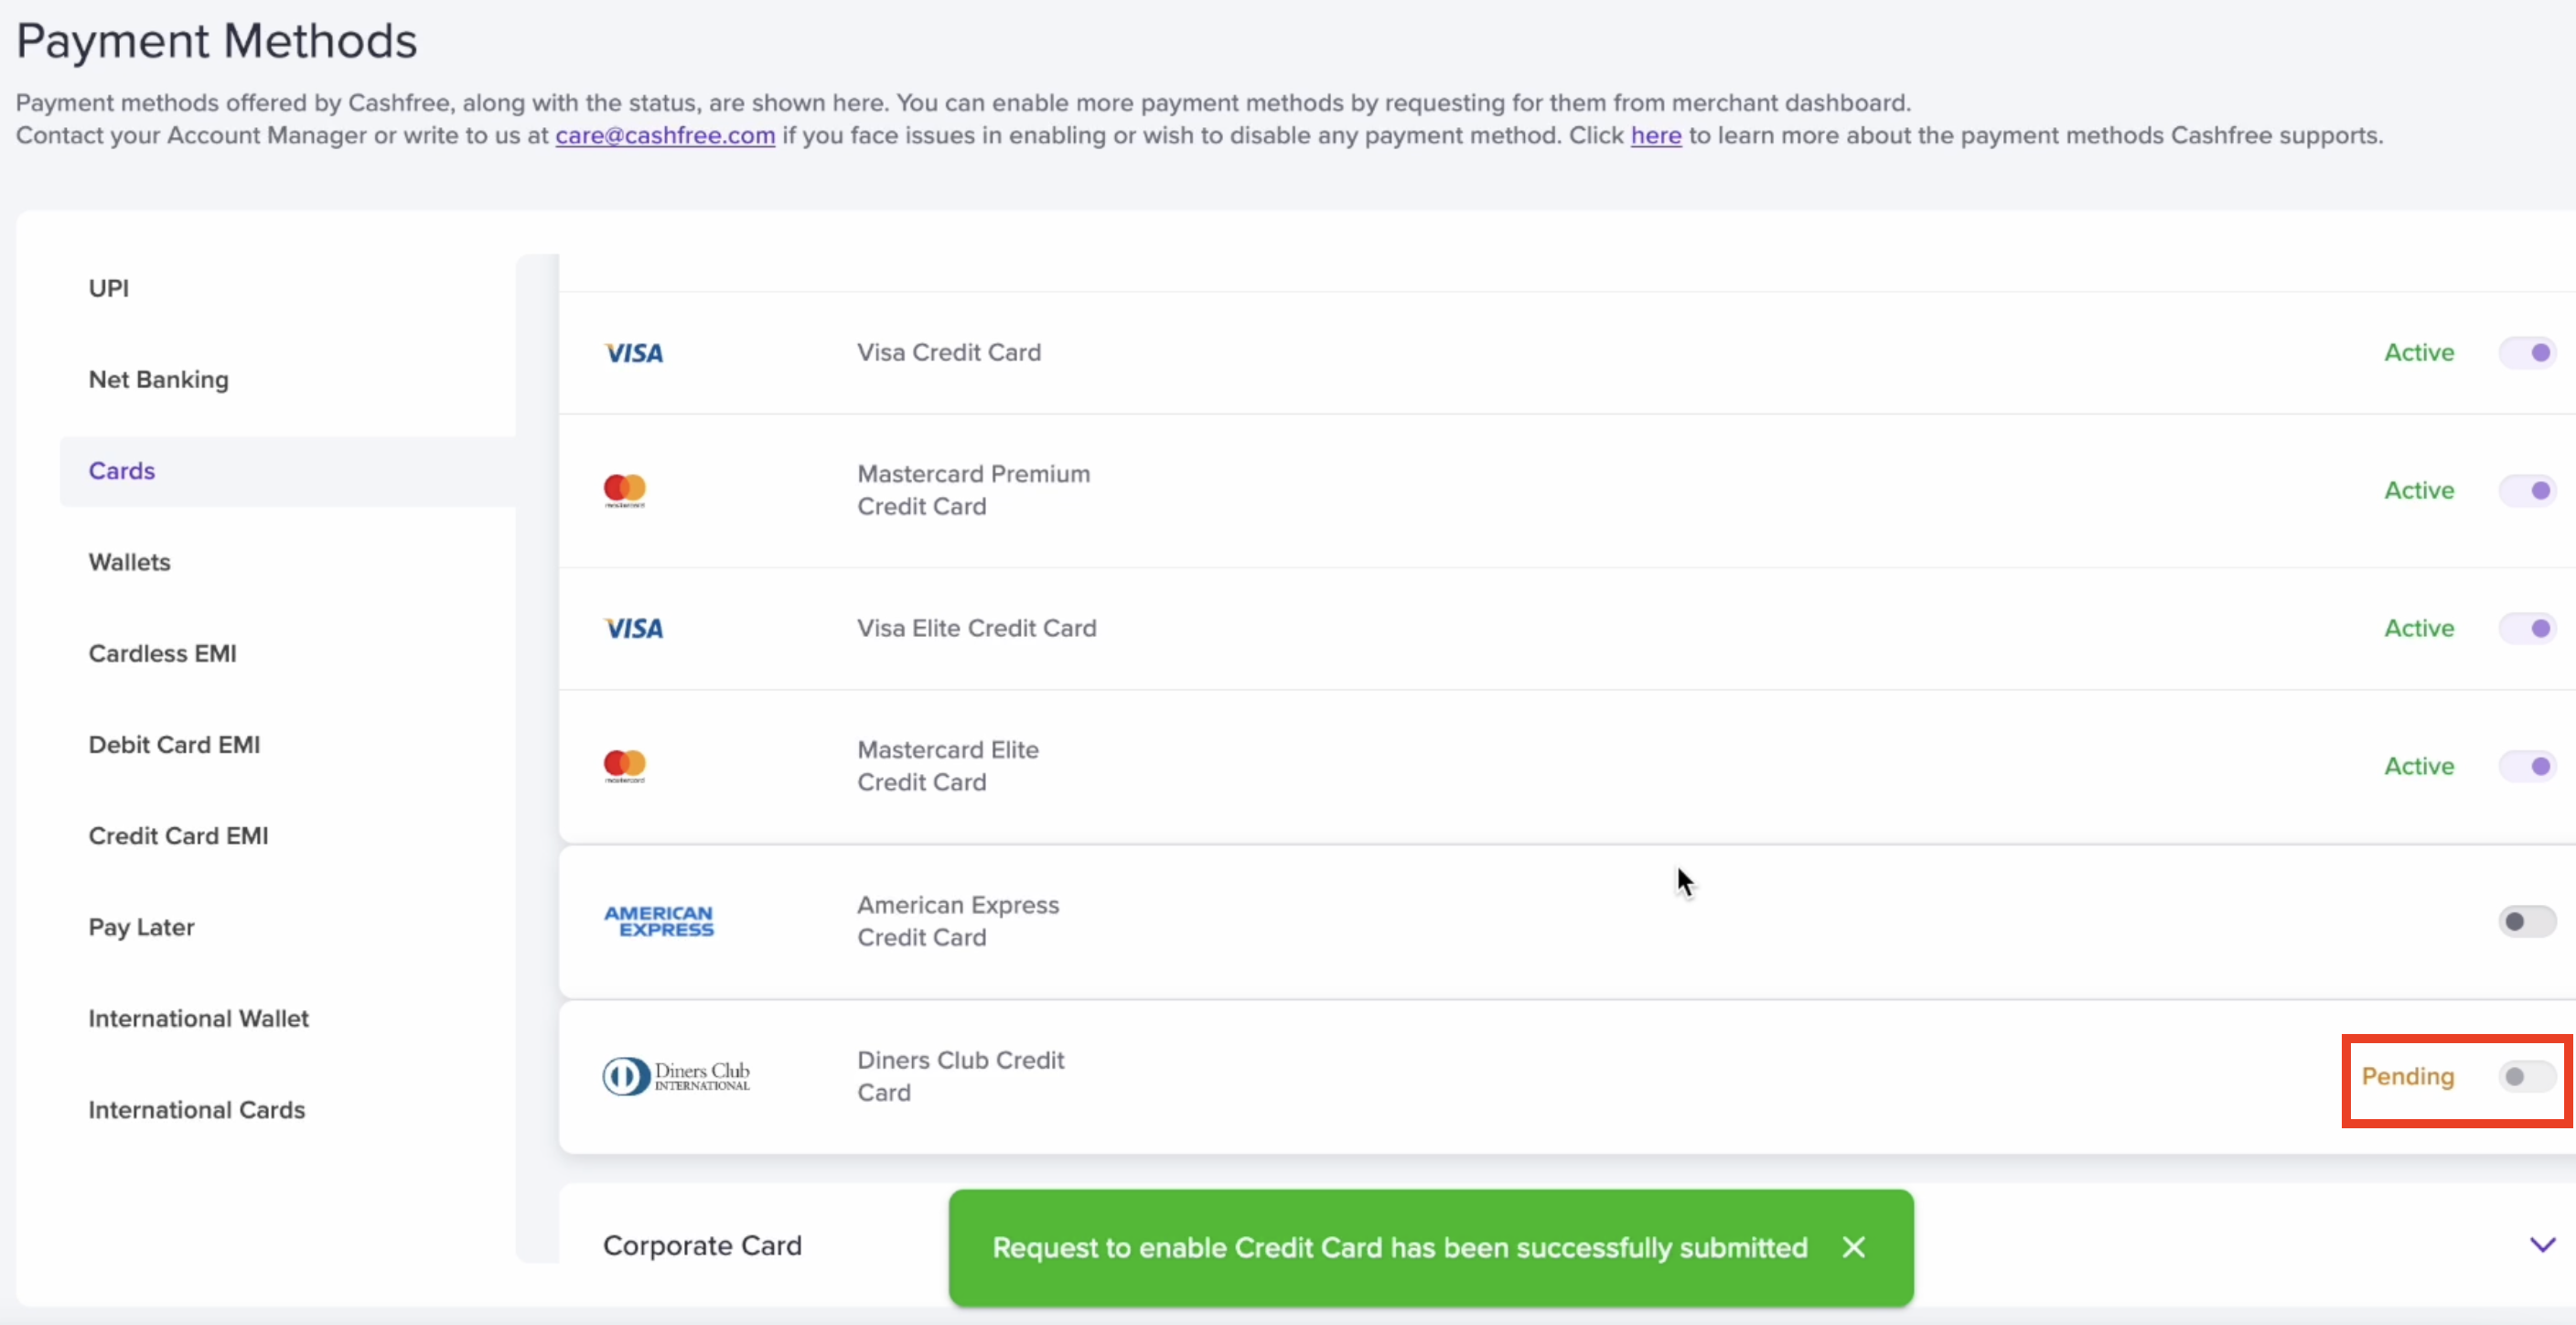
Payment Method Requested Successfully
Activate Payment Mode - Paytm
Watch this GIF to see how Paytm payment mode enablement process works.
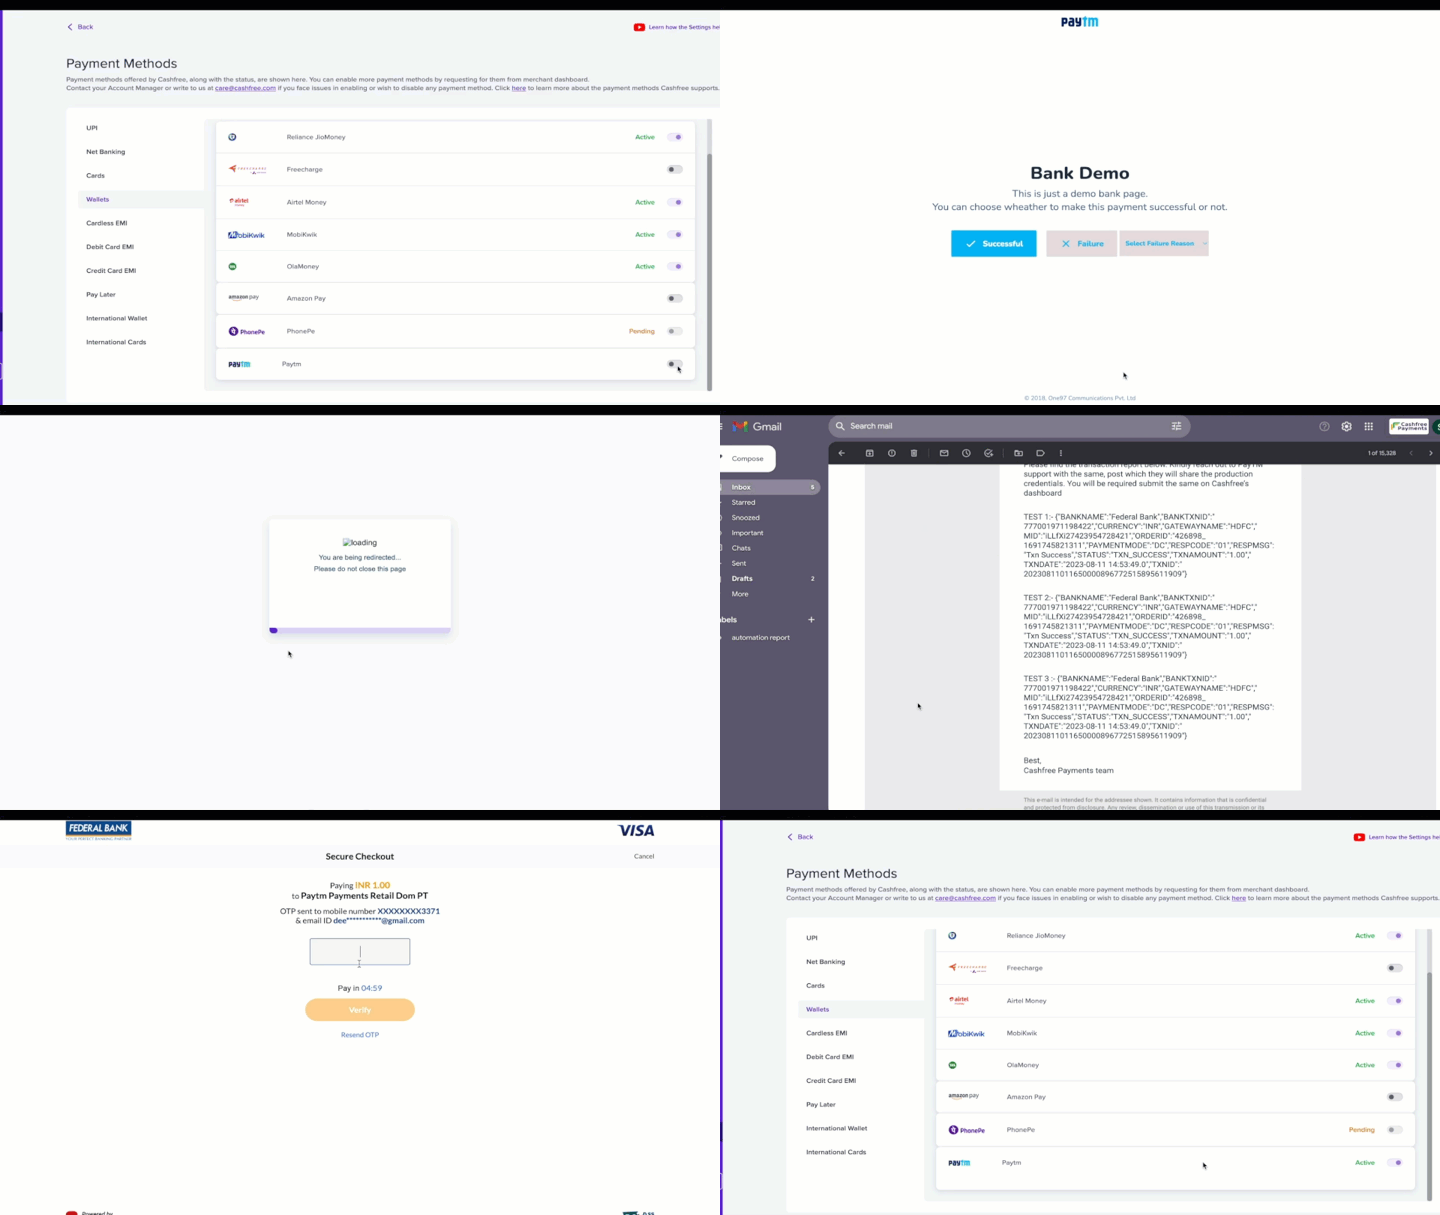
Activate Payment Mode - Paytm
To activate Paytm payment mode,
- Go to Payment Gateway Dashboard in the left navigation bar, click Settings > select Wallets. From the list of wallets, select Paytm.
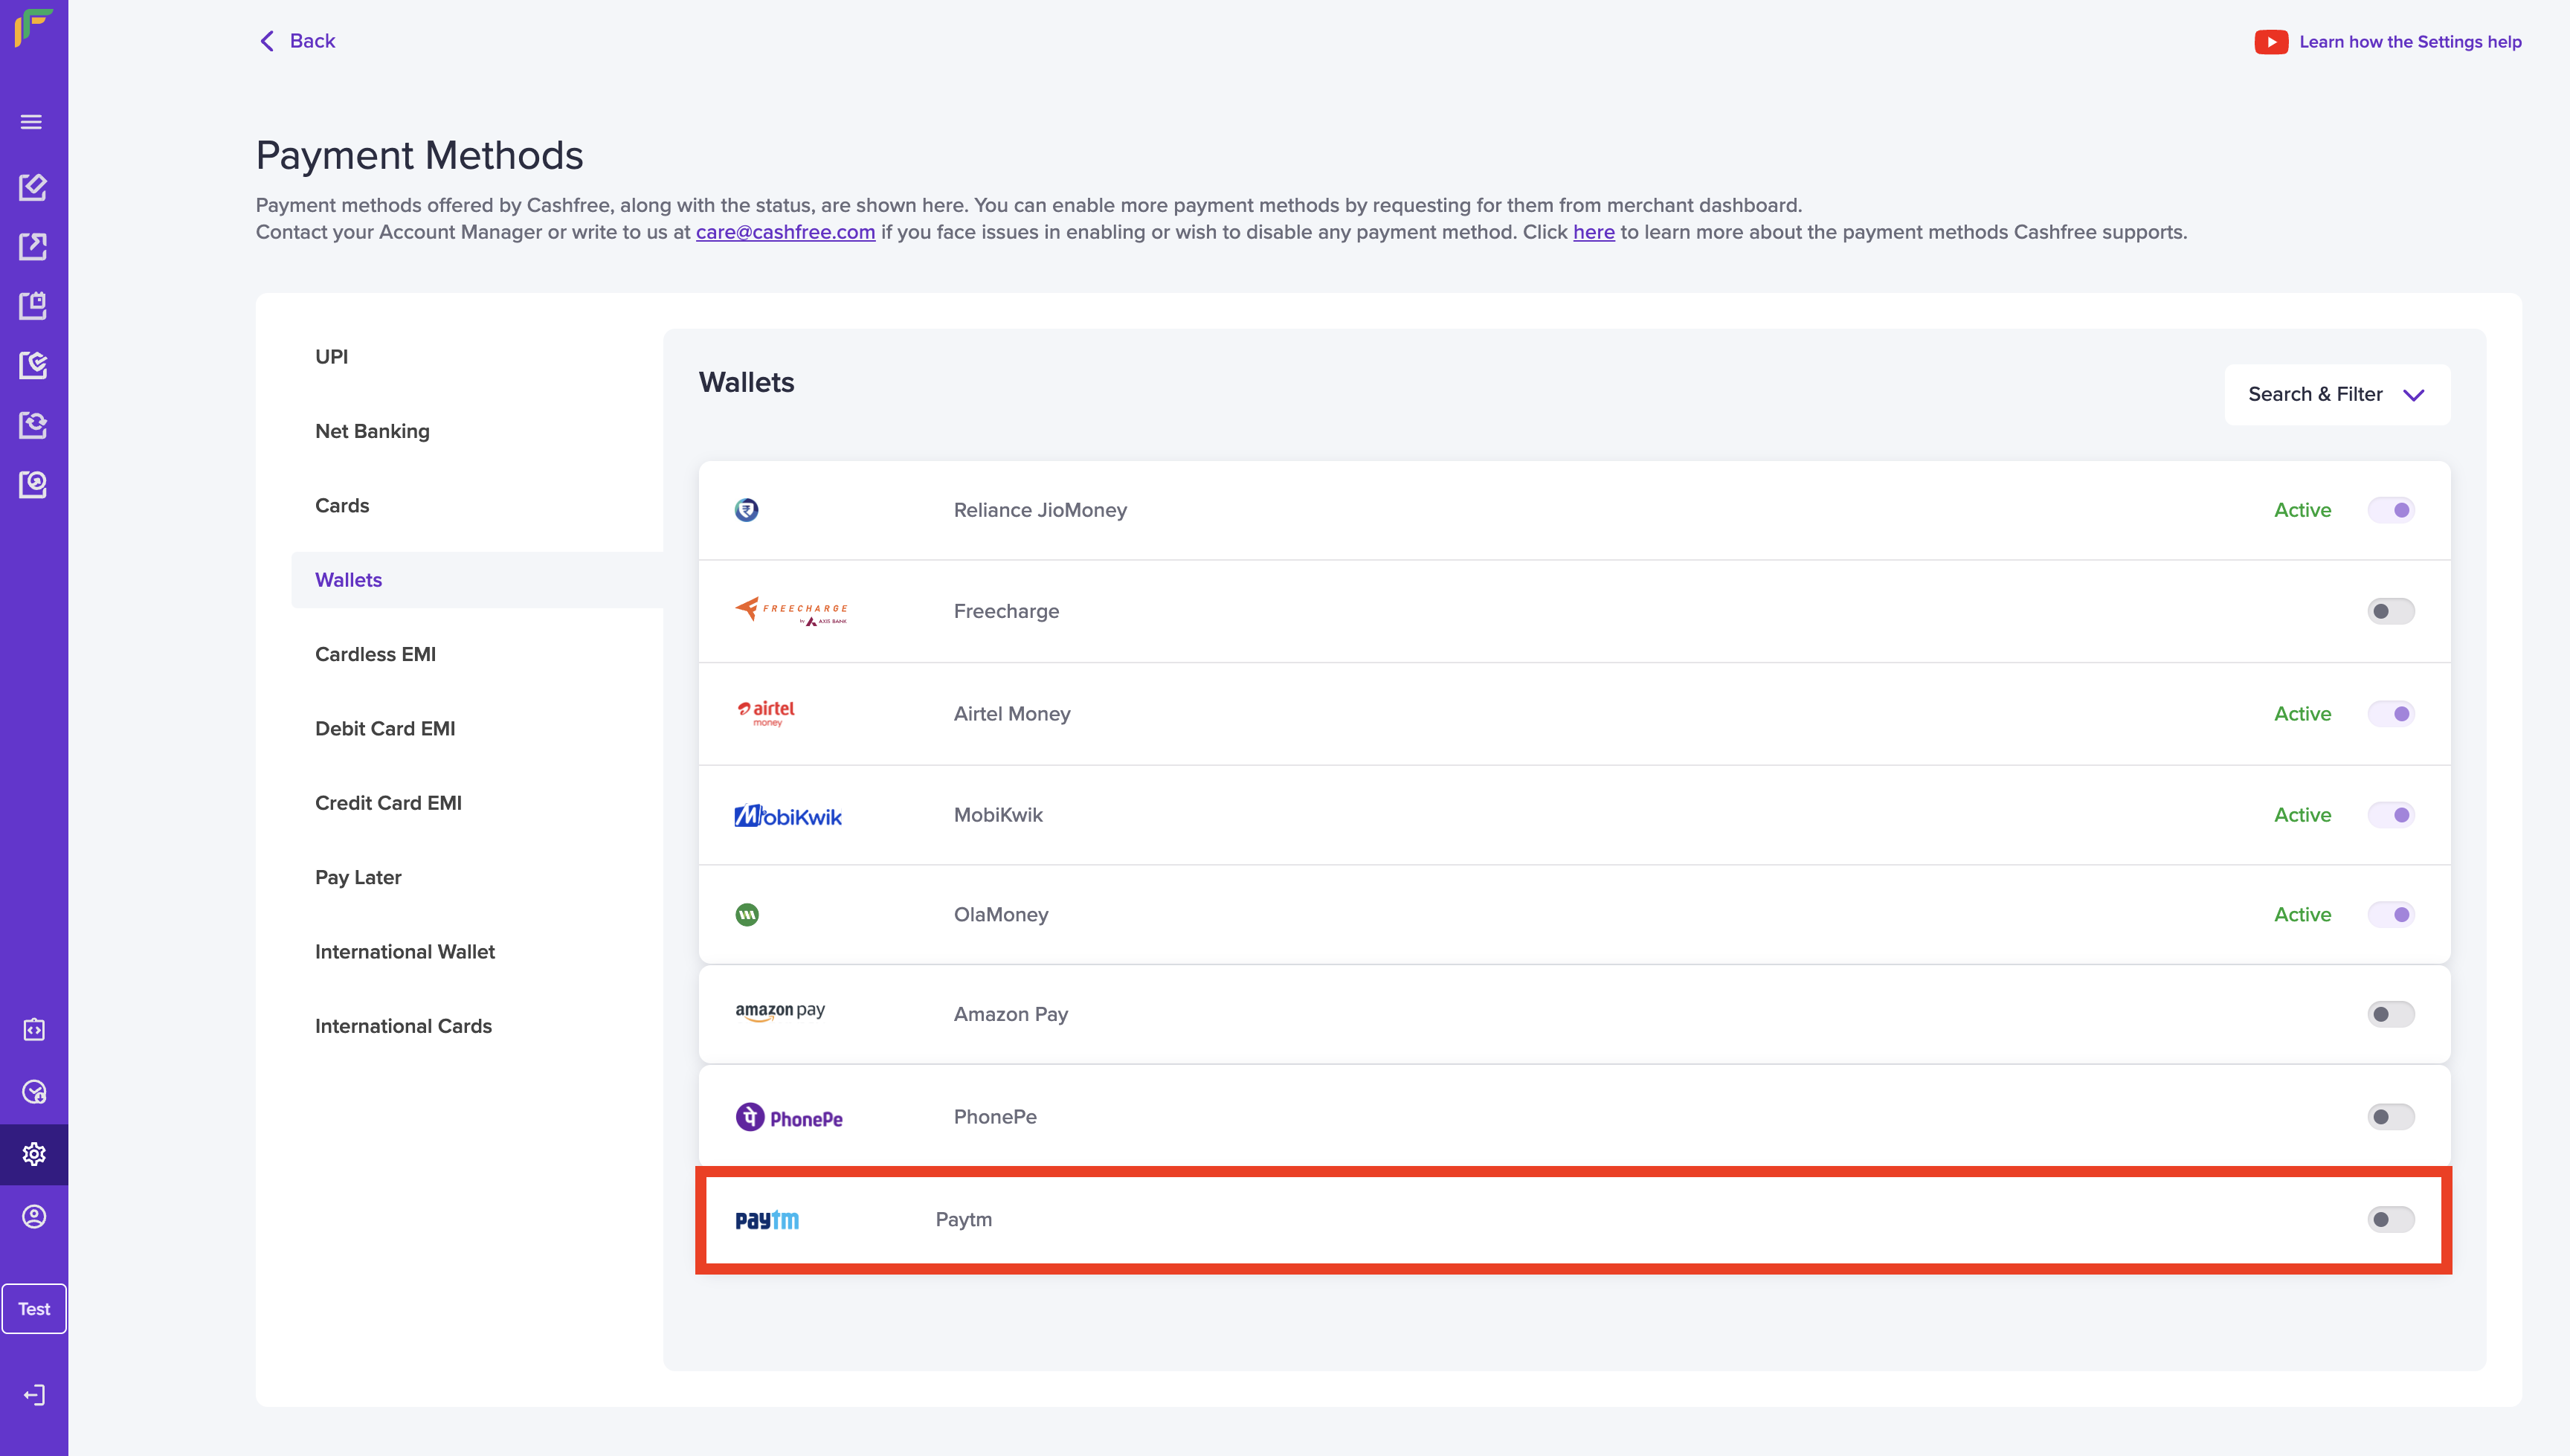
Payment Methods - Paytm
- To enable Paytm payment method you need to connect your active Paytm business account with Cashfree Payments. Click Confirm and proceed further.
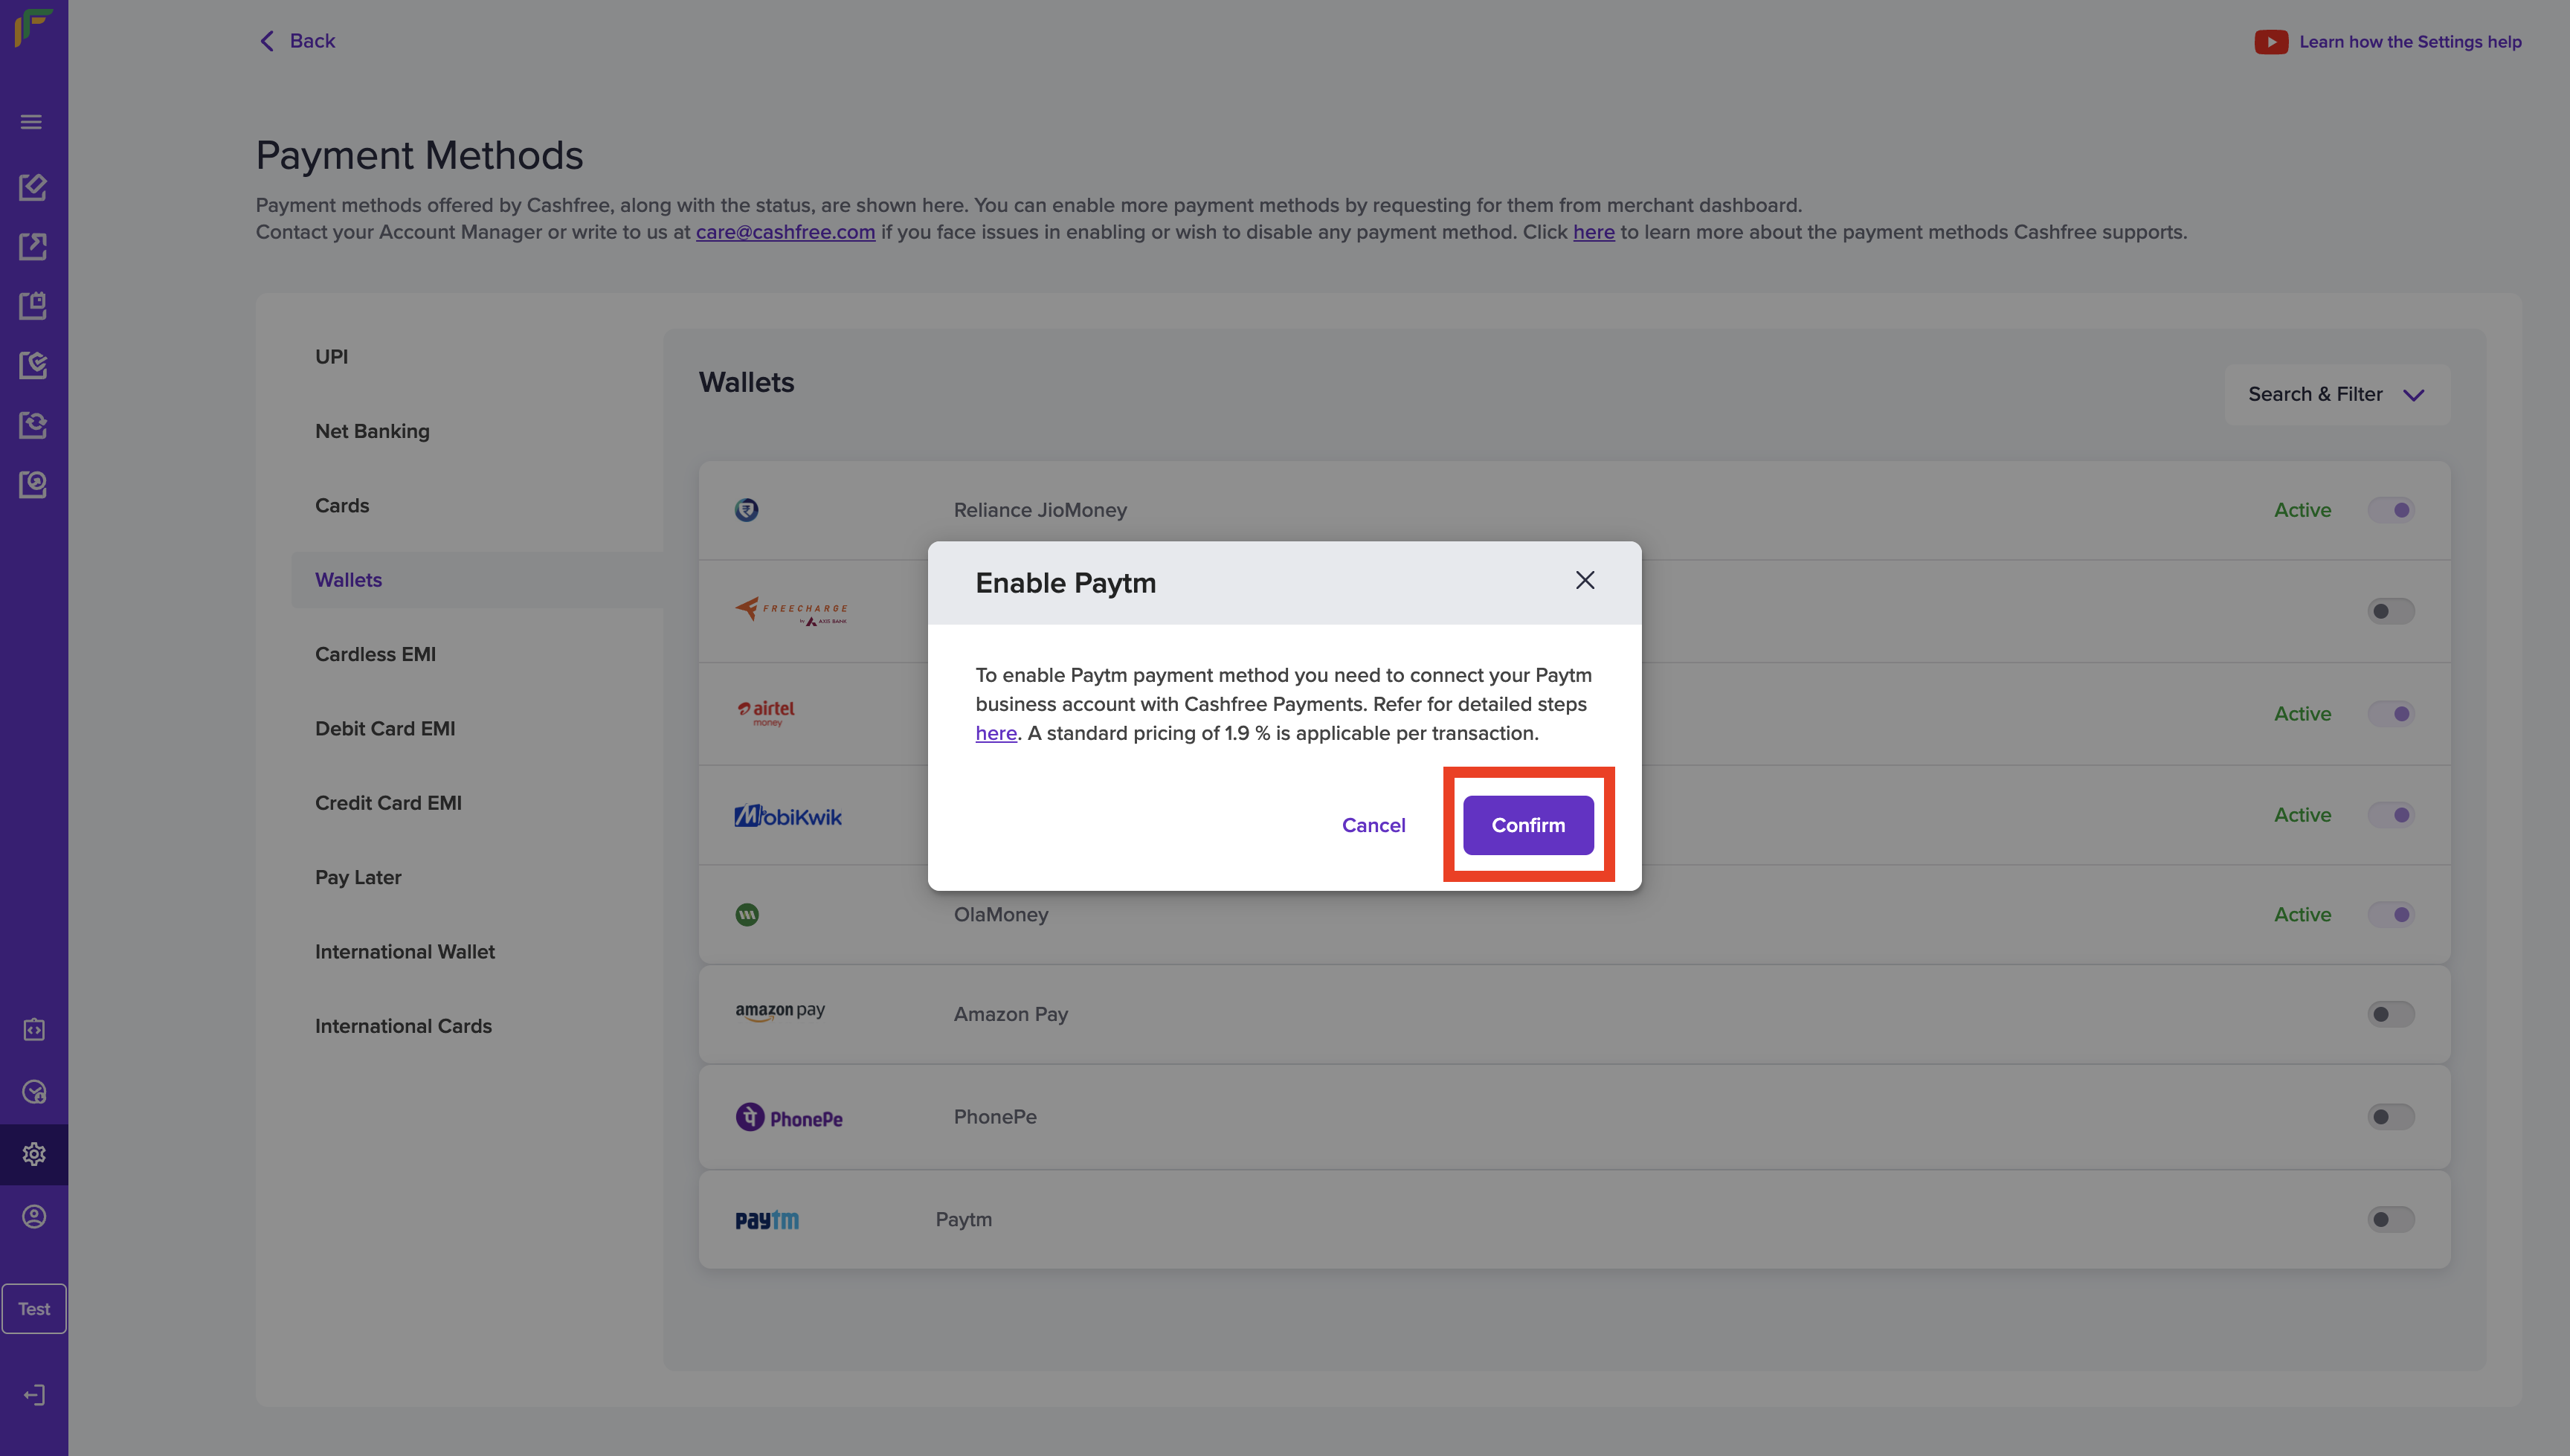
Connect Paytm Account
- You'll be redirected to Paytm dashboard, login with your active Paytm business account and get the test API keys.
- Come back to Cashfree's merchant dashboard and enter your Paytm Test Merchant ID and Test Merchant Key and click on Next.
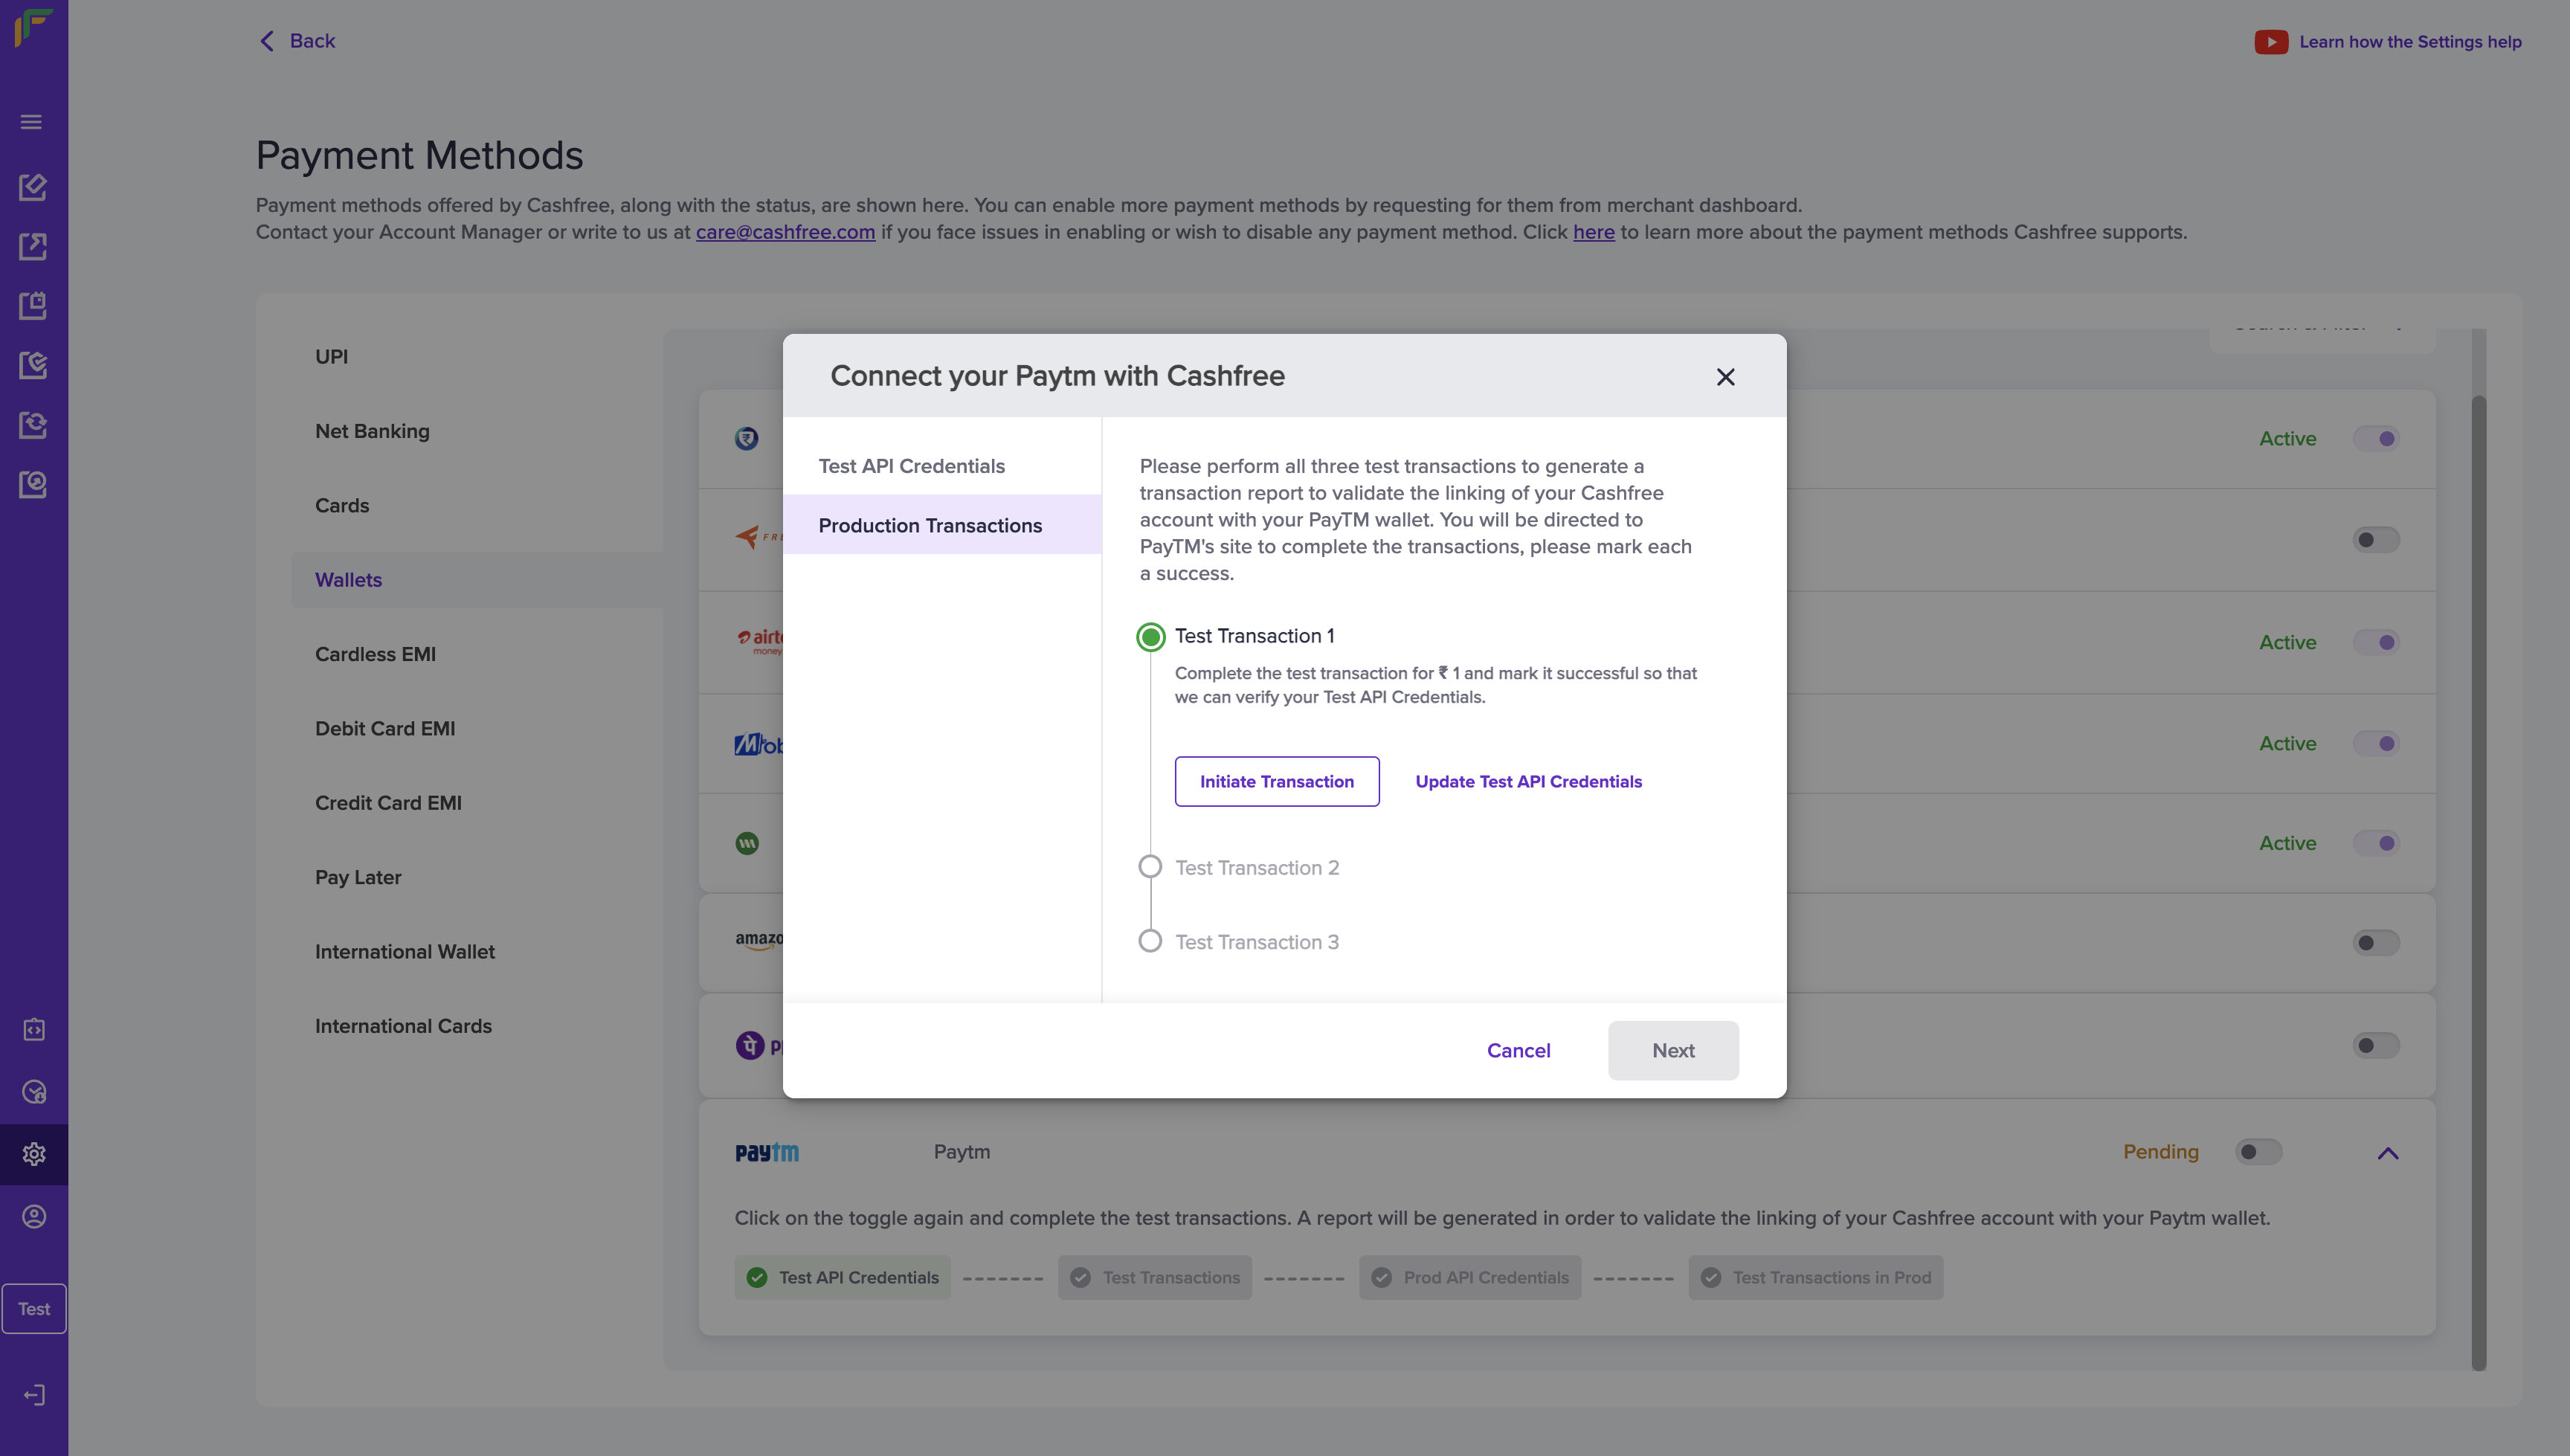
- Click on Initiate Transaction, you'll be redirected to Paytm screen to complete the transaction.
Connect Paytm Account
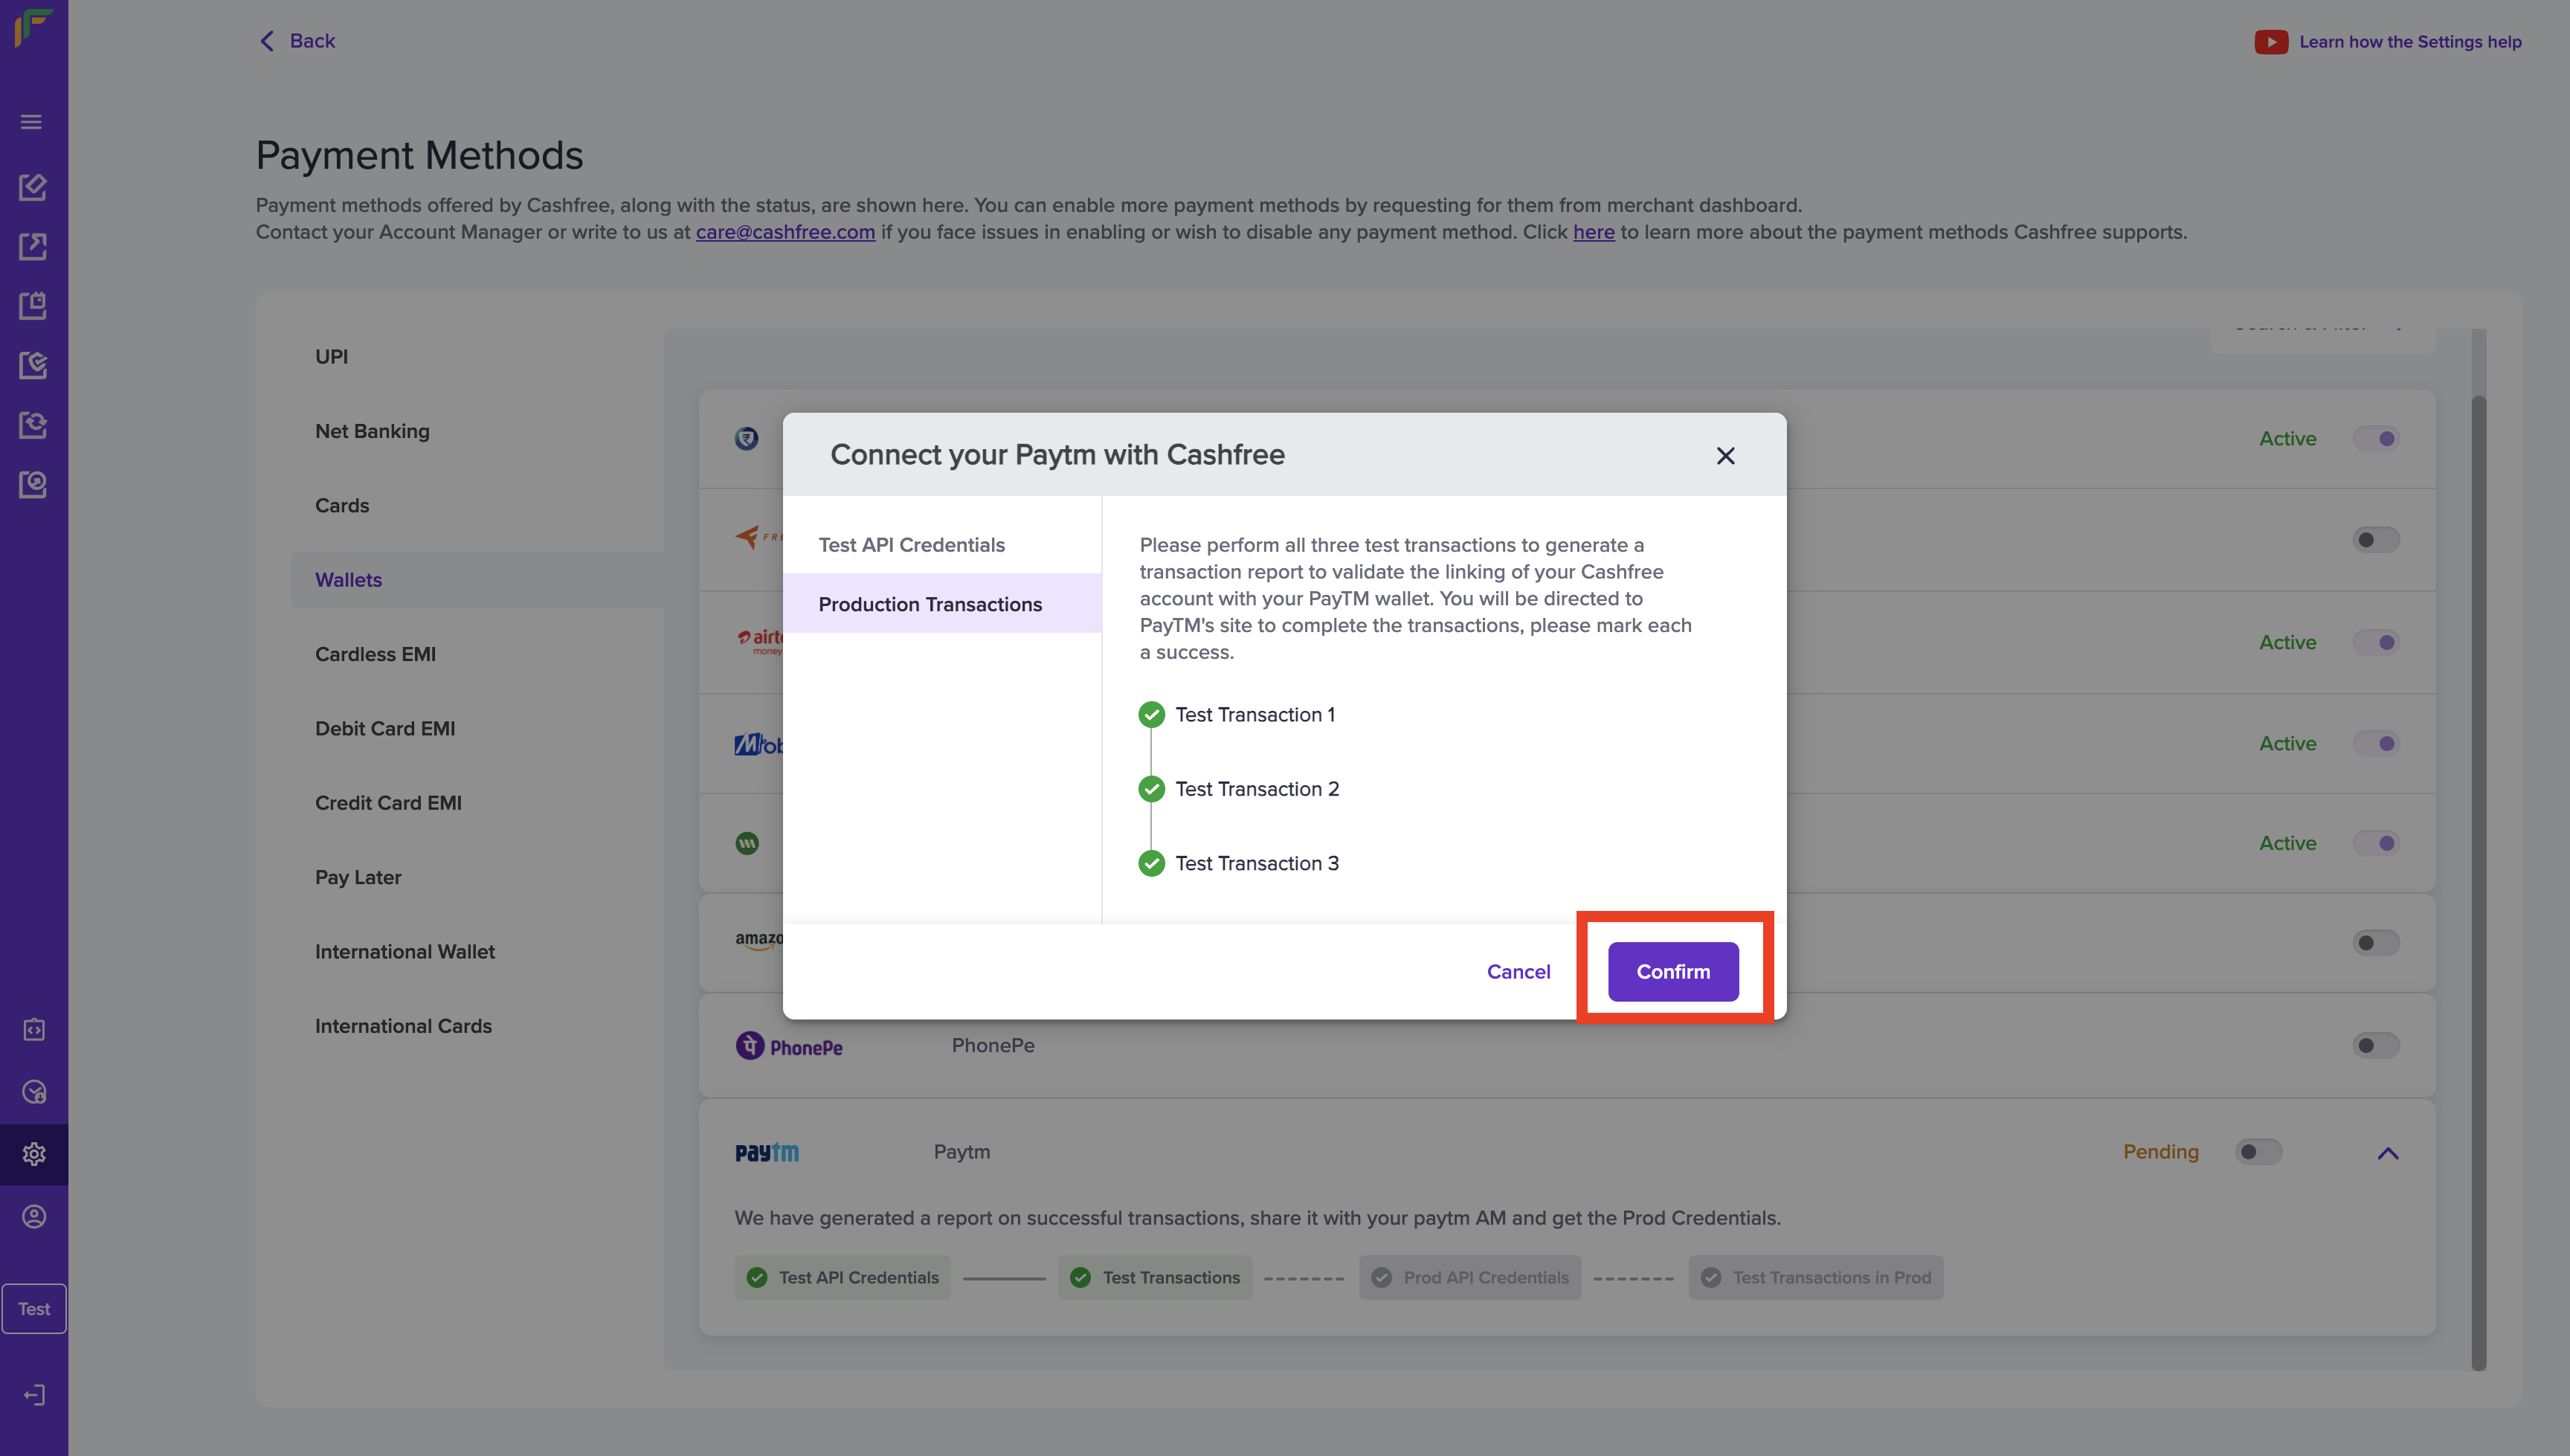
- Complete all 3 test transactions in a similar way and click on Confirm.
Connect Paytm Account
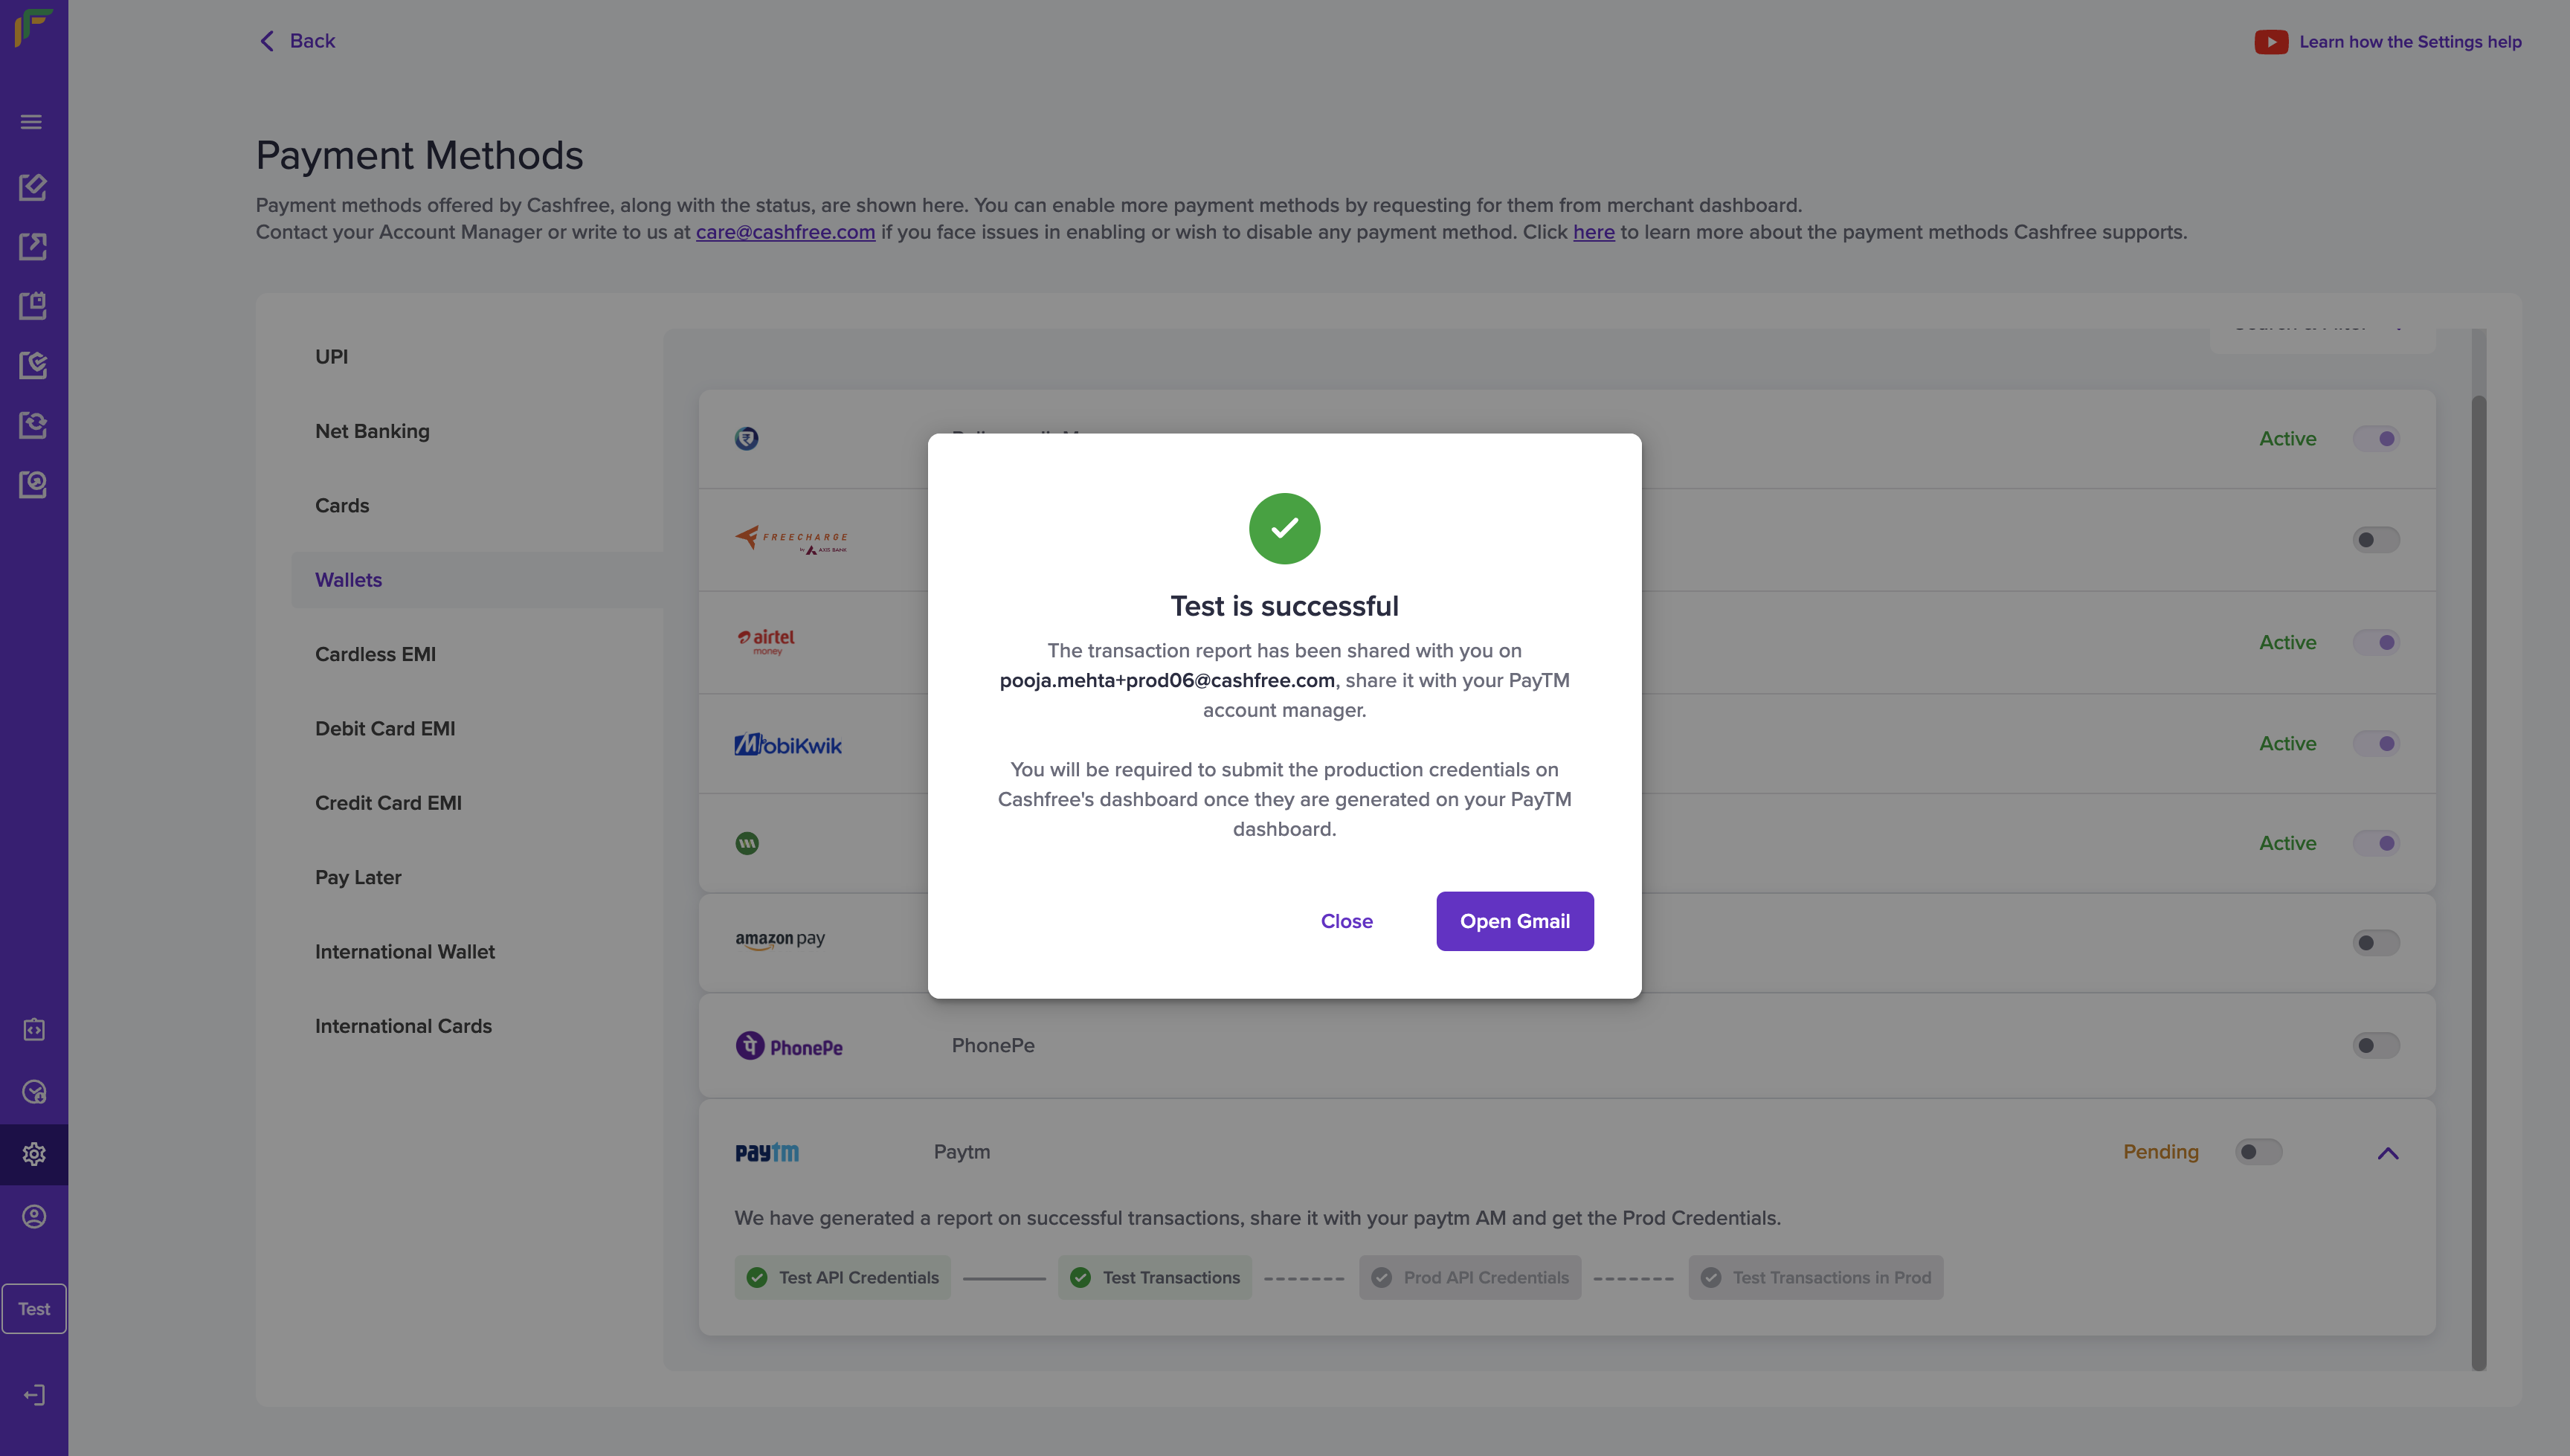
- Your testing is done successfully. Cashfree would mail a transaction report of these test transactions on your registered email. Share it with your Paytm account manager to get your production API keys generated. Please note, your Paytm Account Manager details can be found on your Paytm Dashboard.
Connect Paytm Account
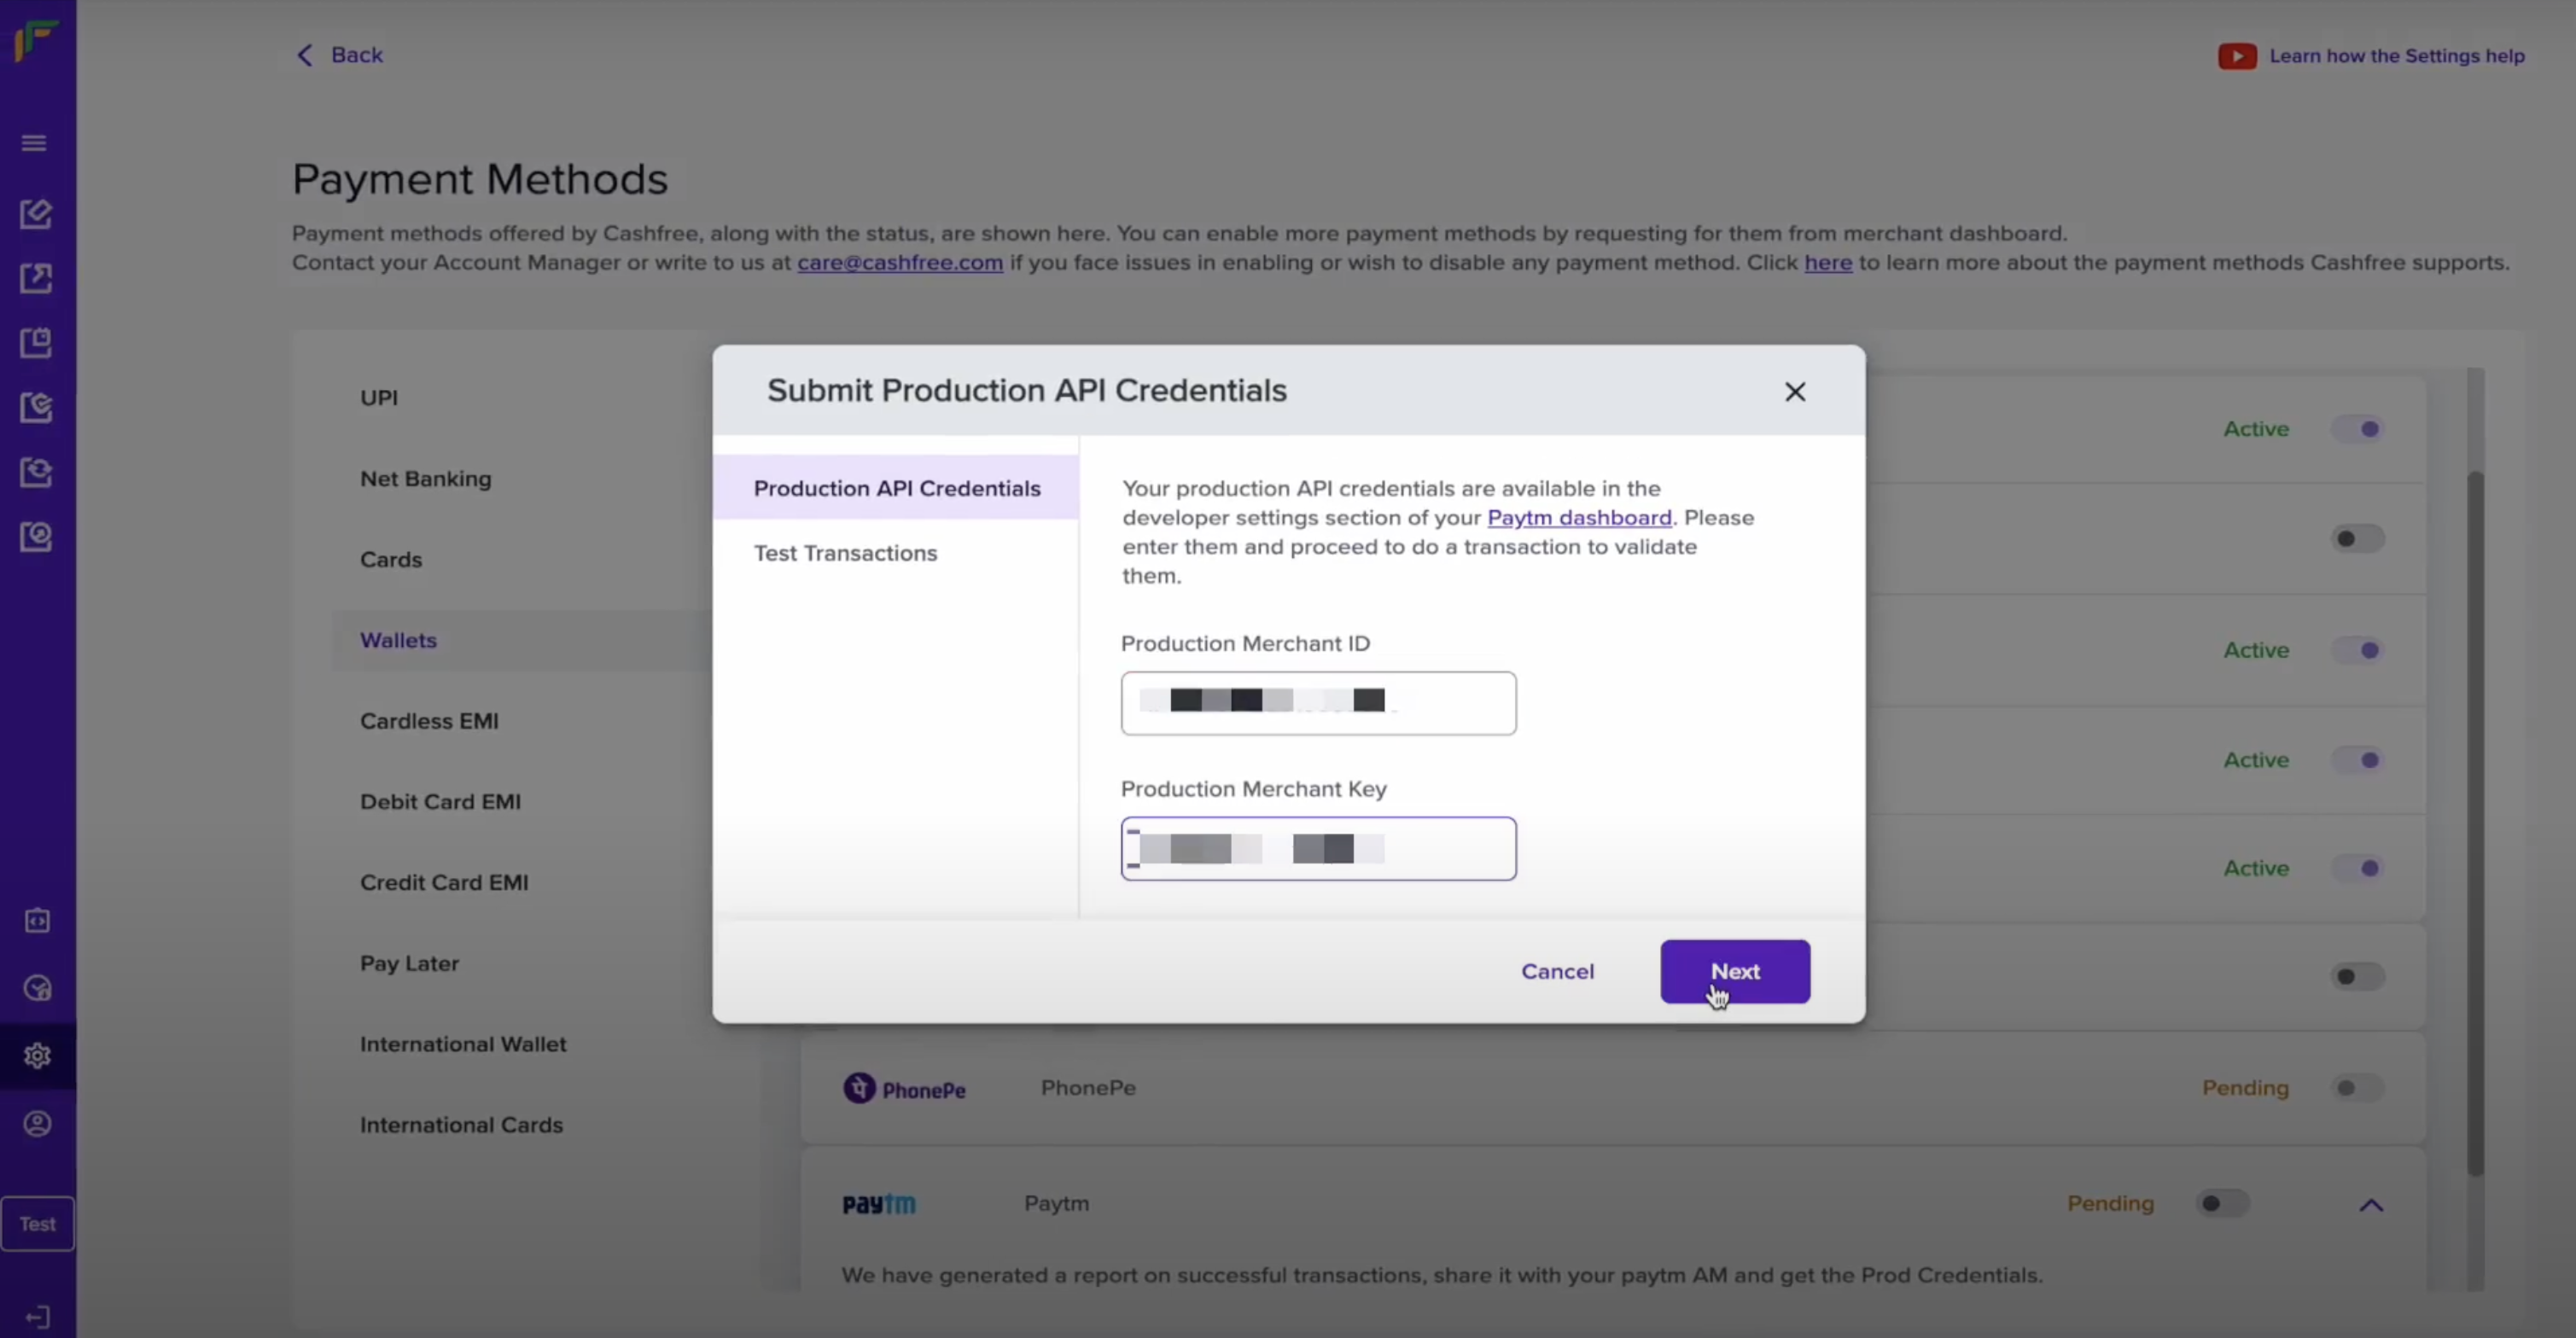
- Come back to Cashfree's Merchant Dashboard and enter Paytm's prod API credentials and click on Next.
Connect Paytm Account
- Click on Initiate Transaction and successfully complete the sample transaction. Once done click on Confirm to complete connecting your Paytm account with Cashfree Payments.
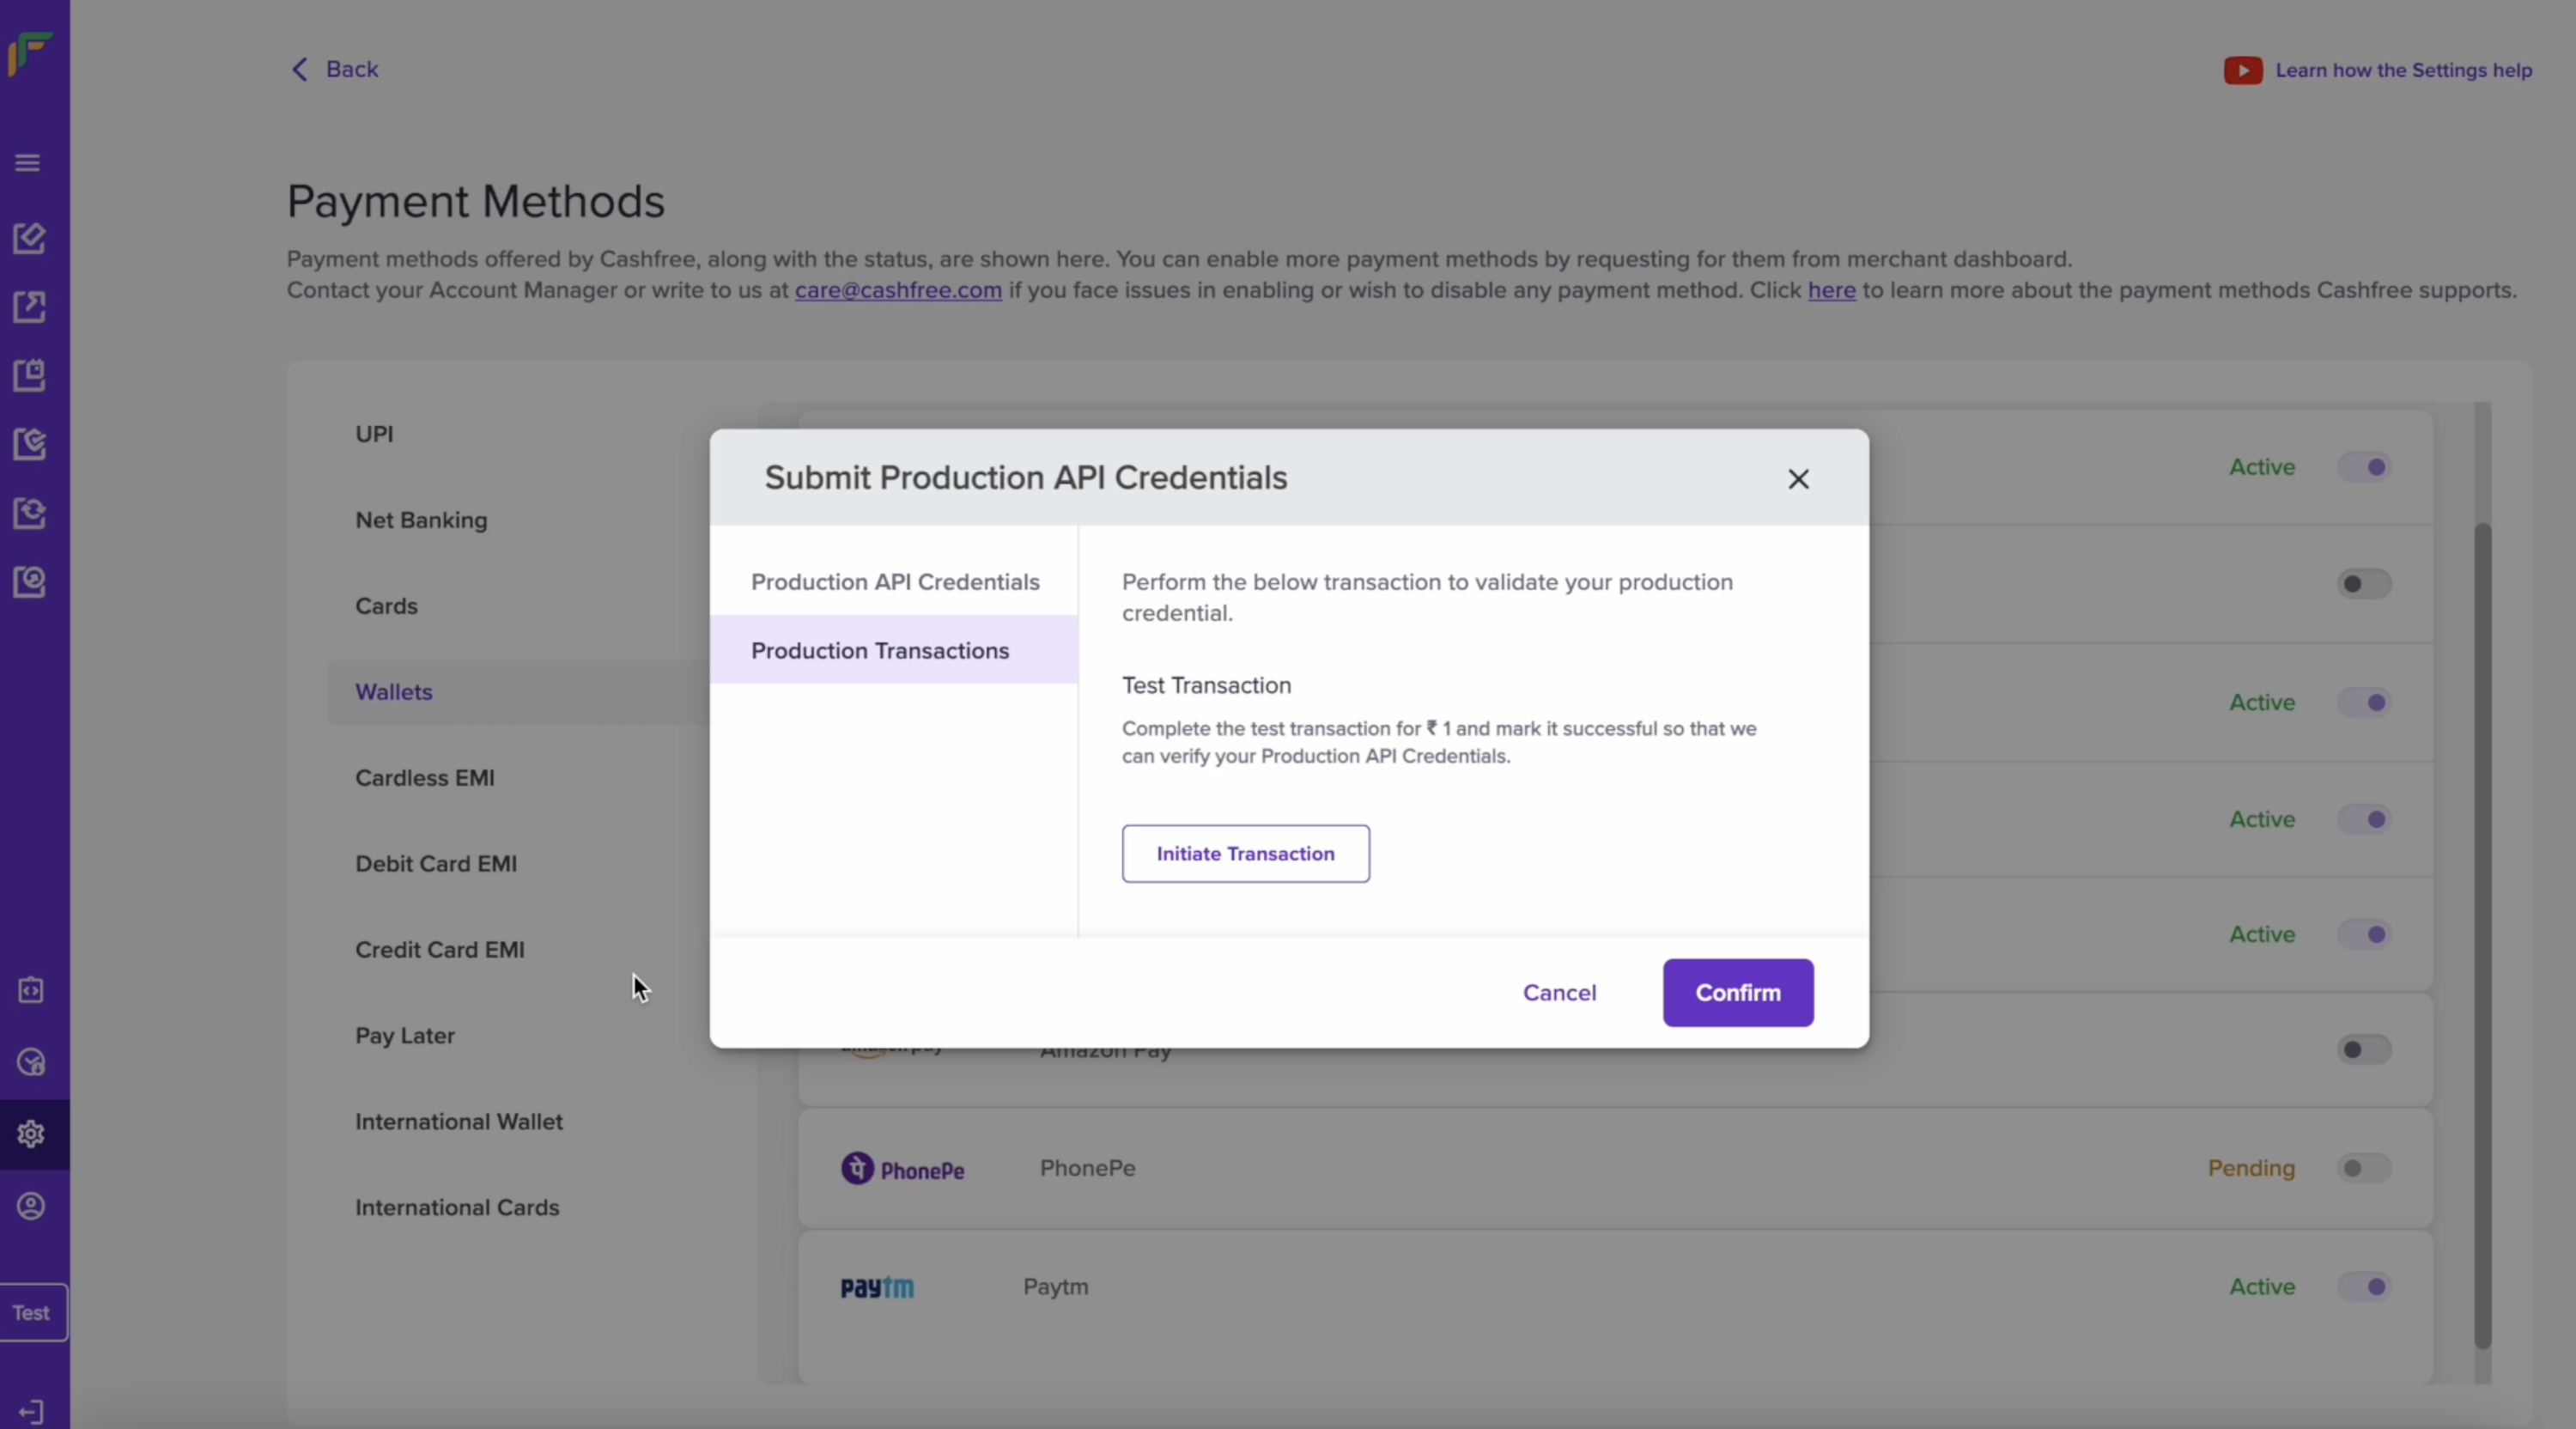
Connect Paytm Account
- You will get a message that Paytm has been activated successfully. You can now start accepting payments from your customers using Paytm payment mode.
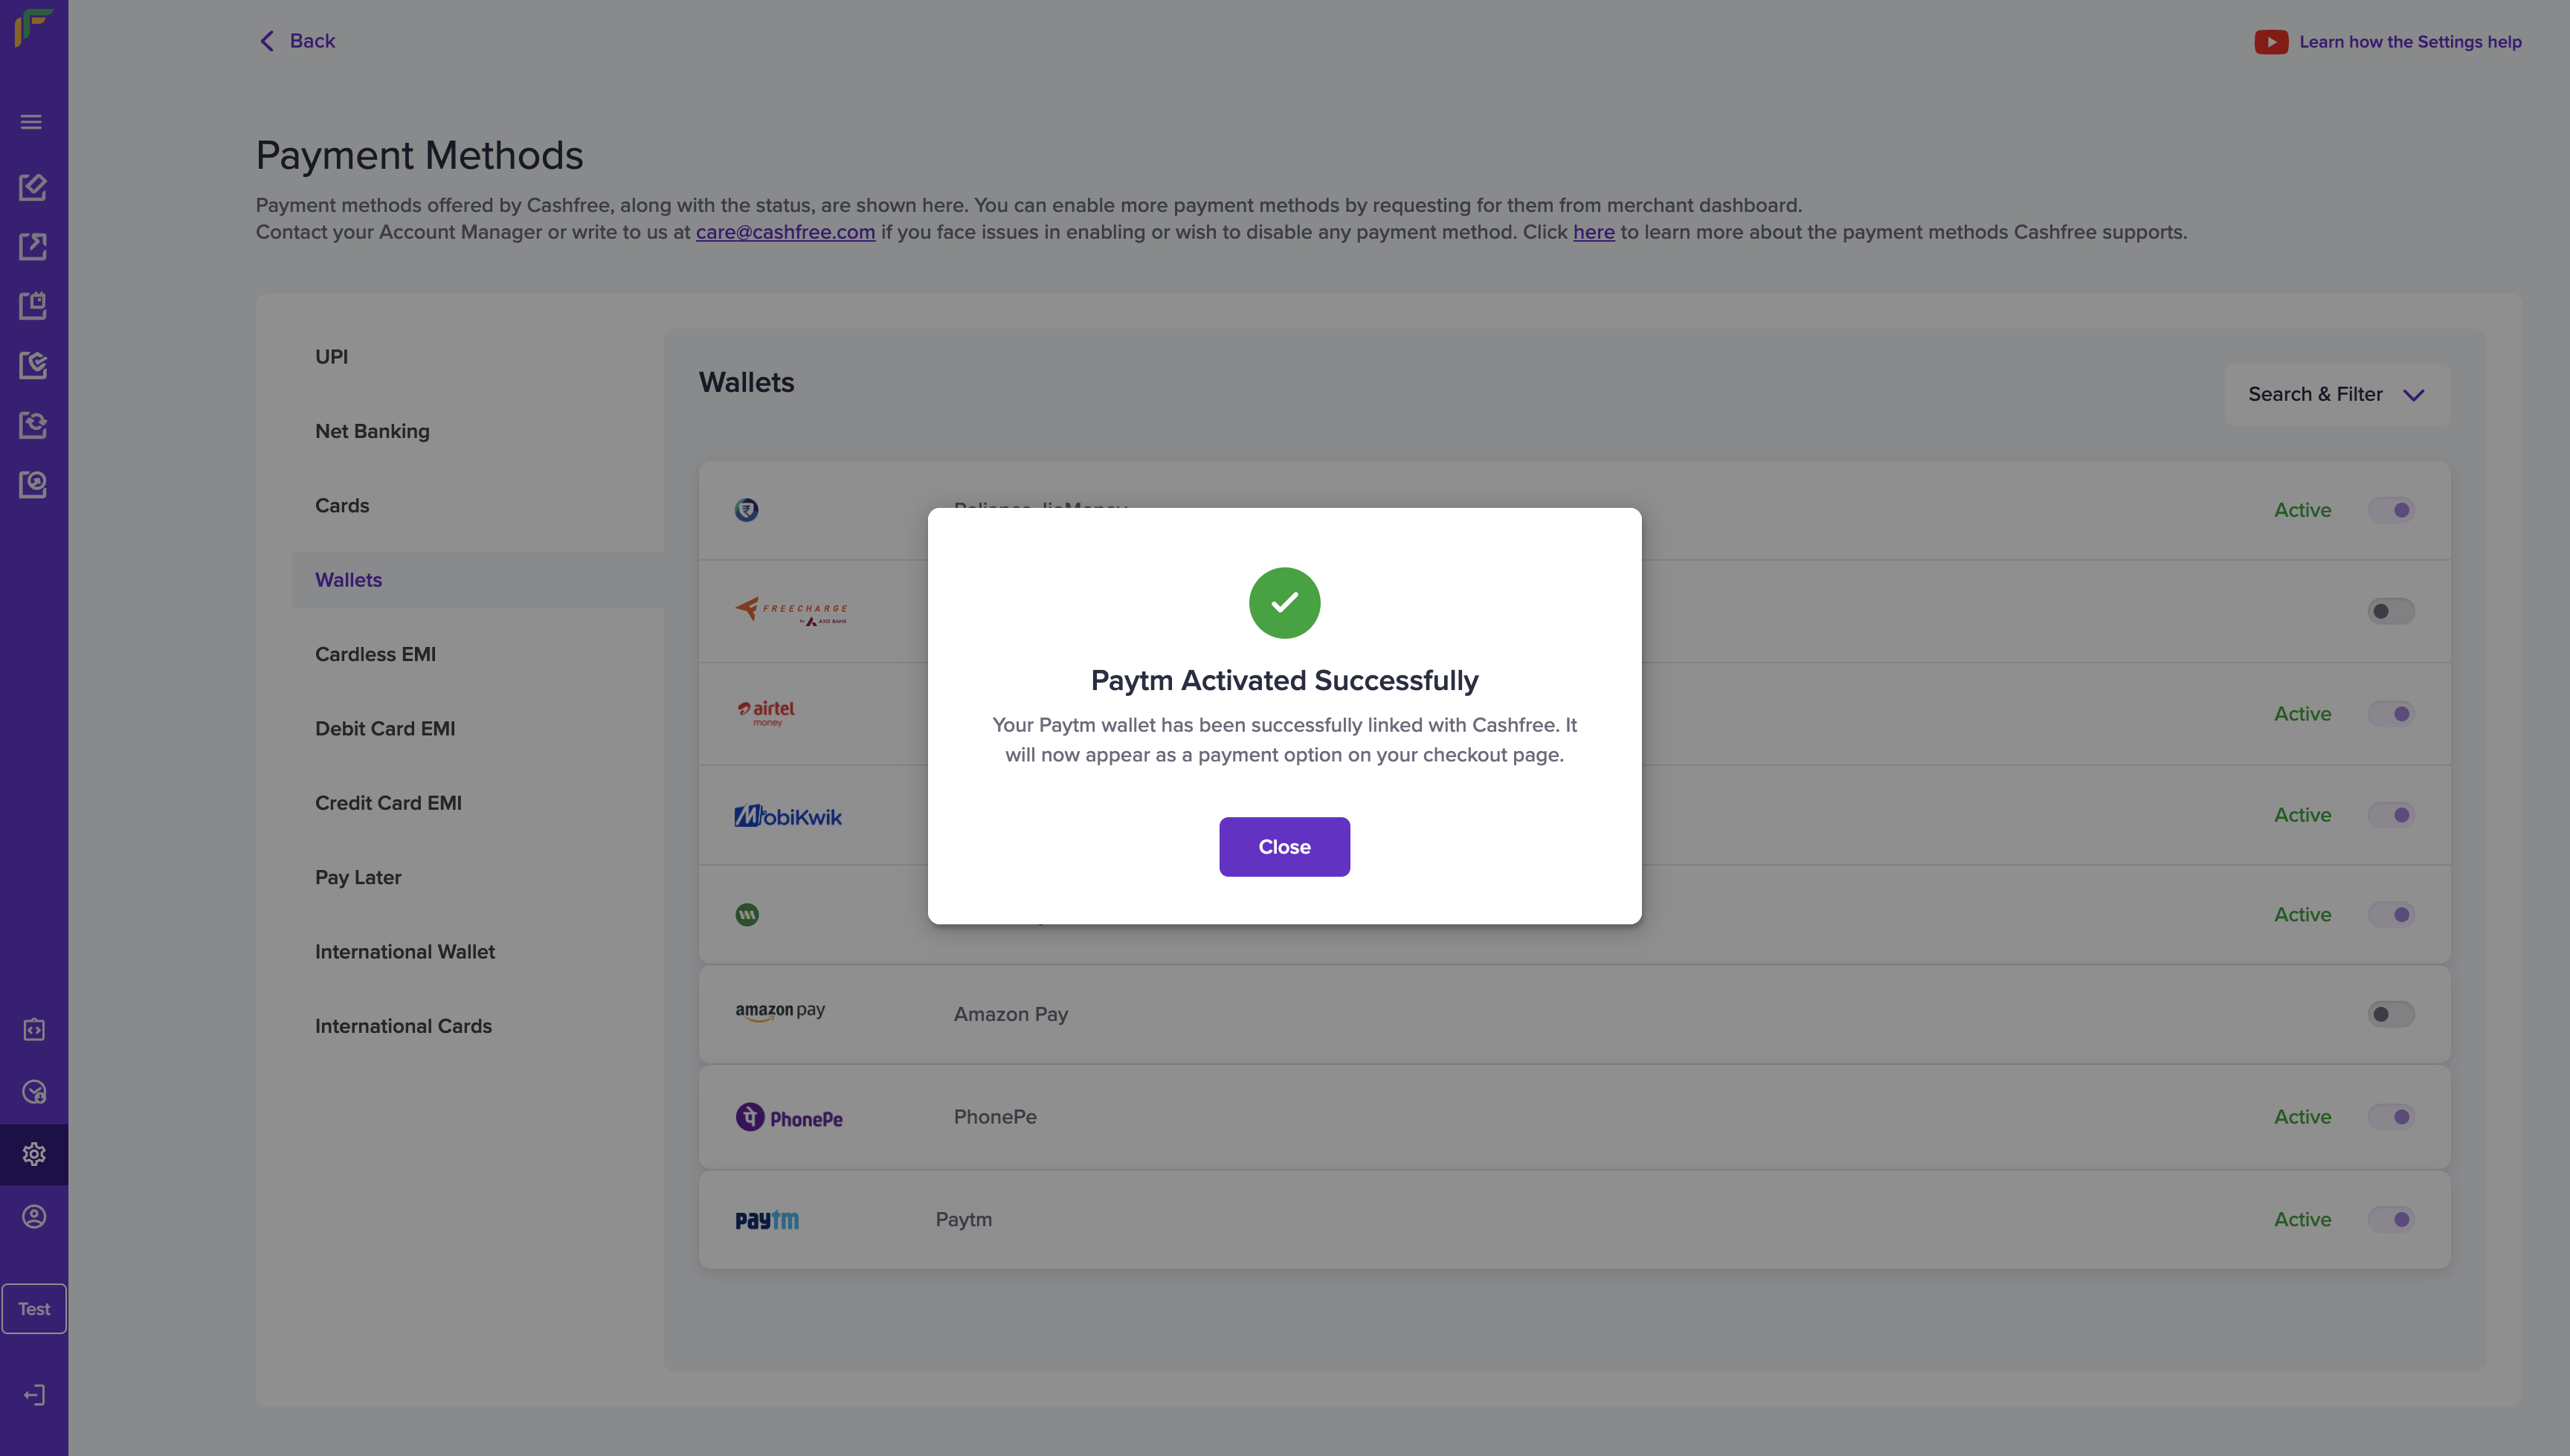
Paytm Enabled Successfully
Activate Payment Mode - PayPal
Watch this GIF to see how PayPal payment mode enablement process works.
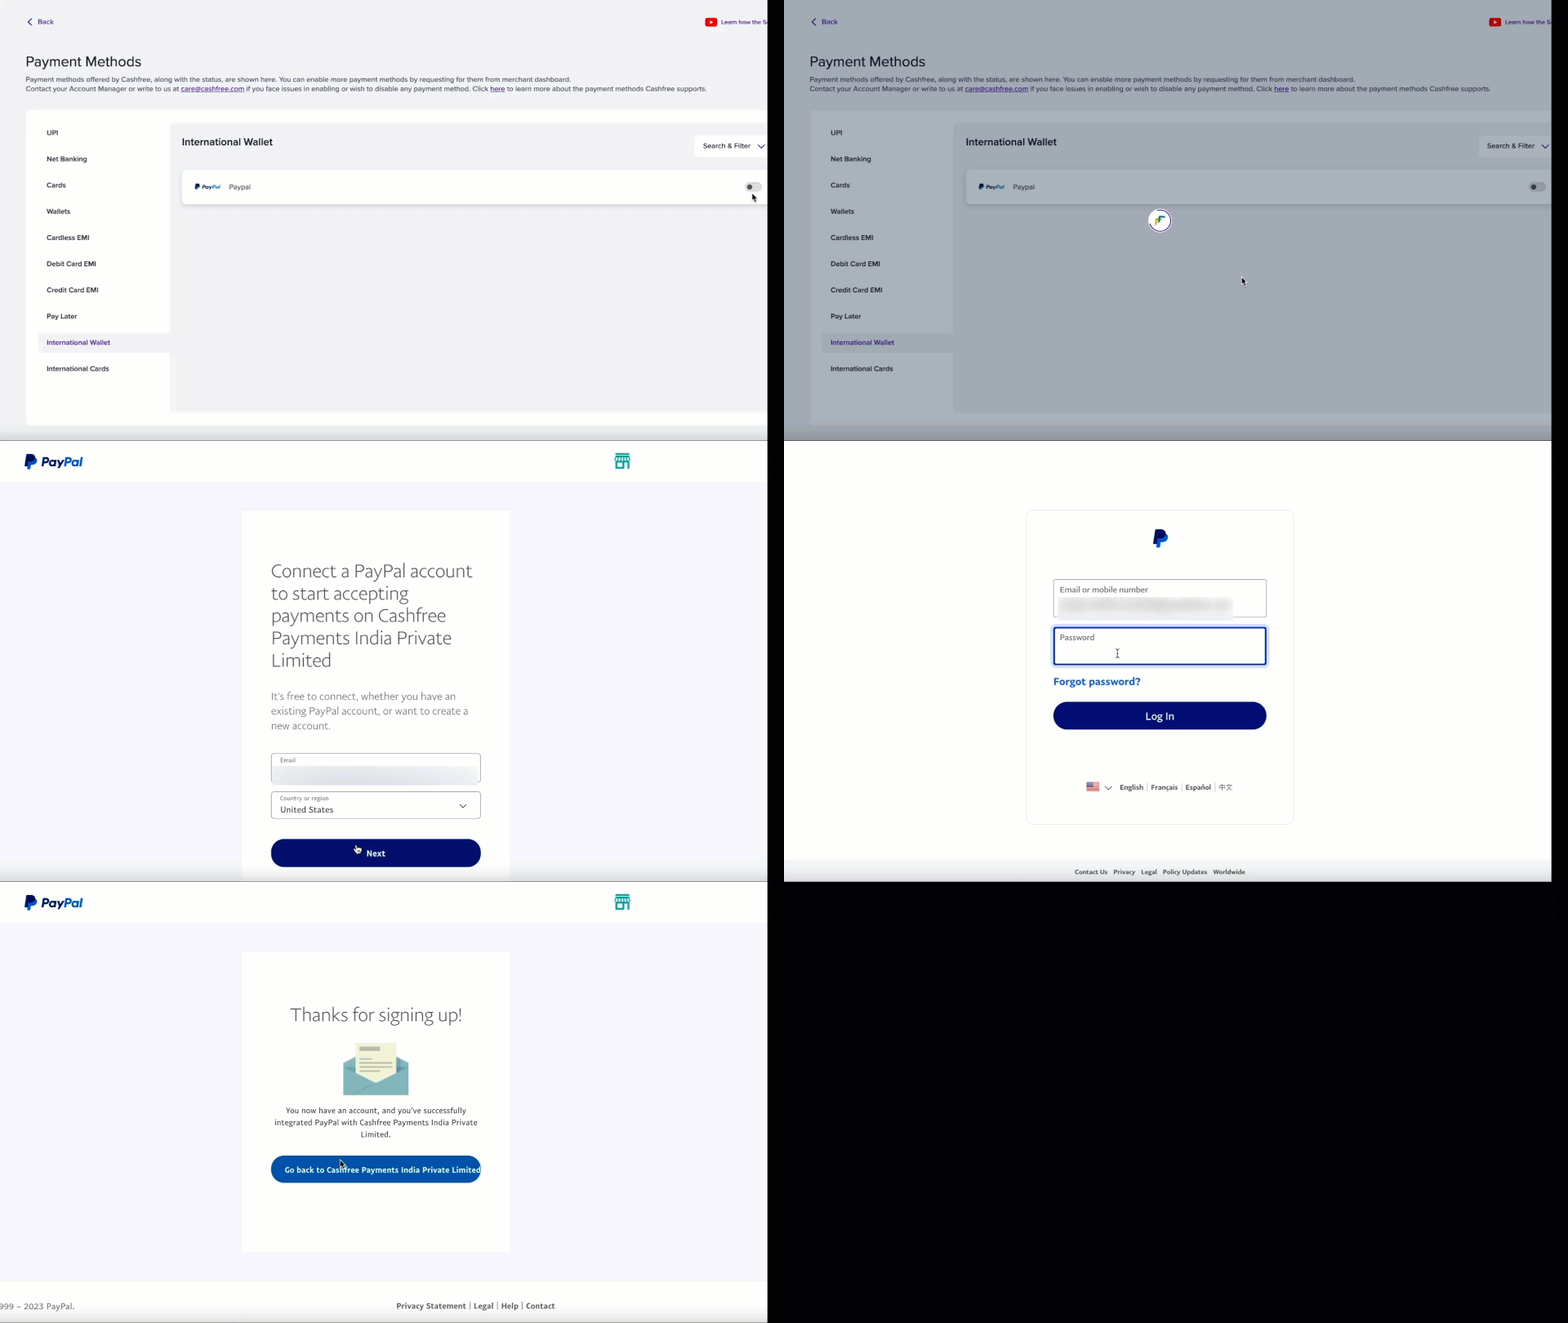
Activate Payment Mode - PayPal
To activate PayPal payment mode,
- Go to Payment Gateway Dashboard in the left navigation bar, click Settings > select International Wallet. Click the toggle button beside PayPal payment mode.
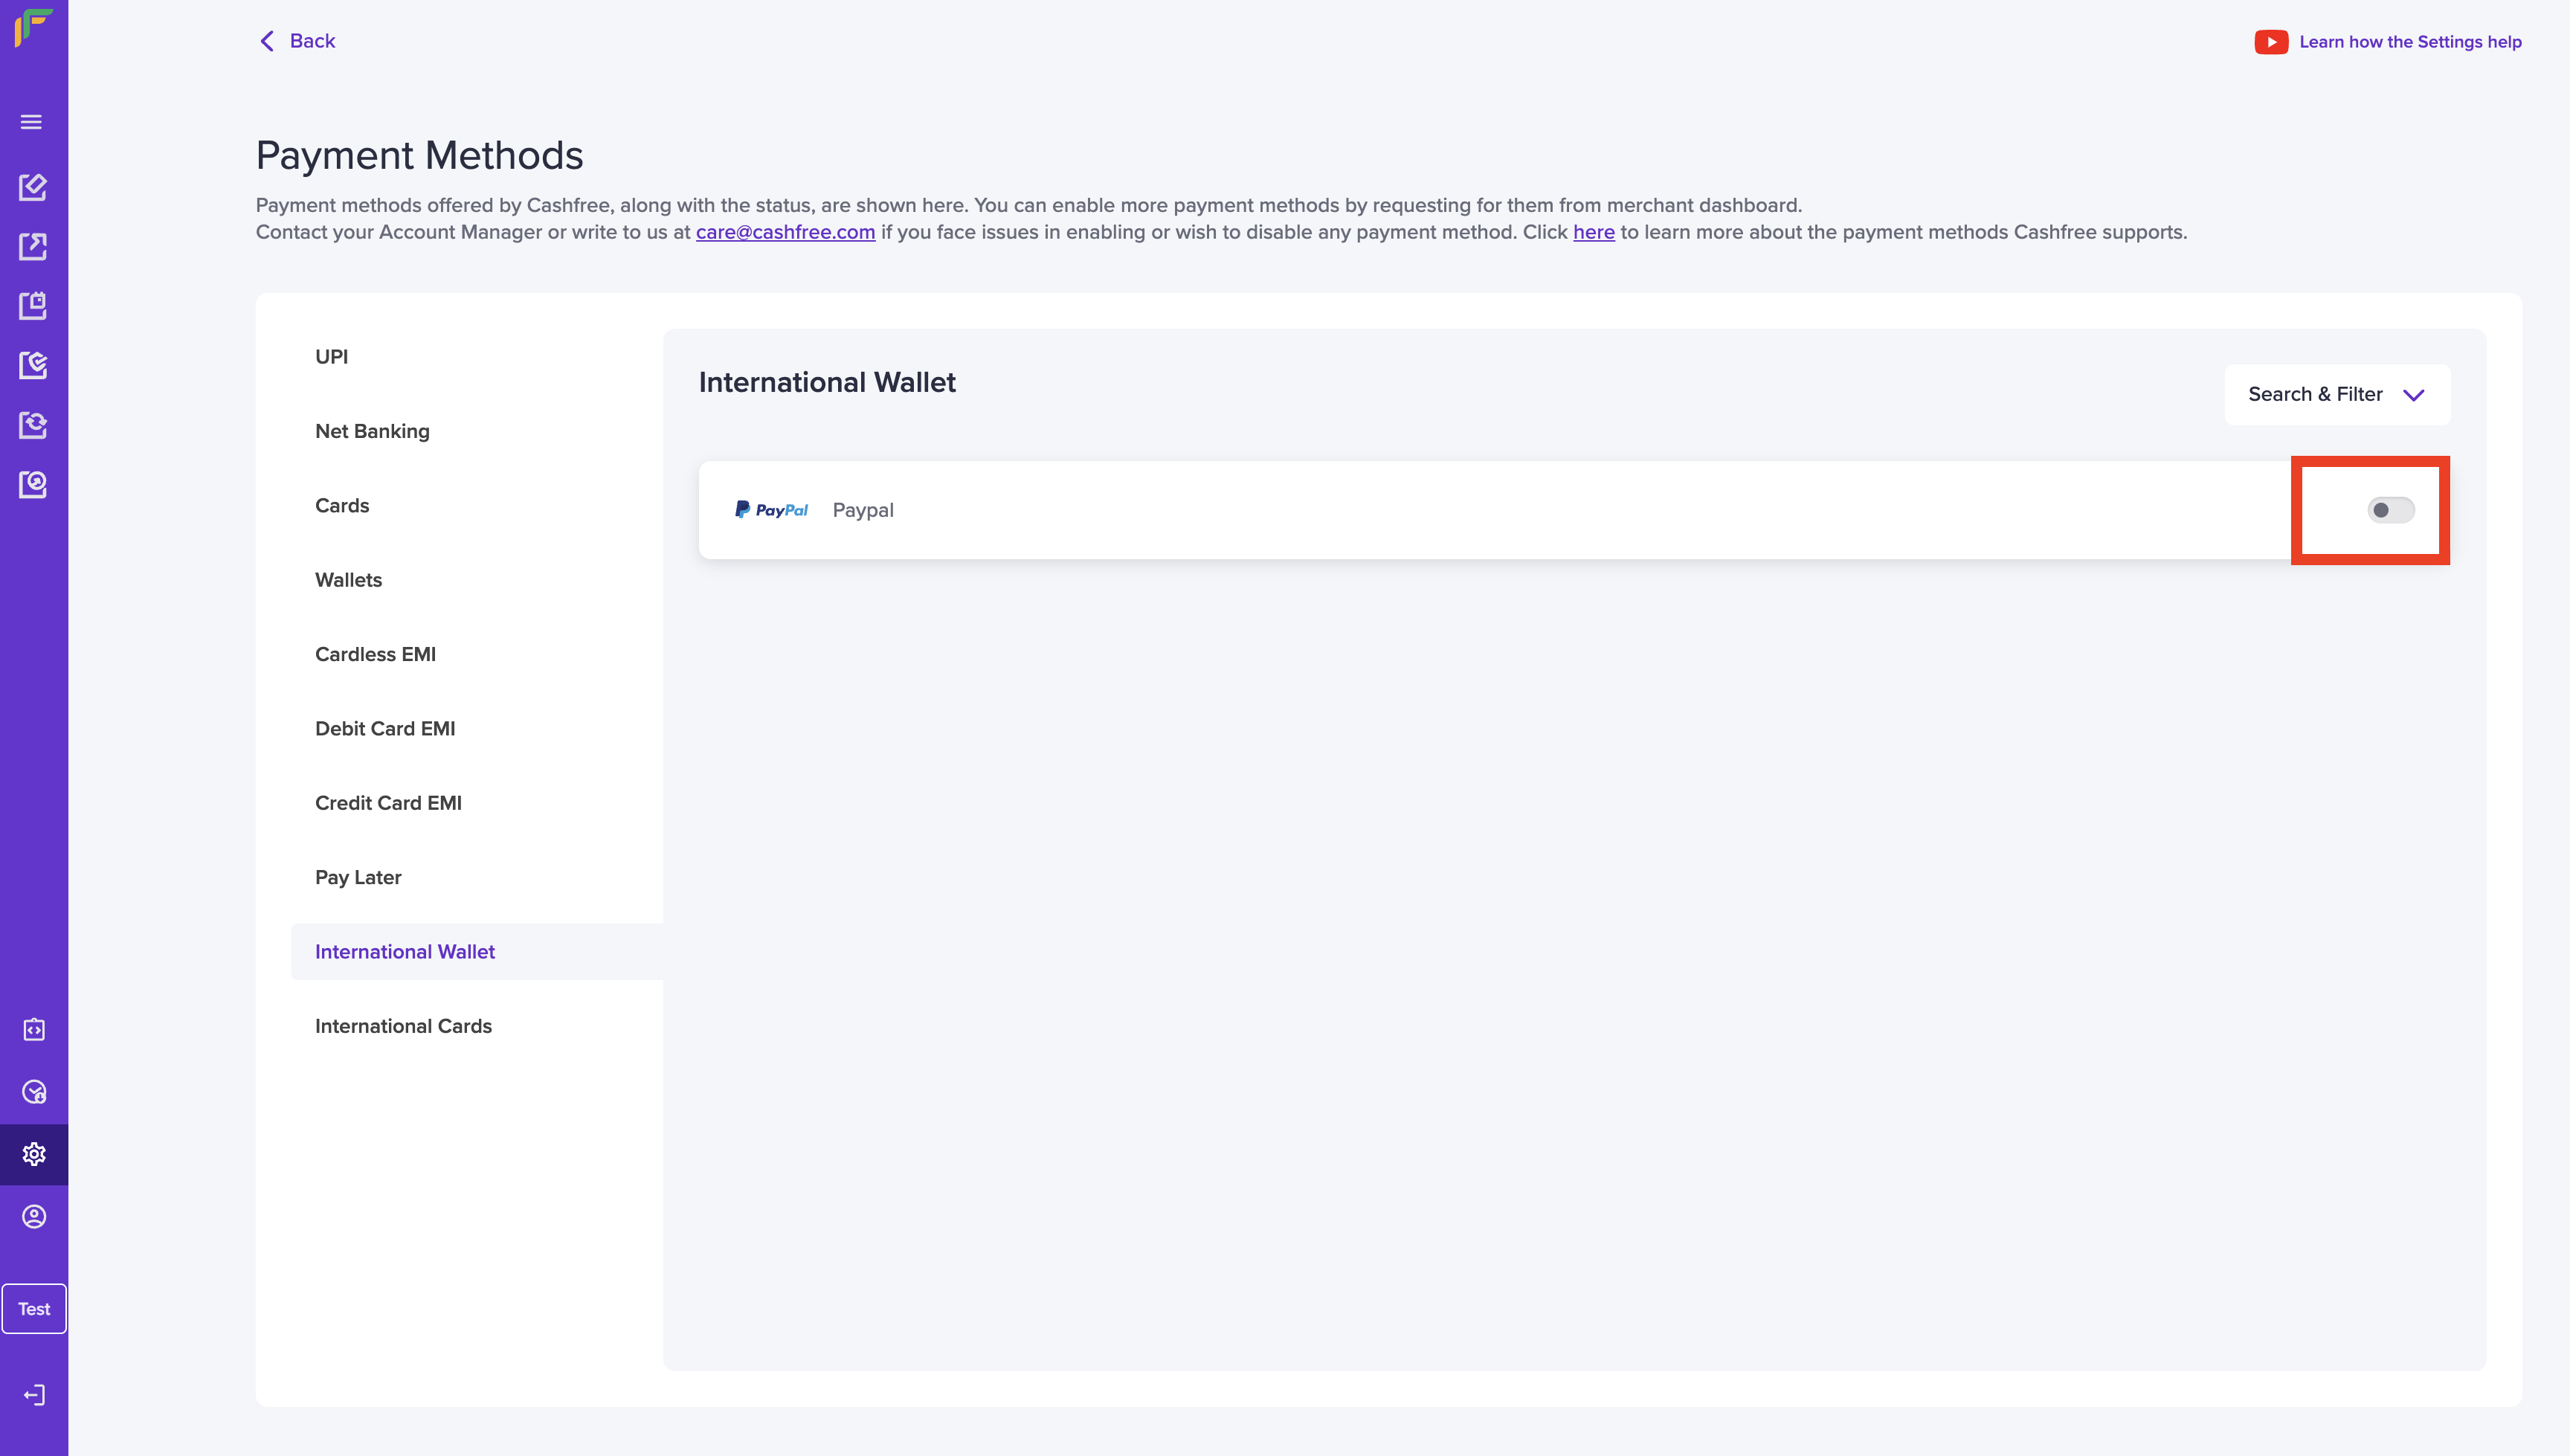
Payment Methods - PayPal
- To enable PayPal payment method you need to connect your PayPal account with Cashfree Payments. PayPal gets enabled immediately if you have an active PayPal account. Standard payment gateway charges will be applicable. Click on Connect Account.
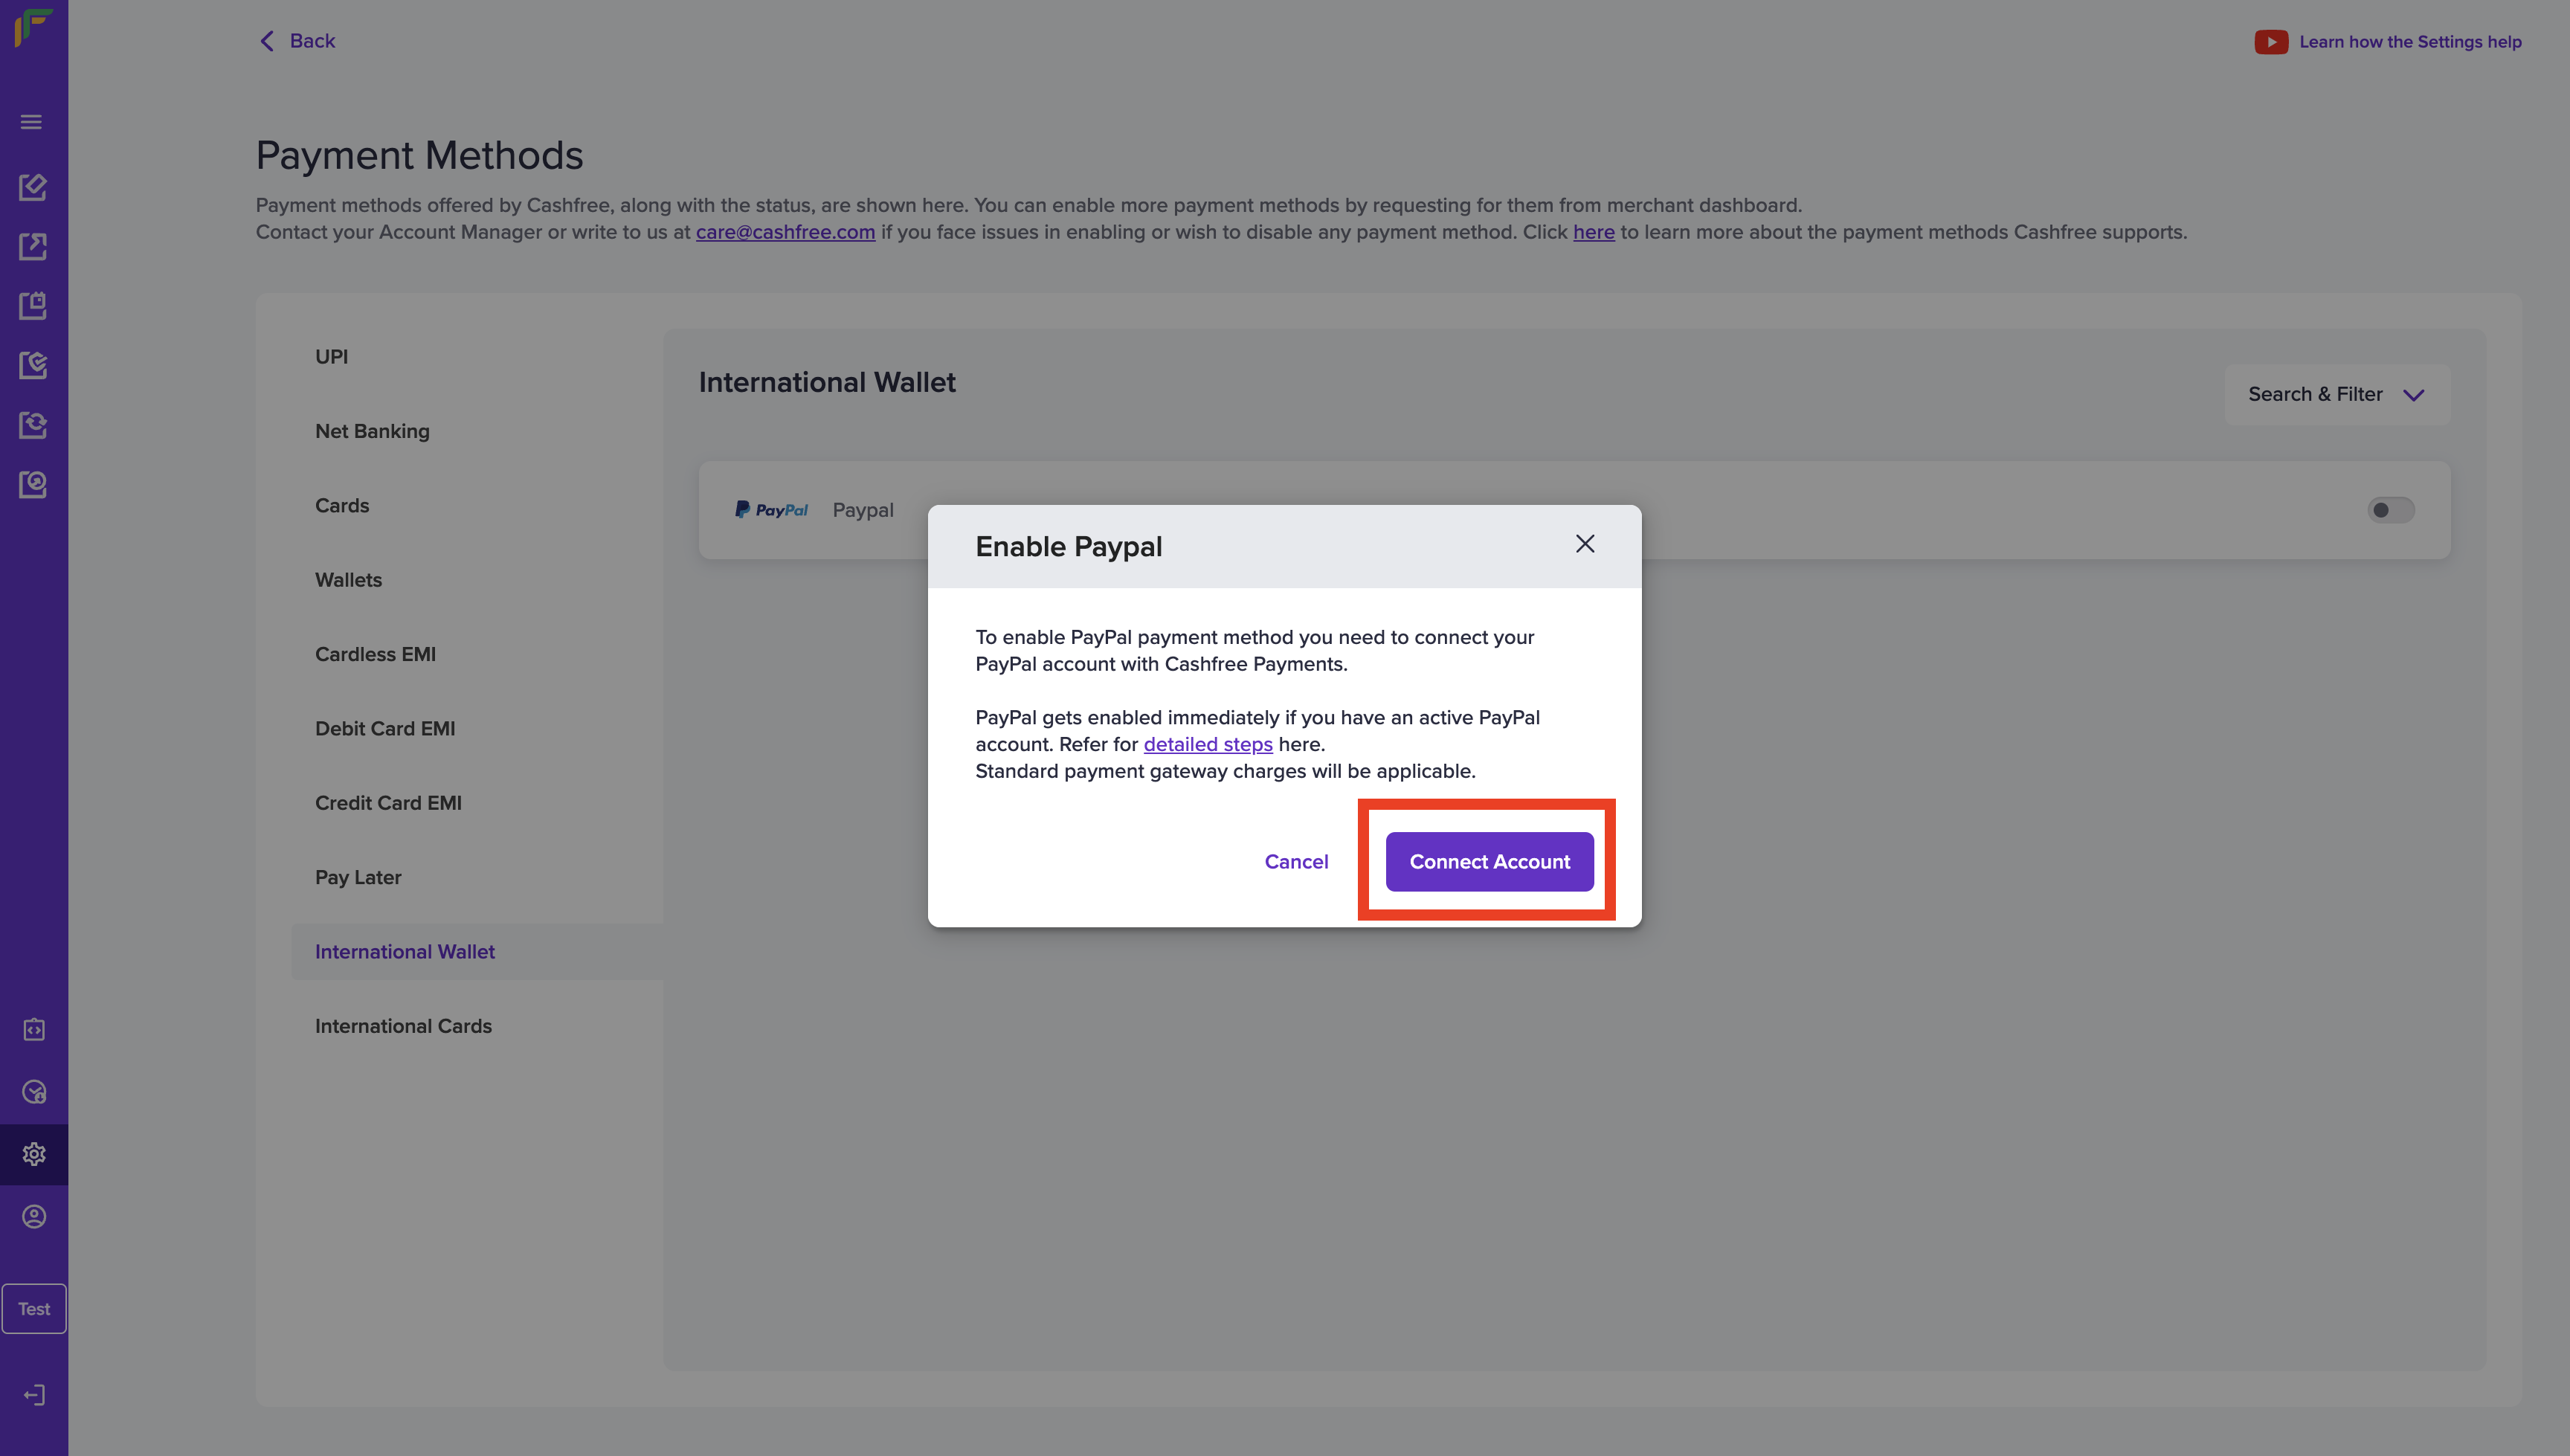
Enable PayPal
- You will be redirected to PayPal's website, please enter your PayPal login credentials. You'll then be redirected to Cashfree Payment Gateway Dashboard after you complete logging in on PayPal with your account. Once you're redirected, your PayPal account is linked with Cashfree Payments successfully.
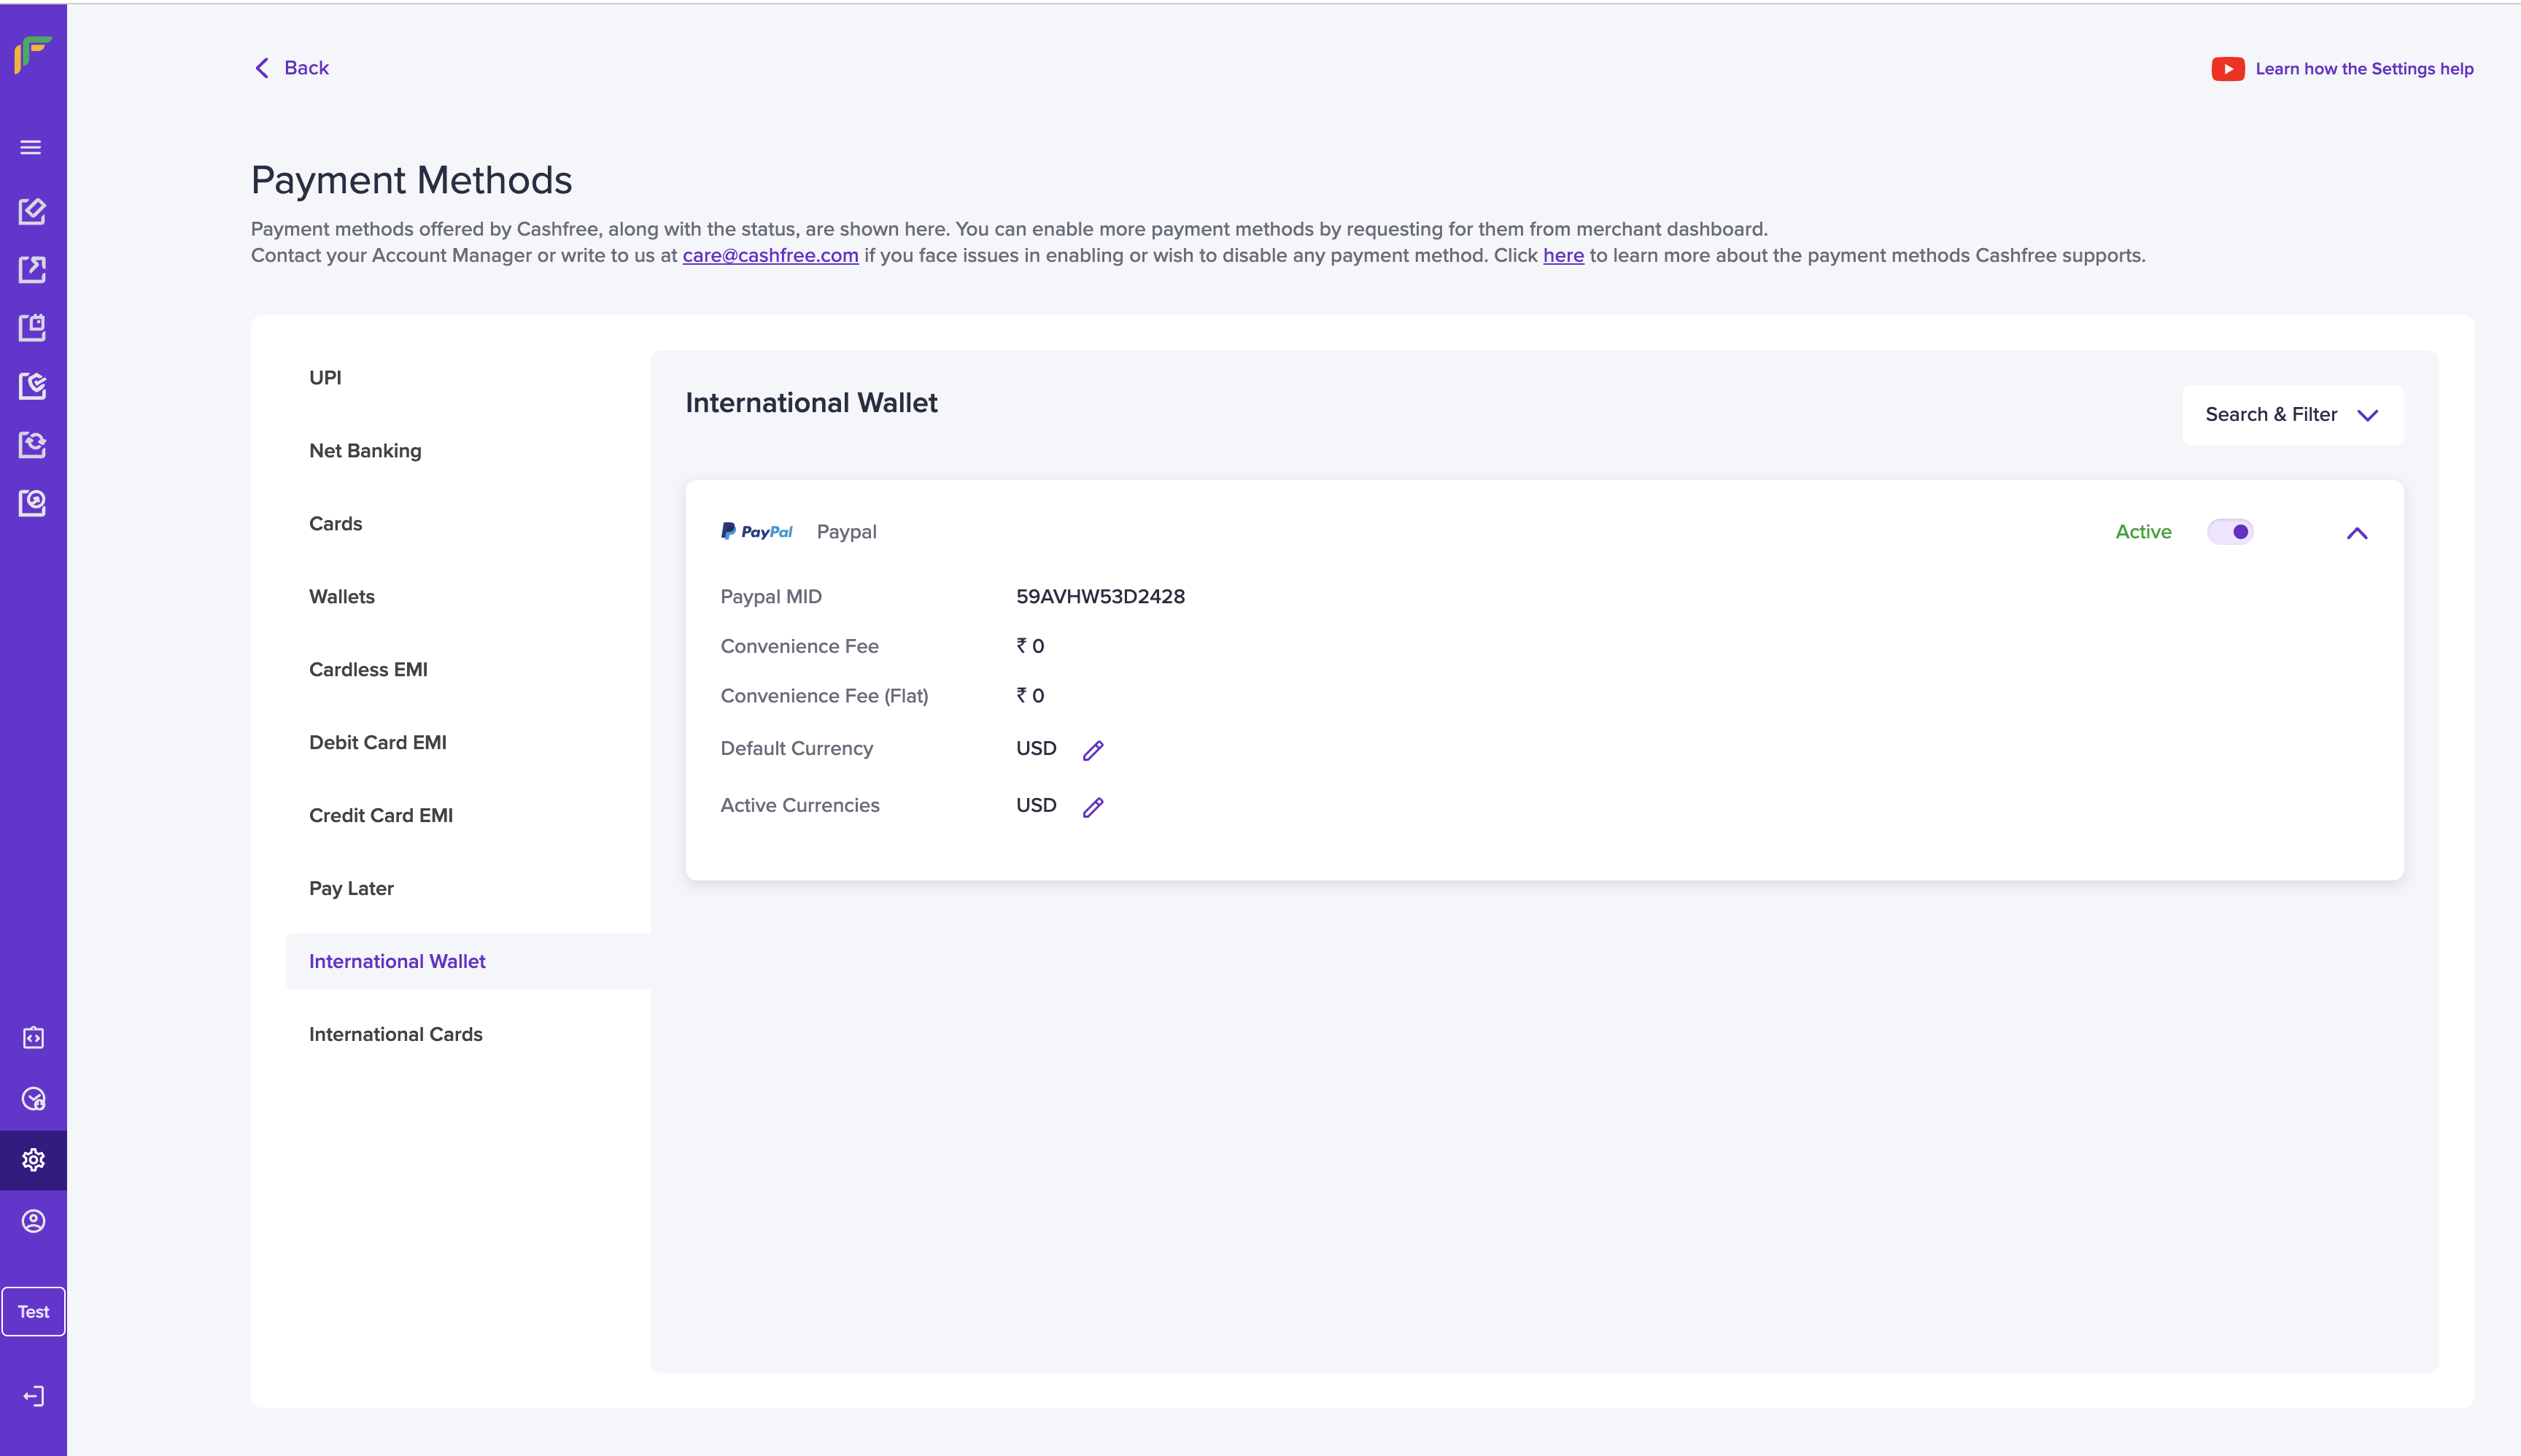
PayPal Account Linked Successfully
Linking PayPal Account with Cashfree -
You need to have an active account with PayPal to link it successfully with your Cashfree Payments account. If you don't have an existing account and you're signing up for a new account, submit your business & bank details, photo ID proof on PayPal dashboard and verify your email address using the link received over email.
After that, PayPal team will approve the account within one business day. Once the KYC and email verification are done, please repeat the above mentioned steps on Cashfree's merchant dashboard and connect using this PayPal account, it should get linked successfully.
- You can also set the active currency and default currency for your PayPal transactions. You can enable multiple currencies as per your business requirements. By default, USD will be your primary currency since most PayPal users can make a payment using it. INR is a restricted currency within PayPal, you must complete your KYC to enable it.
- You also have the option to accept payments through currencies which are not enabled in your PayPal account as well. This will help you accept payments from customers across various countries.
To enable accepting payments automatically in currencies which are not enabled for your account,- Access https://www.paypal.com/businessmanage/preferences/payments by logging into your PayPal business account.
- Select the option Yes, accept and convert them to U.S. dollars in "Allow payments sent to me in a currency I do not hold".
Updated about 1 year ago