Dashboard Actions
Learn in detail about the actions you can perform from the dashboard.
You can view the disputes from the dashboard. To view a dispute from the dashboard, go to Payment Gateway Dashboard > Transactions > and go to the Disputes section.
There are four sections that show the various phases of the disputes.
| Section Name | Description |
|---|---|
| Action Required | This section lists all the disputes to which you much respond. |
| Under Review | This section lists the disputes that are under review. |
| Closed | This section lists all the disputes that are closed. |
| All Disputes | This section lists all the disputes irrespective of their status. |
Action Required
The Action Required page lists all the disputes to which you must respond and take action. There are placards that show the disputes that are due today, tomorrow, or if the evidence submitted is insufficient.
Apart from this, you have other information such as:
- Created On
- Dispute ID
- Order ID
- Transaction ID
- Dispute Type
- Dispute Amount
- Deadline
- Take Action
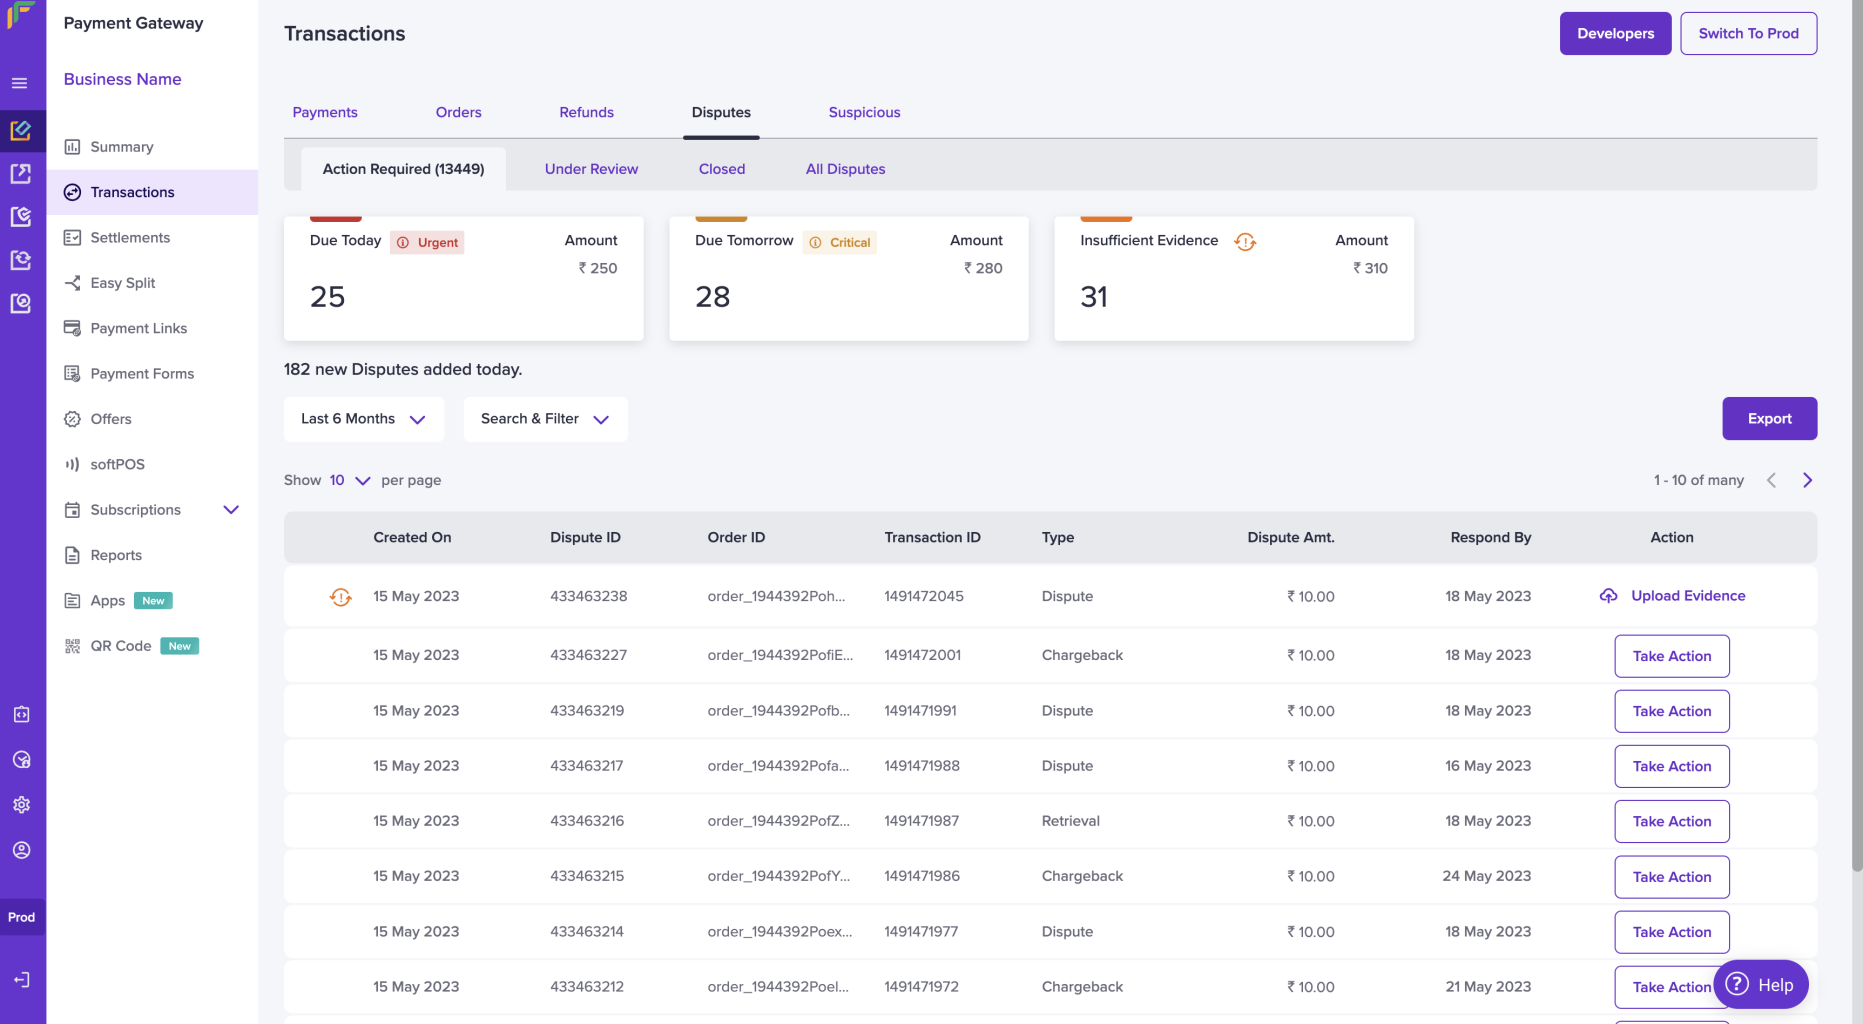
Action Required Section
When you click on a particular placard say for example "Due Today", all the disputes that are due today will be filtered and displayed. A filtered dispute is shown below for your reference.
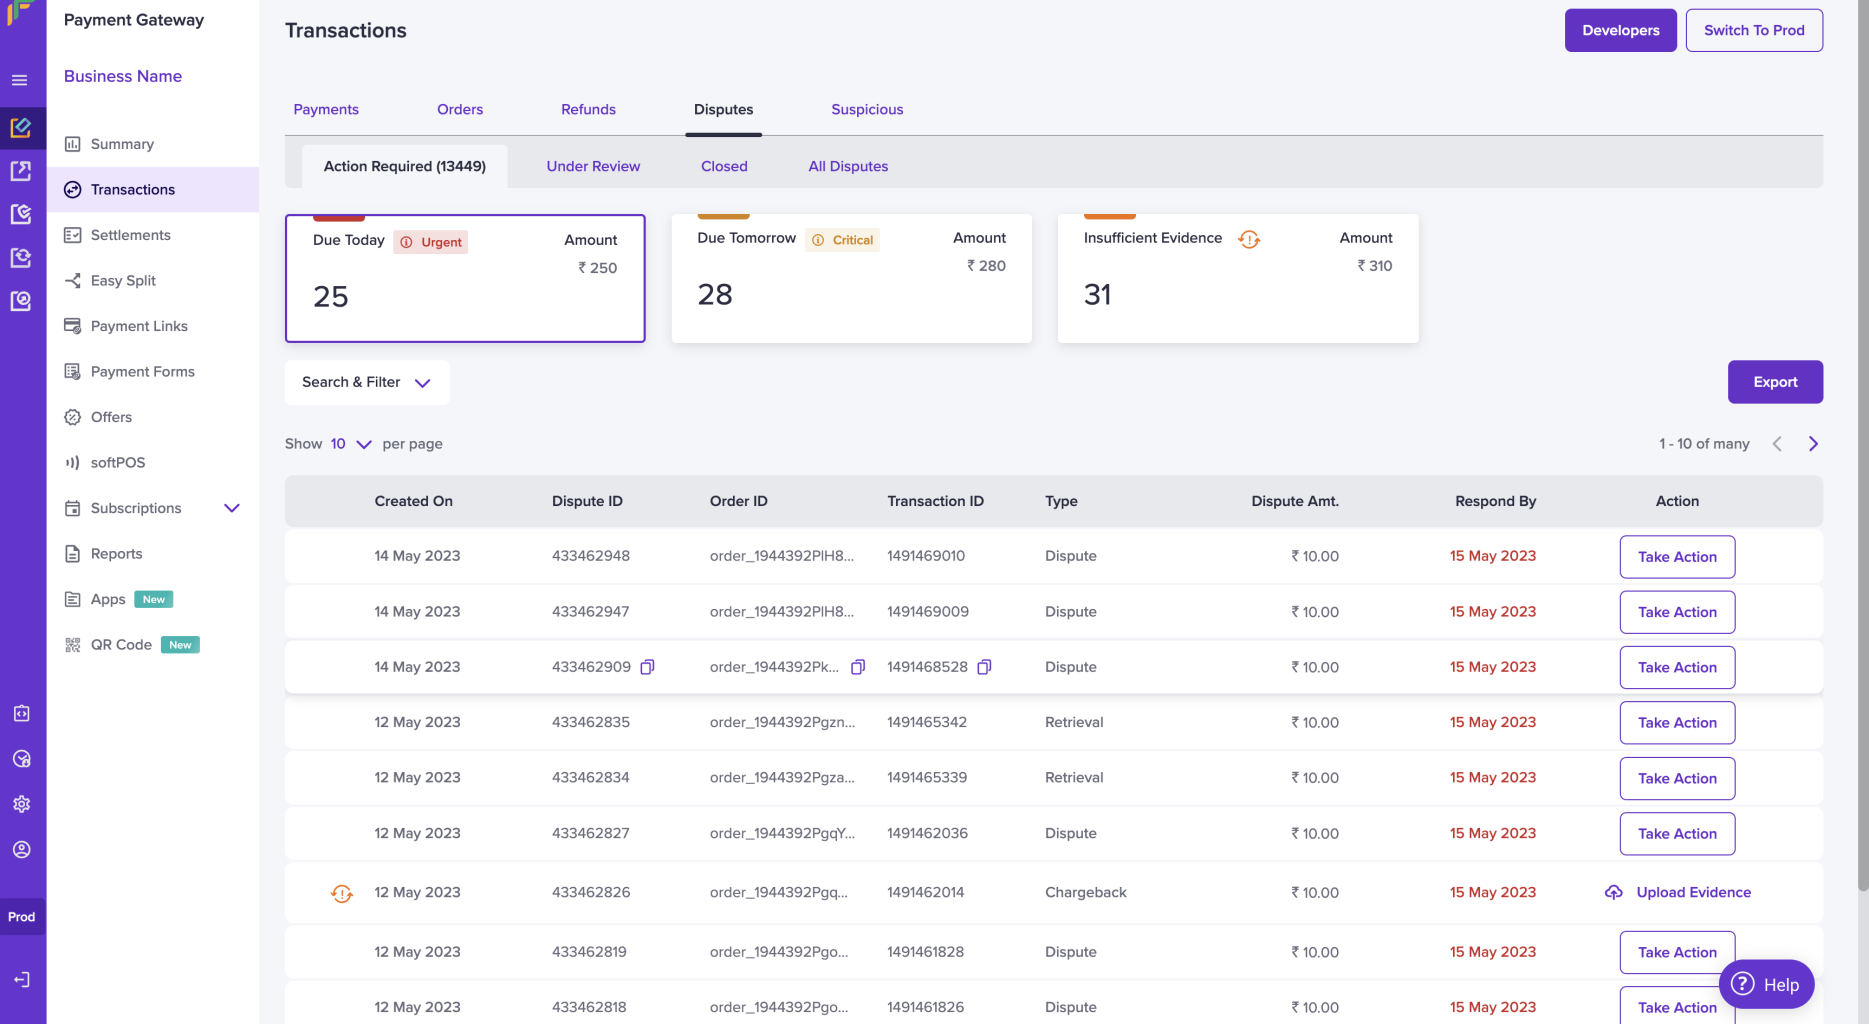
Action Required - Filters
Responding to a Dispute (Take Action)
To respond to a dispute click the Take Action option.
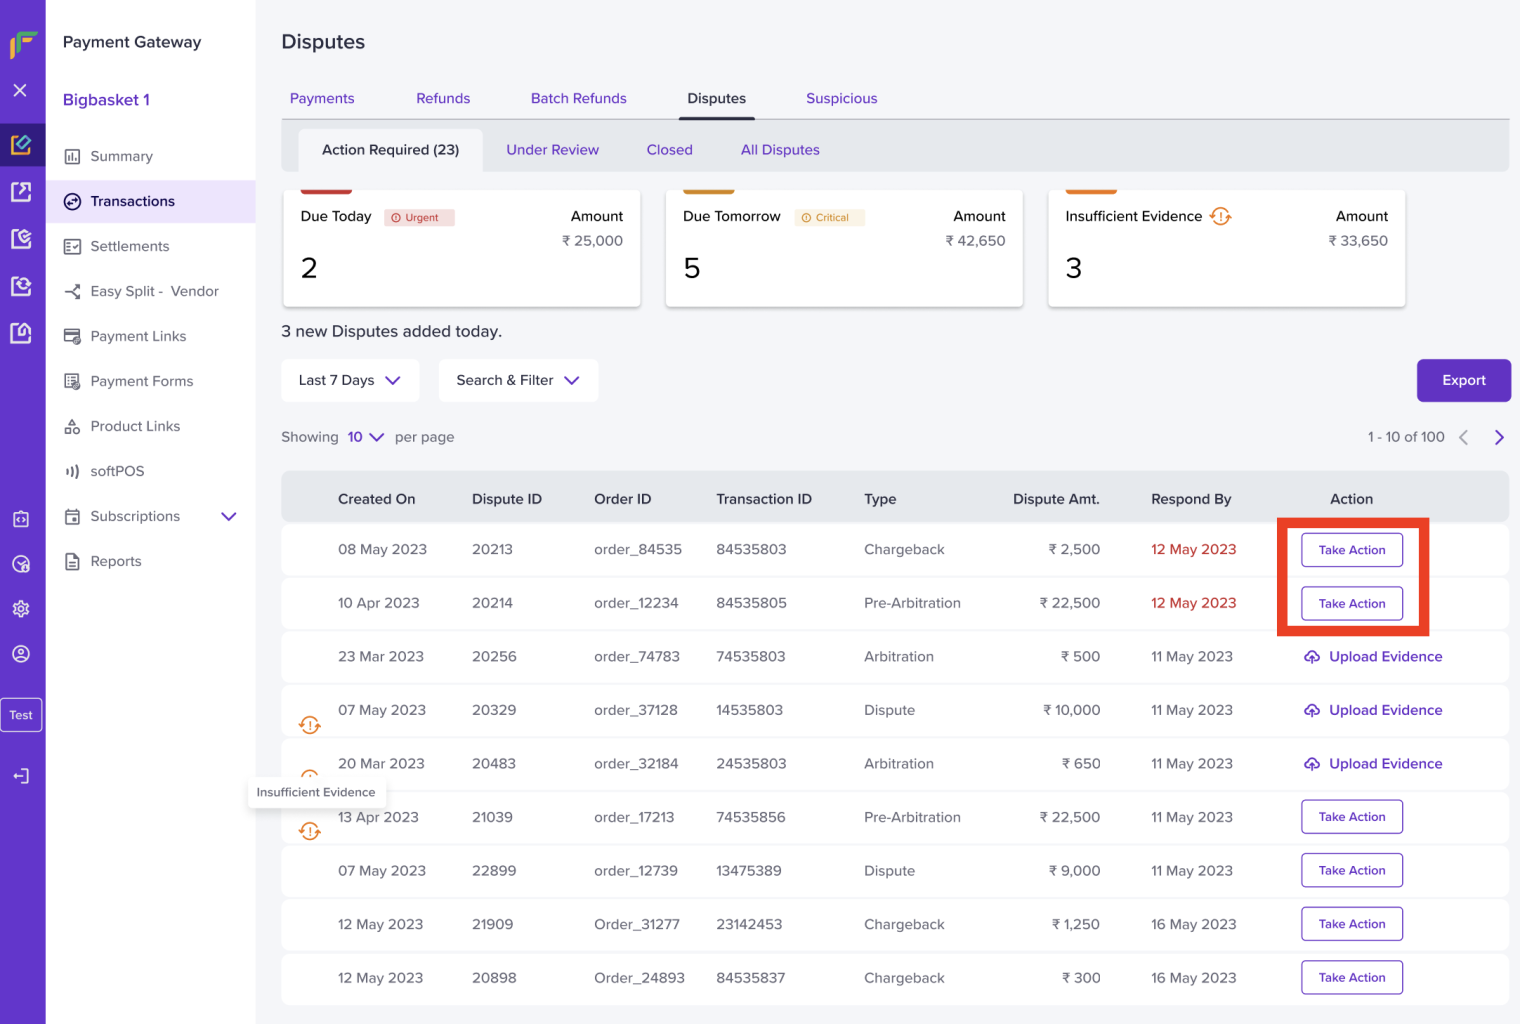
Take Action
When you click the Take Action option, you will get a pop-up from which you can either
- Accept the dispute
(Or)
- Contest the dispute and submit evidence
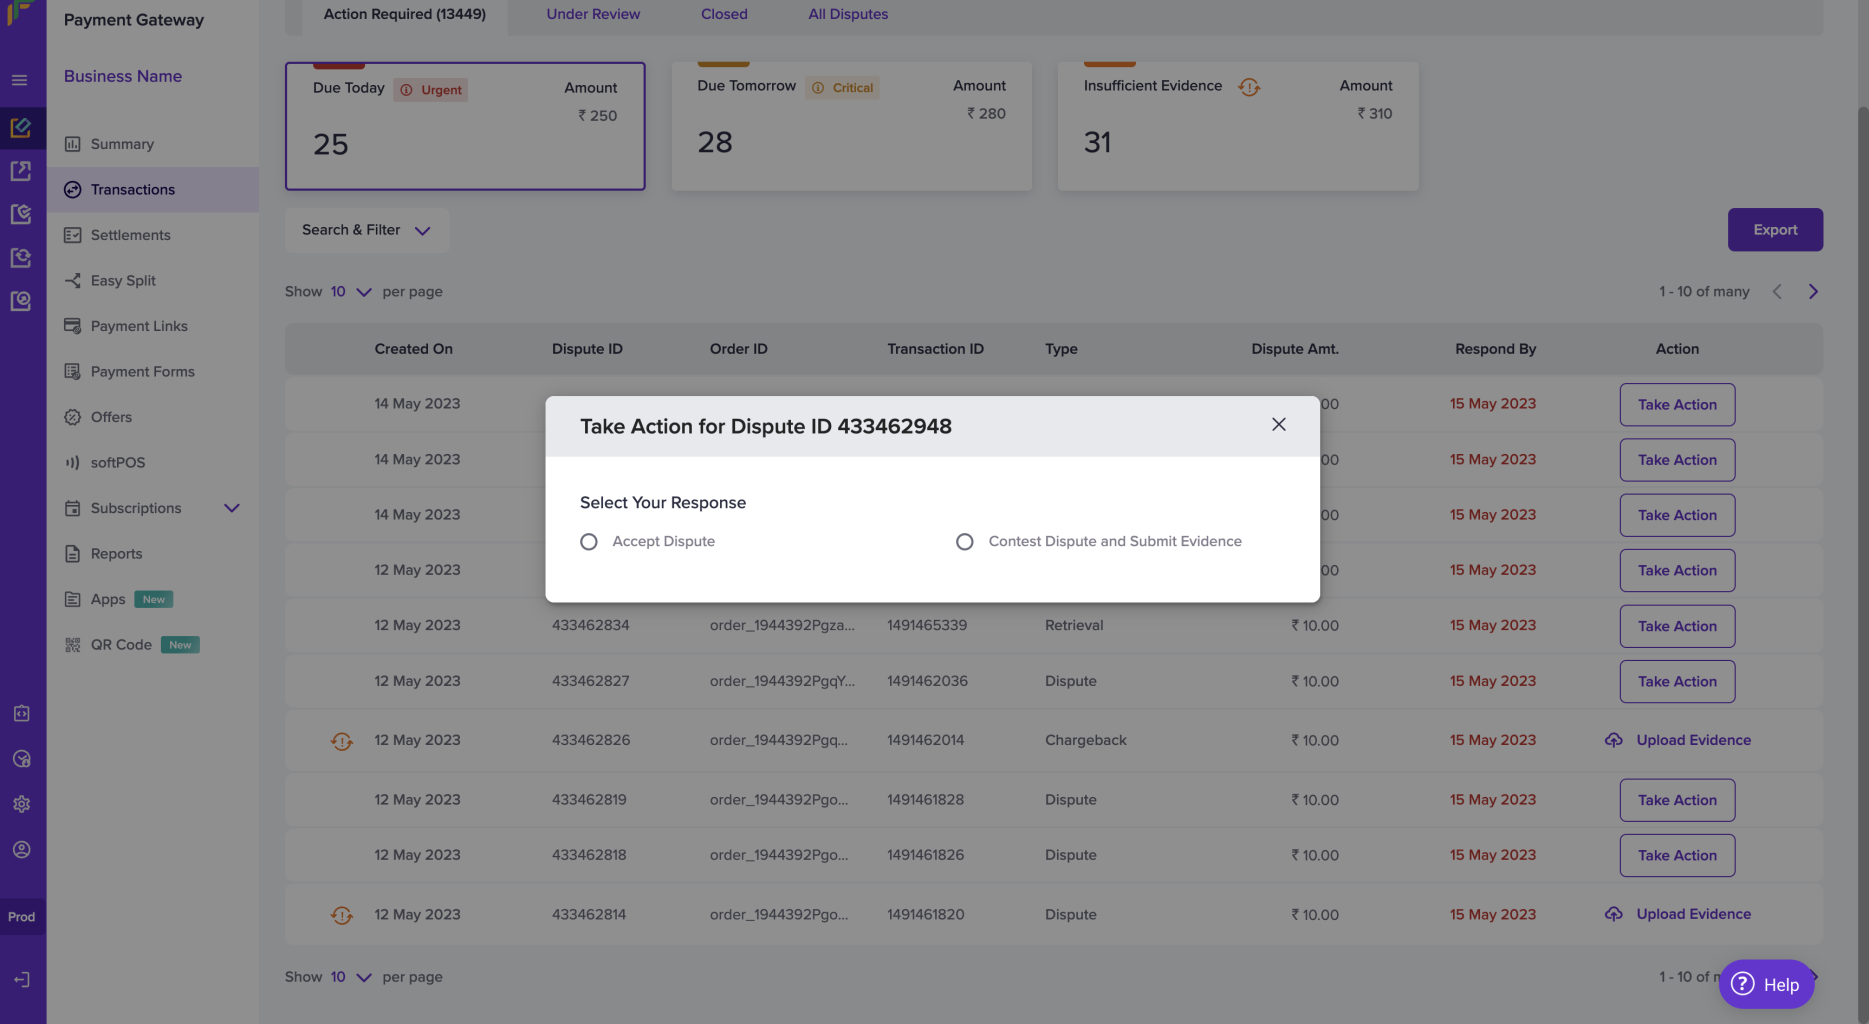
Take Action
Accept a Dispute
You can accept a dispute if you agree with the claim submitted by customer. To accept a dispute, select the Take Action option. From the Take Action pop-up, select the Accept Dispute option. Add any remarks if needed.
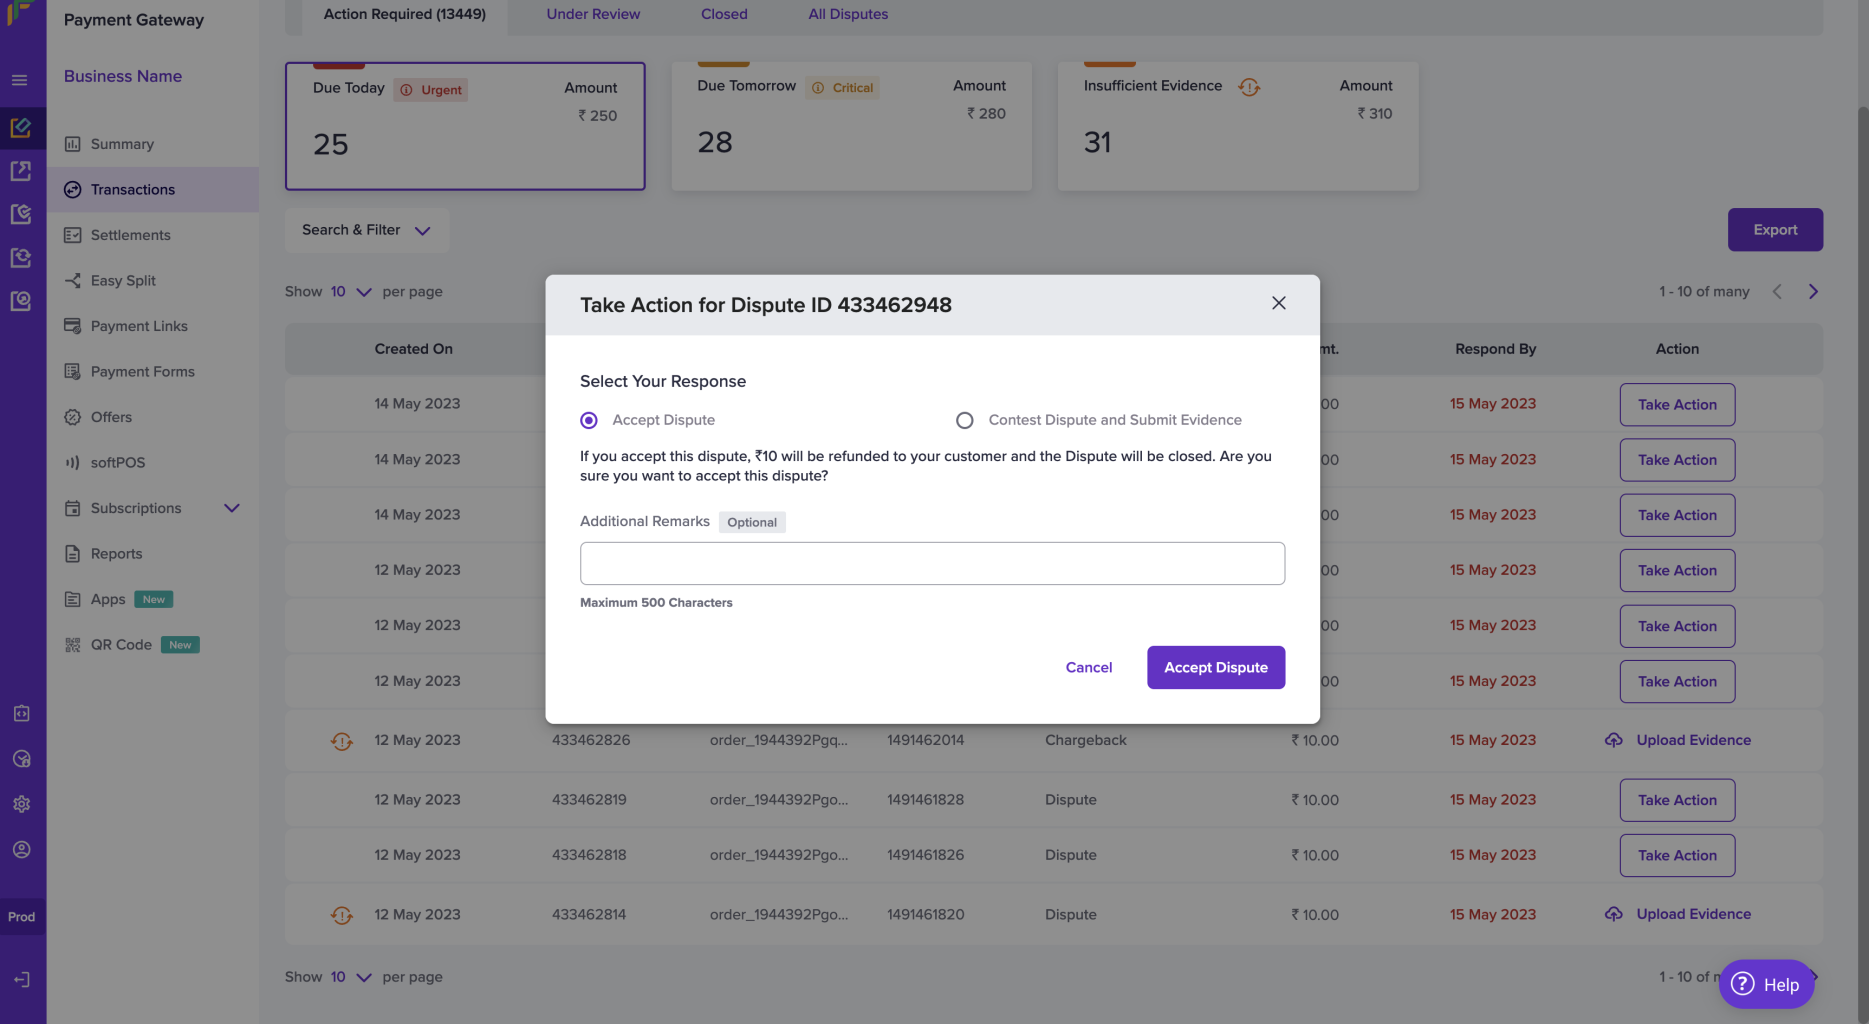
Accept Dispute
Once you click Accept Dispute you will get a message that you have accepted the dispute successfully along with the refund amount. The amount will be refunded to your customer.
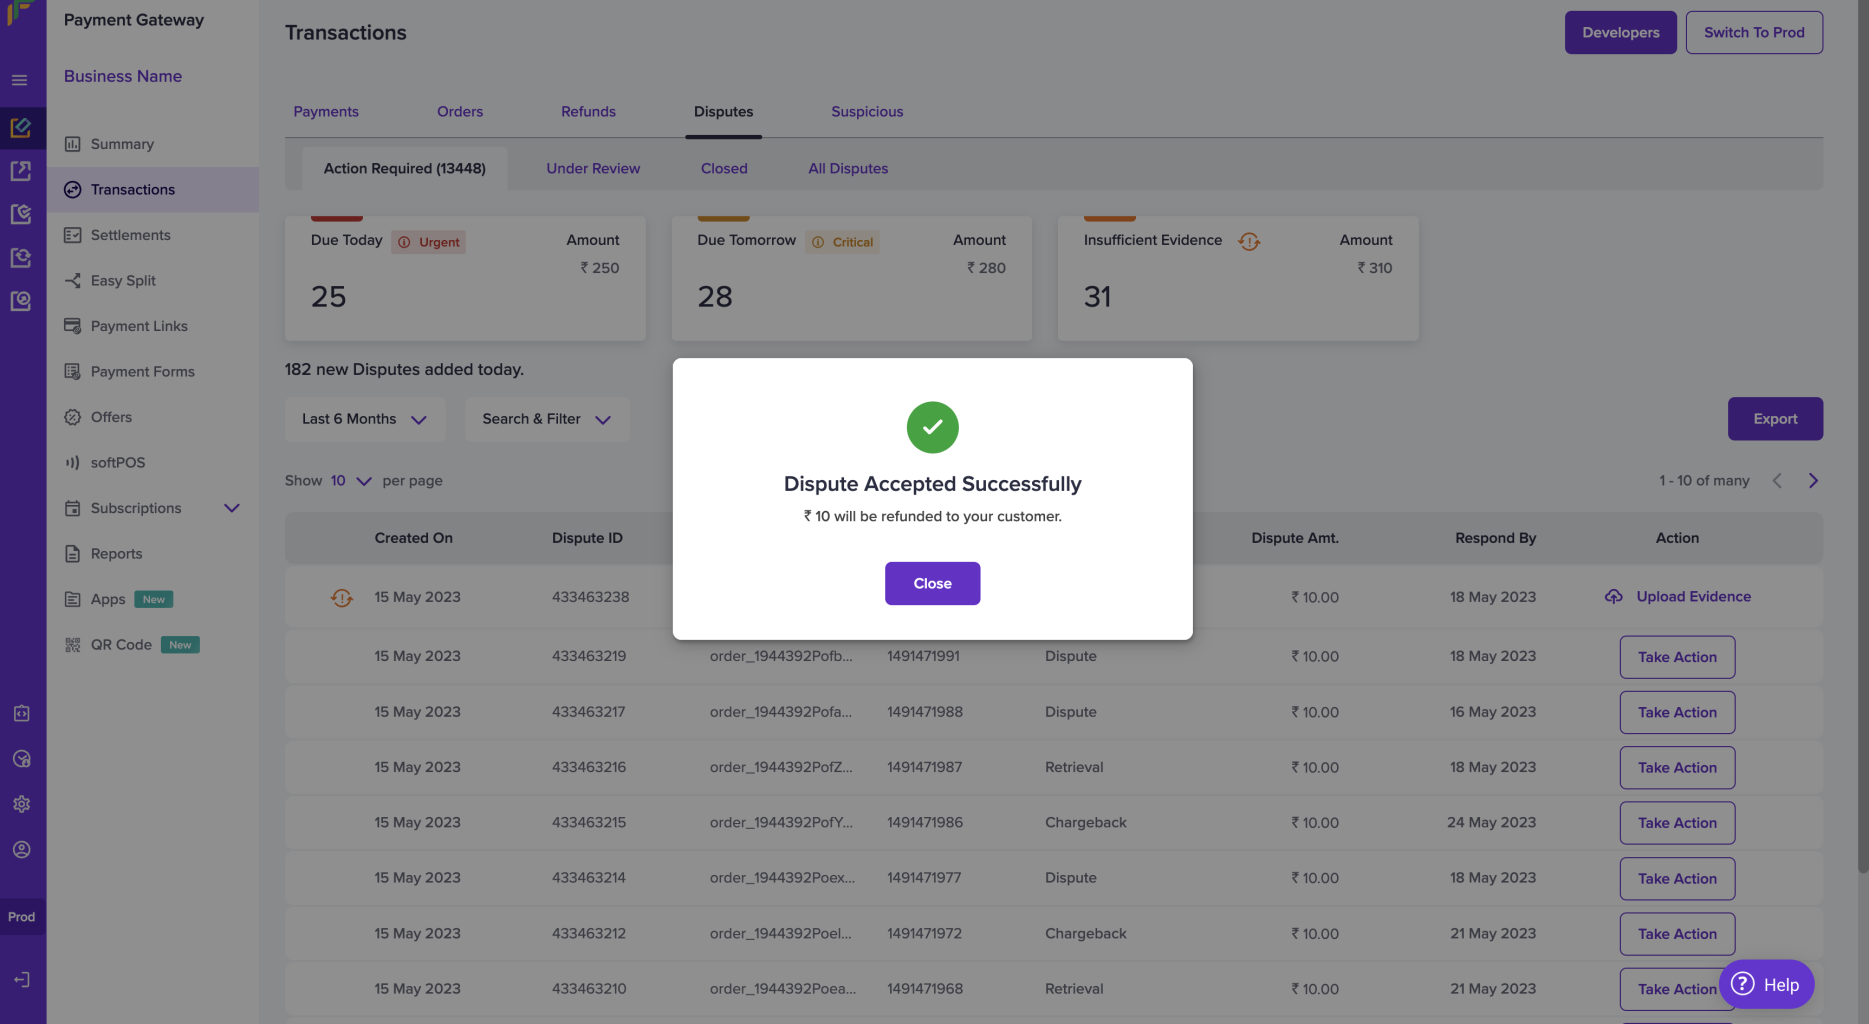
Dispute Accepted
Contest a Dispute
You can contest the dispute if you feel the dispute was raised wrongly and if you have the required evidence.
To challenge a dispute,
- Select the Take Action option. From the Take Action pop-up, select the Contest Dispute and Submit Evidence option.
- Add Additional Evidence if needed and add any remarks if needed.
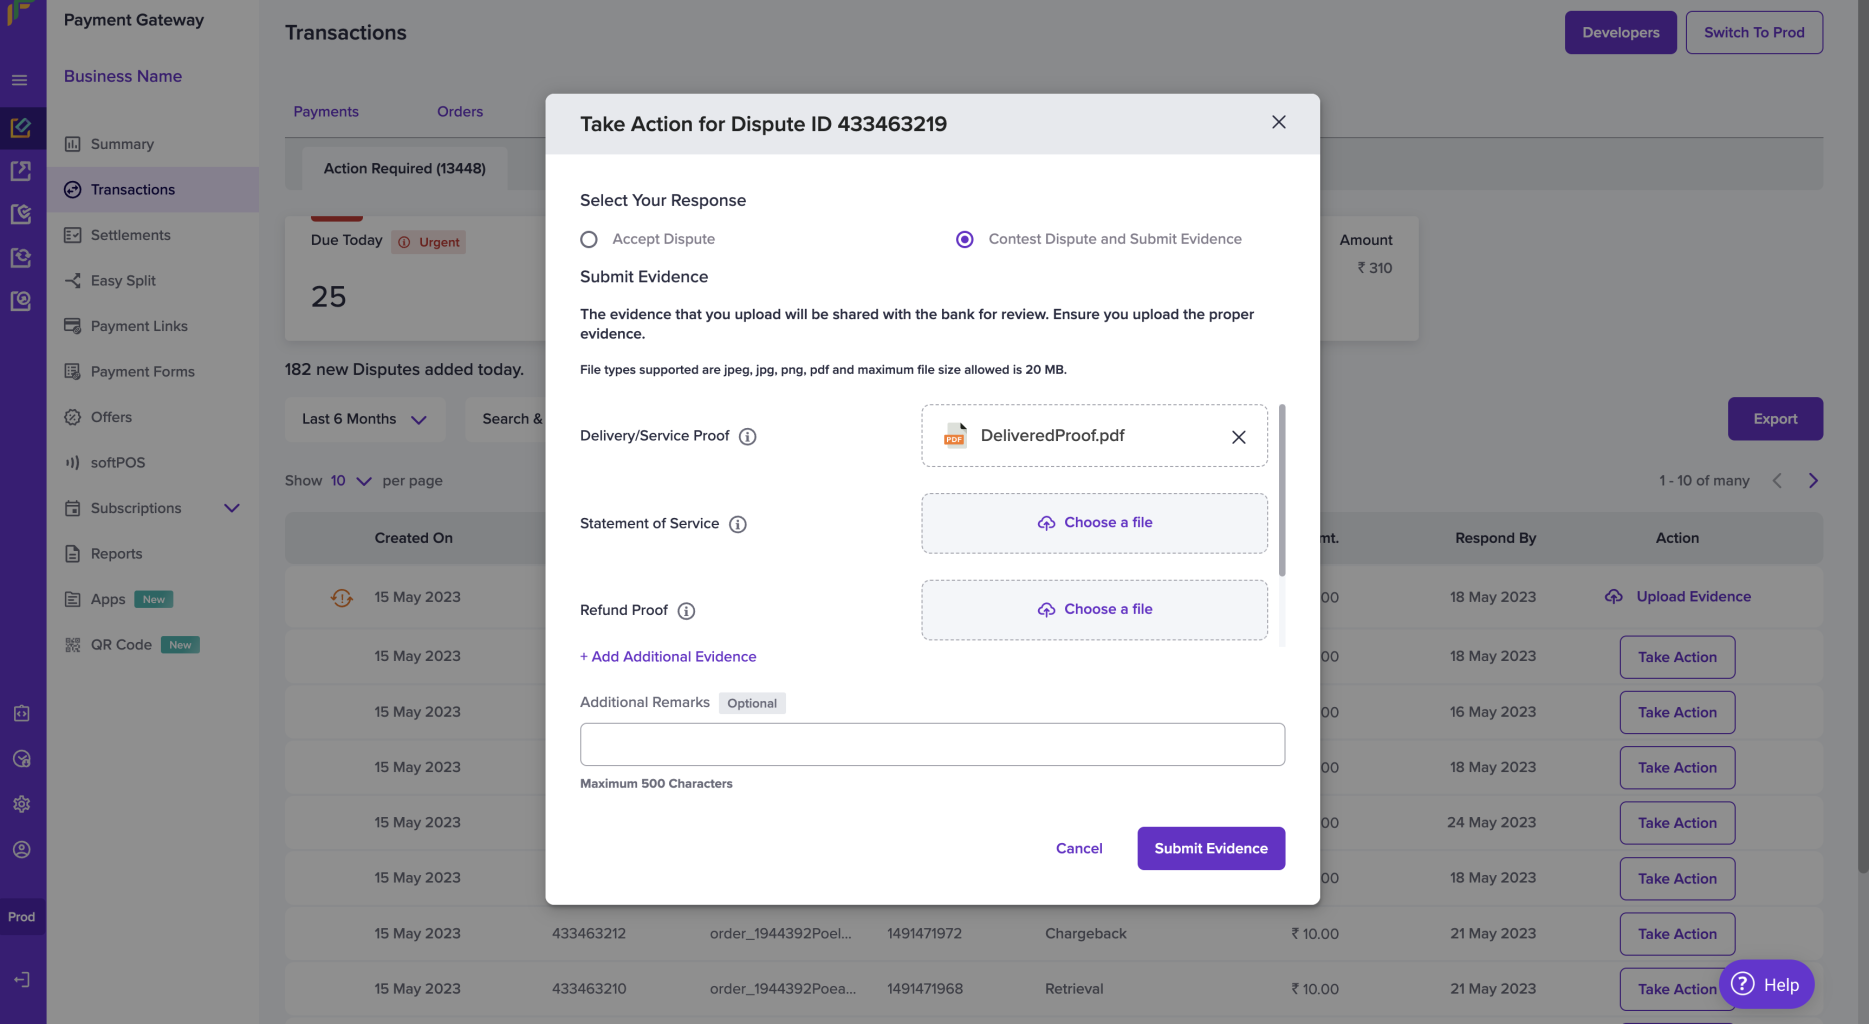
Contest Dispute
- Click on Submit Evidence on done uploading the required evidence. You will get a message stating that you have contested the case successfully.
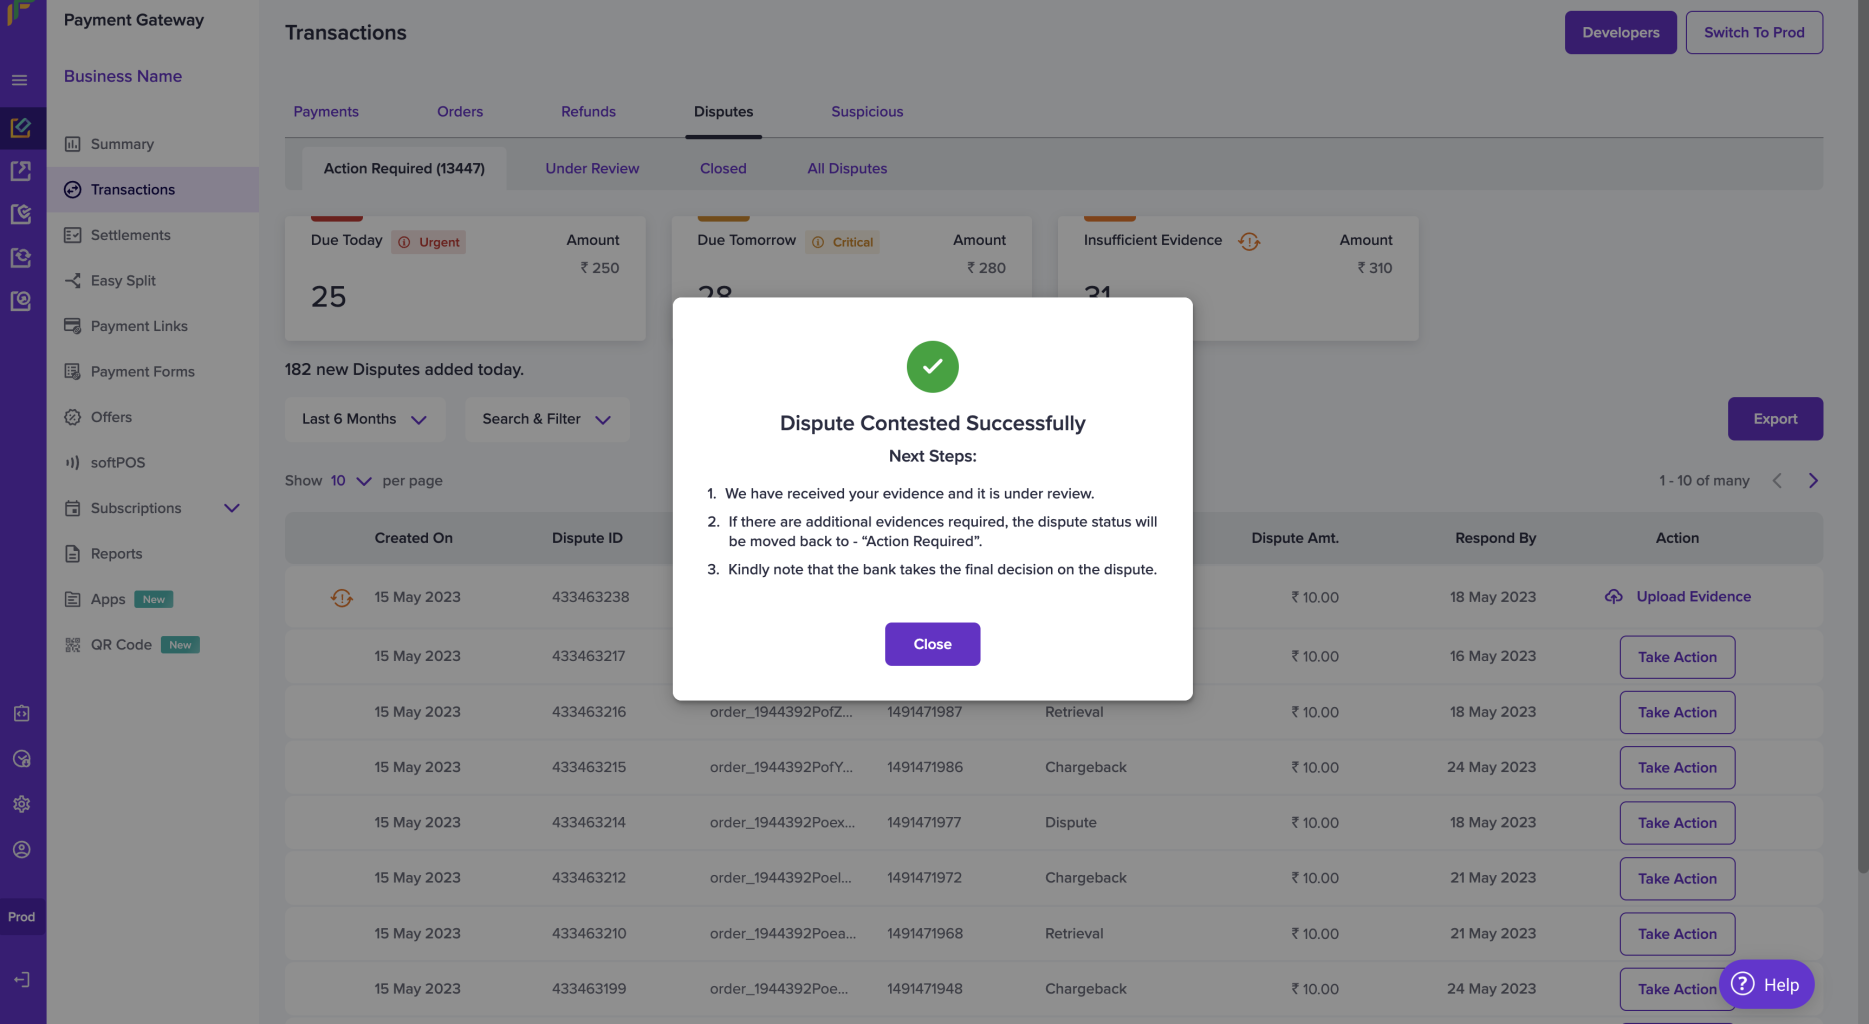
Dispute Contested
Upload Evidence
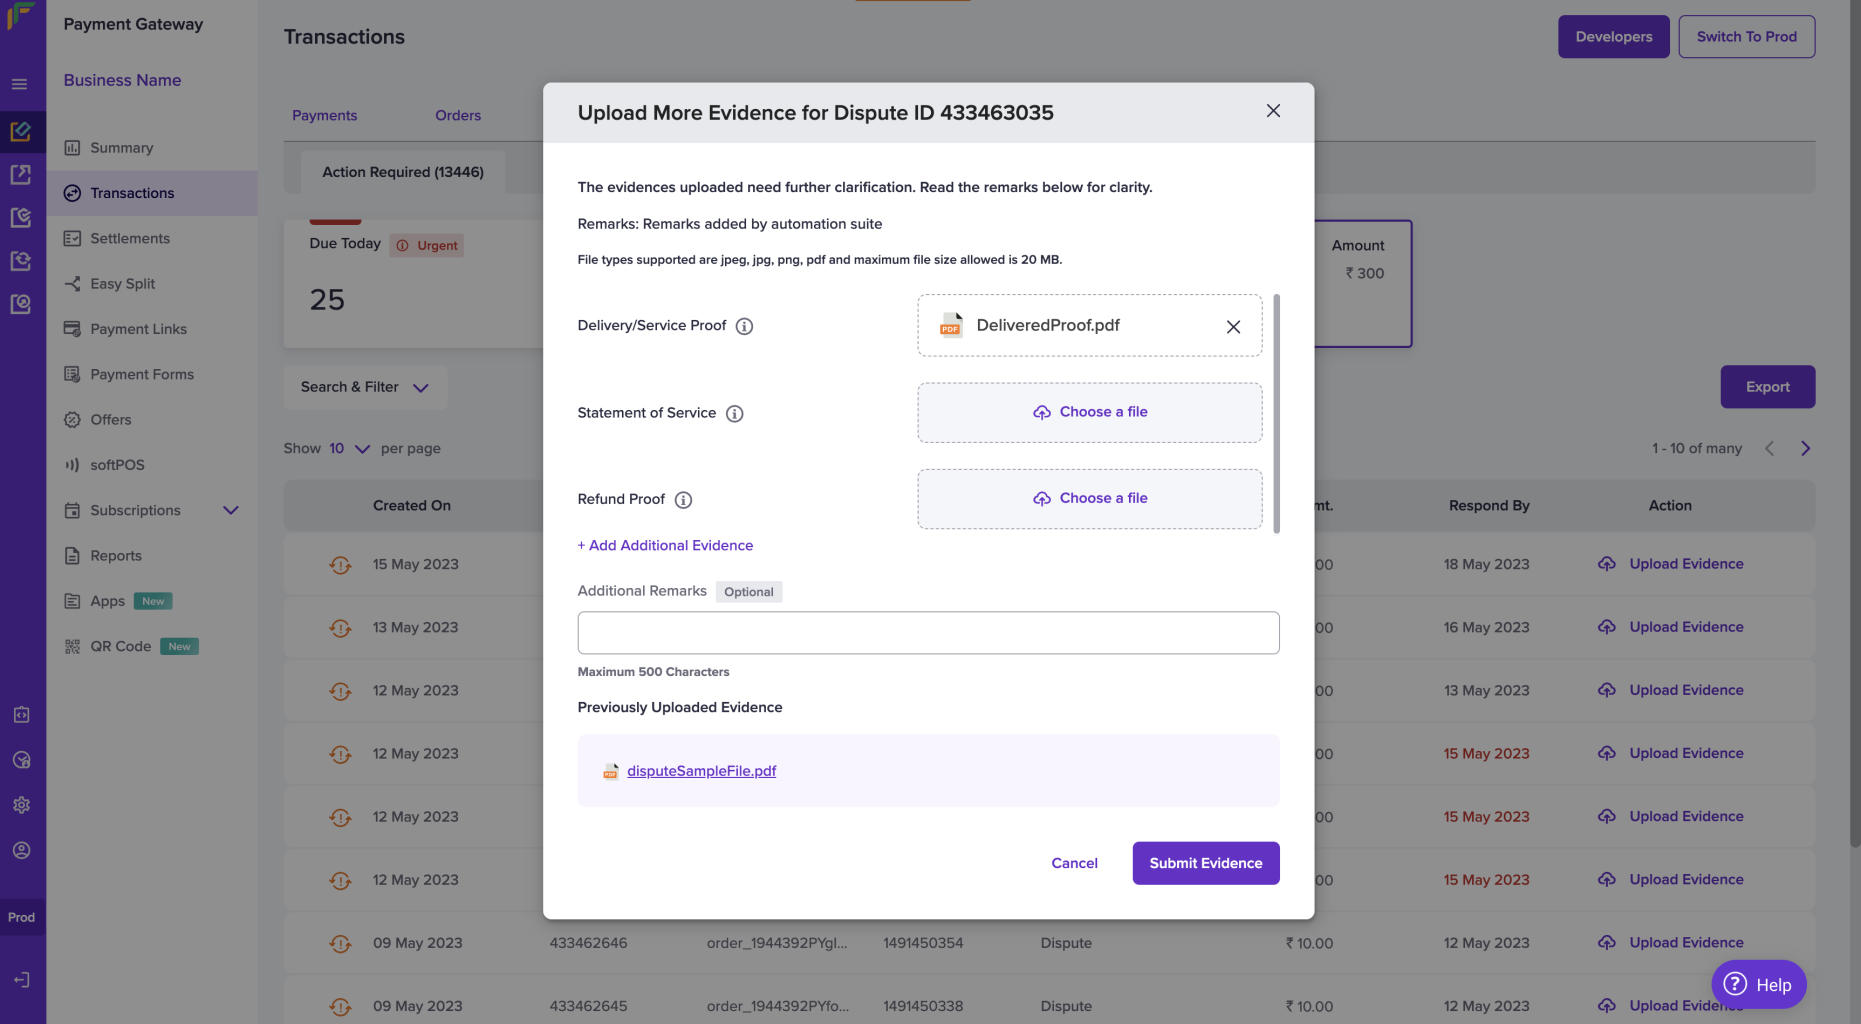
If the evidence you have submitted is insufficient, you will see the Upload Evidence option beside the dispute. Click the Upload Evidence option and upload the required evidence.
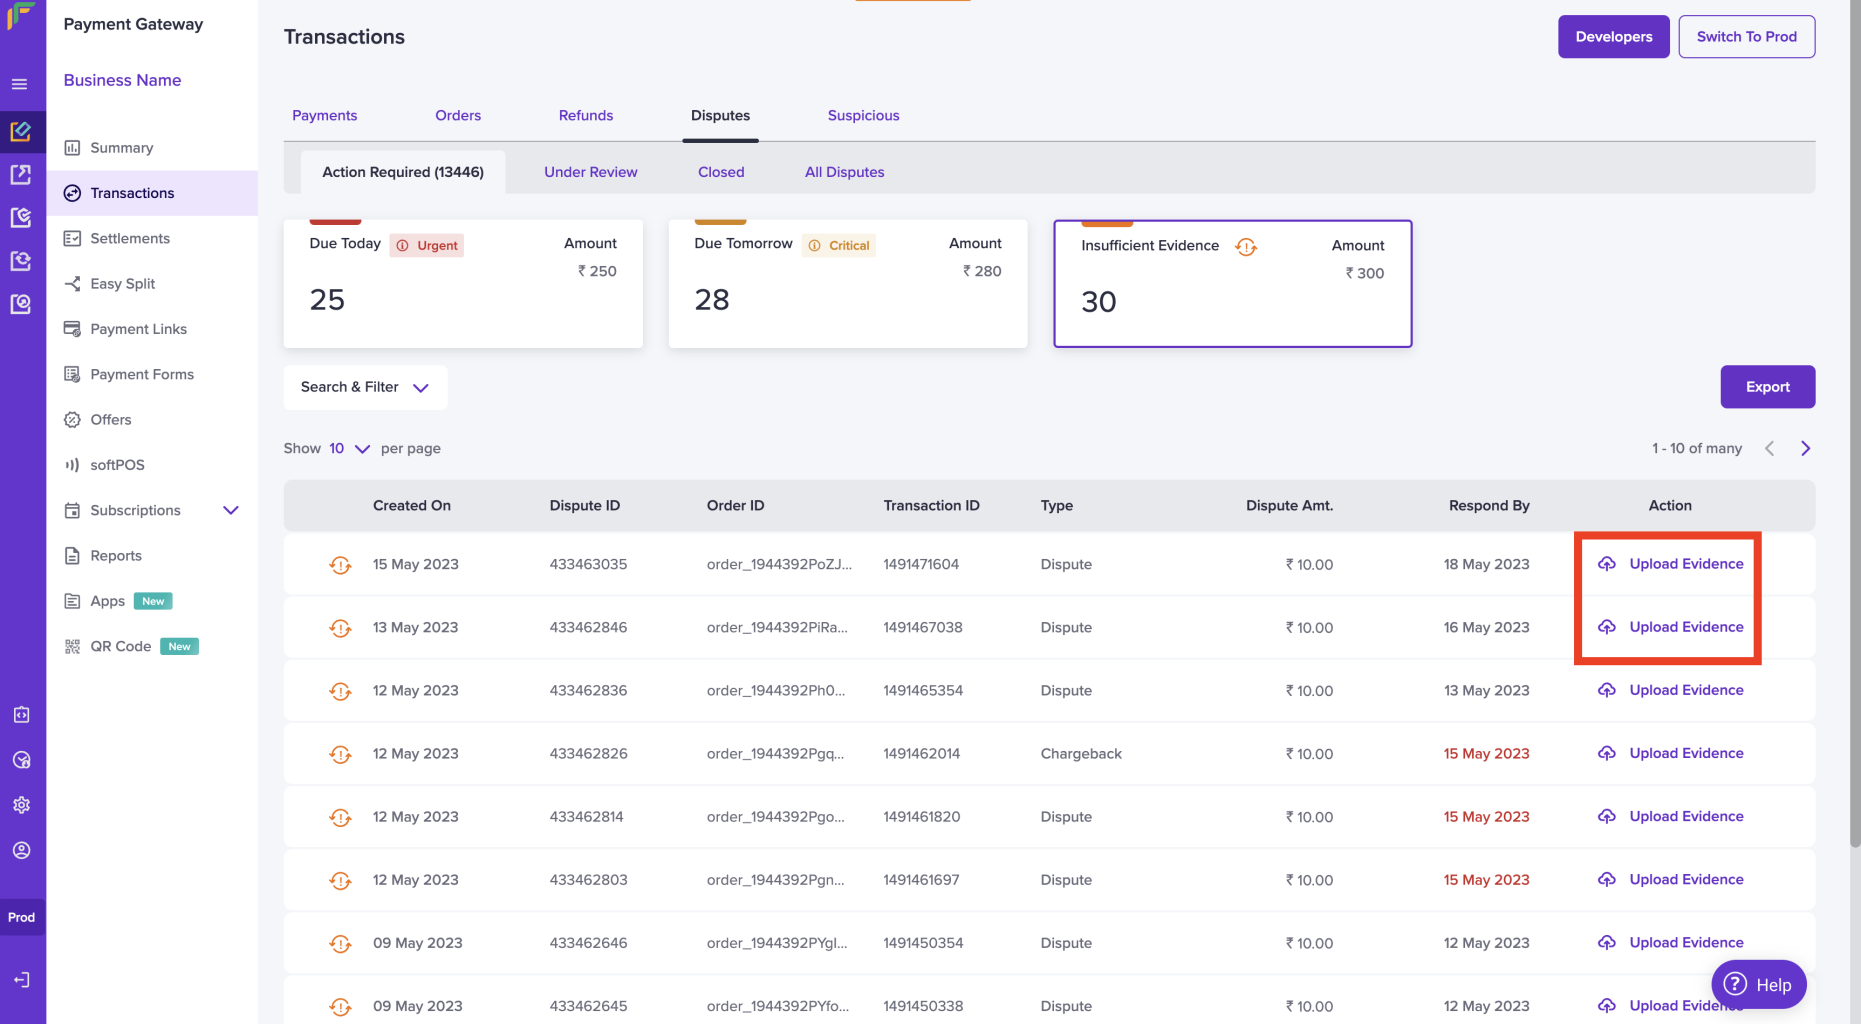
Upload Evidence
Provide any additional remarks if needed. The previously uploaded proofs will be visible for your reference. Once done click on Submit Evidence.
You will get a message stating you have submitted the evidence successfully.
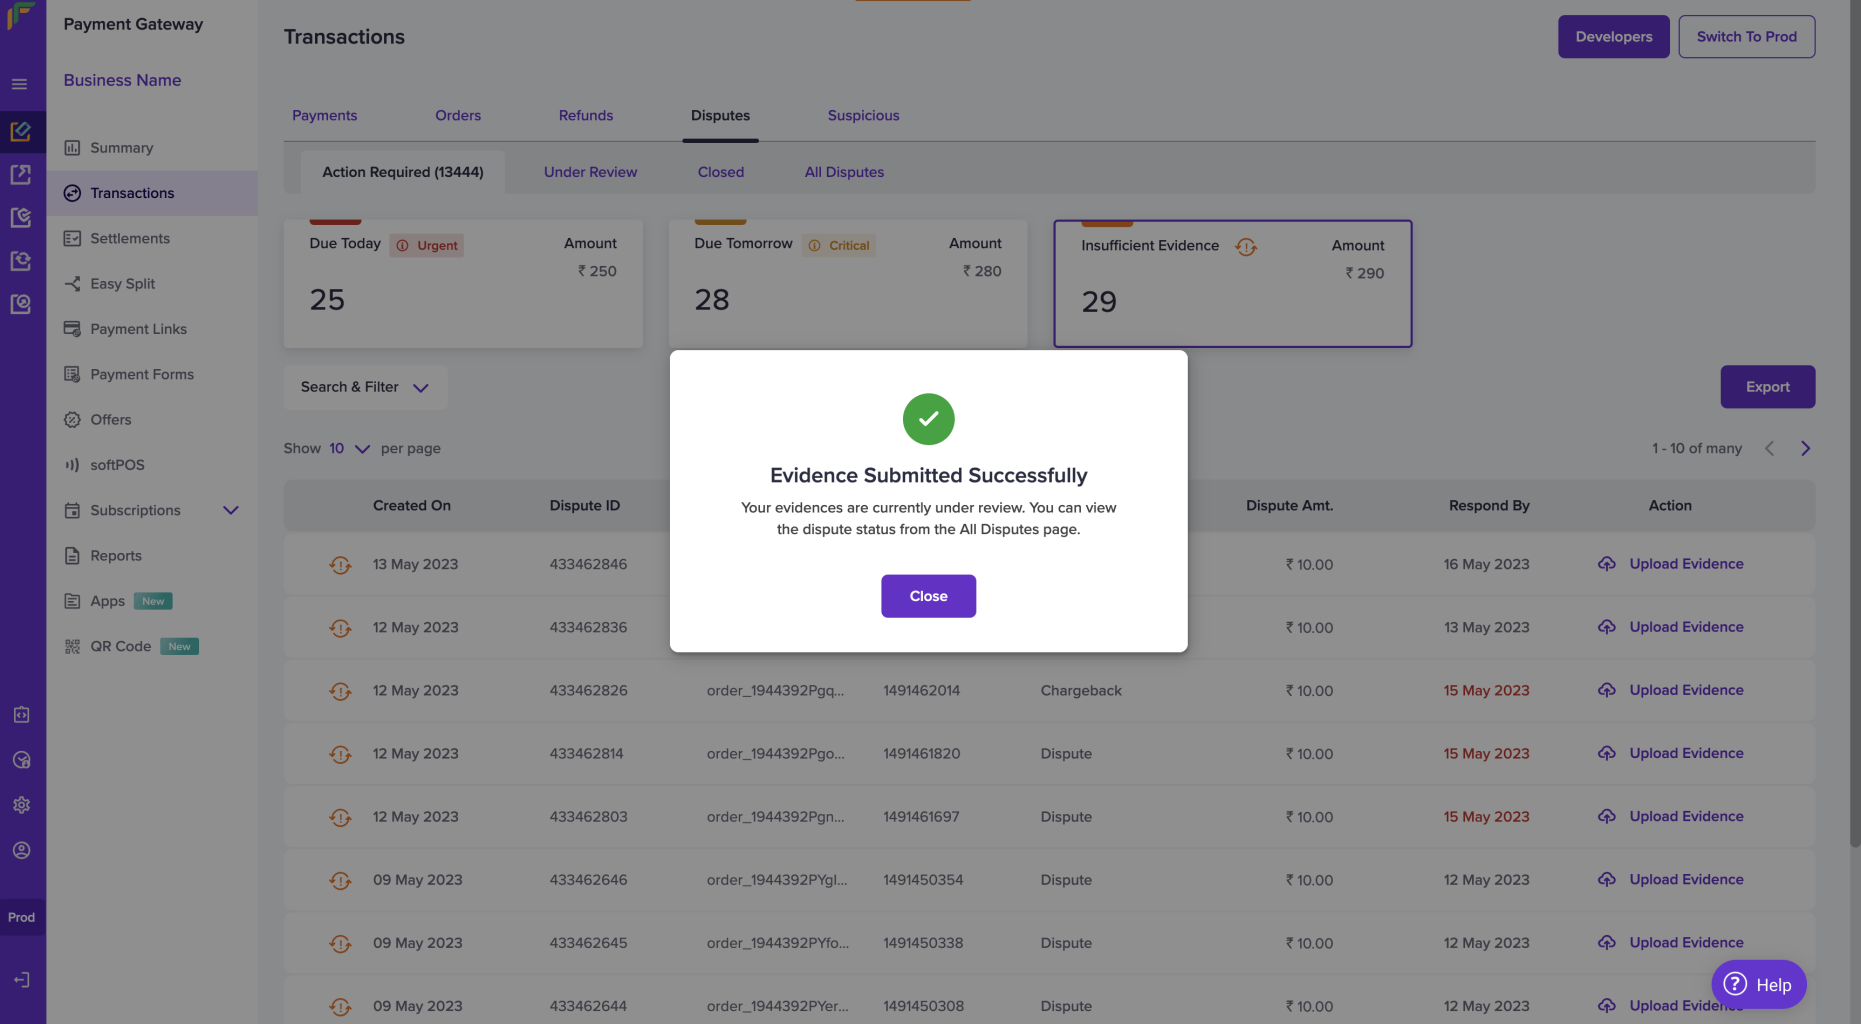
Evidence Submitted
Under Review
The Under Review section lists all the disputes that are submitted for review. A dispute can move from Under Review either to Closed or Action Required based on the decision the banks take. You can upload more evidence by clicking the Upload More Evidence icon.
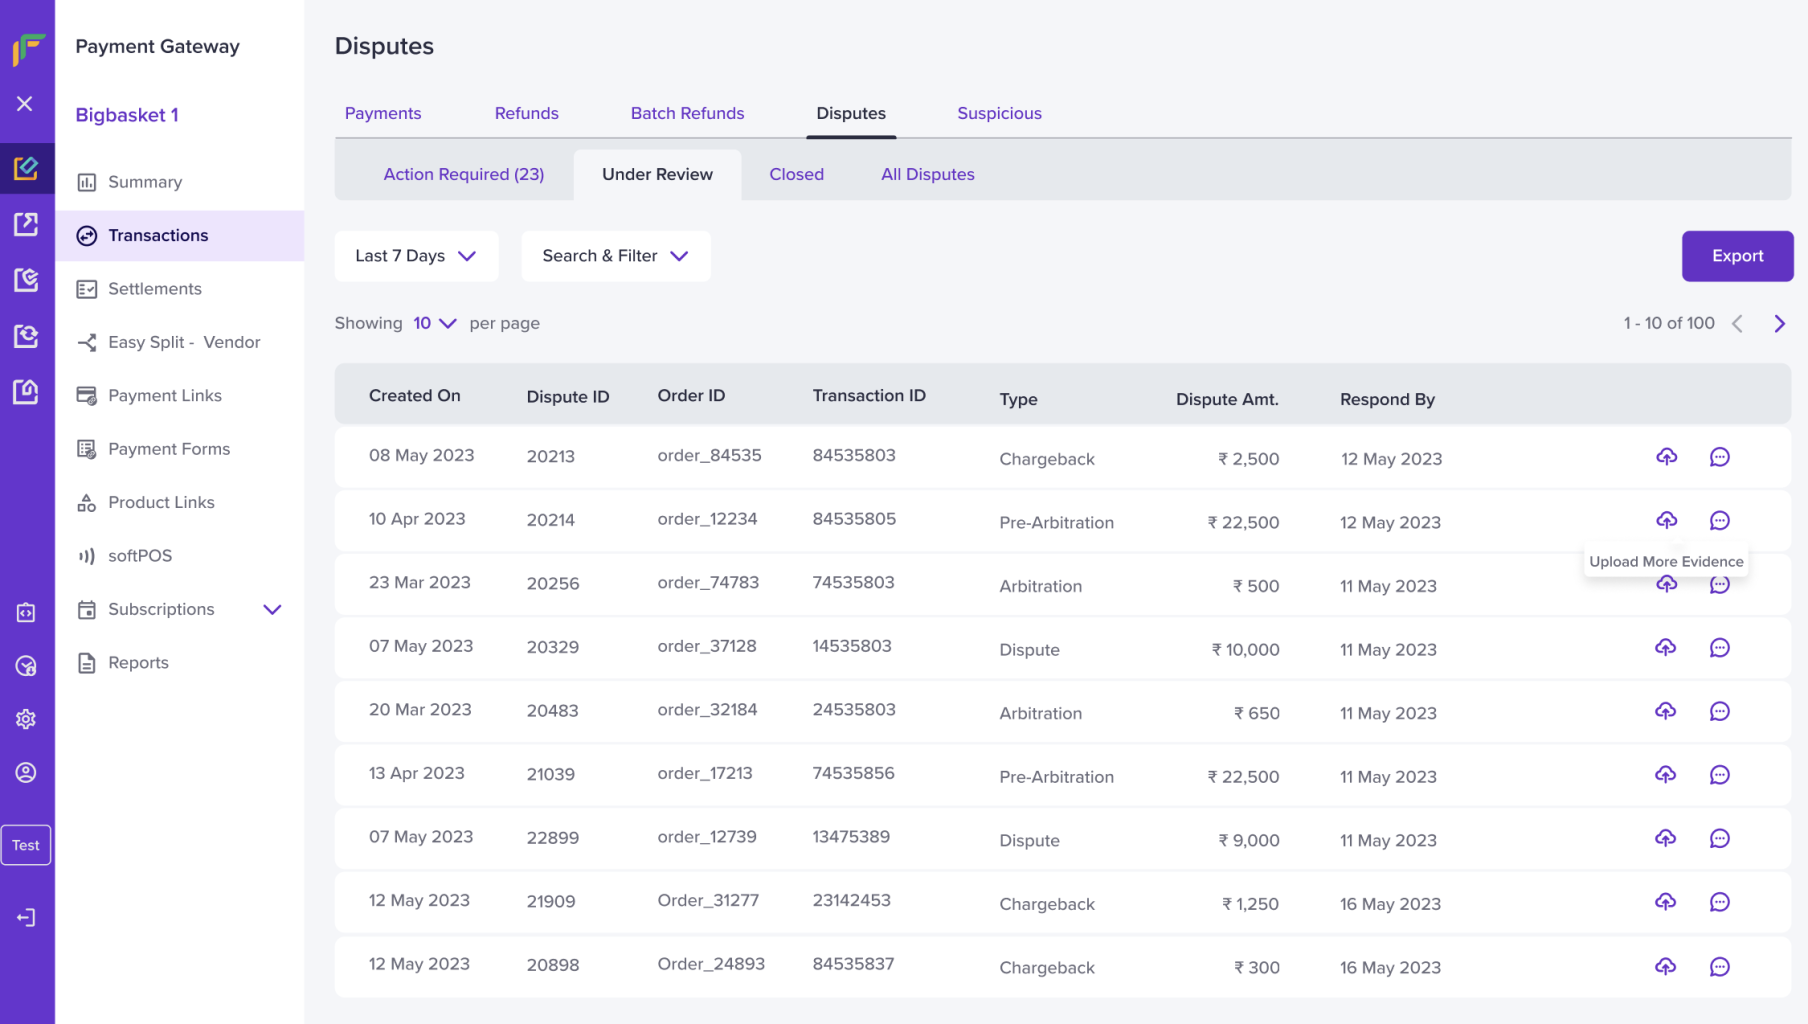
Under Review
Closed
The closed section gives an overview of the disputes that are closed (Disputes have won, lost, and accepted) in the form of a placard along with the date and time it was resolved and the result.
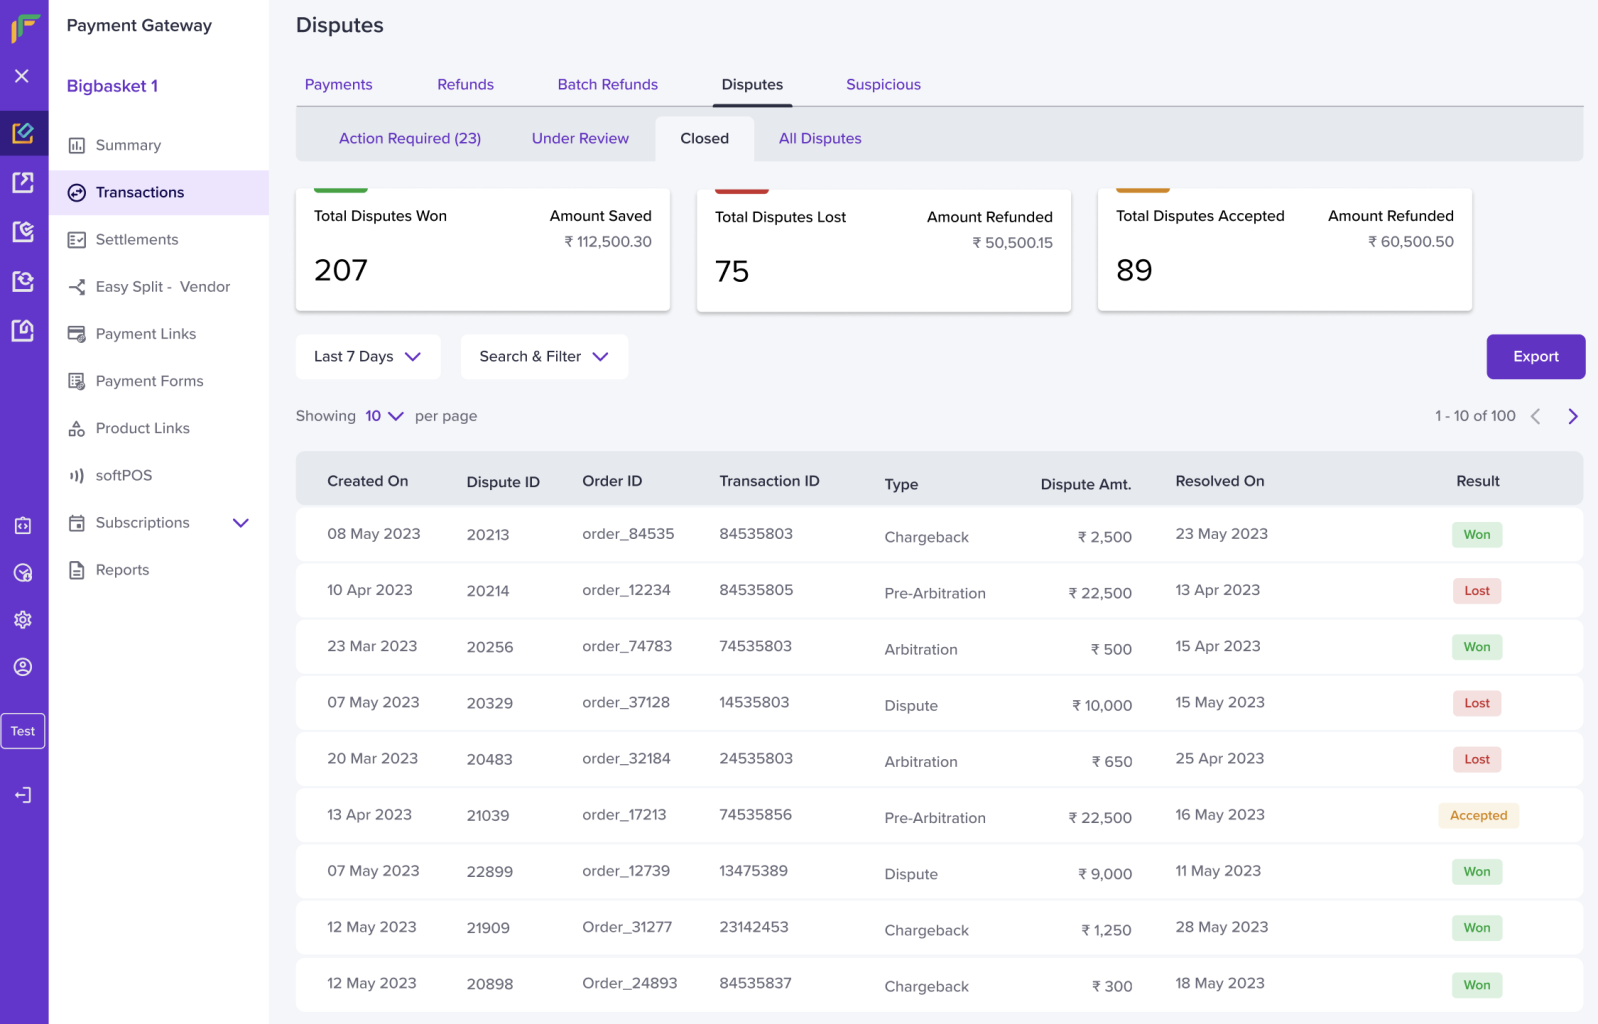
Dispute Closed
For example, if you click the Total Disputes Won placard, all the disputes that you have won will alone be filtered and displayed.
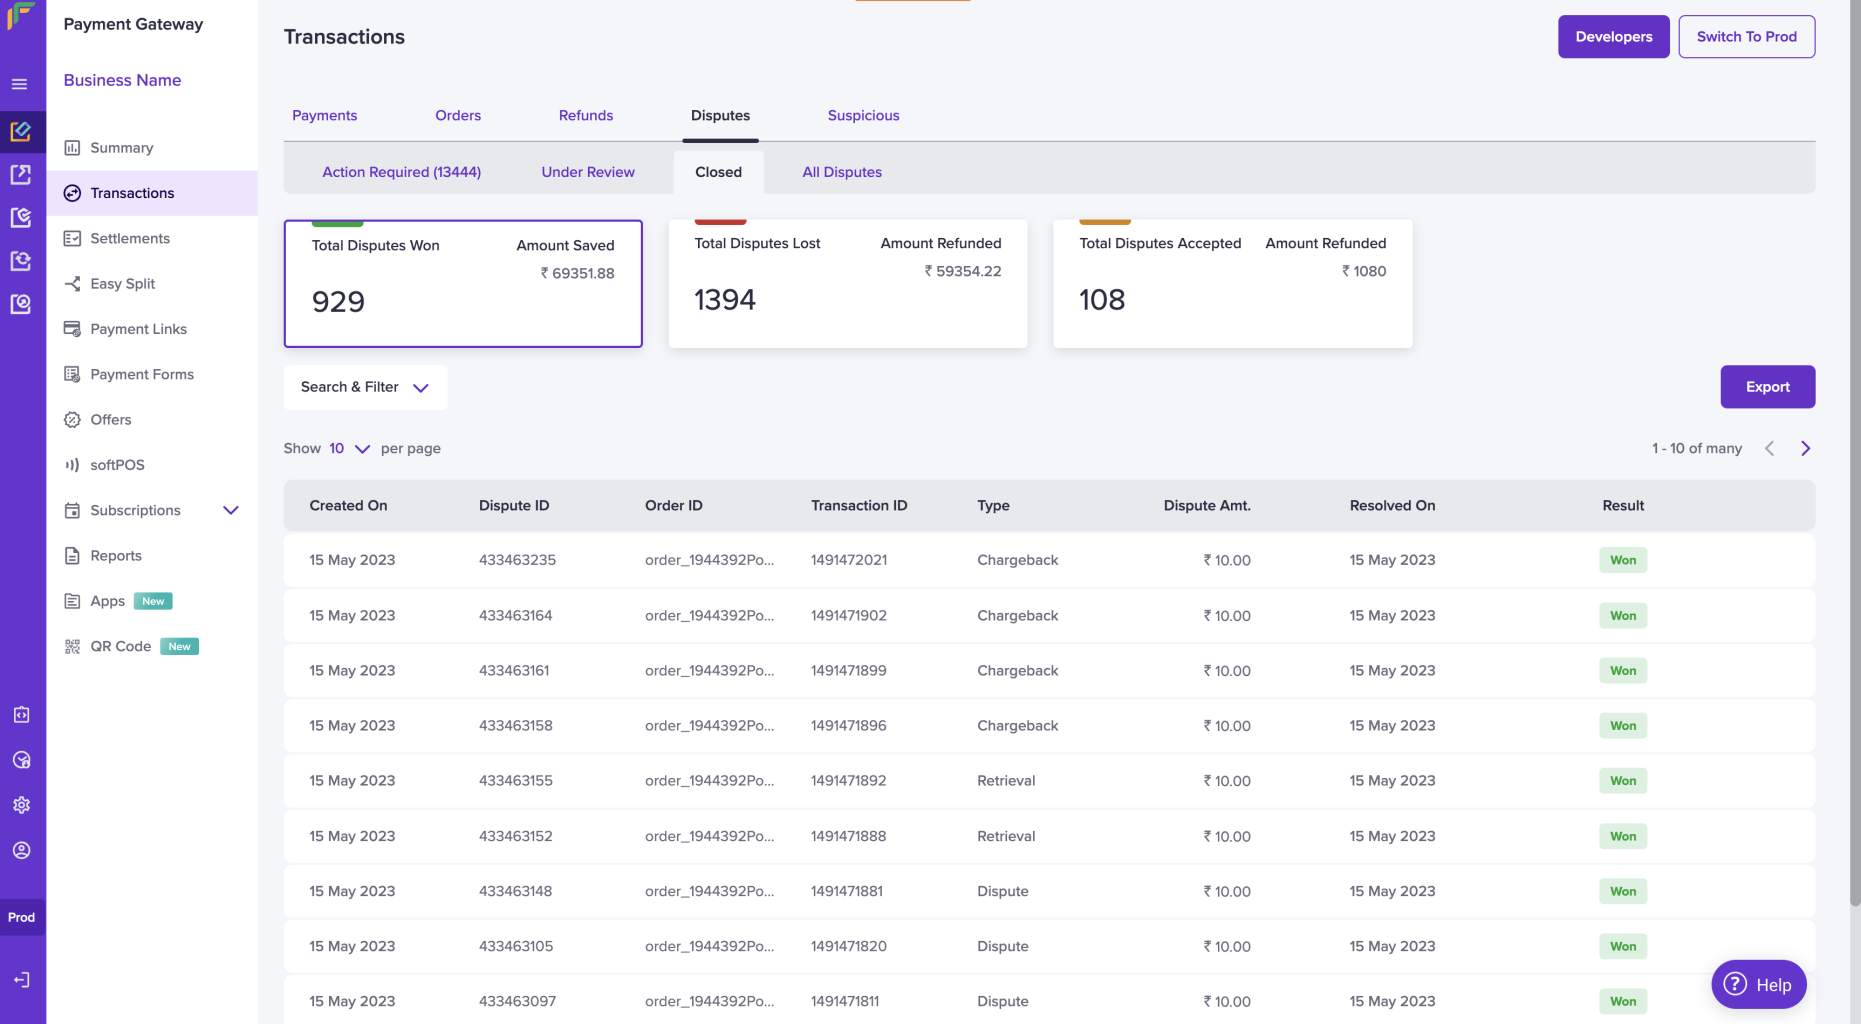
Dispute Closed - Filter
All Disputes
The all dispute section shows all the disputes that are raised by your customer irrespective of the dispute status. You can respond to a dispute or upload further evidence from this section.
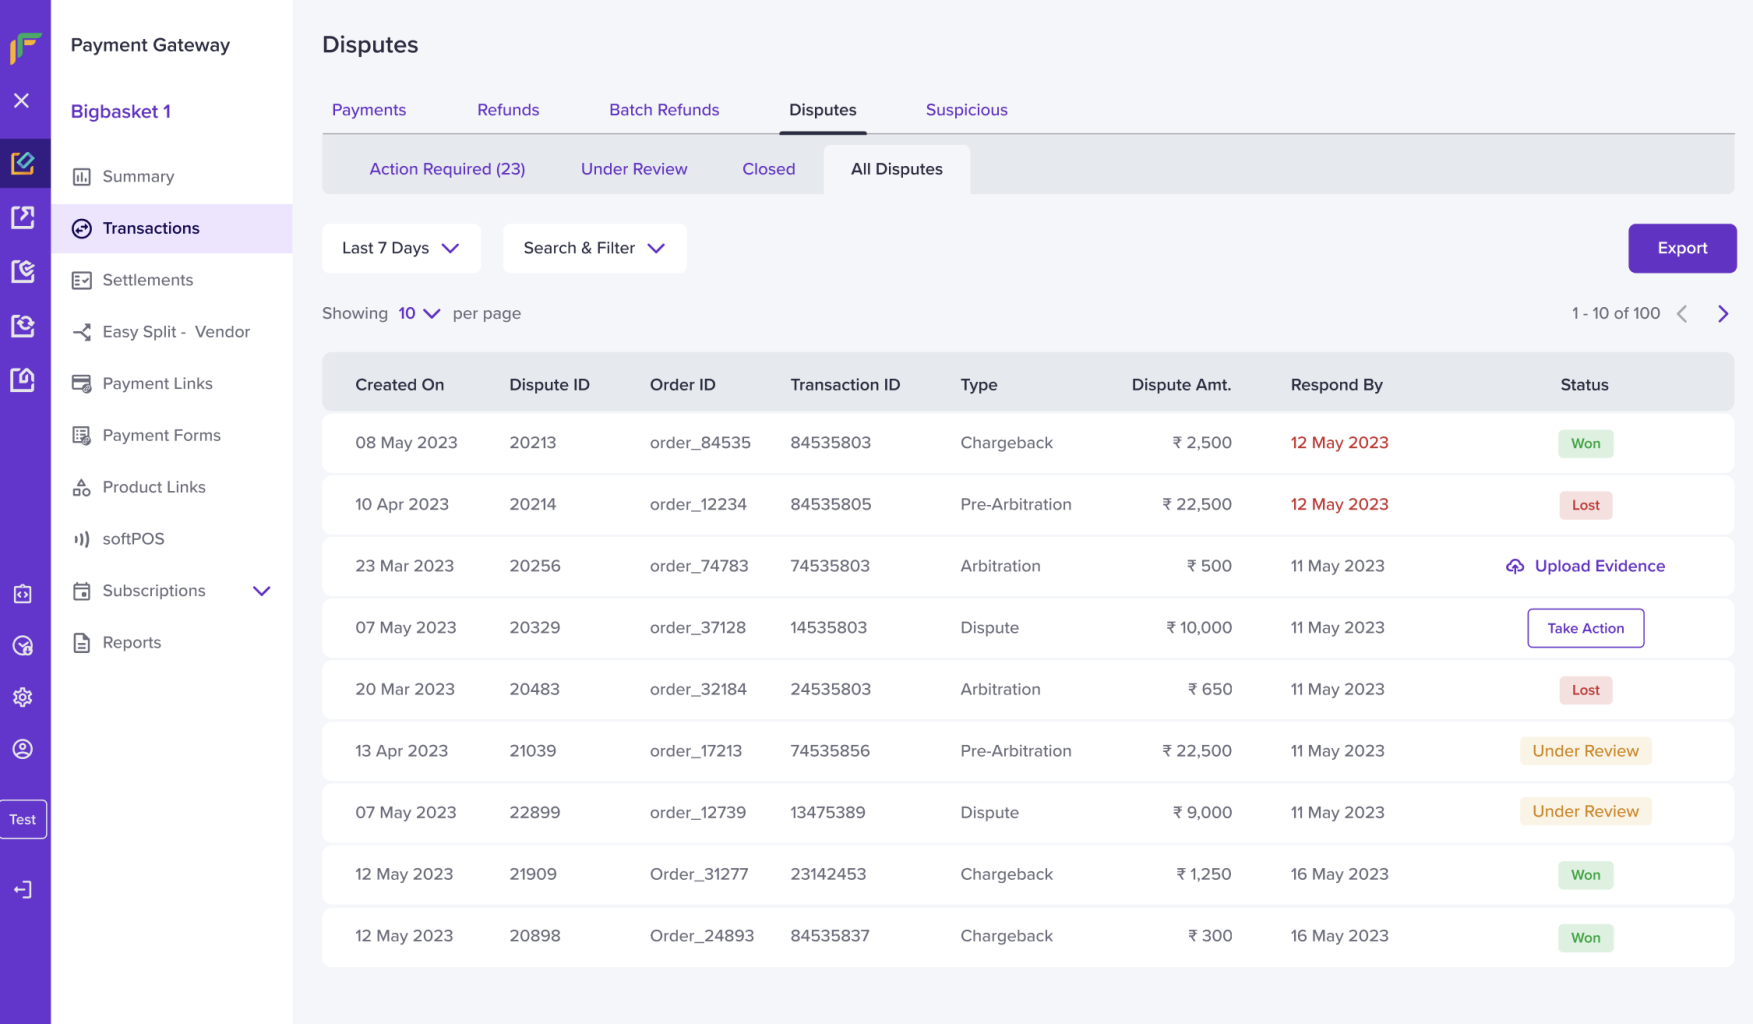
All Disputes
Dispute Details
You can view further details of a dispute from the dispute details page. Click the dispute of which you want to view the dispute details. The following options are available on this page:
- Dispute Timeline
- Dispute ID
- Dispute Details - order ID, transaction ID, transaction amount, dispute amount, payment method, dispute reason, dispute type, and deadline date.
- Take Action/ Upload Evidence
- Message Cashfree Payments
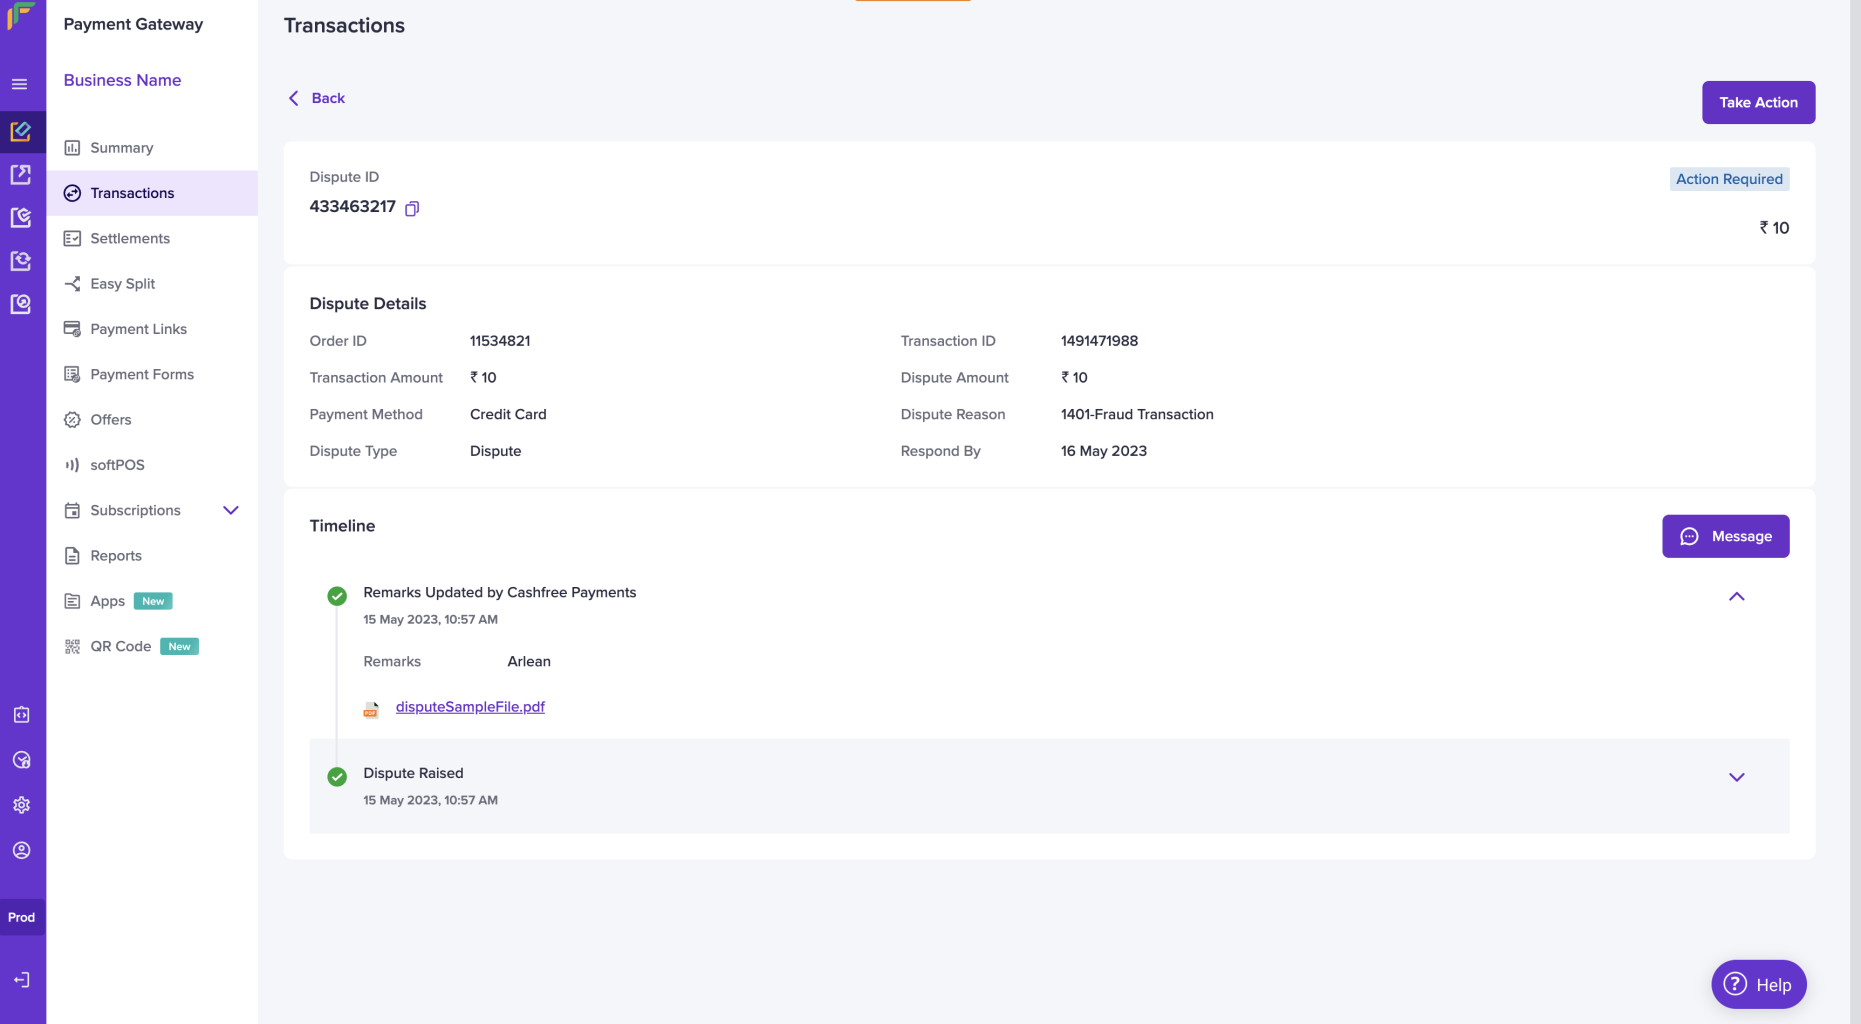
Transactions Detail
Updated about 1 year ago